Table of Contents
Advertisement
Advertisement
Table of Contents

Related Manuals for SpaceraiL Spacewarp Level 2.1


Summary of Contents for SpaceraiL Spacewarp Level 2.1
- Page 1 Level 2.1 Instruction Manual...
-
Page 2: Table Of Contents
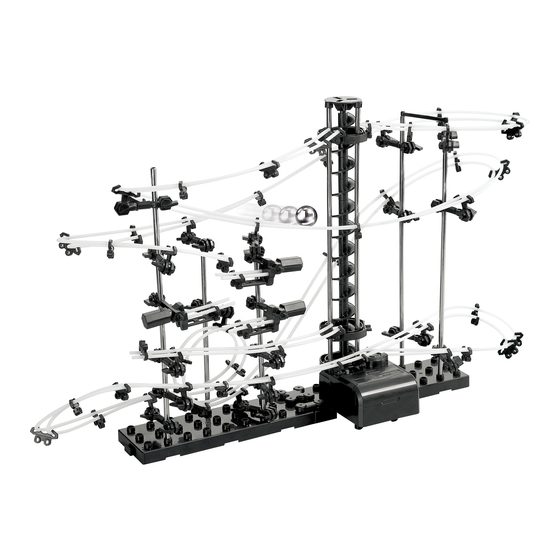
SpaceRail Level 2.1 These images show the fully built model of Spacerail Level 2.1. Correct fitting and interaction of all components and connections has a significant influence on the stability and strength of the complete construction. - Page 3 These images show the SpaceRail Level 2.1 from multiple angles. They will be helpful while you are building. Front Right Left Back...
-
Page 4: Parts List
Parts List Tools for installation Tape Measure Pliers Use 1 x C/ LR 14 battery (not included). Handle the com ponents w ith care to prev ent them from getting lost. P arts list [B 1 ] [S 1 ] 300m m [S2 ] 200m m [R 1 ] 10.000m m [A 1 ]... -
Page 5: Assembly Of The Elevator
Assembly of the elevator [S1] Shaft 300m m A sse m b ly o f th e e le v a to r 06-1 06-2 06-3 1. Insert the 300m m shaft into the gearbox (fg. 06-1) [E1] Elev ator helix 2. -
Page 6: Assem Bly Of Shafts And Arm S
In sta lla tio n o f sh a fts a n d a rm s A ttach the arm s to the shaft (fg . 07 show s a scale of 1:1) Positions of arm s (fg. 07): Shafts are show n in a scale of 1:1. - Page 7 Assembly of shafts, arms, gearbox and base plate [S1] Shaft 300m m Seesaw (m ount right hand side ) Arm position Seesaw position [S2] Shaft 200m m Back Dow n Front [S2] Shaft 200m m Seesaw (m ount left hand side ) Seesaw (m ount left hand side ) Please note the correct positions and directions of arm s (see abov e ) [S1] Shaft 300m m...
-
Page 8: Rail Assem Bly Steps
Assembly of the rails Rail connection m arks Release arm tube [A 3] before m ounting the rails Letters and num bers (e.g. D -2) show the correct positions of shafts and arm s described on page 6-7 D on ´t cut 12-1 R a il a sse m b ly ste p s T his ball roller coaster prov ides 2 elev ator ex its (start) -
Page 9: Rail M Ounting
Assembly of the rails [R1] Rail In s ta lla tio n o f th e ra ils Insert the rails into the arm s (fg. 15+ 16) Rail joining (fg. 1 7) A djust and connect the rails. Insert the rail joining s [R2] into [A 1] Arm the holes at the center of the rails (fg. - Page 10 Assembly of the rails In s ta lla tio n o f th e ra ils D istance betw een rails (fg. 20) Install the rail stand to keep rails parallel Keep rails parallel Curv es (fg. 21+ 22) Curv es need to be assem bled in a certain ang le to prev ent steel balls from m issing the turn (fg.
-
Page 11: Loop M Ounting
Assembly of the rails In sta lla tio n o f a lo o p Ensure the steel balls running sm oothly (fg . 23) T he diam eter of the outer loop should hav e tw ice the diam eter of the inner loop Loop diam eter Im portant inform ation for the assem bly of loops Height... -
Page 12: W Arning S
Safety Instructions – Keep After Reading G e n e ra l Sa fe ty In stru ctio n s T his ball roller coaster is NO T A T O Y and only suitable for persons 14 years and older! W arning: Read the m anual carefully before using the ball roller coaster.
Need help?
Do you have a question about the Spacewarp Level 2.1 and is the answer not in the manual?
Questions and answers