Table of Contents
Advertisement
Quick Links
Advertisement
Table of Contents

Related Manuals for Alcatel-Lucent 8244 DECT Handset


Summary of Contents for Alcatel-Lucent 8244 DECT Handset
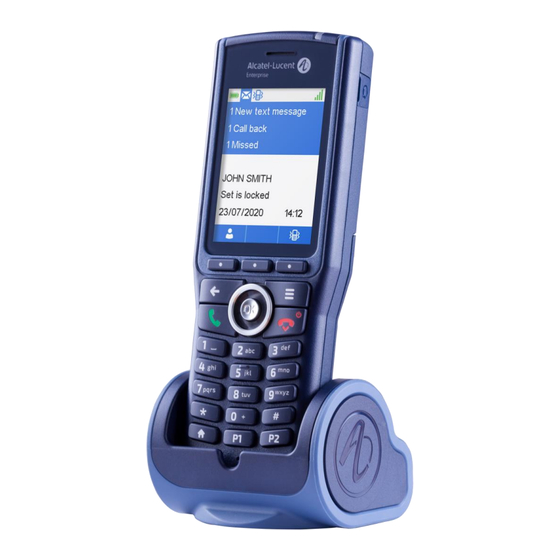
- Page 1 8244 DECT Handset OXO Connect User Manual 8AL90396ENAAed01 – 03/2021...
- Page 2 Getting to know your telephone This document describes the services offered by the 8244 DECT handset connected to an OXO Connect or OXO Connect Evolution system. Your phone can be connected to an IBS, IP-xBS, or IP-DECT radio base station depending on the company telephone system.
-
Page 3: Table Of Contents
Getting to know your telephone Getting to know your telephone Phone description Status icons MENU icons Call icons Accessing the MENU and navigating Handset in icon display mode Alphabetic keypad Getting started Unboxing Installing the battery in the telephone Installing the memory card Charging your telephone battery 2.4.1 Charging the battery on a single charger... - Page 4 Getting to know your telephone During a conversation Make a second call Receiving a second call Switching between two calls (Broker call) Transferring a call Three-way conference with internal and/or external contacts (conference) Placing an outside call on hold (parking) Activate/deactivate voice frequency Programming your telephone Initializing your voice mailbox...
- Page 5 Getting to know your telephone Power mode Change PIN code Using the telephone in E-GAP or GAP mode Phone description Display icons 8.2.1 Status icons 8.2.2 MENU icons 8.2.3 Call icons Accessing the MENU and navigating Making a call Receiving a call Calling from your personal directory Calling your caller by name (company directory) Calling using speed dial key...
- Page 6 Getting to know your telephone List of accessories Belt clip Belt clip cover Spare swivel clip package Spare belt clip Vertical pouch Chargers 9.6.1 How to dock your phone on the desk support Power supply Presentation of the battery pack 9.8.1 Autonomy of your telephone 9.8.2...
-
Page 7: Getting To Know Your Telephone
Getting to know your telephone 1 Getting to know your telephone 1.1 Phone description • Make a call. • Answer the call. • Long press (feature depending on the system): redial last number or access the redial list. • Switching between two calls (Broker call). •... - Page 8 Getting to know your telephone • OK: confirm. • Left, right, up, down arrows: navigate. • Access MENU: press the 'OK' key to directly open the menu associated with the status of the handset (depending on the selected status icon - voicemail, missed call, ringing…).
- Page 9 Getting to know your telephone • Green steady: the phone is on the charger and the battery is fully charged. • Red steady: the phone is on the charger and the battery is charging. • Slow orange flashing: telephonic event such as unread message, missed call, etc.
-
Page 10: Status Icons
Getting to know your telephone 1.2 Status icons The status icons are displayed on the welcome screen and indicate the status of the telephone. When selected, the icons are displayed in white on a blue background: -> Battery charge level ( >... -
Page 11: Menu Icons
Getting to know your telephone You can obtain details on the status icons from the tooltips that appear on the welcome screen when you use the navigator. Press the 'OK' key to directly open the menu associated with the status of the handset (depending on the selected status icon - voicemail, missed call, ringing…). -
Page 12: Call Icons
Getting to know your telephone 1.4 Call icons → When selected, the icons are displayed in white on a blue background: Making a call. The example is given for the first call (line 1). Receiving a call. The example is given for the first call (line 1). Call on hold. -
Page 13: Accessing The Menu And Navigating
Getting to know your telephone 1.5 Accessing the MENU and navigating The screen descriptions are given as examples and are not exact representations of what can be displayed on your handset. Access the menu. Press the Access menu key (short press). -
Page 14: Handset In Icon Display Mode
Getting to know your telephone 1.6 Handset in icon display mode Your phone can be configured to display icons or labels for software key. All descriptions in this user documentation refer to the handset in icon display mode. To ensure that your set matches the documentation make sure the phone is configured correctly. -
Page 15: Getting Started
Getting started 2 Getting started In order to have a fully operational 8244 DECT handset, make sure that you have the following items with your handset: the battery, the AC/DC adapter, and the power supply. 2.1 Unboxing • The 8244 DECT Handset with the The safety and regulatory fixed belt clip. -
Page 16: Installing The Memory Card
Getting started 2.3 Installing the memory card The handset SD card stores handset configuration data and, depending on your system, may also store subscription data. Please refer to the system administrator for more details. The SD card allows up to 500 contacts and 200 messages. You must be in possession of the memory card for your phone. -
Page 17: Charging Your Telephone Battery
Getting started Replace the cover. Switch on the handset Dropping the handset may cause the memory card to dislodge inside the handset. When this happens, the user will be warned via an audible warning signal every 5 seconds, and the message 'Check memory card' is given. -
Page 18: Charging The Battery On A Dual Charger
Getting started 2.4.2 Charging the battery on a dual charger Place the handset into the Dual Charger front slot facing you. If you have a spare battery, you can charge it at the same time. Place the spare battery pack in the back slot, charging contacts down. Push the spare battery forward and downward under the clip to keep it on charge (A). -
Page 19: Switching On Your Telephone
Getting started 2.5 Switching on your telephone • Press the switch on/off key (long press). • Your telephone is switched on. If the display fails to light up or the battery icon is flashing, recharge the battery. If the radio reception icon doesn't appear on the telephone display: •... -
Page 20: Using Your Telephone
Using your telephone 3 Using your telephone 3.1 Messaging portal The messaging portal allows you to access and manage features such as the call log, text messaging and voice messages. When you have received a new event (new voice message, new text message or new missed call) the message icon is displayed in the status bar. - Page 21 Using your telephone • Send msg: access the text mail (send box). Enter your password if required (depending on the system configuration and your preferences). • Use the up-down navigation keys to select an event and press OK to open it. Unread events are in bold.
-
Page 22: Making A Call
Using your telephone To enable or disable the authentication if authorised by the administrator: • Access MENU. • Services • User options • Auth • Enable or disable the authentication. Your personal password is required to disable it. • Press or select OK to confirm. 3.2 Making a call •... -
Page 23: Calling Your Caller By Name (Company Directory)
Using your telephone 3.4 Calling your caller by name (company directory) Quick access: • Access MENU. • Contacts • Directory • Enter the first letters of your contact's name. p r s t uv • Apply. • Select the desired name. •... -
Page 24: Redialing
Using your telephone 3.7 Redialing 3.7.1 Call back one of the last numbers dialed Quick access: • Access MENU. • long press Dialed • Select the number in the list. • Display information about the selected contact (number, date of the last call). •... -
Page 25: Call Back The Contact
Using your telephone 3.9.2 Call back the contact • Select the contact to call. Information about the call is displayed. • Press ok key to open menu. • Call 3.9.3 Delete one call log event • Select the contact to delete. Information about the call is displayed. -
Page 26: Consulting Your Voice Mailbox
Using your telephone 3.11 Consulting your voice mailbox When you have received a message, the message icon is displayed on the welcome screen. The orange LED on your telephone flashes to indicate there is a message. • The number of new vocal messages is displayed in the phone notification area. •... -
Page 27: Consulting Text Messages
Using your telephone 3.12 Consulting text messages When you have received a message, the message icon is displayed on the welcome screen. The orange LED on your telephone flashes to indicate there is a message. • The number of new vocal messages is displayed in the phone notification area. •... -
Page 28: Send A Voice Message Copy
Using your telephone • Confirm. • Select the message to be sent. • Apply. The following 27 predefined messages exist: CALL ME BACK MEETING ON ___ (*) CALL ME BACK TOMORROW MEETING ON ___ AT _:_ (*) CALL ME BACK AT _:_ (*) OUT FOR A WHILE CALL BACK _____ (*) ABSENT FOR THE REST OF THE DAY... -
Page 29: Sending A Recorded Message To A Number Or A Distribution List
Using your telephone • Send copy • Validate your choice. • Dial the number. p r s t uv • Press the OK key to confirm the input.* • Confirm. • Press the OK key to send the message. * When sending a copy of the message, you can also record a comment to join to the copy: •... -
Page 30: Selecting Calls To Be Forwarded
Using your telephone • Apply. • Select the message to be sent. • Confirm. Distribution lists: • 000: the message is sent to all voice mailboxes. • 001 to 050: the message is sent to a group of voice mailboxes. To record the message: •... -
Page 31: Different Types Of Diversions / Example Of Diversion On Busy
Using your telephone 3.18 Different types of diversions / Example of diversion on busy 3.18.1 Different types of diversions You can initiate different types of forwarding from the call forward list. • Access MENU. • Forward • Select the 'List of diversions' icon. When you are in conversation and all your lines are busy, all your calls Fwd Busy are diverted to the defined number. -
Page 32: Cancelling All Forwards
Using your telephone 3.20 Cancelling all forwards • Access MENU. • Forward • Fwd Cancel • Confirm. 3.21 Activating/deactivating the personal assistant As well as leaving a message in the voice mailbox, the personal assistant directs the caller to an internal number, an outside number, a mobile or the switchboard. -
Page 33: Answering The General Bell
Using your telephone • External Nb • Key in an outside number. • Mobile Nb • Key in the number of your mobile. • Choice ON Choice OFF • Activate/deactivate the transfer to the switchboard. • Dial the number. p r s t uv •... -
Page 34: Hunting Groups
Using your telephone If the telephone ringing is not in your pick-up group: • Pick-up Grp The system can be configured to prevent call pick-up on some telephones. 3.25 Hunting groups Hunting group call Some phone sets can be associated to form a group. You can contact any one of them by dialling the group number. -
Page 35: During A Conversation
During a conversation 4 During a conversation During a call and without losing the connection, there are several ways to access the options offered by your system, using: • The list of icons at the top of the screen (use the left-right navigation keys). •... -
Page 36: Receiving A Second Call
During a conversation 4.2 Receiving a second call You are in conversation and a caller is trying to contact you: a beep is sent and the caller's name is displayed for 3 seconds. • Answer the call. • The first call is on hold. Over 3 seconds, move with the navigate-left-right key to the receiving a second call icon, to see the identity of the second caller (and off-hook if necessary): 4.3 Switching between two calls (Broker call) -
Page 37: Three-Way Conference With Internal And/Or External Contacts (Conference)
During a conversation 4.5 Three-way conference with internal and/or external contacts (conference) During a conversation, a second call is on hold: • □ Conference • You are in conference mode. Cancel conference and return to first contact (If conference is active.): •... -
Page 38: Activate/Deactivate Voice Frequency
During a conversation 4.7 Activate/deactivate voice frequency This feature depends on the system configuration. If necessary, contact your administrator. During a call, you sometimes have to send DTMF signals, for example, for a voice message service, an automatic switchboard or when remotely consulting an answering machine: •... -
Page 39: Programming Your Telephone
Programming your telephone 5 Programming your telephone 5.1 Initializing your voice mailbox Before starting initialization, make sure the administrator has created a voice mailbox. • You can use the Message icon on the welcome screen to initialize your voice mailbox. •... -
Page 40: Change Your Personal Password
Programming your telephone To go back to the default message: • Access MENU. • Services • Mbx greeting • Apply. • Default ? • Apply. • • Confirm default message. 5.3 Change your personal password Your personal password is used to access the messaging portal and to lock your telephone. •... -
Page 41: Adjusting The Audio Functions
Programming your telephone 5.4 Adjusting the audio functions You can select the ring tone for your telephone (6 choices) and adjust its volume (4 levels). • Access MENU. • Services • Phone set 5.4.1 Choose the tune • Ext. Melody •... -
Page 42: Switching Rapidly From Ring Mode To Vibrate Mode And Vice-Versa
Programming your telephone 5.4.4 Switching rapidly from ring mode to vibrate mode and vice-versa This feature is available if the ring shortcut option is activated in the handset settings (see: adjusting your telephone functions). • Long press on the ringer/vibrate key. You switch quickly from the current ring mode to vibrate mode and vice-versa. -
Page 43: Adjusting Your Telephone Functions
Programming your telephone • Audio settings • Headset mode • When activated only the headset rings (if plugged in). 5.7 Adjusting your telephone functions • Access MENU. • Settings • Select the function* you want and use the On/Off softkeys to activate or deactivate the function. -
Page 44: Adjusting Keypad
Programming your telephone 5.7.2 Adjusting keypad • Select the menu: Keys • Select the settings to activate/deactivate. • Auto. keylock: activate or deactivate the automatic keypad lock. Set the delay before the keypad is locked (15, 30, or 45 seconds 1, 2, 3, 4, or 5 minutes). To lock the keyboard when the screen is idle, select: Lock on screen off. -
Page 45: Programming Your Personal Directory
Programming your telephone 5.9 Programming your personal directory Your personal directory can contain up to 10 numbers. • Access MENU. • Contacts • Pers Sp Dial • Select the chosen card. • Confirm (long press). • Enter the name. p r s t uv •... -
Page 46: Erase A Record From The Personal Directory
Programming your telephone 5.11 Erase a record from the personal directory • Access MENU. • Contacts • Pers Sp Dial • Select the record to erase. • Confirm (long press). • Delete all characters. • Apply (Ok). • Delete all numbers. •... -
Page 47: Configure The P1, P2 Keys
Programming your telephone 5.13 Configure the P1, P2 keys A lock, speed dial, alarm acknowledgment or notification event (if authorized) feature can be associated with the P1 and P2 keys. Once configured these features can be accessed by a short or a long press. For more information about alarm acknowledge or notification event, please consult: Live signal and notification management. -
Page 48: Calendar
Programming your telephone 5.14 Calendar You can consult and manage an agenda on your phone. 5.14.1 Modify the agenda format • Access MENU. • Access the agenda menu. • More • View week > view of the week. • View month >... -
Page 49: View The Details Of An Appointment
Programming your telephone 5.14.3 View the details of an appointment • Access MENU. • Access the agenda menu. • Use one of the following: o Depending on the agenda view (month or week), select the day or the week when the appointment is defined. More, Go to today: display the current day or week. -
Page 50: Delete An Appointment Reminder
Programming your telephone • Select the appointment of the day (in month view) or the appointment of the week (in week view). • View • More • Copy • Change the appointment by filling in the fields as described in the creation of appointments 5.14.6 Delete an appointment reminder Delete a selected appointment... -
Page 51: Locking Your Telephone
Programming your telephone 5.15 Locking your telephone Locking features on your terminal (System lock) This service enables you to prohibit outside calls and any programming changes on your telephone: • Access MENU. • Lock • Personal code (please refer to the administrator for your password). p r s t uv •... -
Page 52: Pairing Bluetooth® Devices
Programming your telephone • Yes / No When enabled, the unconnected Bluetooth® icon is displayed () and the Led flashes blue slowly. 5.16.2 Pairing Bluetooth® devices This feature is used to detect Bluetooth® devices and to pair them. • Access MENU. •... -
Page 53: Configure Dock Settings
Programming your telephone 5.17 Configure Dock settings You can define how your phone behaves when it is intalled in the charger dock. • Access MENU. • Settings • Dock settings • select from: In Dock Power on in dock: if set to yes, the handset will switch on when installed on the charger (if phone is switched off). -
Page 54: Live Signal And Notification Management
Live signal and notification management 6 Live signal and notification management 6.1 Introduction Your handset offers services of DECT network-based automated monitoring systems. These services must be activated and configured by your administrator. Please contact your administrator before using these services. -
Page 55: Emergency Calls
Live signal and notification management 6.2 Emergency calls These calls are designed to send alarm signals easily in emergency situations. Typically, emergency situations involve injuries or material damage and have highest priority among all other alarm events and calls. Notification calls are made by pressing the following keys: Press the function key (twice or press and hold) to activate the emergency notification call. -
Page 56: Notification Calls
Live signal and notification management 6.4 Notification calls While the phone is making such a call, the standard call processing message appears on the display and you are unable to receive or set up any other calls. Notification calls have the highest priority over any other calls. In the event of a notification call, any other call will be interrupted. -
Page 57: Registering The Telephone
7.1 Registering the telephone on a system for the first time For the mobile telephone to function, it must be registered on at least one Alcatel-Lucent Enterprise or GAP system (registration operation). Your telephone has not yet been registered on any system if, when... -
Page 58: Registering The Telephone On Other Systems
The telephone can be registered on several systems (maximum of 4). Note: the input is usually reserved for use with your main Alcatel-Lucent Enterprise system. You can select the other inputs to register the telephone under another system (Alcatel-Lucent Enterprise or other system). -
Page 59: Selecting Your Telephone System
During registration phase in a multi-system environment, all systems are scanned without priority. The system is selected when the signal strength is above a certain level and registration matches. 7.3 Selecting your telephone system Your telephone can be programmed to function on 4 different DECT systems (Alcatel-Lucent Enterprise or GAP). •... -
Page 60: Deregister
Registering the telephone 7.5 Deregister • Access MENU. • Install • Enter the PIN Code (default code: 0000). • p r s t uv Apply (Ok). • Deregister • Select the network. • Delete registrat.? • (No: to cancel). • Apply (Ok). -
Page 61: Using The Telephone In E-Gap Or Gap Mode
Using the telephone in E-GAP or GAP mode 8 Using the telephone in E-GAP or GAP mode Your telephone complies with the E-GAP/GAP standard and can be used as described in this section. This chapter describes features when connected to an OXO Connect IP-DECT radio base station or a compatible GAP system. - Page 62 Using the telephone in E-GAP or GAP mode • Make a call. • Answer the call. • Long press (feature depending on the system): redial last number or access the redial list. • Switching between two calls (Broker call). • Switch off ringer.
-
Page 63: Display Icons
Using the telephone in E-GAP or GAP mode • Short press: decrease the volume of the ring tone during an incoming call (8 steps) or decrease the volume of the earpiece or loudspeaker during a conversation (8 steps). • Long press in conversation: activate/deactivate the mute feature. •... -
Page 64: Menu Icons
Using the telephone in E-GAP or GAP mode Ringer active. Ringer disabled. Progressive ringing enabled. Loudspeaker on (in conversation). Mute on (in conversation). Radio reception quality - Normal power mode. Radio reception quality - 50 mW Power mode. You can obtain details on the status icons from the tooltips that appear on the welcome screen when you use the navigator. -
Page 65: Call Icons
Using the telephone in E-GAP or GAP mode 8.2.3 Call icons Making a call. Receiving a call. Call is ended. Earpiece and loudspeaker level. 8.3 Accessing the MENU and navigating The screen descriptions are given as examples and are not exact representations of what can be displayed on your handset. -
Page 66: Making A Call
Using the telephone in E-GAP or GAP mode 8.4 Making a call • Dial. p r s t uv • Send the call. You are in communication. • Hang up. 8.5 Receiving a call You are receiving a call. • Use one of the following: o Answer the call by selecting the 'answer' key. -
Page 67: Calling Using Speed Dial Key
Using the telephone in E-GAP or GAP mode • Enter the first letters of the name, name-first name or the initials of your caller. p r s t uv • • Select the type of search you want (last name, last name and first name or initials). •... -
Page 68: Sending Dtmf Signals
Using the telephone in E-GAP or GAP mode • More or 'OK' key o Add contact If the contact is not in your local directory, you can save them as a new local contact. Append to contact Add the number to an existing local contact. Send message Send message to the contact. -
Page 69: Modify A Contact
Using the telephone in E-GAP or GAP mode • Work: / Mobile: / Home: / Other: select the type of contact. • Enter the number (up to 32 digits). p r s t uv • Apply. • Save • Ring: define the ringtone when this contact calls you (default or specific ringtone) •... -
Page 70: Deleting A Contact
Using the telephone in E-GAP or GAP mode 8.13.3 Deleting a contact • Select the contact to delete. • Apply (press the OK key or softkey: Select). • More • Delete contact • Apply (press the OK key or softkey: Select). •... -
Page 71: Make A Second Call
Using the telephone in E-GAP or GAP mode 8.15 Make a second call When you are on a call, you can initiate a second call. Use one of the following to make a second call: • Dialing the number • You are in conversation with one contact. -
Page 72: Receiving A Second Call
Using the telephone in E-GAP or GAP mode 8.18 Receiving a second call You are in a call and another person is trying to contact you. • Press the star key. • The first call is on hold. • Press the start key if you want to retrieve the first caller. 8.19 Sending DTMF signals During a call, you sometimes have to send DTMF signals, for example, for a voice message service, an automatic switchboard or when remotely consulting an answering machine. -
Page 73: Send Predefined Text Messages
Using the telephone in E-GAP or GAP mode 8.22 Send predefined text messages • Access MENU. • Messages Access the messaging portal. • Select the predefined messages icon. • Select the predefined message to send. • Enter number: enter the person's phone number directly,. •... -
Page 74: Diverting Calls To Your Voice Message Service
Using the telephone in E-GAP or GAP mode 8.25 Diverting calls to your voice message service • Enter the feature code of the type of forward you want to program. p r s t uv • Enter the voicemail number. p r s t uv when the set is forwarded, you hear a specific tone after hooking off the set. -
Page 75: Selecting Language
Using the telephone in E-GAP or GAP mode 8.27.3 Selecting language • Access MENU. • Settings • Language • Select the language of your choice. • Apply (press the OK key or softkey: Select). • Return to idle. 8.27.4 Other features •... - Page 76 (Normal, Any key, On earpiece, On handsfree). • Select System: Selecting your telephone system. Your telephone can be programmed to function on 4 different DECT systems (Alcatel-Lucent Enterprise or GAP). To let the phone choose the best system, select: Auto. select. •...
-
Page 77: Configure The P1, P2 Keys
Using the telephone in E-GAP or GAP mode 8.28 Configure the P1, P2 keys A lock or speed dial feature can be associated with the P1 and P2 keys. Once configured these features can be accessed by a short or a long press. 8.28.1 Define the feature to associate with the P1/P2 key •... -
Page 78: Calendar
Using the telephone in E-GAP or GAP mode 8.29 Calendar You can consult and manage an agenda on your phone. 8.29.1 Modify the agenda format • Access MENU. • Access the agenda menu. • More • View week > view of the week. •... -
Page 79: Modify An Appointment Reminder
Using the telephone in E-GAP or GAP mode • View (month view only). • View the agenda for the selected date (month view only). • Select the appointment of the day (in month view) or the appointment of the week (in week view). •... -
Page 80: Delete An Appointment Reminder
Using the telephone in E-GAP or GAP mode 8.29.6 Delete an appointment reminder Delete a selected appointment • Access MENU. • Access the agenda menu. • Select a date (month view only). • View (month view only). • View the agenda for the selected date (month view only). •... -
Page 81: Locking Your Terminal (Key Lock)
Using the telephone in E-GAP or GAP mode 8.30 Locking your terminal (Key lock) This service enables you to prevent your phone being used. Long press. • Select the lock option. • Apply. Unlock your terminal: Long press. enter the unlock code (if a lock code is entered). p r s t uv 8AL90396ENAAed01 81 /90... -
Page 82: List Of Accessories
List of accessories 9 List of accessories 9.1 Belt clip When you purchase your phone, it is equipped with a belt clip on the back. You can remove this belt clip and replace it with a specific cover. The cover is not provided with the handset. -
Page 83: Vertical Pouch
List of accessories 9.5 Vertical pouch Your phone can also be carried in a protective case with swivel clip. It is recommended to use the protective case if your telephone is to be used in an industrial environment (presence of dust, filings, vapors of diverse origins or its at the risk of being dropped). -
Page 84: How To Dock Your Phone On The Desk Support
List of accessories 9.6.1 How to dock your phone on the desk support Put your phone on its support. Plug the USB cable into a 5V socket (AC/DC adaptor, computer, …). The AC/DC adaptor is not provided with the set. Please contact your provider for a recommended AC/DC adaptator. -
Page 85: Battery Charge Level
List of accessories 9.8.3 Battery charge level > 66% 33% - 66% 10% - 33% < 10% When the battery charge level is lower than 5%, you can only receive calls. 9.8.4 Place or remove the battery in the telephone If the belt clip is installed, you must lift it up and maintain it in this position during the battery installation or replacement. -
Page 86: Headphone / External Microphone
D Audio (left) 9.10 Cleaning and disinfecting your telephone This chapter provides guidelines for cleaning or disinfecting Alcatel-Lucent Enterprise terminals to protect products and optimize performance. The final result will depend on each user's personal procedures, for which ALE cannot be held responsible. -
Page 87: Technical Specifications
Technical specifications 10 Technical specifications 8244 DECT Handset Height 140 mm (5,51 in) Width - top 53.5 mm (2,11 in) Width - bottom 48.3 mm (1,89 in) Depth 21 mm (0,83 in) Weight 155 g Color Blue 2.4 inch TFT color display with backlight,... -
Page 88: Ordering Information
82x4 DECT Handset dual desktop charger 3BN67372AA 82x4 DECT Handset belt clip 3BN67374AA 82x4 DECT Handset swivel clip 3BN67375AA 82x4 DECT Handset belt clip cover (box of 10) 3BN67376AA 8244 DECT Handset vertical pouch 3BN67381AA Battery 3BN67332AA Power Supply Europe 3BN67335AA Power Supply WW 3BN67336AA... -
Page 89: Declaration Of Compliance
Declaration of compliance 12 Declaration of compliance This equipment uses DECT frequency range that depends on country: 1880 - 1900 MHz in Europe, 1920 - 1930 MHz in US/Canada, 1910 - 1930 MHz in LATAM, 1910 - 1920 MHz in Brazil. The equivalent isotropically radiated power at the antenna is less than 110 mW or 250 mW (it depends on the country). - Page 90 Safety and Regulatory Instructions and User Documentation are available at the following Web site: https://www.al-enterprise.com/products. www.al-enterprise.com The Alcatel-Lucent name and logo are trademarks of Nokia used under license by ALE. To view other trademarks used by affiliated companies of ALE Holding, visit: www.al-enterprise.com/en/legal/trademarks-copyright.
-
Page 91: Quick Guide
Related Documentation - Other languages for these Safety and Regulatory Instructions and User Documentation are available at the following Web site https://www.al-enterprise.com/products. 8AL90396ENAAed01 - The Alcatel-Lucent name and logo are trademarks of Nokia used under license by ALE. Copyright © ALE International 2021... - Page 92 Related Documentation - Other languages for these Safety and Regulatory Instructions and User Documentation are available at the following Web site https://www.al-enterprise.com/products. 8AL90396ENAAed01 - The Alcatel-Lucent name and logo are trademarks of Nokia used under license by ALE. Copyright © ALE International 2021...
- Page 93 Related Documentation - Other languages for these Safety and Regulatory Instructions and User Documentation are available at the following Web site https://www.al-enterprise.com/products. 8AL90396ENAAed01 - The Alcatel-Lucent name and logo are trademarks of Nokia used under license by ALE. Copyright © ALE International 2021...
- Page 94 Related Documentation - Other languages for these Safety and Regulatory Instructions and User Documentation are available at the following Web site https://www.al-enterprise.com/products. 8AL90396ENAAed01 - The Alcatel-Lucent name and logo are trademarks of Nokia used under license by ALE. Copyright © ALE International 2021...
Need help?
Do you have a question about the 8244 DECT Handset and is the answer not in the manual?
Questions and answers