
Subscribe to Our Youtube Channel
Related Manuals for Lennox e-Baltic D BOX 55


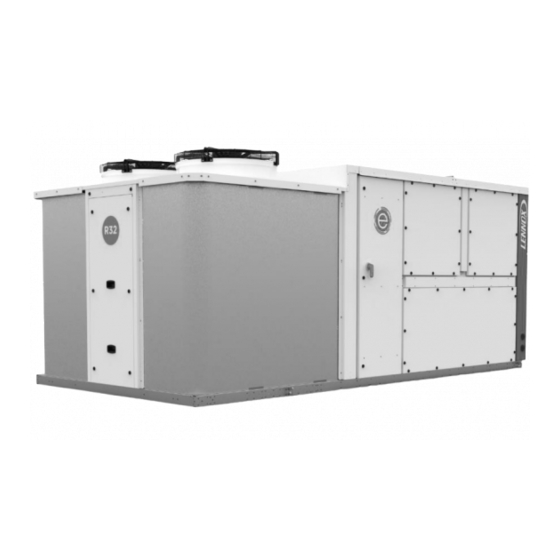
Summary of Contents for Lennox e-Baltic D BOX 55
- Page 1 e-Baltic Air cooled rooftop packaged units Installation, Operating and Maintenance e-BALTIC-IOM-2020.12-EN...
-
Page 2: Table Of Contents
CONTENTS INSTALLATION, OPERATING & MAINTENANCE MANUAL Ref : e-BALTIC-IOM-2020.12-EN INTRODUCTION................................... 1 GENERAL DESCRIPTION ................................1 SAFETY CODES & REGULATIONS .............................. 1 MACHINE DESIGNATION ................................. 1 EMC DIRECTIVE COMPLIANCE ..............................2 REGULATION .................................. 2 WARRANTY ....................................2 NOTES FOR UNIT FITTED WITH GAS BURNER ........................... 3 SAFETY .................................... - Page 3 INSTALLATION ON AN ADAPTABLE ROOFCURB ........................35 CURBING AND FLASHING ............................... 36 NON-ADJUSTABLE NON-ASSEMBLED ROOFCURB INSTALLATION ..................37 TRANSITION CURB ................................. 39 FOAM INSULATION INSTALLING (C,D,E,E+) ..........................39 FOAM GASKET INSTALLING (C,D,E,E+) ........................... 39 ELECTRICAL CONNECTION ..............................39 HEAT RECOVERY ................................40 SENSOR MOUNTING .................................
-
Page 4: Introduction
All the technical and technological information contained in this manual, including any drawing and technical descriptions provided by us, remain the property of LENNOX and must not be used (except in operation of this product), reproduced, issued to or made available to third parties without the prior written agreement of LENNOX. -
Page 5: Emc Directive Compliance
In these circumstances LENNOX is indemnified from any product liability claims from third parties. In the event of a warranty claim the machine serial number and LENNOX order number must be quoted. The technical information and specifications contained in this manual are for reference only. The manufacturer reserves the right to modify these without warning and without obligation to modify equipment already sold e-BALTIC-IOM-2020.12-EN... -
Page 6: Notes For Unit Fitted With Gas Burner
All the technical and technological information contained in this manual, including any drawing and technical descriptions provided by us, remain the property of Lennox and must not be used (except in operation of this product), reproduced, issued to or made available to third parts without the prior written agreement of Lennox. -
Page 7: Safety
SAFETY The safety information contained in this manual is provided as a guide for the safe handling of this installation. LENNOX does not vouch for the completeness of this information and can therefore not accept liability for any possible omissions. -
Page 8: Safety Definition
INTRODUCTION SAFETY DEFINITION The rooftops meet the following safety definitions and is provided with CE markings if applicable (for further information see EU declaration). • 2014/68/EU Pressure Equipment Directive EU 2016/426 Gas Equipment Regulation EN-378-2016 • 2006/42/EC “Machine Directive” 2011/65/EU (2015/863/EU) RoHS (Directive 2014/35/EU relating to low voltages taken into account in the machinery directive according to Annex 1 ̕... -
Page 9: Labels
INTRODUCTION LABELS The rooftop may be marked with the following warning labels to alert to potential hazards (on or near the potentially hazardous part). The rooftop may include the following labels High temperatures Electrical Voltage Rotating parts Sharp parts Warning Wear of PPE (Personal A2L: slightly flammable Don’t walk... -
Page 10: Ped Directive
INTRODUCTION PED DIRECTIVE For units covered by the Pressure Equipment Directive (see EU Declaration of Conformity). Warning: 1. Attention: The high-pressure safety switches are essential elements which guarantee the system remains within the admissible operating limits. Before switching on the installation, always ensure all electrical connections are correct on these elements. -
Page 11: Main Safety Recommendations
• The brazing shall be carried out by a qualified brazier. The brazing shall comply with standard EN1044 AG107 (minimum 30% silver). REPLACING COMPONENTS, EQUIPMENT AND PIPING: • Replacement shall be carried out using spare parts, or using parts approved by Lennox. • Only the refrigerant shown on the manufacturer’s nameplate shall be used. PARAMETERING AND CONTROL: •... - Page 12 INTRODUCTION TRANSPORT – HANDLING • Never lift the unit without forklift protections • Remove the forklift protection before installation • If access to the installation is difficult, provide guard rail. This recommendation is valid for installations in general and for return and curbs.
-
Page 13: Delivery Checks
If the product is damaged, exact details must be confirmed in writing by registered post to the shipping company within 48 hours of delivery (working days). A copy of the letter must be addressed to Lennox and the supplier or distributor for information purposes. -
Page 14: Operating Limits
INTRODUCTION OPERATING LIMITS D , E BOX Cooling mode Heating mode Coil indoor inlet temperature (°C) E+ , F , G , H-BOX Cooling PRE HEATER OR FRESH mode AIR MANDATORY TO HAVE ≥7°C INLET COIL Heating mode PRE HEATER MANDATORY Coil indoor inlet temperature (°C) e-BALTIC-IOM-2020.12-EN... -
Page 15: Maintenance Key
INTRODUCTION MAINTENANCE KEY On delivery we recommend that you keep the key which is attached to an eyebolt in a safe and accessible place. This allows you to open the panels for maintenance and installation work. The locks are ¼ turn + then tighter. CONDENSATE DRAINS The condensate drains are not assembled when delivered and are stored in the electrical panel with their clamping collars. -
Page 16: Flammable Gases
A2L / A2 / A3 flammable gases are subject to more important safety regulations than gases classified A1. This section summarizes the standard and provides specific Lennox recommendations. This section is based on the EN 378, EN 60079-10-1 standards as well as numerical simulations and tests related to the flammability risk carried out on these products. It provides the recommendations to be taken into account so that the product is installed, used, maintained and destroyed at the end of its life cycle without putting the actors in the product life cycle at risk. -
Page 17: Safety Area
For a given volume of building to be ventilated, the standard gives a maximum load per circuit in flammable fluid A2L/A2/A3. According to the standard, for R32 fluid, Lennox recommends a maximum load per circuit of : If the mass of refrigerant is between 1.8 and 12kg : m ≤... -
Page 18: Powering Up A Unit Containing Flammable Gas
FLAMMABLE GASES POWERING UP A UNIT CONTAINING FLAMMABLE GAS Before switching on the power supply, please carry out a refrigerant leak detection using an appropriate device to ensure that there is no refrigerant around the machine. ELECTRIC WIRING ON A UNIT CONTAINING FLAMMABLE GAS When a cable passes through a wall, be sure to use a cable gland to ensure that the cable is sealed and insulated. -
Page 19: On-Board Safety On R32 Gas Unit
Connecting the 24 V fieldbus voltage to terminal X7 of the local bus can destroy the board. COMMISSIONING Commissioning must only be carried out by people authorized by Lennox. A documented functional test must be carried out during commissioning (without the presence of gas). - Page 20 FLAMMABLE GASES MAINTENANCE AND CALIBRATION During maintenance, you must perform the calibration and functional test, see below, in addition to the inspection. A fixed calibration interval is recorded for each sensor type. For an SC2 sensor, if this interval is exceeded, a digital maintenance message is generated and transmitted. Performing calibration automatically clears this message.
- Page 21 FLAMMABLE GASES MEANING OF LEDS The alarm relay is used to raise the presence of gas. The fault relay is used to detect the presence of a fault on the sensor. Start up and normal operation Analog output Relay Power Alarm Default Alarm...
-
Page 22: Handling
HANDLING HANDLING MANDATORY HANDLING DEVICES Handling slings to guide the unit towards the roofcurb Vacuum lifting beam to position the unit COMPLIANT NON COMPLIANT e-BALTIC-IOM-2020.12-EN... -
Page 23: Dimensions And Weights
HANDLING DIMENSIONS AND WEIGHTS e-BALTIC Size Model (C, D, E, E+, F, G, H box) D BOX D BOX E BOX E BOX E+ BOX E+ BOX F BOX F BOX G BOX G BOX H BOX H BOX A (mm) 2250 2250 2250... -
Page 24: Lifting The Unit
HANDLING LIFTING THE UNIT LIFTING SHACKLES DIMENSIONS Use lifting shackles on each lifting lug located on each angle of the unit. Maximum diameter of the ring shaft = 20 mm UNITS C, D, E, E+ The unit must be lifted using spacing beams to avoid the belts damages to the casing. Spacing beams must have a length equal to the machine width –... -
Page 25: Lifting The Roof Curbs
HANDLING LIFTING THE ROOF CURBS Do not install the unit on the refrigeration side on Roofcurb. DUCTING CONNECTION DETAILS (C,D,E,E+) The supply and return air ducts can be secured to the 30 mm flanges at the bottom of the roofcurb. Any ducting weight above 100 kg must be fixed independently to other building frames. - Page 26 HANDLING FORKLIFT PROTECTIONS WARNING: NEVER LIFT THE UNIT WITHOUT FORKLIFT PROTECTIONS Do not remove the unit plastic cover while lifting. DO NOT LIFT THIS SIDE Do not lift the unit by the side (coil end side or drain pan outlet side). This will damage the unit. Lift the unit on the long side using a forklift with dimensions according to the figure below.
-
Page 27: Installation
• The entire surface of the chassis must rest on a support (except for the Lennox PIED option provided for this purpose). • For the installation of a machine without the roofcurb or box supplied by Lennox, it is imperative that the load of the machine is evenly distributed under the entire frame. -
Page 28: Minimum Clearance Around The Unit
INSTALLATION MINIMUM CLEARANCE AROUND THE UNIT Figure below shows the required clearances and service access around the unit. NOTE: Ensure the fresh air inlet does not face prevailing wind direction • Make sure that the fresh air duct is not in the same direction as the prevailing winds. •... -
Page 29: Recommendations For Ducts Connections
INSTALLATION RECOMMENDATIONS FOR DUCTS CONNECTIONS Some rules must be respected for the connections between ducts and unit. Whatever the supply configuration is, respect a minimal duct’s length (D) of 2m before any elbow or any duct’s diameter change Horizontal supply GOOD CONNECTION GOOD CONNECTION Vertical supply... - Page 30 INSTALLATION EXTRACTION > 8m It is recommended to sheath the exhaust air by at least 8m (according to local regulations) to escape the fresh air inlet when the input-output are on the same side. General remarks: It is forbidden to walk on the machine. The machine must not be used to support the ducts.
-
Page 31: Custumer Wiring
INSTALLATION CUSTUMER WIRING VERTICAL CUSTOMER WIRING C, D, E, E+ BOX 1- Remove the indicated plate. Drill the sheet metal to the diameter of the cable glands It is recommended to use only one cable per cable gland 2- Place the cable glands on the plate. 3- Wire through the plate. - Page 32 INSTALLATION Accessibility for main switch connection on C-Box Accessibility for main switch connection on C-Box (size 24-30-38-42) In case of full options control panel, the access to connect the power cable to the main switch can be limited. Therefore a removable hatch is available at the back of the control board (accessible from the ventilation panel).
- Page 33 INSTALLATION WIRING WITH ROOFCURB WITHOUT EXTRACTION WIRING WITH ROOFCURB WITH EXTRACTION HORIZONTAL CUSTOMER WIRING ON C, D, E, E+BOX e-BALTIC-IOM-2020.12-EN...
- Page 34 HORIZONTAL CUSTOMER WIRING ON F BOX AND G BOX (OPTION) To horizontally wire a F or G-BOX e-BALTIC power supply, it must be placed on feet. Do not install the unit on mounts (fixed or antivibration) other than those provided by LENNOX. First, remove the 4 transport feet and the 2 sheaths when the e-BALTIC unit is lifted.
- Page 35 INSTALLATION Complete the tightening of the feet screws. Connect the unit by the bottom as vertical wiring. e-BALTIC-IOM-2020.12-EN...
- Page 36 INSTALLATION CUSTUMER HORIZONTAL CABLING H-BOX To horizontally wire a H-BOX e-BALTIC power supply, place metal cable glands in front, under the electrical cabinet. 1- Remove the indicated plate. 2- Drill the sheet to the diameter of the cable glands. It is recommended to use only one cable per cable gland. WARNING: cable glands must be in metal and not in plastic.
-
Page 37: Installation On A Roofcurb
INSTALLATION ON A ROOFCURB INSTALLATION ON A ROOFCURB TYPE OF ROOFCURB Non adjustable roofcurb Adjustable roofcurb ADHESIVE GASKET PVC 20X15 TECNOCEL ADHESIVE GASKET PVC 20X14 TECNOCEL Exhaust roofcurb Multidirectionnal roofcurb WARNING : a multidirectionnal flowcurb and horizontal extraction flowcurb must be secured to the ground using existing fixing holes on the frame. -
Page 38: Installation On An Adaptable Roofcurb
INSTALLATION ON A ROOFCURB INSTALLATION ON AN ADAPTABLE ROOFCURB CAUTION: • Installation of the unit and accessibility must be compliant with the local regulations. Ensure that all access equipment allow maintenance operation in safety (electrical cabinet, main switch, panels, filter, refrigerant circuit…); this recommendation is valid for installations in general and in particular for return and curbs. -
Page 39: Curbing And Flashing
INSTALLATION ON A ROOFCURB CURBING AND FLASHING Check that the insulation is continuous, counter flash and seal around the frame as shown CAUTION: To be effective, the upstream must end below the drop edge. Where pipes and electrical conduits extend through the roof, flashing must conform to local codes of practice Before installing the equipment, make sure that seals are not damaged and check that the unit is secured to the mounting frame. -
Page 40: Non-Adjustable Non-Assembled Roofcurb Installation
INSTALLATION ON A ROOFCURB NON-ADJUSTABLE NON-ASSEMBLED ROOFCURB INSTALLATION The roof mounting frame provides support when the units are installed in down-flow configurations. The non-adjustable, non-assembled roof mounting frame can be installed directly on decks having adequate structural strength or on roof supports under deck. NOTE: frame assembly must be installed flat, leveled within 5mm per linear meter in any direction SIZE C, D, E, E+ BOX FRAME PARTS PACKING... - Page 41 INSTALLATION ON A ROOFCURB ASSEMBLY Unit support rail Unit floor insulation + gasket Air duct Fixing Roofcurb flange SIZE F, G, H BOX FRAME PARTS PACKING Figure below shows the different parts used in the assembly of this roof mounting frame. SECURING THE FRAME To ensure proper mating with units, it is mandatory that the roof mounting frame be squared to roof structure as follows: •...
-
Page 42: Transition Curb
INSTALLATION ON A ROOFCURB TRANSITION CURB This roof curb will arrive as a packaged on a pallet and need to be built together. The part will be connected by special corrosion free nails. It is not possible to connect with standard nail equipment because there is a lot of power needed. -
Page 43: Heat Recovery
HEAT RECOVERY HEAT RECOVERY GENERAL DESCRIPTION Heat recovery modules (HRM) have following interests: • in winter season and heating mode, the heat in the extract air is exchanged with the fresh air ; • in summer season and cooling mode, the heat of the fresh air is transferred to the extract air. HRM are two plates heat exchanger modules, that differ from each other by their horizontal (HRMH) or vertical (HRMV) configuration. - Page 44 HEAT RECOVERY HEAT RECOVERY INSTALLATION C, D, E BOX (ERVF + HRMV) Install the flowcurb. Before installing the rooftop Fix the brackets (5 pieces) on the curb by 24 screws(6x16mm); ADJUST the position of the attachment bracket so that it is 5 mm above the support surface (without the foam);...
- Page 45 HEAT RECOVERY ELECTRICAL CONNECTIONS OF THE HEAT RECOVERY UNIT Two components have to be connected in the space between the plate heat exchanger and the economizer: • • For the air pressostat, connect and tighten the 2 spade- For the actuator, assembly the two parts of the tips on terminal 1 and 3 (no polarity) : connector:...
- Page 46 HEAT RECOVERY THERMODYNAMIC HEAT RECOVERY C,D, E, E+BOX - INSTALLATION REFRIGERATION CIRCUIT Frigorific components access: Compressor is located in the fix condenser part. Its access for electrical checking and pressure taps (HP and LP) is made through the screwed access door behind the hinged coil.
- Page 47 HEAT RECOVERY SERVICE DIAGNOSTIC REFRIGERATION Fault Possible causes and symptoms Solution Alarm 317: main frigorific issue Lack of charge, obstructed components Freezing: wait that coil is defrosted by Low LP and LP cut out exhaust air; Alarm 327: too low LP Air flow too low on evaporating side (too low speed rate / fouled filter or coil).
- Page 48 HEAT RECOVERY ENERGY RECOVERY INSTALLATION (ERVF+HRMV) ON UNITS E+ BOX 1. Install the flowcurb 2. Before installing the rooftop: Fix the brackets (5 pieces) on the curb by 24 screws (6x16mm); b. ADJUST the position of the attachment bracket so that it is 5 mm above the support surface (without the foam);...
- Page 49 HEAT RECOVERY ENERGY RECOVERY INSTALLATION ON UNITS F, G, H BOX *F & G DIMENSIONS (mm) WEIGHT SIZE F-box 100-120 2146* 2063 1422 1796 525 kg G-box 130-150 2330* 2247 1518 2170 635 kg H-box 180-210 2516 2497 1676 2418 730 kg e-BALTIC-IOM-2020.12-EN...
- Page 50 HEAT RECOVERY STEP 1: SUPPLIED ROOFTOP CONFIGURATION NO HOOD NO PANEL Remove lifting lug Remove corner sheet metal STEP 2: LIFTING e-BALTIC-IOM-2020.12-EN...
- Page 51 HEAT RECOVERY STEP 3: FITTING STEP 4: CHECK SAME LEVEL 0 – 15 mm e-BALTIC-IOM-2020.12-EN...
- Page 52 HEAT RECOVERY STEP 5: FIXING H-box: for each side: H=10 x Ø4,8 x 32mm 5-10 mm F & G-box: for each side: F = 8 G = 8 X Ø 4, 8 x 25 mm e-BALTIC-IOM-2020.12-EN...
- Page 53 HEAT RECOVERY On top F = 13 G = 15 H = 15 X Ø 4, 8 x 25 mm STEP 6: MASTICATE Apply mastic on side junctions and higher junction e-BALTIC-IOM-2020.12-EN...
- Page 54 HEAT RECOVERY STEP 7: ELECTRICAL WIRING The Recovery module is sent with a power cable and a T- lan cable: MODBUS CABLE POWER CABLE Separate these 2 cables (communication and power ones) using the two holes. Then, attach the 2 cables to the grid of the extraction curb and insert them into the rooftop electrical panel.
- Page 55 HEAT RECOVERY Then connect the power cable from the module to the rooftop, and the Modbus cable according to the bus connection wiring diagram (it could be connected to the BE (A1) connector in electrical rooftop panel or other options with bus communication): Extraction roofcurb connection Recovery module connection Actuator roofcurb connection...
- Page 56 HEAT RECOVERY STEP 8: ROOF CURB ECONOMIZER ADJUSTMENT With Heat Recovery module option the extract air goes through the wheel, that’s why the economizer of the roofcurb has to be permanently fully closed. If roofcurb economizer is not fully closed, close it manually And don’t connect the actuator to the rooftop ACTUATOR ROOFCURB...
-
Page 57: Sensor Mounting
SENSOR MOUNTING SENSOR MOUNTING CO2 OR ADVANCED ENTHALPIC CONTROL PACK SENSOR The probe is delivered unassembled on the machine. The installer is responsible for mounting and connecting this sensor. The device can be installed in dry surroundings (IP20) by screws on the wall surface or on the standard flush mounting box. -
Page 58: Economiser And Extraction
ECONOMISER AND EXTRACTION ECONOMISER AND EXTRACTION ECONOMISER Free cooling is provided through the use of fresh air which is more appropriate than excessive cooling amounts of return air. The economizer is factory fitted and tested prior to shipment. It includes two dampers operating from a 24V actuator RAIN HOOD It also includes a factory fitted rain hood. -
Page 59: Commisioning
COMMISIONING COMMISIONING WARNING: Check that all recommendations related to the paragraph on flammable fluids are followed before commissioning. All the components must be installed by a qualified technician. Commissioning must only be carried out by trained refrigeration technician whom qualification certificates are compliant with the local regulation. CASING CONDENSATION RISK Depending of the ambient outdoor conditions and the supply air performance of the unit, some condensation on the outside skin of the unit casing may appear. -
Page 60: Before Turning On The Power
All units are delivered with a complete oil charge, and there is no need to add any oil before start-up or afterwards. Overcharging with oil can cause serious problems on an installation, particularly for the compressors. The oil type depends on compressor model that depends on the unit size. Use only oil approved and recommended by Lennox POWERING THE UNIT Power up the unit by closing the isolator switch. -
Page 61: Climatic™ Configuration
COMMISIONING CLIMATIC™ CONFIGURATION SETTINGS 1. Supply Air-flow adjustment (depending on customer requirements) a. 3333 = nominal air flow / pressure b. 3334 = reduced air flow / pressure c. 3332 = Manual/Automatic d. 3331 = Nominal/DeadZone/PartLoad/Pressure 2. Exhaust Air-flow adjustment (optional) a. - Page 62 COMMISIONING CHECK: 1. Air-flow Vs Damper a. Test B.Nom100% : i. adjust the blower speed % (3333) to get the required airflow ii. adjust the exhaust speed % (3864) to get the required airflow b. Test B.Nom0%: i. adjust the damper compensation (3335) to maintain the required airflow even with damper fully closed ii.
-
Page 63: Fresh Air Wood
FRESH AIR WOOD FRESH AIR WOOD INSTALLING The fresh air hood has to be opened and secured during commissioning. The 3 parts of the fresh air hood have to be assembled thanks to self-taping screws delivered in the spare part box Check the proper position of the black seal on the top of the hood cover. -
Page 64: Filters
FILTERS FILTERS FILTER REPLACEMENT After opening the filter access panel, lift the filter retaining log. The filters can then be removed and replaced easily by sliding the dirty filters out and clean ones in. The CLIMATIC controller monitors the pressure drop across the filter. -
Page 65: Refrigerant Circuit
REFRIGERANT CIRCUIT REFRIGERANT CIRCUIT GENERIC REFRIGERANT SKETCH Depending on the unit size or the selected options, the number of circuits and compressors can change. The specific principle diagram is at the end of the electrical diagram supplied with the unit. Some connection valves (Schrader type) are available to load/unload the circuit. - Page 66 REFRIGERANT CIRCUIT E+, F BOX : BEV- Indoor coil Temperature sensor Expansion valve Check valve Filter dryer BCD- Outdoor coil Low/High pressure switch Cycle reversal valve Compressor VAM- Manual valve Suction line accumulator e-BALTIC-IOM-2020.12-EN...
- Page 67 REFRIGERANT CIRCUIT G BOX BEV- Indoor coil Temperature sensor Expansion valve Check valve Filter dryer BCD- Outdoor coil Low/High pressure switch Cycle reversal valve Compressor Suction line accumulator e-BALTIC-IOM-2020.12-EN...
- Page 68 REFRIGERANT CIRCUIT H BOX BEV- Indoor coil Temperature sensor Expansion valve Check valve Filter dryer BCD- Outdoor coil Low/High pressure switch Cycle reversal valve Compressor Suction line accumulator e-BALTIC-IOM-2020.12-EN...
-
Page 69: Preheating Of The Crankcase Heaters
REFRIGERANT CIRCUIT PREHEATING OF THE CRANKCASE HEATERS It’s important to avoid starting the compressors without preheating of the crankcase heaters. The crankcase heaters are regulated according to the outside temperature (< 16°C). WARNING: In case of extended shutdown of the unit (> 6 hours), it is mandatory to power on the unit 8 hours minimum before to start the compressors equipped with crankcase heaters ELECTRONIC EXPANSION VALVE Different electronic valves types can be fitted on e-Baltic range. -
Page 70: Heating Option
HEATING OPTION HEATING OPTION HOT WATER COIL HYDRAULIC CONNECTIONS Hot water coils offer fully modulating control through the use of a 3-way valve. The hot water coil, connections and valves are all tested at pressure of 15 bars. Frost protection is provided by forcing the opening the 3-ways valve when supply temperature from hot water coil falls below 8°C and by stopping the outdoor fan when that supply temperature falls below 6°C. - Page 71 HEATING OPTION HOT WATER COIL CONNECTION PIPE INTERNAL DIAMETERS (DN) D BOX E BOX E+ BOX F BOX G BOX H BOX Model designation 055-065 075-085 095-150 110-120 130-150 180-210 MAXIMUM WORKING PRESSURE: 8 BARS / MAXIMUM WORKING TEMPERATURE: 110°C e-BALTIC-IOM-2020.12-EN...
-
Page 72: Electric Heaters
HEATING OPTION ELECTRIC HEATERS The electric heater comprises of shielded resistance heaters, which are smooth stainless steel tubes 6 W/cm2 capacity. High temperature limit control offers overload protection and is set to 93°C and located at less than 150mm after electric heaters. -
Page 73: Electrical Preheater (D, E, E+ Box)
HEATING OPTION ELECTRICAL PREHEATER (D, E, E+ BOX) WARNING: electric pre-heater is connected heater to main power – risk of electrical Shock – switch off the unit prior to open this section Pre-heater is running only with high fresh air rate under low outdoor ambient temperature (see setpoint in CLIMATIC™ section). A metallic filter is installed between air filter &... -
Page 74: Condensing Gas Burner
• Combustion air inlet and burnt gas exhaust(s) must not be obstructed in any way. • Depending on the operating conditions (prevailing winds), it may be necessary to separate the air inlets from the flue gas outlets (excluding LENNOX supply). SUPPLY NETWORK PIPE SIZING MALE THREADED CONNECTION FOR GAS BURNER: 3/4”... - Page 75 HEATING OPTION SAFETY INSTRUCTIONS FUEL: Before starting up the heater, make sure that: • The gas mains supply data is compatible with the data stated on the nameplate; • The combustion air intake ducts (when fitted) and the fume exhaust pipes are those specified by the manufacturer; •...
- Page 76 HEATING OPTION GAS BURNER DETAILS • Premix burner (venturi, gas fan, pilot group, head) gas valve • Electronic controls with display • Combustion chamber in stainless steel AISI 441 • Exchanger bundle in stainless steel AISI 441 • Safety probe •...
- Page 77 HEATING OPTION CONNECTIONS ÉLECTRIQUES POWER SUPPLY 2/PE 50Hz 400V WARNING It is mandatory to have earth connection. e-BALTIC-IOM-2020.12-EN...
- Page 78 HEATING OPTION GAS CONNECTION The module cannot support supply pressures higher than 50 mbar (0.05 bar) otherwise it can break of the gas valve membranes. For natural gas: always install a stabilizer on the main line. For gas GPL (Butane-Propane) gas: a pressure reducer must be installed A pressure gauge must always be installed upstream and downstream of the main gas supply line visible with a scale of [0 –...
- Page 79 HEATING OPTION CONDENSATE DRAIN WARNING: Do not forget to connect the condensate drain (No need to add a siphon). The condensates must absolutely be drained at least 5 meters from the unit into an appropriate place. The condensates are corrosive and could damage the unit (or other parts of the installation) if they are not drained properly.
- Page 80 HEATING OPTION MAINTENANCE OPERATIONS To keep the machine in efficient condition and guarantee a long lifetime of the heater, it is advisable to run some inspections every year: check the status of the start-up electrodes, detection electrodes and pilot flame; check the status of fume exhaust and air intake ducts and terminals;...
-
Page 81: Recovery Water Coil C,D,E,E+ Box
HEATING OPTION RECOVERY WATER COIL C,D,E,E+ BOX Heat recovery water coil is delivered with a 3 ways valve inside carton to be assembled on site by installer. The freeze protection is made via fresh damper safeties nevertheless for a full freezing protection has to be done using glycoled water e-BALTIC-IOM-2020.12-EN... -
Page 82: Maintenance Diagnostic
MAINTENANCE DIAGNOSTIC MAINTENANCE DIAGNOSTIC REFRIGERATION FAULT POSSIBLE CAUSE AND SYMPTOMS SOLUTION Measure the superheat and sub-cooling Good if 5°C<SC<10°C and 5°C<SH<10°C Bad Refrigerant charge too low if SC>10°C and SH too low Check superheat adjustment and charge unit (a leak check must be carried out) In Heat Pump Mode the temperature difference between T outdoor and Tevap. - Page 83 MAINTENANCE DIAGNOSTIC REFRIGERATION FAULT POSSIBLE CAUSE AND SYMPTOMS SOLUTION Heat pump mode: Check the filter before the indoor coil measure and estimate the airflow rate increase the speed Incorrect airflow rates of the fan Cooling mode: Check the condenser fan Summer operation Several hours after the unit has stopped, Moisture or contaminants in the system...
- Page 84 MAINTENANCE DIAGNOSTIC INDOOR FAN BLOWER FAULT POSSIBLE CAUSE AND SYMPTOMS SOLUTION Reduce the rotation speed of the fan Pressure drop in the ducting installation too Measure and estimate the airflow and High amps on action Fan motor low. pressure and compare with the specification from customer.
- Page 85 MAINTENANCE DIAGNOSTIC WATER INFILTRATION FAULT POSSIBLE CAUSE AND SYMPTOMS SOLUTION Cooling mode: Check the air flow rate and reduce it if Water carried away from the coil because of necessary excessive airflow and speed on the coil. Low air pressure in the compartment due to Water found in the Check filter a high airflow rate or a high pressure drop...
-
Page 86: Maintenance Plan
• It is recommended to keep a minimum stock of common replacement parts in order to be able to carry out regular maintenance operations (i.e. filters). You can contact your local Lennox representative which can assist you in establishing a parts list for each type of equipment. - Page 87 Wash and dry carefully. Replace filter if necessary Clean or replace filters: • by an original Lennox filter. Disposable, or metal frame. Blocked filter will reduce the performance of the unit. THE UNIT SHOULD NEVER BE OPERATED WITHOUT FILTERS...
- Page 88 MAINTENANCE PLAN + Half Task Operating mode Monthly Quarterly Yearly Check overall working of the flow controller (only for Cut-off the compressors, stop the water circulation, then start rooftops with water the unit, wait for the water flow failing signal in the controller. condensation function) Check the water flow ( only Measure the water flow and compare it to the initial value set...
- Page 89 MAINTENANCE PLAN + Half Task Operating mode Monthly Quarterly Yearly Check Glycol concentration in Check the glycol concentration in the pressurized water circuit. the HWC circuit and/or in the ( a concentration of 30% gives a protection down to approx.. - water condenser circuits 15°C) check the circuit pressure Gas burner module check for...
-
Page 90: Warranty
WARRANTY WARRANTY TERMS AND CONDITIONS In the absence of any other written agreement, the guarantee shall only apply to design faults which occur within a 24 months period (warranty period). The warranty period starts on the date of commissioning and at the latest six months after the delivery of the Rooftop. DO NOT CONFUSE THE WARRANTY WITH MAINTENANCE The warranty will only apply if a maintenance contract has been signed, starting from the date of commissioning, and if the maintenance contract has actually been performed. - Page 92 LENNOX EMEA Headquarters LENNOX EMEA 7 rue des Albatros - Z.I. Les Meurières, 69780 Mions - France +33 (0) 810 502 502 www.lennoxemea.com...
Need help?
Do you have a question about the e-Baltic D BOX 55 and is the answer not in the manual?
Questions and answers