Lennox LGH480 Installation Instructions Manual
Gas and cooling packaged units (35, 40, 45, & 50 ton)
Hide thumbs
Also See for LGH480:
- User's information manual (9 pages) ,
- Installation instructions manual (8 pages)
Table of Contents
Advertisement
E2017
WARNING
Improper installation, adjustment, alteration, service
or maintenance can cause property damage, personal
injury or loss of life. Installation and service must be
performed by a licensed professional HVAC installer
or equivalent, service agency, or the gas supplier
Table of Contents
. . . . . . . . . . . . . . . . . . . . . . . . . . . . . . . . .
. . . . . . . . . . . . . . . . . . . . . . . . .
. . . . . . . . . . . . . . . . . . . .
. . . . . . . . . . . . . . . . . . . . . . . . . . . . . . . . . . . .
. . . . . . . . . . . . . . . . . . . . . . . . . . . . . . . .
. . . . . . . . . . . . . . . . . . . . . . . . . . . .
. . . . . . . . . . . . . . . . . . . . . . .
. . . . . . . . . . . . . . . . . . . . . . . . . . . . .
. . . . . . . . . . . . . . . . . . . . . . . . . .
. . . . . . . . . . . . . . . . . . . . . . . . .
. . . . . . . . . . . . . . . . . . . . .
. . . . . . . . . . . . . . . . . . . . . . .
. . . . . . . . . . . . . . . . . . . . . . . . .
. . . . . . . . . . . . . . . . . . . . . . .
. . . . . . . . . . . . . . . . . . . . . . . . . . . .
. . . . . . . . . . . . . . . . . . . . . . . . . . .
. . . . . . . . . . . . . . . . . . . . . . . .
Page 2
Page 4
Page 5
Page 5
Page 5
Page 6
Page 7
Page 7
. . . . . . . . . . . . . . . . . .
Page 10
Page 11
Page 11
Page 11
Page 12
Page 12
Page 13
. . . . . . . . . . . . . .
Page 16
. . . . . . . . . . . . . . . . . .
Page 18
. . . . . . . . . . . .
Page 19
Page 32
Page 36
. . . . . . . . . . .
Page 37
Page 37
INSTALLATION
INSTRUCTIONS
LGH420, 480, 540, 600
LCH420, 480, 540, 600
(35, 40, 45, & 50 Ton)
GAS AND COOLING PACKAGED UNITS
507232-04
7/2017
Supersedes 507232-03
IMPORTANT
Supply air VFD motor rotation is controlled indepen
dently from scroll compressor rotation. See Cooling
Start-Up section for correct compressor rotation.
Compressor damage due to improper rotation is the
responsibility of the installer.
. . . . . . . . . . . . . . . . . . . . . . . .
. . . . . . . . . . . . . . . . . . . . .
. . . . . . . . . . . . . . . . . . . . . . . .
. . . . . . . . . . . . . . . . . . . . . . .
. . . . . . . . . . . . . . . . . . . . . . . . . . . . . . . . . . . .
RETAIN THESE INSTRUCTIONS
FOR FUTURE REFERENCE
. . . . . . . . . . . . . . . . . . .
Page 38
Page 50
. . . . . . . . . . . . . .
Page 51
. . . . . . . . . . . . . . . . . . .
Page 51
Page 51
Page 53
. . . . . . . . . . . . . . . . .
Page 56
Page 57
. . . . . . . . . . . . . . . .
Page 58
. . . . . . . . . . . . . . .
Page 59
Page 60
Advertisement
Table of Contents

Related Manuals for Lennox LGH480


Summary of Contents for Lennox LGH480
-
Page 1: Table Of Contents
E2017 INSTALLATION WARNING INSTRUCTIONS Improper installation, adjustment, alteration, service or maintenance can cause property damage, personal LGH420, 480, 540, 600 injury or loss of life. Installation and service must be performed by a licensed professional HVAC installer LCH420, 480, 540, 600 or equivalent, service agency, or the gas supplier (35, 40, 45, &... -
Page 2: Dimensions
LGH/LCH 420, 480, 540, 600 Unit Dimensions Vertical Airflow - Inches (mm) - Gas Heat Shown Optional Barometric Relief Hoods (one or two, each side). NOTE - If only one hood is used it is located on this side of unit. 36-3/4 104-3/4 See Electrical... - Page 3 LGH/LCH420, 480, 540, 600 Unit Dimensions Horizontal Airflow - In. (mm) - Gas Heat Shown Optional Outdoor Air See End View for gas Hoods (2) supply inlet detail Return Opening (2286) Return Opening 1-1/2 (38) (all 4 sides of supply air opening) Optional Barometric Relief Hoods...
-
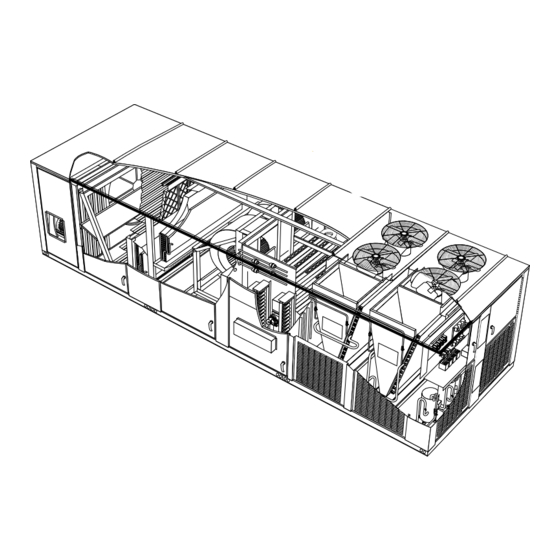
Page 4: Parts Arrangements
Page 4 LGH/LCH420, 480, 540, 600... -
Page 5: Shipping And Packing List
Shipping and Packing List Requirements See figure 1 for unit clearances. Package 1 of 1 contains: 1- Assembled unit WARNING Check unit for shipping damage. Receiving party should contact last carrier immediately if shipping damage is found. Electric shock hazard and danger of explosion. -
Page 6: Duct Connection
A-Downflow Discharge Application 5- Units require support along all four sides of unit base. Supports must be constructed of steel or suitably Roof Mounting with S1CURB10E-1 treated wood materials. 1- The S1CURB10E-1 roof mounting frame must be installed, flashed and sealed in accordance with the Duct Connection instructions provided with the frame. -
Page 7: Rigging Unit For Lifting
HORIZONTAL SUPPLY AIR RIGGING UNIT BACK OF UNIT LIFTING POINT SHOULD BE DIRECTLY ABOVE CENTER OF UNIT CAUTION - Do not HORIZONTAL SUPPLY AIR walk on unit. SECURE FLANGES SHIPPING COVER WITH SCREWS FROM INSIDE OF UNIT INSTALL NARROW SIDE OF FLANGE ON THE INSIDE OF PANEL ALL 8 POINTS MUST BE... - Page 8 Power Exhaust Shipping Blocks 2- Remove four shipping blocks and screws beneath the power exhaust assembly frame as shown in figure 7. 1- Open access panels on return end end of unit. See figure 4. ACCESS TO COMPRESSOR HAT SECTION AND INDOOR BLOWER SHIPPING BLOCKS FRONT SIDE OF UNIT SHOWN COMPRESSOR HAT SECTION INDOOR BLOWER...
- Page 9 POWER EXHAUST SHIPPING BLOCKS Note - Shipping blocks are only present when optional spring mounts are installed. REMOVE SHIPPING BLOCKS AND SCREWS OPTIONAL SPRING MOUNT (TYPICAL) FIGURE 7 Page 9 507232-04 7/2017...
-
Page 10: Reverse Condensate Drains
Reverse Condensate Drain Pan REMOVE SCREWS SECURING DRIP SHIELD AND DRAIN PAN Unit is shipped from the factory with the condensate drain LONG DRIP SHIELD facing the front of the unit. Reverse drain pan when needed as follows: 1- Remove blower door on front of unit. See figure 8 and 9. FRONT MULLION BLOWER DOOR REMOVE... -
Page 11: Condensate Drains
When making piping connections a drip leg should be Condensate Drain installed on vertical pipe runs to serve as a trap for sediment or condensate. A 1/8” N.P.T. plugged tap is Make drain connection to the 1” N.P.T. drain coupling located on gas valve for test gauge connection. -
Page 12: Flue And Intake Hoods
PRESSURE TEST GAS LINE INSTALL EXHAUST AND INTAKE HOODS REMOVE AND DISCARD SHIPPING COVERS OVER MANUAL MAIN EXHAUST OPENINGS SHUT-OFF VALVE GAS VALVE FIGURE 14 EXHAUST HOODS CAUTION Some soaps used for leak detection are corrosive to certain metals. Carefully rinse piping thoroughly after leak test has been completed. -
Page 13: Electrical Connections
Electrical Connections 2nd Disconnect Mounting Location Control Box (Dual Power Supply) POWER SUPPLY Do not apply power or close disconnect switch until installation is complete. Refer to start-up directions in Cooling Start-Up section. Refer closely to unit wiring diagram. Refer to unit nameplate for minimum circuit ampacity and maximum fuse size. - Page 14 24 VOLT FIELD WIRING IN THERMOSTAT MODE (Unit Controller in default T'Stat System Mode 6.01 Option 0) UNIT CONTROLLER UNIT CONTROLLER SMOKE INPUTS HUMIDISTAT THERMOSTAT 24VAC G W1 W2 Y1 Y2 O 2A2 (2HT/2C) THERMOSTAT NOTE - ON ELECTRO-ME CHANICAL THERMOSTATS SET ANTICIPATOR AT 0.1 AMPS.
- Page 15 Connect both cable shield drain wires to TB1-7 as shown in figure 20. Wire runs over 150 feet (mm): Use a local, isolated 24VAC transformer such as Lennox cat #18M13 (20VA minimum) to supply power to RH sensor as Optional Building Static Pressure Supply Static Pr.
-
Page 16: Multi-Staged Air Volume Start-Up
TABLE 2 FIELD WIRING HOT GAS REHEAT UNITS Blower CFM Design Specifications (Using A Humidity Sensor With More Than 150 Ft. Wire Runs) No. Stages / Design Blower Speed Control Type Specified CFM CONNECTED ISOLATED 24V TRANSFORMER A55 UNIT Htg. CONTROLLER Clg. - Page 17 SETTINGS > RTU OPTIONS > EDIT PARAMETER > TABLE 3 MINIMUM AND MAXIMUM CFM - STAGED BLOWERS ENTER DATA ID - 9 > MIN DAMPER LOW BLOWER = X.X% Gas Heat Minimum CFM Measure the intake air CFM. If the CFM is lower than the Unit Gas Heat Size Airflow CFM...
-
Page 18: Variable Air Volume Start-Up
The supply air VFD may be by-passed using jack/plug Variable Air Volume Start-Up connections. Locate J/P198 connectors in control box Units may contain an optional supply air blower equipped area under the relays. Disconnect J198 from P198 and with a variable frequency drive A96 (VFD) which varies connect J204 to P198. -
Page 19: Blower Operation And Adjustments
BLOWER ASSEMBLY UPPER ADJUSTMENT LOCKWASHER LOWER ADJUSTMENT TO LOOSEN BELT TO TIGHTEN BELT Turn upper nut on both ad Turn lower nuts on both justment bolts counter adjustment bolts clock clockwise. Secure support wise. Secure support plate with lower nuts. plate with upper nuts. - Page 20 B-Check Belt Tension 12 lbs. for 10 & 15 HP applications 11 lbs. for 20, 25, & 30 HP applications Overtensioning belts shortens belt and bearing life. Check force below these values indicates belt tension as follows: undertensioned belt. A force above these values 1-Measure span length X.
- Page 21 4- Referring to Page 22 and Page 23, use static pressure 6-Variable Air Volume Supply Air Blowers - and RPM readings to determine unit CFM. Use In addition to adjusting the motor pulley, the supply Page 28 when installing the unit in horizontal air CFM can be adjusted at the Unit Controller or by using discharge applications.
- Page 22 BLOWER DATA BLOWER TABLE INCLUDES RESISTANCE FOR BASE UNIT ONLY WITH DRY INDOOR COIL AND AIR FILTERS IN PLACE Add factory installed options air resistance, then determine from blower table blower motor output and drive kit required. See page 28 for horizontal configured unit air resistance. See page 29 for factory installed options air resistance data.
- Page 23 BLOWER DATA BLOWER TABLE INCLUDES RESISTANCE FOR BASE UNIT ONLY WITH DRY INDOOR COIL AND AIR FILTERS IN PLACE Add factory installed options air resistance, then determine from blower table blower motor output and drive kit required. See page 28 for horizontal configured unit air resistance. See page 29 for factory installed options air resistance data.
- Page 24 BLOWER DATA POWER EXHAUST FANS 50% HIGH STATIC OPERATION, NO ERW Return Duct Negative Static Pressure - Inches Water Gauge (Pa) Volume RPM BHP RPM BHP RPM BHP RPM BHP RPM BHP RPM BHP RPM BHP RPM BHP RPM BHP RPM BHP RPM BHP 4000 410 0.75 465 1.00 520 1.25 575 1.50...
- Page 25 BLOWER DATA POWER EXHAUST FANS 50% HIGH STATIC OPERATION WITH ERW (BY-PASS DAMPERS CLOSED) Return Duct Negative Static Pressure - Inches Water Gauge (Pa) Volume RPM BHP RPM BHP RPM BHP RPM BHP RPM BHP RPM BHP RPM BHP RPM BHP RPM BHP RPM BHP RPM BHP 2500 390 0.35 460 0.50 530 0.70 600 0.90...
- Page 26 BLOWER DATA POWER EXHAUST FANS 50% HIGH STATIC OPERATION WITH ERW IN ECONOMIZER MODE (BY-PASS DAMPERS OPEN) Return Duct Negative Static Pressure - Inches Water Gauge (Pa) Volume RPM BHP RPM BHP RPM BHP RPM BHP RPM BHP RPM BHP RPM BHP RPM BHP RPM BHP RPM BHP RPM BHP 3500 380 0.55 435 0.70 495 0.90 555 1.10...
- Page 27 BLOWER DATA POWER EXHAUST FANS STANDARD STATIC ( TWO FAN OPERATION) Return Duct Return Duct Air Volume Air Volume Negative Static Pressure Negative Static Pressure Inches Water Gauge Inches Water Gauge 12,100 0.50 5700 0.05 11,600 0.55 5000 0.10 11,150 0.60 4300 0.15...
- Page 28 BLOWER DATA AIR RESISTANCE HORIZONTAL AIRFLOW APPLICATIONS Standard Static Power Exhaust fans 50% High Static 100% High Static Air Volume Power Exhaust Fans Power Exhaust Fans No Power Exhaust Fans in. w.g. in. w.g. in. w.g. 10,000 10,500 11,000 11,500 12,000 12,500 13,000...
- Page 29 BLOWER DATA FACTORY INSTALLED OPTIONS AIR RESISTANCE ECONOMIZER RETURN AIR DAMPER WITH ERW Outdoor Air Volume Return Duct Negative Static Pressure 0 in. w.g. With ERW 3250 0.32 0.12 - - - - - - - - - 3500 0.36 0.16 - - - - - -...
- Page 30 BLOWER DRIVE KITS VARIABLE FREQUENCY DRIVE KIT SPECIFICATIONS Nominal Maximum Drive Kit RPM Range Number (Adjustable Pulley) 510 - 640 5.75 630 - 760 635 - 770 8.63 750 - 905 670 - 825 11.5 750 - 905 880 - 1050 745 - 900 17.25 875 - 1045...
- Page 31 TABLE 5 SUPPLY AIR BLOWER DRIVE COMPONENT MANUFACTURER'S NUMBERS DRIVE COMPONENTS MOTOR PULLEY BLOWER PULLEY BLOWER BUSHING BELTS OEM Part Drive OEM Part No. Browning No. OEM Part No. Browning No. OEM Part No. Browning No. Browning No. P-8-2237 1VP62 X 1-1/8 78M9001 1B5V160 79M0601...
-
Page 32: Cooling Start-Up
3- Check to ensure that refrigerant lines do not rub against Cooling Start-Up the cabinet or against other refrigerant lines. IMPORTANT-The crankcase heater must be energized for 4- Check voltage at disconnect switch. Voltage must be 24 hours before attempting to start compressor. Set control within range listed on nameplate. - Page 33 REFRIGERANT CIRCUITS EVAPORATOR COILS (ROW SPLIT) CONDENSER COILS COMPRESSORS 1 Refrigerant circuit 1 2 Refrigerant circuit 2 3 Refrigerant circuit 3 4 Refrigerant circuit 4 FIGURE 31 Page 33 507232-04 7/2017...
- Page 34 TABLE 8 D-Refrigerant Charge and Check LGH/LCH420H - R410 - VFD WARNING-Do not exceed nameplate charge under any condition. Circuit 1 Circuit 2 Circuit 3 Circuit 4 Outdoor Coil En This unit is factory charged and should require no further tering Air adjustment.
- Page 35 E-Charge Verification - Approach Method - AHRI de-energizing condenser fan when liquid pressure falls TESTING below 240 psig +10 (1655 kPa+69). Switch closes to energize condenser fan when pressure rises to 450 1-Using same thermometer, compare liquid psig +10 (3103kPa + 69). temperature to outdoor ambient temperature.
-
Page 36: Gas Heatstart-Up
This unit is equipped with an automatic spark ignition system. Gas Heat Start-Up There is no pilot. In case of a safety shutdown, move FOR YOUR SAFETY READ BEFORE LIGHTING thermostat switch to OFF and return the thermostat switch to HEAT to reset ignition control. -
Page 37: Gas Heat Operation And Adjustment
5- Turn gas valve switch to OFF. See figure 33. On 3- Spark ignitor energizes and gas solenoid valve opens. Honeywell VR8305Q gas valves, turn the knob on the gas valve clockwise to “OFF”. Do not force. See 4- Spark ignites gas, ignition sensor proves the flame and figure 34. -
Page 38: Lch420
T = Economizer - Temperature (Note: Used for both set Economizer Start-Up point and offset temperature control.) The economizer, when configured, controls: G = Economizer - Global Damper position, which determines how much outdoor S = Economizer - Single Enthalpy air is used to meet free cooling or indoor air quality requirements, and D = Economizer - Dual Enthalpy... - Page 39 TABLE 15 MENU INTERFACE (LEVEL 1 - SETTINGS) - T (TEMPERATURE ECONOMIZER) USE THE ADJUST AND SET VALUES ARROWS TO SCROLL UP OR DOWN FOR SELECTION Level 2 Level 3 Level 4 Level 5 OPTIONS. ECONOMIZER TEMP ECON TYPE = TEMPERATURE OFFSET OR TEMPERATURE SETPT ECONOMIZER OAT SETPOINT = XX.X F FREE COOLING...
- Page 40 TABLE 17 MENU INTERFACE (LEVEL 1 - SETTINGS) - S (SINGLE ENTHALPY) USE THE ADJUST AND SET VALUES ARROWS TO SCROLL UP OR Level 2 Level 4 Level 3 DOWN FOR SELECTION OPTIONS. ENTHALPY SET POINT MA SETTING 73°F 12.0 ECONOMIZER ENTHALPY SETPOINT = 70°F...
- Page 41 1.2. Damper Operation During Free Cooling 0 = Disable Compressor Lockout These are operating profile options for the economizer 1 = Lockout Compressor if outdoor air is suitable damper (Parameter 164 - ECONOMIZER PROFILE) during regardless of outdoor air temperature. free cooling when any compressor is on and can be selected as follows: 2 = Lockout Compressor if outdoor air temperature is...
- Page 42 RT16 AND RT17 SENSORS RT17 RT16 OUTDOOR AIR SENSOR RETURN (access through the AIR SENSOR control area) FIGURE 35 RT6 SENSOR DISCHARGE AIR SENSOR FIGURE 36 TABLE 19 1.5. Enthalpy Set Point TITLE 24 COMPLIANCE FREE COOLING SETPOINT This setting pertains to the single enthalpy free cooling Setpoint Setpoint mode only.
- Page 43 ENTHALPY SENSOR OUTPUT CURRENT HONEYWELL C7400 40°F 50°F 60°F 70°F 80°F 90°F 100°F FIGURE 37 1.6. Free Cooling Damper Maximum 1.8. Motorized Outdoor Air Damper Position Set damper position according to “Minimum Damper Position” section 1.7. For normal operation, make sure the Damper Maximum position for free cooling is by default set motorized outdoor air damper is set correctly in to 100%.
- Page 44 Measure the voltage on P262 between pin 3 (VOT MEASURE ERW PRESSURE DROP damper control) and pin 2 (GND) using pin 1 as common. Voltage should read approximately 2 VDC. Measure the static pressure drop across the ERW Adjust the DAMPER POSITION ACTUAL: to 100.0% position.
- Page 45 Step 5. ALL TEMPERATURE MODES OF OPERATION Step 6. GLOBAL MODULATING (GLO) MODE OF OPERATION In the Economizer – Temperature mode, the damper opens In the GLO (modulating) mode, dampers modulate open for for free cooling when the outdoor air temperature is: free cooling when the global input is energized;...
- Page 46 1.10. Demand Control Ventilation Use the menu interface to read carbon dioxide ppm. DATA > IN/OUTPUTS > SENSORS > C02. Figure 40 shows 1.10.1. General default or proportional operation. A field-provided and installed indoor air quality (IAQ) sensor 1.10.3. Maximum and Minimum Demand Control can be used with the modulating economizer or OADM to Ventilation Damper Settings control carbon dioxide levels in the conditioned space.
- Page 47 DEFAULT DEMAND CONTROL VENTILATION (DCV) OPERATION Low Temp. Operation High Temp. Operation 40°F Parameter 75°F Parameter 121 30°F 85°F 20°F 95°F Min. Position 10°F Parameter 122 105°F Parameter 120 1000 Parameter 118 Parameter 119 (ppm) FIGURE 40 TABLE 22 DEMAND CONTROL VENTILATION PARAMETERS Control Parameter Control Value Parameter Short...
- Page 48 TABLE 22 DEMAND CONTROL VENTILATION PARAMETERS Control Parameter Control Value Parameter Short Description Screen Name Min. Default Max. Units Units Description Description Demand Control Ventilation Outdoor Air Control Low Low outdoor air temp. where fresh air DCV LO TMP OV ST CL -31.0 40.0 132.0...
- Page 49 1.10.4.1. Set Point Control Option IMPORTANT Set point control mode is commonly used in areas with high occupancy and frequent change out such as classrooms or Mixed air temperatures less than 45°F (7°C) on units with an aluminized heat exchanger or less than 30°F conference rooms.
-
Page 50: Power Exhaust
Optional Power Exhaust POWER EXHAUST VARIABLE FREQUENCY DRIVE General VIEW SHOWN FROM BACK Unit may contain one or two power exhaust fans or SIDE OF UNIT blowers. Exhaust blowers are shown in figure 42. Exhaust fans are located in the same place and discharge air in the same direction. -
Page 51: Barometric Relief Dampers
1- Connect field-provided 1/4” tubing to the (+) port on the Optional Outdoor Air Dampers transducer. Route tubing through unit return air opening to a return air grille in the duct work. Unit may contain optional outdoor air dampers which provide fresh outdoor air. - Page 52 SECURE HOODS TO UNIT SECURE BOTH SIDES OF EACH BAROMETRIC HORIZONTAL HOOD RELIEF DAMPER DISCHARGE UNIT HOODS (1 OR 2 INTAKE HOODS REQUIRED) VERTICAL DISCHARGE UNIT INTAKE HOODS BAROMETRIC RELIEF DAMPER HOODS (1 OR 2 REQUIRED) SIDE VIEW UNIT UNIT FLANGE HOOD SECURE...
-
Page 53: Hot Gas Reheat
Reheat will terminate when the indoor relative humidity falls Optional Hot Gas Reheat 3% (57% default) or the digital output de-energizes. The reheat deadband can be adjusted 1-10% RH by changing General parameter 107. Hot gas reheat units provide a dehumidifying mode of A91 Humidity Sensor operation. - Page 54 Check-Out IMPORTANT - Free cooling does not operate during reheat. Free cooling will operate as shown in the Unit Test hot gas reheat operation using the following Controller manual. procedure. Reheat will operate as shown in table 24. 1- Make sure reheat is wired as shown in wiring section. Units are shipped from the factory to provide two stages of 2-Make sure unit is in local thermostat mode.
- Page 55 TABLE 24 REHEAT OPERATION Two-Stage Thermostat - Default Operation T'stat and Humidity Demands Compressors Reheat Only Compressor 1 & 2 Reheat Compressor 1 & 2 Reheat and Reheat & Y1 Compressor 3 & 4 Cooling Reheat &Y1 & Y2 Compressor 1, 2, 3 & 4 Cooling Three-Stage Thermostat (Transfer relay required) Operation T'stat and Humidity Demands...
-
Page 56: Modulating Gas Valves
MODULATING GAS VALVE (MGV) TO RIGHT HEAT SECTION RIGHT HEAT SECTION MODULATING TO LEFT HEAT GAS VALVE SECTION MANIFOLD PRESSURE PORT LEFT HEAT SECTION MODULATING RIGHT HEAT GAS VALVE SECTION GAS VALVE LEFT HEAT SECTION GAS VALVE MANIFOLD PRESSURE INLET PORT FIGURE 50 4- Use the options in the Unit Controller Service Test... -
Page 57: Hot Gas Bypass
when the suction pressure drops below 105 psig (R410A). Optional Hot Gas Bypass (HGB) The de-superheating TXV routes cooler gas from the liquid Hot gas bypass is a factory-installed option only. The HGB line to the suction line. This prevents high refrigerant valve routes refrigerant from the discharge line to the temperatures in the compressor. -
Page 58: Outdoor Air Cfm Control
Note - The minimum damper position setting MUST be set Optional Outdoor Air CFM Control lower than the OAC max damper position setting (50% Outdoor air CFM Control is a factory-installed option default). To modify the max damper position setting, available on units equipped with a supply air variable navigate to SETTINGS >... -
Page 59: Energy Recovery Wheels
Note - When the outdoor air temperature is between 65°F Optional Energy Recovery Wheel and 40°F, DL43 will energize the ERW for one minute every Unit may contain an optional energy recovery wheel. The ten minutes to clean the wheel. ERW is located in the outdoor air entering and exhaust air By-pass dampers will close as outdoor air dampers close or streams. -
Page 60: Service
Service ORIENT REPLACEMENT FILTERS IMPORTANT Mineral oils are not compatible with R410A. If oil must be added, it must be a polyol ester oil. CAUTION Label all wires prior to disconnection when servicing controls. Wiring errors can cause improper and dan gerous operation. - Page 61 D-Combustion Air Inducer (Gas Units) WARNING A combustion air proving switch checks combustion air This product contains a chemical known to the State inducer operation before allowing power to the gas of California to cause cancer, birth defects, or other controller.
- Page 62 Clean combustion air inducer as follows: 2- Remove flue box cover. Clean with a wire brush as required. 1- Shut off power supply and gas to unit. 2- Disconnect pressure switch air tubing from combustion 3- Reassemble the unit. The flue box cover gasket and air inducer port.
Need help?
Do you have a question about the LGH480 and is the answer not in the manual?
Questions and answers