Table of Contents
Advertisement
Quick Links
22
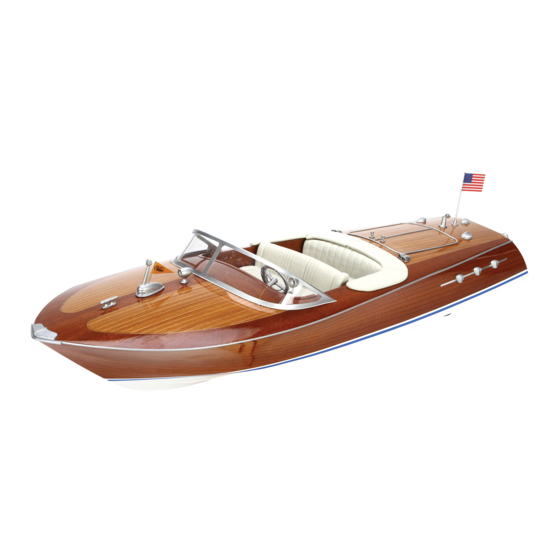
Electric-powered ready-to-run Deep-V
Owners Manual
Specifications
Hull Length ............................................................................................ 22 in (558.8mm)
Beam ................................................................................................... 7.5 in (190.5mm)
Motor ............................................................................................Water-cooled 550-sized
Radio System........................................................................... Pro Boat AM 27MHz 2-Stick
Speed Control ............................................................. Electronic speed control with reverse
www.ProBoatModels.com
®
Advertisement
Table of Contents

Related Manuals for Horizon Hobby PRO BOAT Volere 22


Summary of Contents for Horizon Hobby PRO BOAT Volere 22
- Page 1 Electric-powered ready-to-run Deep-V Owners Manual Specifications Hull Length .................... 22 in (558.8mm) Beam ....................7.5 in (190.5mm) Motor ....................Water-cooled 550-sized Radio System................Pro Boat AM 27MHz 2-Stick Speed Control ............. Electronic speed control with reverse www.ProBoatModels.com ®...
-
Page 2: Additional Required Items
Introduction Thank you for purchasing the Pro Boat ® Volere The Volere comes ready-to-run with an AM radio ™ Electric-Powered Ready-To-Run boat. Please read system and electronic speed controller already these instructions carefully before attempting to installed. All assembly is done at the factory, operate the boat. -
Page 3: Installation Of Transmitter Batteries
Installation of Transmitter Batteries 1. Remove the battery cover from the 4. Move the switch to the "ON" position. The LED transmitter. will light if the batteries are in good condition and installed properly. LEDs Switch ON 2. Install 8 AA alkaline batteries into the transmitter. - Page 4 Installing the 8.4V Ni-MH Battery 1. Carefully lift the magnetic rear deck lid to 3. Connect the battery plug to the matching expose the battery compartment. connector on the electronic speed control. 2. Install a fully charged 8.4-volt Ni-MH battery ...
-
Page 5: Checking The Radio System
Checking the Radio System 1. Turn on the transmitter then the receiver 2. With the propeller free from any objects, and check for correct operation. Move the give some throttle input to ensure that the right stick on the transmitter left and right. motor is working. -
Page 6: Water Cooling
Testing the Boat in the Water 1. Make sure that the radio is on and the battery 4. Be certain to avoid all objects in the water. is plugged into the speed controller and Once you feel comfortable with the control motor. - Page 7 Maintenance and Lubricating the Driveshaft Before and at the end of each run, make sure that After each day of operation, remove the driveshaft all screws are tight and that the propeller is free to clean and remove debris. from any entanglement. ...
-
Page 8: Replacement Parts
3. Remove any debris, burned oil or rust from 4. Install the driveshaft back in the stuffing the driveshaft with fine emory cloth or box. Remember to install the white nylon washer, sandpaper. Thoroughly oil the driveshaft. drive dog, propeller and propeller nut back on the driveshaft. -
Page 9: Section 11: Warranty Information
Warranty Period PRODUCT, WHETHER SUCH CLAIM IS BASED IN CONTRACT, WARRANTY, NEGLIGENCE, OR STRICT Exclusive Warranty- Horizon Hobby, Inc., (Horizon) LIABILITY. Further, in no event shall the liability warranties that the Products purchased (the of Horizon exceed the individual price of the “Product”) will be free from defects in materials... -
Page 10: Inspection Or Repairs
Provided warranty conditions have been met, your Product will be repaired or replaced Horizon Hobby UK free of charge. Repair or replacement decisions are Units 1-4 Ployters Rd at the sole discretion of Horizon Hobby. Staple Tye Harlow, Essex Non-Warranty Repairs CM18 7NS... -
Page 11: Fcc Information
Signed for and on behalf of: health and the environment. For more information about where you can drop off your waste Horizon Hobby, Inc. equipment for recycling, please contact your local Champaign, IL USA city office, your household waste disposal service or where you purchased the product. - Page 12 ® www.ProBoatModels.com © 2009, Horizon Hobby, Inc. 4105 Fieldstone Road Champaign, Illinois 61822 (877) 504-0233 www.horizonhobby.com Printed 09/2009 15969...
Need help?
Do you have a question about the PRO BOAT Volere 22 and is the answer not in the manual?
Questions and answers