Alpine MRD-M1001 Owner's Manual
Alpine mrd-m1001: user guide
Hide thumbs
Also See for MRD-M1001:
- Owner's manual (27 pages) ,
- Service manual (34 pages) ,
- Service manual (5 pages)
Table of Contents
Advertisement
Quick Links
• OWNER'S MANUAL
• MODE D'EMPLOI
• MANUAL DE OPERACIÓN
CONTENTS
ACCESSORIES ....................................................... 1
Introduction ........................................................... 2
WARNING .............................................................. 2
CAUTION ............................................................... 3
INSTALLATION ...................................................... 4
CONNECTIONS ...................................................... 5
OPERATION METHOD ......................................... 11
IN CASE OF DIFFICULTY ...................................... 19
SYSTEMS ............................................................ 20
SPECIFICATIONS ................................................. 22
ACCESSORIES
• Terminal Cover ................................................... 1
• Hexagon Wrench ......................................... 1 SET
• Self-Tapping Screw ............................................ 4
• Hexagon Screw .................................................. 2
English
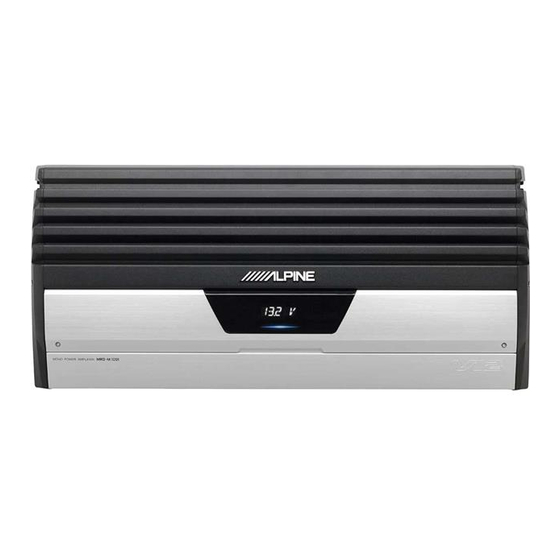
MRD-M1001
MONO POWER AMPLIFIER
Please read this manual to maximize your enjoyment of the outstanding
performance and feature capabilities of the equipment, then retain the
manual for future reference.
Veuillez lire ce mode d'emploi pour tirer pleinement profit des excellen-
tes performances et fonctions de cet appareil, et conservez-le pour toute
référence future.
Lea este manual, por favor, para disfrutar al máximo de las excepciona-
les prestaciones y posibilidades funcionales que ofrece el equipo, luego
guarde el manual para usarlo como referencia en el futuro.
English
TABLE DES MATIERES
ACCESSOIRES ........................................................... 1
Introduction ............................................................... 2
AVERTISSEMENT ...................................................... 2
ATTENTION ................................................................ 3
INSTALLATION .......................................................... 4
CONNEXIONS ............................................................ 5
METHODE DE FONCTIONNEMENT .......................... 11
EN CAS DE PROBLEME ............................................ 19
SYSTEMES ............................................................... 20
SPECIFICATIONS ..................................................... 22
• Couvercle cache-bornes ........................................ 1
• Clé hexagonale ............................................... 1 JEU
• Vis autotaraudeuse ................................................ 4
• Vis à tête hexagonale ............................................. 2
Français
Français
ACCESSOIRES
ÍNDICE
ACCESORIOS ........................................................ 1
Introducción .......................................................... 2
ADVERTENCIA ....................................................... 2
PRUDENCIA .......................................................... 3
INSTALACIÓN ........................................................ 4
CONEXIONES ........................................................ 5
MÉTODO DE OPERACIÓN .................................... 11
EN CASO DE DIFICULTAD ....................................... 19
SISTEMAS ............................................................ 20
ESPECIFICACIONES ............................................ 22
ACCESORIOS
• Cubierta de terminales ....................................... 1
• Llave hexagonal ...................................... 1 JUEGO
• Tornillo autorroscante ........................................ 4
• Tornillo hexagonal .............................................. 2
Español
R
Español
1
Advertisement
Table of Contents

Subscribe to Our Youtube Channel
Related Manuals for Alpine MRD-M1001


Summary of Contents for Alpine MRD-M1001
-
Page 1: Table Of Contents
SPECIFICATIONS ... 22 ACCESSORIES • Terminal Cover ... 1 • Hexagon Wrench ... 1 SET • Self-Tapping Screw ... 4 • Hexagon Screw ... 2 MRD-M1001 MONO POWER AMPLIFIER TABLE DES MATIERES ACCESSOIRES ... 1 Introduction ... 2 AVERTISSEMENT ... 2 ATTENTION ... -
Page 2: Introduction
Introduction: Please read this OWNER'S MANUAL thoroughly to fa- miliarize yourself with each control and function. We at ALPINE hope that your new MRD-M1001 will give you many years of listening enjoyment. In case of problems when installing your MRD-M1001, please contact your authorized ALPINE dealer. -
Page 3: Caution
HALT USE IMMEDIATELY IF A PROBLEM APPEARS. Fail- ure to do so may cause personal injury or damage to the product. Return it to your authorized Alpine dealer or the nearest Alpine Service Center for repairing. HAVE THE WIRING AND INSTALLATION DONE BY EX- PERTS. -
Page 4: Installation
English INSTALLATION Due to the high power output of the MRD-M1001, con- siderable heat is produced when the amplifier is in op- eration. For this reason, the amplifier should be mounted in a location which will allow for free circulation of air, such as inside the trunk. -
Page 5: Connections
(remove any paint, dirt or grease if necessary) of the car chassis. • If you add an optional noise suppressor, connect it as far away from the unit as possible. Your Alpine dealer carries various noise suppressors. Contact them for further information. - Page 6 English Input level switch Use this switch to match the output level of the head unit. • Adjustment Range : 0.5V-8.0V/0.1V-2.0V Battery Lead (Sold Separately) Be sure to add a fuse as close as possible to the battery’s positive (+) terminal. This fuse will protect your vehicle’s electrical system in case of a short circuit.
- Page 7 English Cautions on wire lead connections • Use third-party Power cables currently available on the market. • Refer to the description below for the proper proce- dure. If you are in doubt about how to make this connec- tion, consult your dealer. 1.
- Page 8 English MOUNTING THE TERMINAL COVER • The product’s appearance can be improved by mounting the terminal cover on the main unit after installation. • Mount the terminal cover after the connections have been made and you have checked that operation is normal. 1.
- Page 9 English 3. Fastening the door 1) Close the door p . 2) Mount the door p using the two original hexagonal screws q . * Tighten the screws securely so that they do not come loose due to vibrations while the vehicle is moving.
- Page 10 SAVE MEMORY WRITE LOAD MEMORY READ About the Remote Controller • Be aware of the following when using the MRD-M1001 with the Remote Controller (RUX-4280, sold sepa- rately). 1. About functions that cannot be operated from the Remote Controller. • The following functions cannot be operated from the Remote Controller.
-
Page 11: Operation Method
English 9 10 11 12 13 (DOWN) Button MODE Button MODE Button ENT Button (UP) Button DISP Button Status Indicator OPERATION METHOD Switching of the display: (1) Press the “DISP” button. The display will change with each press of the but- ton. - Page 12 English Selecting the input mode 1. Press the MODE button. Press the button until “INPUT” is displayed. 2. Press the ENT button. 3. Press the button until “SEL” is displayed. 4. Press the ENT button. 5. Use the buttons to select the input mode. The mode switches each time one of the buttons is pressed.
- Page 13 English Adjusting the low pass filter frequency 1. Press the MODE button. Press the button until “LPF” is displayed. 2. Press the ENT button. 3. Press the button until “FREQ” is displayed. FREQ 4. Press the ENT button. 5. Use the button to adjust the low pass filter frequency.
- Page 14 English PARAMETRIC EQUALIZER MODE Turning the parametric equalizer on and off 1. Press the MODE button. Press the button until “P.EQ” is displayed. 2. Press the ENT button. 3. Press the button until “ON.OFF” is displayed. ON.OFF 4. Press the ENT button. 5.
- Page 15 English 5. Use the button to adjust the parametric equal- izer level. • Adjustment Range: ±12 dB (1 dB step) –12 6. Press the ENT button. BASS COMPENSATION MODE Turning the bass compensation on and off 1. Press the MODE button. Press the button until “COMP”...
- Page 16 English 5. Use the button to adjust the time correction delay time. • Adjustment Range: 0 – 10ms (0.1ms step) 6. Press the ENT button. PHASE MODE Selecting the phase 1. Press the MODE button. Press the button until “PHASE” is displayed. 2.
- Page 17 English OUTPUT DISABLE MODE Turn the output disable mode on only when adjusting the DSP function. Only the power of DSP circuit is ON and in the current saving state. After adjustment, turn the output disable mode off. Turning the output disable mode on and off 1.
- Page 18 English Selecting the memory read mode 1. Press the MODE button. Press the button until “MEMO” is displayed. 2. Press the ENT button. 3. Press the button until “LOAD” is displayed. LOAD 4. Press the ENT button. 5. Use the buttons to select the memory read mode.
-
Page 19: In Case Of Difficulty
Otherwise, make sure the rest of your system is properly connected or con- sult your authorized Alpine dealer. G Volume is low. • Input level from the head unit with which the am- plifier is being used is low. -
Page 20: Systems
SYSTEMS/SYSTEMES/SISTEMAS English G Single-Speaker System/Système à un seul haut-parleur/Sistema de un sólo altavoz – SPEAKER OUTPUT G Parallel-Speaker System/Système à haut-parleur parallèle/Sistema de altavoz paralelo – SPEAKER OUTPUT INPUT LEVEL CH-1 CH-1 CONTROLLER 0.5V-8.0V 0.1V-2.0V INPUT PREOUT CH-2 CH-2 – [English] RCA Extension Cable (Sold Separately) Head Unit etc. - Page 21 English G Amplifier LINK System/Système de LIEN d'amplificateur/Sistema de ACOPLAMIENTO de amplificador *ch1+ch2 [English] Amplifier LINK compatible head unit Amplifier LINK Connector Amplifier LINK box (KCE-510M, Sold Separately) – SPEAKER OUTPUT INPUT LEVEL CONTROLLER BATTERY CH-1 CH-1 0.5V-8.0V 0.1V-2.0V INPUT PREOUT POWER SUPPLY CH-2...
-
Page 22: Specifications
English SPECIFICATIONS Power Output: RMS Continuous Power (at 14.4V, 20Hz to 200Hz) Per channel into 4 ohms (≤1% THD+N) ... 500Wx1 Per channel into 2 ohms (≤1% THD+N) ... 1,000Wx1 Power Output: RMS Continuous Power (at 12.0V, 20Hz to 200Hz) Per channel into 4 ohms (≤1% THD+N) ... - Page 23 English Français Español...
-
Page 24: Soins Pratiques
Enregistrer le numéro de série de l'appareil dans l'espace prévu ici et le conserver en permanence. La plaque de numéro de série est située à l'arrière de l'appareil. ALPINE ELECTRONICS OF AUSTRALIA PTY. LTD. 6-8 Fiveways Boulevarde Keysborough, Victoria 3173, Australia Phone 03-9769-0000 ALPINE ELECTRONICS GmbH Frankfurter Ring 117, 80807 München,...
Need help?
Do you have a question about the MRD-M1001 and is the answer not in the manual?
Questions and answers