Advertisement
Quick Links
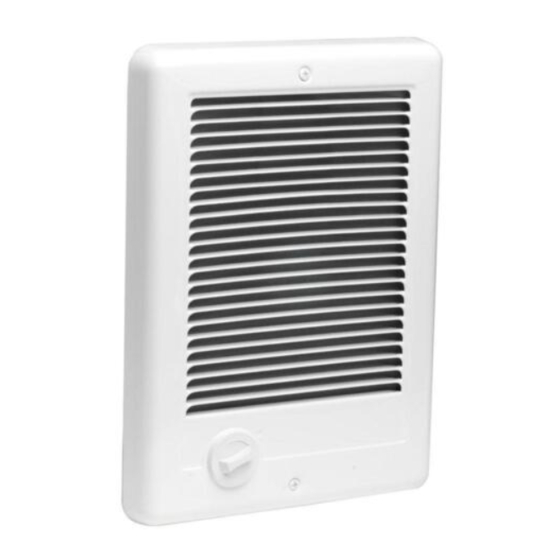
Grill
Side
Front
9"
Side
Tools Required:
Phillips Screwdriver
Straight Screwdriver
Wire Strippers
Drill or Hammer
Drill Bits
Utility Knife
4 Screws
360-693-2505
3 Wire Nuts
1 Strain Relief
Fax: 360-694-6939
Connector
P.O. Box 1675
Vancouver, WA
98668-1675
OWNER'S GUIDE
The Com-Pak
The Com-Pak Plus
Model C
Wall Can
Side
12"
11 /
1
"
10"
2
3 /
1
"
4
1 /
1
"
4
The Com-Pak Twin Plus
Model CT
Grill
Wall Can
Front
General Safety Information
WARNING!
Take extreme caution when
working with electricity. Turn
off all power at the circuit
panel or fuse box before
doing any electrical wiring.
Lock, tape, or tag the circuit
panel door so power cannot
be turned on during
installation. Failure to do so
could result in serious injury
or possible fatality!
1. Read all information labels.
Verify that the electrical
supply wires are the same
voltage as the heater.
2. All electrical work and
materials must comply with
Models: The Com-Pak Plus
C072
C102
C122
C152
C202
C208
C101
C151
Models: The Com-Pak Twin Plus
CT302
Bottom
CT402
6 /
7
"
8
1 /
5
" 1 /
1
"
CT408
8
2
4"
3 /
1
"
4
Features & Benefits
I Wall can designed to fit between two
studs for ease of installation
Side
I Powder coat paint system eliminates
sharp cutting edges
I Nichrome element wrapped around mica
insulators for durability – 2 year warranty
I Model C has two limit switches for safety
and assurance, a manual reset limit and
a back-up shutdown safeguard.
(Model CT is equipped with four limits)
I Fully tested at factory
I Made in the U.S.A.
the National Electric Code (NEC), the Occupational
Safety and Health Act (OSHA), and all state and local
codes.
3. The heater must be grounded to the grounding pigtail
(copper wire) provided in the wall can.
4. If you need to install a new circuit or need additional
wiring information, consult a qualified electrician.
5. Protect electrical supply from kinks, sharp objects, oil,
grease, hot surfaces or chemicals.
6. DO NOT install the heater in a floor, behind doors, towel
racks, drapes, furniture or coat racks, or anywhere the
air discharge may be blocked in any manner.
7. DO NOT install heater in any area where combustible
vapors, gases, liquids, or excessive lint or dust are
present.
Keep for future reference
Plus
TM
C072T
C102T
C122T
C152T
C202T
C208T
C101T
C151T
CT302T
CT402T
CT408T
Advertisement

Related Manuals for Cadet 2000 Series


Summary of Contents for Cadet 2000 Series
- Page 1 OWNER’S GUIDE The Com-Pak Plus Models: The Com-Pak Plus C072 C072T C102 C102T C122 C122T C152 C152T C202 C202T The Com-Pak Plus C208 C208T Model C C101 C101T Grill Wall Can Side Front C151 C151T Side Models: The Com-Pak Twin Plus CT302 CT302T Bottom...
- Page 2 READ ALL Installation Instructions INSTRUCTIONS Part One AND SAFETY INFORMATION PLACEMENT: The Com-Pak Plus (Model C) and Com-Pak Twin Plus (Model CT) have been designed, tested and UL approved for installation into a non-insulated wall. *DO NOT INSTALL IN AN INSULATED WALL. Install Model C and Model CT vertically, with element(s) at top of heater.
- Page 3 WARNING! Installation Instructions Warranty is void Part Two if any material is sprayed on the After you have followed all instructions in PART ONE for either new element or blower. construction or an existing wall, you are ready to install the heater assembly. Use paint mask How do I insert the heater provided if walls...
- Page 4 These warranties give you specific legal rights, and you may also have other rights which vary from state to state. Cadet neither assumes, nor authorizes anyone to assume for it, any other obligation or liability in connection with these electric heaters or any part of such heaters.
Need help?
Do you have a question about the 2000 Series and is the answer not in the manual?
Questions and answers