Advertisement
Quick Links
Advertisement

Subscribe to Our Youtube Channel
Related Manuals for HobbyKing Waco SRE


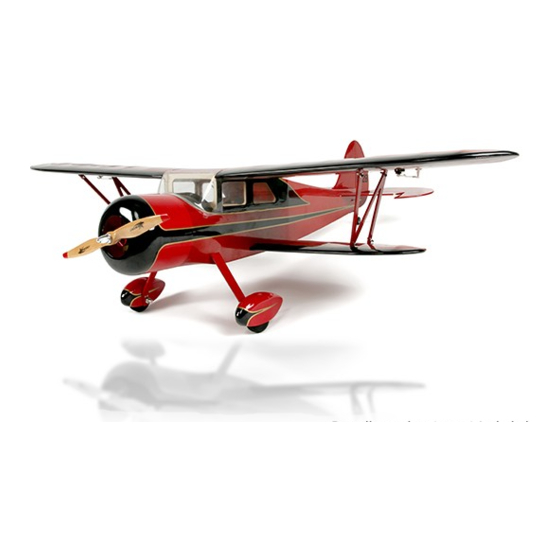
Summary of Contents for HobbyKing Waco SRE
- Page 1 � ffl±...
- Page 2 Always make sure to check for any loose screws or parts, and that the airframe Lodi Glue is free from damage that may cause failure in flight. HobbyKing is not responsible for any injury or property damage inflicted due to negligence in assembly or maintenance. Thin/Thick CA...
-
Page 3: Airframe Assembly
Airframe Assembly Contents 1. Position the U-shaped rod in the center and mark the location on the elevator as shown. 2. Use a 2mm drill to make holes in the stabiliser to accept the U-shaped rod. 3. Install the elevator to the stabiliser and secure the hinges using a thin CA glue. - Page 4 7. Ensure both the stabiliser and the fin are square to each 4. The completed stabiliser assembly. other and to the fuselage whilst the glue is setting. 8. Install one of the supplied horns to the elevator inline with 5. Dry fit the rudder and stabiliser. Remove the covering the elevator pushrod.
- Page 5 13. Install the servos for the rudder and elevator, then install the rudder 10. Install the tailwheel assembly to the tail. Dry fit the rudder control surface to and elevator pushrods. the tail fin and mark the position of the tailwheel steering arm on the rudder as shown.
- Page 6 16. Use threadlock on all the screws. 19. Install the control horns to both ailerons with the screws provided. Ensure the servo horns are at 90°,install the control linkages as shown. 17. Trim off the wing covering for the installation of the 20.
- Page 7 21 (continued). Please do not glue the tabs at this time. Align the top and bottom wings and dry fit the inter-plane struts with the tabs slotted into the wings. Make sure there is no stress to the wings when the inter-plane struts and tabs are in position.
- Page 8 22. Install the inter-plane struts to the wing with the supplied nuts and screws, ensure they are securely locked. 23. Install the windshield with the supplied self tapping screws as shown. Glue together and install the motor mount . 25. Apply the supplied decals as shown to the wings and the fuselage .
- Page 9 Pre-Flight Checks. 1. Before flying this model check that it is assembled correctly as per the manual and is free from any damage that may have occurred during transport. 2. Insert the battery and check that the center of gravity is correct, this is 70mm back from the leading edge of the top wing.
Need help?
Do you have a question about the Waco SRE and is the answer not in the manual?
Questions and answers