
Related Manuals for Alcatel OmniStack LS 6248


Summary of Contents for Alcatel OmniStack LS 6248
-
Page 1: Getting Started Guide
Part No. 060203-10, Rev. C January 2007 OmniStack® LS 6200 Series Getting Started Guide Installationsanleitung www.alcatel.com... - Page 2 An Alcatel service agreement brings your company the assurance of 7x24 no-excuses technical support. You’ll also receive regular software updates to maintain and maximize your Alcatel product’s features and functionality and on-site hardware replacement through our global network of highly qualified service delivery partners. Additionally, with 24-hour-a-day access to Alcatel’s Service and Support web page, you’ll be able to view and update any case (open or closed) that you have reported to Alcatel’s technical support, open a new case or access helpful release notes, technical bulletins, and manuals.
- Page 3 reasonable protection against harmful interference when the equipment is operated in a commercial environment. This equipment generates, uses, and can radiate radio frequency energy and, if not installed and used in accordance with the instructions in this guide, may cause interference to radio communications.
-
Page 5: Compliances And Safety Warnings
Compliances and Safety Warnings FCC - Class A This equipment generates, uses, and can radiate radio frequency energy and, if not installed and used in accordance with the instruction manual, may cause interference to radio communications. It has been tested and found to comply with the limits for a Class A computing device pursuant to Subpart A of Part 15 of FCC Rules, which are designed to provide reasonable protection against such interference when operated in a commercial environment. - Page 6 Immunity: • Product family standard according to EN55024:1998 • Electrostatic Discharge according to EN61000-4-2:1995 (ContactDischarge: ±4 kV, Air Discharge: ±8 kV) • Radio-frequency electromagnetic field according to EN61000-4-3:1996 (80 - 1000 MHz with 1 kHz AM 80% Modulation: 3 V/m) •...
-
Page 7: Underwriters Laboratories Compliance Statement
Safety Compliance Warning: Fiber Optic Port Safety When using a fiber optic port, never look at the transmit laser while it is CLASS I powered on. Also, never look directly at the fiber TX port and fiber cable LASER DEVICE ends when they are powered on. -
Page 8: Veuillez Lire À Fond L'information De La Sécurité Suivante Avant D'installer Le Switch
• The unit must be connected to an earthed (grounded) outlet to comply with international safety standards. • Do not connect the unit to an A.C. outlet (power supply) without an earth (ground) connection. • The appliance coupler (the connector to the unit and not the wall plug) must have a configuration for mating with an EN 60320/IEC 320 appliance inlet. -
Page 9: Bitte Unbedingt Vor Dem Einbauen Des Switches Die Folgenden Sicherheitsanweisungen Durchlesen
personnel qualifié. • Ne branchez pas votre appareil sur une prise secteur (alimentation électrique) lorsqu'il n'y a pas de connexion de mise à la terre (mise à la masse). • Vous devez raccorder ce groupe à une sortie mise à la terre (mise à la masse) afin de respecter les normes internationales de sécurité. - Page 10 erfolgen. • Das Gerät sollte nicht an eine ungeerdete Wechselstromsteckdose angeschlossen werden.•Das Gerät muß an eine geerdete Steckdose angeschlossen werden, welche die internationalen Sicherheitsnormen erfüllt. • Der Gerätestecker (der Anschluß an das Gerät, nicht der Wandsteckdosenstecker) muß einen gemäß EN 60320/IEC 320 konfigurierten Geräteeingang haben. •...
-
Page 11: Warnings And Cautionary Messages
Warnings and Cautionary Messages Warning: This product does not contain any serviceable user parts. Warning: Installation and removal of the unit must be carried out by qualified personnel only. Warning: When connecting this device to a power outlet, connect the field ground lead on the tri-pole power plug to a valid earth ground line to prevent electrical hazards. -
Page 12: Wichtige Sicherheitshinweise (Germany)
Wichtige Sicherheitshinweise (Germany) Bitte lesen Sie diese Hinweise sorgfältig durch. Heben Sie diese Anleitung für den späteren Gebrauch auf. Vor jedem Reinigen ist das Gerät vom Stromnetz zu trennen. Verwenden Sie keine Flüssigoder Aerosolreiniger. Am besten eignet sich ein angefeuchtetes Tuch zur Reinigung. -
Page 13: Related Publications
• Continual monitoring of safety standards. End of Product Life Span This product is manufactured in such a way as to allow for the recovery and disposal of all included electrical components once the product has reached the end of its life. Manufacturing Materials There are no hazardous nor ozone-depleting materials in this product. -
Page 15: Table Of Contents
Contents Chapter 1: Introduction Overview Switch Architecture Network Management Options Description of Hardware 10/100/1000BASE-T Ports SFP Slots Status LEDs Setting the Working Modes Optional Backup Power Supply Power Supply Receptacles Features and Benefits Connectivity Expandability Performance Management Chapter 2: Installing the Switch Selecting a Site Ethernet Cabling Equipment Checklist... - Page 16 Contents 1000 Mbps Gigabit Ethernet Collision Domain 100 Mbps Fast Ethernet Collision Domain 10 Mbps Ethernet Collision Domain Cable Labeling and Connection Records Appendix A: Troubleshooting Diagnosing Switch Indicators Power and Cooling Problems Installation In-Band Access Appendix B: Cables Twisted-Pair Cable and Pin Assignments 10BASE-T/100BASE-TX Pin Assignments 1000BASE-T Pin Assignments Fiber Standards...
- Page 17 Figures Front Panel ...1-6 Port LEDs ...1-8 Combo Port LEDs ...1-8 System LEDs ...1-9 DC BPS Back Panel ...1-11 AC BPS Back Panel ...1-11 PoE BPS Back Panel ...1-11 Power Supply Receptacle ...1-11 RJ-45 Connections ...2-14 Attaching the Brackets ...2-15 Installing the Switch in a Rack ...2-16 Attaching the Adhesive Feet ...2-16 Inserting an SFP Transceiver into a Slot ...2-17...
- Page 18 Figures...
- Page 19 Tables Port Status LEDs ...1-8 System Status LEDs ...1-9 Maximum 1000BASE-T Gigabit Ethernet Cable Length ...3-24 Maximum 1000BASE-SX Gigabit Ethernet Cable Length ...3-24 Maximum 1000BASE-LX Gigabit Ethernet Cable Length ...3-24 Maximum Fast Ethernet Cable Distance ...3-25 Maximum Ethernet Cable Distance ...3-25 Troubleshooting Chart ...4-27 10/100BASE-TX MDI and MDI-X Port Pinouts ...5-30 1000BASE-T MDI and MDI-X Port Pinouts ...5-30...
- Page 20 Tables...
-
Page 21: Chapter 1: Introduction
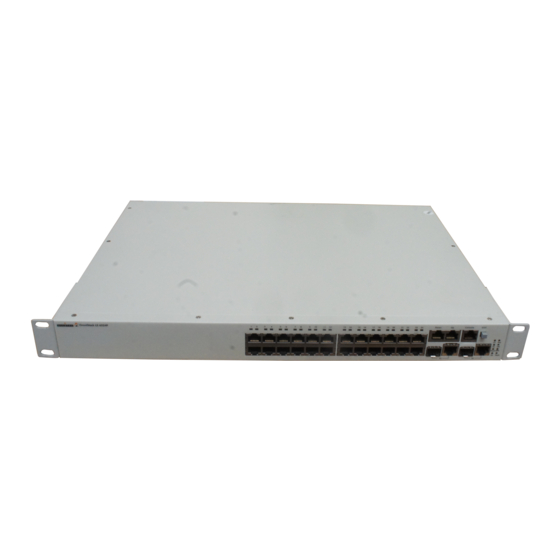
Chapter 1: Introduction Overview The OmniStack® 6200 series has nine platforms: • OS-LS-6212 – Ethernet based switch with 12 RJ-45 10/100Base-TX ports, two Gigabit combo uplink ports (with SFP or 10/100/1000Base-TX interfaces) and two ports full-duplex Gigabit stacking • OS-LS-6212P – Ethernet based switch with 12 RJ-45 10/100Base-TX ports providing standard-based Power over Ethernet, two Gigabit combo uplink ports (with SFP or 10/100/1000Base-TX interfaces) and two ports full-duplex Gigabit stacking... -
Page 22: Switch Architecture
Introduction Switch Architecture The Fast Ethernet Switch employs a wire-speed, non-blocking switching fabric. This permits simultaneous wire-speed transport of multiple packets at low latency on all ports. This switch also features full-duplex capability on all ports, which effectively doubles the bandwidth of each connection. Network Management Options This switch contains a comprehensive array of LEDs for “at-a-glance”... -
Page 23: Sfp Slots
Each port also supports auto-negotiation of flow control, so the switch can automatically prevent port buffers from becoming saturated. On the LS-OS-6224U, there are two RJ-45 ports, which are shared with two of the SFP transceiver slots. SFP Slots On all devices except the LS-OS-6224U, the Small Form Factor Pluggable (SFP) transceiver slots are shared with two of the RJ-45 ports (Ports 25~26/49~50). -
Page 24: Status Leds
Introduction Status LEDs The LEDs, which are located on the front panel for easy viewing, are shown below and described in the following table. Figure 1-3. Combo Port LEDs Condition RJ-45 Ports Non-POE On Green Flashing Green On Amber Flashing Amber SFP Ports On Green Flashing Green... -
Page 25: System Leds
Condition Green Green Blinking Amber Amber Flashing Figure 1-4. System LEDs Table 1-2. System Status LEDs Condition Power On Green Amber Diag Flashing Green On Green On Amber On Green On Amber Stack On Green Flashing Green On Amber Flashing Amber Description of Hardware Port Status LEDs Status... - Page 26 Introduction Setting Stacking/Standalone Modes The OS6200 switch provides Stacking and Standalone working modes. To Set the required mode by using the Unit push button perform the following procedures: To work in a stacking mode : Reboot the Alcatel OS6200 switch. Wait until the LED color turns to green.
-
Page 27: Optional Backup Power Supply
Optional Backup Power Supply The switch supports an optional Backup Power Supply (BPS), that can supply power to the switch in the event of failure of the internal power supply. The U24 device support three kind of BPS: • 100W — OS-LS-62BP-DC —OS LS-6200 modular DC backup power supply. Provides backup power to one non-PoE switch. -
Page 28: Features And Benefits
Introduction Features and Benefits Connectivity • 12/24/48 dual-speed ports for easy Fast Ethernet integration and for protection of your investment in legacy LAN equipment. • Auto-negotiation enables each RJ-45 port to automatically select the optimum communication mode (half or full duplex) if this feature is supported by the attached device;... -
Page 29: Chapter 2: Installing The Switch
Chapter 2: Installing the Switch Selecting a Site Switches can be mounted in a standard 19-inch equipment rack or on a flat surface. Be sure to follow the guidelines below when choosing a location. • The site should: • be at the center of all the devices you want to link and near a power outlet. •... -
Page 30: Equipment Checklist
Installing the Switch Figure 2-1. RJ-45 Connections Equipment Checklist After unpacking the switch, check the contents to be sure you have received all the components. Then, before beginning the installation, be sure you have all other necessary installation equipment. Package Contents •... -
Page 31: Mounting
Mounting A switch unit can be mounted in a standard 19-inch equipment rack or on a desktop or shelf. Mounting instructions for each type of site follow. Rack Mounting Before rack mounting the switch, pay particular attention to the following factors: •... -
Page 32: Desktop Or Shelf Mounting
Installing the Switch Mount the device in the rack, using rack-mounting screws (not provided). Figure 2-3. Installing the Switch in a Rack If installing a single switch only, turn to “Connecting to a Power Source” at the end of this chapter. If installing multiple switches, mount them in the rack, one below the other, in any order. -
Page 33: Installing An Optional Sfp Transceiver Into The Switch
are at least two inches of space on all sides for proper air flow. If installing a single switch only, go to “Connecting to a Power Source” at the end of this chapter. If installing multiple switches, attach four adhesive feet to each one. Place each device squarely on top of the one below, in any order. -
Page 34: Connecting The Bps To The Switch
Installing the Switch Figure 2-6. Power Receptacle Plug the other end of the cable into a grounded, 3-pin socket. Note: For International use, you may need to change the AC line cord. You must use a line cord set that has been approved for the receptacle type in your country. Check the front-panel LEDs as the device is powered on to be sure the Power LED is lit. -
Page 35: Montage
• Imstande sein, eine Temperatur zwischen 0 und 45 °C (32 und 113 °FF) und eine Feuchtigkeit innerhalb von 5% bis 95% (nichtkondensierend) beizubehalten; • In einem genügend weiten Abstand (ungefähr 5 cm oder zwei Zoll) von allen Seiten fur eine ausreichende Beluftung aufgestellt werden; •... - Page 36 Installing the Switch Wenn Sie mehrere Switches installieren möchten, dann montieren Sie sie untereinander in einer beliebigen Reihenfolge. 2-20...
-
Page 37: Chapter 3: Making Network Connections
Chapter 3: Making Network Connections Connecting Network Devices This switch is designed to interconnect multiple segments (or collision domains). It can be connected to network cards in PCs and servers, as well as to hubs, switches or routers. It may also be connected to devices using optional SFP transceivers. Twisted-Pair Devices Each device requires an unshielded twisted-pair (UTP) cable with RJ-45 connectors at both ends. -
Page 38: Network Wiring Connections
Making Network Connections If the device is a PC card and the switch is in the wiring closet, attach the other end of the cable segment to a modular wall outlet that is connected to the wiring closet. (See “Wiring Closet Connections” on the next page.) Otherwise, attach the other end to an available port on the switch. -
Page 39: Fiber Optic Sfp Devices
Fiber Optic SFP Devices An optional Gigabit SFP transceiver (1000BASE-SX, or 1000BASE-LX) can be used for a backbone connection between switches, or for connecting to a high-speed server. Each multimode fiber optic port requires 50/125 or 62.5/125 micron multimode fiber optic cabling with an LC connector at both ends. -
Page 40: Connectivity Rules
Making Network Connections Connectivity Rules When adding hubs (repeaters) to your network, please follow the connectivity rules listed in the manuals for these products. However, note that because switches break up the path for connected devices into separate collision domains, you should not include the switch or connected cabling in your calculations for cascade length involving other devices. -
Page 41: 100 Mbps Fast Ethernet Collision Domain
100 Mbps Fast Ethernet Collision Domain Table 3-4. Maximum Fast Ethernet Cable Distance Type Cable Type 100BASE-TX Category 5 or better 100-ohm UTP or STP 100 m (328 ft) 10 Mbps Ethernet Collision Domain Table 3-5. Maximum Ethernet Cable Distance Cable Type Twisted Pair, Categories 3, 4, 5 or better 100-ohm UTP... -
Page 42: Cable Labeling And Connection Records
Making Network Connections Cable Labeling and Connection Records When planning a network installation, it is essential to label the opposing ends of cables and to record where each cable is connected. Doing so will enable you to easily locate inter-connected devices, isolate faults and change your topology without need for unnecessary time consumption. -
Page 43: Appendix A: Troubleshooting
Appendix A: Troubleshooting Diagnosing Switch Indicators Table A-1. Troubleshooting Chart Symptom Power LED is Off Link LED is Off Diag LED is Red Power and Cooling Problems If the power indicator does not turn on when the power cord is plugged in, you may have a problem with the power outlet, power cord, or internal power supply. - Page 44 Troubleshooting subnet mask, and default gateway. If you have trouble establishing a link to the management agent, check to see if you have a valid network connection. Then verify that you entered the correct IP address. Also, be sure the port through which you are connecting to the switch has not been disabled.
-
Page 45: Appendix B: Cables
Appendix B: Cables Twisted-Pair Cable and Pin Assignments Caution: DO NOT plug a phone jack connector into any RJ-45 port. Use only twisted-pair cables with RJ-45 connectors that conform with FCC standards. For 10BASE-T/100BASE-TX connections, a twisted-pair cable must have two pairs of wires. -
Page 46: 1000Base-T Pin Assignments
Cables Table B-1. 10/100BASE-TX MDI and MDI-X Port Pinouts Receive Data plus (RD+) Receive Data minus (RD-) Transmit Data plus (TD+) Transmit Data minus (TD-) Not used 4,5,7,8 Note: The “+” and “-” signs represent the polarity of the wires that make up each wire pair. -
Page 47: Fiber Standards
tests are specified in the ANSI/TIA/EIA-TSB-95 Bulletin, “The Additional Transmission Performance Guidelines for 100 Ohm 4-Pair Category 5 Cabling.” Note that when testing your cable installation, be sure to include all patch cables between switches and end devices. Adjusting Existing Category 5 Cabling to Run 1000BASE-T If your existing Category 5 installation does not meet one of the test parameters for 1000BASE-T, there are basically three measures that can be applied to try and correct the problem:... - Page 48 Cables B-32...
-
Page 49: Appendix C: Specifications
Appendix C: Specifications Physical Characteristics Ports OS-LS-6212 – Ethernet based switch with 12 RJ-45 10/100Base-TX ports, two Gigabit combo uplink ports (with SFP or 10/100/1000Base-TX interfaces) and two ports full-duplex Gigabit stacking OS-LS-6212P – Ethernet based switch with 12 RJ-45 10/100Base-TX ports providing standard-based Power over Ethernet, two Gigabit combo uplink ports (with SFP or 10/100/1000Base-TX interfaces) and two ports full-duplex Gigabit stacking... - Page 50 Specifications Port: Link/Act (Activity), FDX (Duplex/half duplex), Stacking (Activity) Weight Non PoE Devices OS-LS-6212 – 3.0 Kg OS-LS-6224 – 3.0 Kg OS-LS-6224U – 3.5 Kg OS-LS-6248 – 4.1Kg PoE Devices OS-LS-6212P – 3.5 Kg OS-LS-6224P – 4.5Kg OS-LS-6248P – 5.5Kg DC Devices OS-LS-6224-DC –...
-
Page 51: Compliances
PoE Device OS-LS-6212P – 135W 100-240VAC 12V/4.5A OS-LS-6224P – 225W 100-240VAC -50V/3.6A, 12V/4A OS-LS-6248P – 465W 100-240VAC 12V/7.5A,-50V/7.5A The maximum power supply for PoE devices is 345. Backup Power Supply OS-LS-62BP — 126W, 100-240VAC 2-1A. OS-LS-62BP-P — 510W, 100-240VAC 10 - 5A. OS-LS-62BP-DC —... - Page 52 Specifications C-36...
-
Page 53: Glossary
Glossary 10BASE-T IEEE 802.3 specification for 10 Mbps Ethernet over two pairs of Category 3, 4, or 5 UTP cable. 1000BASE-LX IEEE 802.3z specification for Gigabit Ethernet over two strands of 50/125, 62.5/125 or 9/125 micron core fiber cable. 1000BASE-SX IEEE 802.3z specification for Gigabit Ethernet over two strands of 50/125 or 62.5/125 micron core fiber cable. - Page 54 Glossary Ethernet A network communication system developed and standardized by DEC, Intel, and Xerox, using baseband transmission, CSMA/CD access, logical bus topology, and coaxial cable. The successor IEEE 802.3 standard provides for integration into the OSI model and extends the physical layer and media with repeaters and implementations that operate on fiber, thin coax and twisted-pair cable.
- Page 55 Glossary Light emitting diode used for monitoring a device or network condition. Local Area Network (LAN) A group of interconnected computer and support devices. Media Access Control (MAC) A portion of the networking protocol that governs access to the transmission medium, facilitating the exchange of data between network nodes.
- Page 56 Glossary Glossary-40...
- Page 57 Index Numerics 10 Mbps connectivity rules 3-25 100 Mbps connectivity rules 3-24 1000 Mbps connectivity rules 3-24 1000BASE-T pin Assignments 5-30 1000BASE-T ports 1-6 100BASE-TX ports 1-6 10BASE-T ports 1-6 10BASE-T/100BASE-TX pin Assignments 5-29 adhesive feet, attaching 2-16 air flow requirements 2-13 Backup Power Supply 6-36 backup power supply 1-11 optional backup power supply 1-11...
- Page 58 Index location requirements 2-13 management agent 1-6 features 1-12 6-36 out-of-band 1-6 SNMP 1-6 Web-based 1-6 mounting the switch in a rack 2-15 on a desktop or shelf 2-16 multimode fiber optic cables 3-23 network connections 3-21 optional backup power supply 1-11 out-of-band management 1-6 package contents 2-14 pin assignments 5-29...
- Page 60 060190-10...
Need help?
Do you have a question about the OmniStack LS 6248 and is the answer not in the manual?
Questions and answers