Table of Contents
Advertisement
Advertisement
Table of Contents

Related Manuals for Alcatel LinkHub HH70VH


Summary of Contents for Alcatel LinkHub HH70VH
- Page 1 User Manual HH70VH...
-
Page 2: Table Of Contents
Table of contents Safety and use ........................1 1. Overview ........................5 System requirements ..................5 Device description ...................5 ................7 Insert nano-SIM ....................7 Connect the power adapter ................8 Optional: Installing the external antennae ..........9 How to connect in Wi-Fi mode ..............10 ................12 Configure your Cat7 Router via application.......... -
Page 3: Safety And Use
Safety and use We recommend that you read this chapter carefully before using your device. The manufacturer disclaims any liability for damage, which may result as a consequence of improper use or use contrary to the instructions contained herein. CONDITIONS OF USE: Switch the device off before boarding an aircraft. - Page 4 This symbol on your device and the accessories means that these products must be taken to collection points at the end of their life: - Municipal waste disposal centres with specific bins for these items of equipment; - Collection bins at points of sale. They will then be recycled, preventing substances being disposed of in the environment, so that their components can be reused.
- Page 5 Product expires (including any indemnification in regard to infringement IPR). General information Internet address: www.alcatel-mobile.com Hot Line Number: see "SERVICES" leaflet or go to our website. Manufacturer: TCL Communication Ltd.
- Page 6 LTE 2100/1800/2600/900/800 : 23dBm LTE TDD 38/40 : 23dBm 802.11a/b/g/n/ac: 2.4GHz<20dBm , 5GHz<20dBm Hereby, TCL Communication Ltd. declares that the radio equipment type Alcatel HH70VH is in compliance with Directive 2014/53/EU. Additional information The full text of the EU declaration of conformity is available at the following internet address: http:/ /www.alcatel-mobile.com/EU_doc...
-
Page 7: Overview
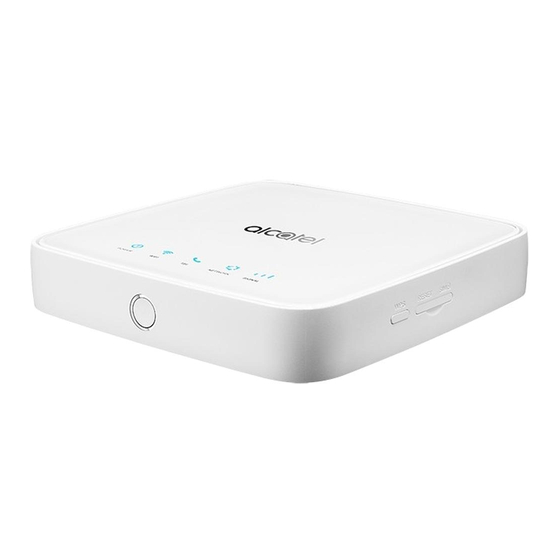
by the purchaser. TCL Communication Ltd. shall not be held responsible for the lack of availability of any application, as its availability depends on the country and the operator of the purchaser. TCL Communication Ltd. reserves the right at any time to add or remove Third Party Materials from its devices without prior notice;... - Page 8 WPS button To enable WPS, press and hold the WPS button for 3 seconds. The Wi-Fi LED will start to flash blue. Then press the WPS button on the device you wish to connect to within two minutes. Your Cat7 Router will automatically assign your network settings to the device you wish to connect to.
-
Page 9: Insert Nano-Sim
Icon Description • Solid yellow: Connected to 2G. • Solid green: Connected to 3G. • Solid blue: Connected to 4G/Ethernet. • Solid red: No nano-SIM available or the device is not registered to the network. • Flashing yellow: Registered to 2G. •... -
Page 10: Connect The Power Adapter
Follow the illustration below to plug in the power adapter. Once connected to a power outlet, your Cat7 Router will automatically power on. To prevent interference caused by radio signals, place the Cat7 Router at least one metre away from phones and other electrical devices. -
Page 11: Optional: Installing The External Antennae
In areas with poor signal reception, connect external antennae to the two ports labelled 'LTE' to improve signal reception. Before installing the external antennae, ensure that your Cat7 Router is powered off and disconnected from the power outlet. The external antennae must be installed by a qualified technician. Use antennae supplied by device manufacturer only. -
Page 12: How To Connect In Wi-Fi Mode
2.4 How to connect in Wi-Fi mode Step 1: Enabling Wi-Fi on your Cat7 Router. When the Wi-Fi indicator is solid blue, Wi-Fi is enabled. Step 2: Recording the SSID and Wi-Fi Key. The default SSID and Wi-Fi key are printed on the device label, situated on the underside of your Cat7 Router. - Page 13 Open the WPS page on your Web User Interface (Navigate to Settings > Wi-Fi > WPS). Enter the WPS key on the WEB User Interface and click Apply. Your device should then connect automatically. Option 3: PBC Open the WPS page on your Web User Interface (Go to >...
-
Page 14: Configure Your Cat7 Router Via Application
Download the Alcatel Wi-Fi Link app from App Store or Google Play store. Click on Alcatel Wi-Fi Link app icon to log in to the management page. Note: The Alcatel Wi-Fi Link app and website share the same password. Default password is: admin. - Page 15 3.2.1 Open your web browser. Input http:/ /192.168.1.1 into the address bar and press enter. The Home page will then load, as shown in the image below. Log in to change your Cat7 Wi-Fi device SSID and password, or change other basic settings.
- Page 16 Description Icon displayed Wi-Fi status Wi-Fi is enabled. Wi-Fi is disabled. USB device or printer is connected. 3.2.3 Status Status allows you to view your device information including internet, LAN, WAN and Wi-Fi. You can connect, disconnect or change the SSID of the device here. 3.2.4 Statistics The internet statistics can be seen here, both for your current session and your total traffic for the month.
-
Page 17: Services
4. Services You can navigate to Services and click the items you want. In this section, the following items are included: 4.1 SMS List the messages received. List the messages sent successfully. Drafts: Unsent messages are saved here. Write a new message. Configure settings for messaging. -
Page 18: Call Logs
How to delete an SMS: Find the message you wish to delete in either the Inbox, Sent or Draft folder. Tick the box in the far right column for the message(s) that you wish to delete. Click Delete. How to delete all SMS: Left-click at the top of the column to select all. - Page 19 Log in to your Cat7 Router Web-UI and go to Services > > Device access > Connected devices. Ensure that the of the connected devices is enabled. Go to Services > > USB and enter the administrator password. Enable Samba. On Windows OS: Go to 'My Computer'.
- Page 20 Click on Services > and enable Samba. Click Start, enter \\192.168.1.1, and press Enter. You can then access the storage in the same way as outlined above. • USB Printer Connect a USB printer via the USB port on your Cat7 Router. Connect your computer to your Cat7 Router.
-
Page 21: Dial-Up
You can go to and make changes to the following: Dial-up Wi-Fi Security 5.1 Dial-up 5.1.1 Network connection Network connection allows you to configure connection mode, data roaming and IP mode. 5.1.2 Profile management allows you to set up a new APN profile or edit/delete existing profiles. -
Page 22: Wan
Note: The default profile cannot be deleted. • 1) Select the profile from the profile management list. 2) Click Set default. Note: Once the new profile has been set as default, (Default) will be added next to the profile name. 5.1.3 You can set the network search mode to either Auto or Manual, and change the network mode to Auto, 2G only, 3G only or 4G only. -
Page 23: Wi-Fi
Static IP: Access the internet using a fixed IP address, subnet mask, gateway IP address and Primary DNS server. These should all be provided by your network service provider. 5.2.3 MAC Clone Using the MAC Clone function, multiple clients can connect to the Cat7 Router and access the internet. - Page 24 • Security: You can choose the security mode, available options are Disable, WEP, WPA, WPA2, or WPA/WPA2. • Encryption: This is set to Auto by default, available options are TKIP, AES, or Auto. • Password: You can check your Wi-Fi key here. 5.3.2 Advanced •...
-
Page 25: Security
5.3.3 WPS Use the WPS key to verify the WPS access credentials. Your router will receive an access request from the client within 2 minutes. Enter the WPS key from the wireless access client, then click Apply. (For more information on how to set up WPS, please see page 10 ) 5.4 Security 5.4.1... -
Page 26: Nat
5.4.3 IP filter By default, any device connected to your Cat7 Router is allowed to access the internet. You can use the IP filter to block specific devices from accessing the internet. Disable: All connected devices can access the internet. : Only devices with an IP address added to this list can access the internet. -
Page 27: Qos
network services for data sharing, communications, and entertainment. You may enable or disable UPnP. This function is disabled by default. 5.5.3 Virtual Server This device supports virtual server connections, enabling external users to access the services provided in the local area network (LAN) using the Hypertext Transfer Protocol (HTTP), File Transfer Protocol (FTP), and other protocols. -
Page 28: Update
6.3 Update Online updates: Click . Your Cat7 Router will check if there is an update available. If one is found, you may click Download. Once the file has been downloaded successfully, you can click Update. Note: Do not power off your router during the update process as this may damage the device. -
Page 29: Warranty
to enable Inform, enter Inform interval, ACS URL, ACS username, and ACS password. Click Apply when finished. 7. Warranty Your device is warranted against any defect or malfunctioning which may occur in conditions of normal use during the warranty period of twenty-four (24) months from the date of purchase as shown on your original invoice. -
Page 30: Q&A
In no event shall TCL Communication Ltd. or any of its affiliates be liable for indirect, incidental or consequential damages of any nature whatsoever, including but not limited to commercial or financial loss or damage, loss of data or loss of image to the full extent those damages can be disclaimed by law. - Page 31 Reboot your Cat7 Router and try again. If MAC address filtering is enabled, make sure your device MAC address is on the approved list. If Parental Control is enabled, make sure your device name and MAC address is not under parental control. Restart the device.
- Page 32 Select the network name (SSID) of your Cat7 Router from the drop-down menu and enter the Wi-Fi key. Make sure you have entered the correct Wi-Fi key. When there is no nano-SIM, no service, or the device is not registered to the network, the network indicator on Cat7 Router is solid red.
- Page 33 Possible reasons for this may be that there is no nano-SIM inserted in the device, it is inserted incorrectly, or the nano-SIM is disabled. Try removing your nano- SIM and reinserting it. Make sure not to touch the contact points when doing This means the nano-SIM is locked.
- Page 34 Log in to the Home page (refer to "How can I access the Home page?"). Go to Statistics > Internet. Log in to the Home page (refer to "How can I access the Home page?"). Go to > Dial-up > Network connection. Select Manual from the network connection mode.
- Page 35 Alcatel is a trademark of Alcatel-Lucent and is used under license by TCL Communication Ltd. © Copyright 2017 TCL Communication Ltd. All rights reserved. TCL Communication Ltd. reserves the right to alter material or technical specification without prior notice.
Need help?
Do you have a question about the LinkHub HH70VH and is the answer not in the manual?
Questions and answers