Advertisement
Quick Links
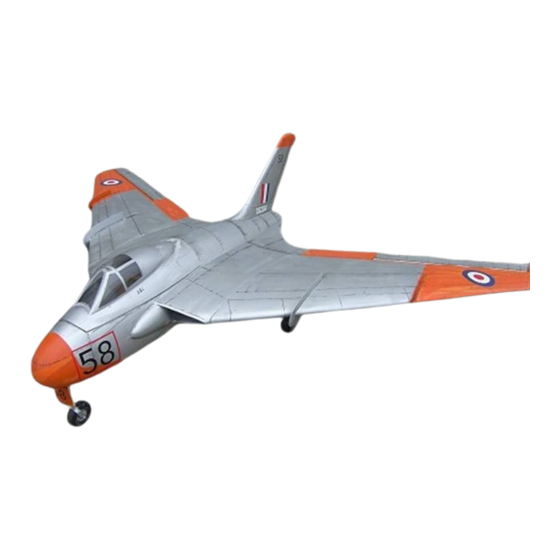
Thank you for purchasing DH108 Swallow 90mm from www.rbckits.com
For the first time, R/C enthusiasts we have a choice in scale and fun flyer aircraft designs.
Our goal, through computer technology and state-of-the-art production techniques, is to offer aircraft
which in the past have not been modelled simply because they weren't popular enough to justify mass
production. Our production techniques allow us to produce aircraft which, though not as popular and
well known as P-51s and P-47s, still offer historical significance (good or bad!), Good looks and flying
characteristics, and a uniqueness that is sure to turn heads wherever you take your airplane!
Your airplane has many unique features in its design:
CAD Design
CAD design allows strength to be built into the airplane without sacrificing weight. Accurate parts
design and placement ensures a perfect fit.
CAD Drawn Plans
The plans in this kit are not copied from a master set! They are originals drawn directly from the CAD
program where the airplane was designed. We do this because it allows us to use colour, which helps
you better visualize the various components of the airplane, and we can use better quality paper,
which greatly reduces the possibility of shrinkage.
Since you're going to build directly on the plans, they ought to be the proper size! Also, parts
placement is guaranteed to be accurate, so you can build a better, straighter model.
Small and hard-to-produce parts are simply a computer file away, so you get a more accurate airplane.
Lightening Holes
Lightening holes are cut into all ribs and formers where possible and justified. This allows us to keep
the weight on each plane to a minimum without sacrificing strength.
The same program that generates the design and plans also drives the cnc cutter, so every part is
reproduced exactly as it was designed. Cnc cutting also allows us to fit more parts on each sheet of
Advertisement

Related Manuals for RBC kits DH108 Swallow


Summary of Contents for RBC kits DH108 Swallow
- Page 1 Thank you for purchasing DH108 Swallow 90mm from www.rbckits.com For the first time, R/C enthusiasts we have a choice in scale and fun flyer aircraft designs. Our goal, through computer technology and state-of-the-art production techniques, is to offer aircraft which in the past have not been modelled simply because they weren’t popular enough to justify mass production.
- Page 2 Lexan General Building Information The DH108 Swallow 90MM can be built by a person with experienced building skills. It is not designed for someone who has built a trainer or low wing sport plane. No unusual building techniques are required, although more difficult areas are explained in detail where necessary. Certain steps in the building process must be followed as depicted, or you might find yourself digging back into the structure to redo something.
- Page 3 Also use white glue, and canopy glue or epoxy for the canopy and cowls Some drilling and bending tools, wire cutter, safety goggles etc. etc. For finishing you need: Glass 25 gram or japan paper 12 gr 3mtr and PU dope or epoxy finish 1 litre, brushes sanding paper 60,120,180, paint of your choice Wheels as on the drawing, controls, motor, battery etc.
- Page 4 might also place in the split 20mm main joiner to compare with the 14mm back joiner Step by step glue with thin ca Make Sure not to glue the back joiner to the fuselage, you need it for the wing. Make some strong glue joints with white glue at the wing joiner formers. Place duct end formers F20 and Place 3x6 stringer on duct side into formers Now place the duct sheeting and lining ,cut as per plan from thick paper in 2 pieces , it can be done in 1 piece note the cut-outs in the paper you might widen them up a bit for easy placing.
- Page 5 Place motor wiring and servo leads. Sand top of F23 flush to take fairing sheet, make sure fuselage is straight and level with fuselage build support place build support formers in front and back see pictures on cd, place 3x6 stringers Cut fairing sheet to size and glue .
- Page 6 Sheet top of fuselage with the 2x12 sheeting strips try to be as precise as possible it just looks nicer. Turn over fuselage into build support, it will fit at the wing sections use some in between balsa , the fuselage is stiff now Place wing fasteners, parts , glue in M3 nut into former with epoxy, join formers , and place to F24 and F42 bottom only place scrap fill to front formers to get flush with sheeting, note remember where you...
- Page 7 Place all wires you need for servo and motor Now start sheeting the bottom of the fuselage with the 2x12 strip , Mark fan unit hatch, the formers F28,F31 andF32 will be ad in when hatch is cut out. Sand intake sheet flush with former to take 2x12mm sheeting strip Mark front retract hatch , you can make a working hatch or make a tight fit hatch around the retract leg.
- Page 8 Make canopy frame from formers as per plan, place top sheeting inside canopy from stiff paper. Clean opening in F17 for canopy closing , harden opening with thin ca. Carefully draw canopy edges with a sharpie better a bit too large as to small cut canopy and glue to frame with canopy glue, we use ca (clean up canopy with window cleaner first) Glue canopy closing with some scrap balsa to canopy , cut out hatch.
- Page 9 Glue assembly in fuselage nose section with white glue., place steering servo to floor glue servo to floor use a 1mm steering wire with a z-bend see the drawing Front hatch is made in 2 pieces . We used springs and rubber bands for closing , we mount the hinges with fasteners and epoxy, and these parts are not in the kit it is all DIY Cut out main wheel wells in fairings., details for hatch cover are on the drawing, we used thin aluminium, not in kit...
- Page 10 Place fan unit place outlet duct cut as per plan. Make the outlet tube from the supplied pvc sheet as per plan , do fit and try , we use cello tape to join the plastic, make openings for wiring , place tube into exhaust tube in fuselage , then slide forward over fan unit and fasten with tape , we made a large hole into the fan hatch for cooling the controller, The receiver and retract batteries are placed also in the edf room.
- Page 11 Place wing drawing under a sheet of clear plastic. Start by making the wing sheeting from 1,5mm balsa as per plan , see the templates for cutting the sheets and the wing top view for the glue template , and do make oversize ! Take out all parts that are needed for the wings and clean them up with a sanding block from the small holding tabs.
- Page 12 Glue ribs and main formers. Place retract formers laminate a piece of 200gr glass between them for added strength , use white glue or epoxy for this , place wing joiner as per drawing, Place R18 fill in bottom of retract formers to get a good connection with the bottom sheeting.
- Page 13 Place wing joiners and glue them into wing with some ca Cut the top sheeting , mark it with some lines from the inner panel as lead . And glue top sheeting assembly with thick ca or use slow white glue . Take of panel, Sand all edges and place leading edge from 6x20 balsa , sand to shape as per plan Join tip blocks and place to wing at R8 sand tips with course paper and razorplane , Take out opening for your retracts, use some scrap ply to fill the mount till the top of the retract unit is...
- Page 14 Now mark trailing edge as per plan and cut clear the trailing edge and sand , you can glass or paper it first , as it is easy to work on , also you can after finishing take out aileron .check disk for pictures. For a close gap between the wing and fuselage , tape inner panel with thin plastic and fill the edge of the outer panel with 5min epoxy , sand flush ..
- Page 15 stabilizer. Join them with help from the dowels , do not glue dowels in yet . Sand leading edge as per plan , place tip , place trailing edge capping, sand all to shape. Place dowels , cut dowels to size after test fitting to fuselage Finishing: The whole wing is covered in 25gr glass and doped with PS100 Pu and filled with some extra talcum powder sands great and smooth, when ready a thinned layer of PS100 is OK...
- Page 16 I am sure we can find a solution for your build. Some tips: We used electric retracts for the DH108 Swallow 90mm, and we used a separate battery for the retracts and receiver this makes it safer, air set is also possible, the weight difference is none CG: we had to place our retract and receiver battery in the edf room, if you like you can also place your receiver there, it won’t give any problems.
- Page 17 Have Fun with the DH108 Swallow 90MM WWW.RBCKITS.COM Rontgenweg 16G 2408AB Alphen aan den Rijn Netherlands Some items used in the Swallow Servoless Retract with Metal Trunion 44mm x 41mm Mount (2pcs) https://hobbyking.com/en_us/servoless-retract-with-metal-trunion-44mm-x-41mm-mount-2pcs.html Servoless Steerable Nose Retract with Metal Trunion 44mm x 41mm Mount https://hobbyking.com/en_us/servoless-steerable-nose-retract-with-metal-trunion-44mm-x-41mm-...
Need help?
Do you have a question about the DH108 Swallow and is the answer not in the manual?
Questions and answers