
Related Manuals for Lifetime 90029


Summary of Contents for Lifetime 90029
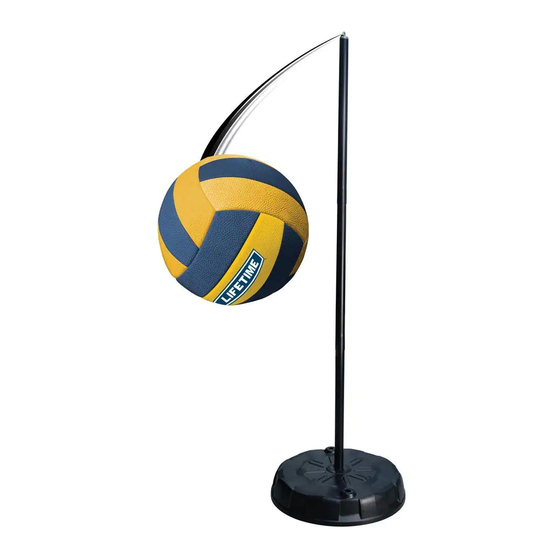
- Page 1 MODEL N° 90029 OWNER’S MANUAL Keep this Identification Number in case you must contact our Customer Service Department.
-
Page 2: Safety Instructions
We invite you to read our privacy policy at www.lifetime.com REGISTER today! Save this instruction in the event that the manufacturer has to be contacted for replacement parts. - Page 3 ASSEMBLY GUIDES Refer to the following areas throughout the instructions to assist in the assembly process: TOOLS AND HARDWARE REQUIRED FOR THIS PAGE This area is located at the top, left-hand corner of the page and indicates which tools and hardware are needed to complete the assembly steps on a page.
-
Page 4: Parts & Hardware List
PARTS & HARDWARE LIST DESCRIPTION Pole Section Base Base Plate Ball/Rope/Clasp Assembly TETHERBALL HARDWARE BAG 1/2” x 1.9” Metal Spacer 1/4”-20 x 2 3/4” Hex Bolt 1/4”-20 Nylock Nut 1/4”-20 x 5 1/2” Carriage Bolt 2” Expanding Pole Cap 2” Pole Cap Wedge Washer Collar Link 5/16”... -
Page 5: Parts Identifier
PARTS IDENTIFIER MISCELLANEOUS PARTS Parts are not shown at actual size ALG (x3) Pole Section AZX (x1) Base Plate AZM (x1) Base AZT (x1) Ball/Rope/Clasp Assembly FIQ (x1) FIR (x1) Base Cap Rubber Gasket... -
Page 6: Hardware Identifier
HARDWARE IDENTIFIER TETHERBALL HARDWARE BAG - [BUG] Parts shown at actual size except where indicated by * EQX (x1) AAS (x1) 5/16”-18 x 3” Hex Bolt *BQB (x1) 1/4”-20 x 2 3/4” Hex Bolt Pump and Needle Set AZW (x2) 1/4”-20 x 5 1/2”... -
Page 7: Hardware Required
POLE ASSEMBLY HARDWARE REQUIRED NO HARDWARE REQUIRED FOR THIS SECTION PARTS REQUIRED Part not shown to scale ALG (x3) Pole Section TOOLS USED (NOT INCLUDED) Scrap Wood... - Page 8 TOOLS AND HARDWARE REQUIRED FOR THIS PAGE NO HARDWARE REQUIRED FOR THIS SECTION POLE ASSEMBLY Insert the tapered end of a Pole Section (ALG) into Place the flared end of the third Pole the flared end of another Pole Section. Section over the tapered end of the Pole Sections you assembled in Step 1.1.
- Page 9 TOOLS AND HARDWARE REQUIRED FOR THIS PAGE Scrap Wood NO HARDWARE REQUIRED FOR THIS SECTION ATTENTION: THIS STEP CANNOT BE REVERSED! In order to seat the Pole Sections, strike each end of the Pole Assembly very hard five to six times on a piece of scrap wood or cardboard.
- Page 10 POLE TO BASE ASSEMBLY HARDWARE REQUIRED Parts shown at actual size AZW (x2) 1/4”-20 x 5 1/2” Carriage Bolt AAS (x1) AZS (x2) 1/4”-20 x 2 3/4” Hex Bolt Split Collar AZU (x1) AZP (x3) 1/2” x 1.9” Metal Spacer 1/4”-20 Nylock Nut PARTS REQUIRED Parts not shown to scale...
- Page 11 TOOLS AND HARDWARE REQUIRED FOR THIS PAGE 7/16” (x2) AAS (x1) AZP (x1) AZU (x1) POLE TO BASE ASSEMBLY Turn the Base (AZM) on its side and slide the flared end of the Pole Assembly through the hole in the Base. Align the tabs of the Base Plate (AZX) with the holes on the flared end of the Pole Assembly.
- Page 12 TOOLS AND HARDWARE REQUIRED FOR THIS PAGE AZS (x2) (Not to Scale) Interlock the two halves of the Split Collar (AZS) around the Pole Assembly. Slide the Split Collar Assembly down to the Base. WARNING Do not place the system in an upright position until instructed.
- Page 13 TOOLS AND HARDWARE REQUIRED FOR THIS PAGE 7/16” 5 1/2” (Not To Scale) AZW (x2) AZP (x2) Line up the holes in the Split Collar with the holes in the Base Plate. Insert the two (2) 1/4”-20 x 5 1/2” Carriage Bolts (AZW) through the holes in the Split Collar and out through the Base Plate.
- Page 14 TETHERBALL TO POLE ASSEMBLY HARDWARE REQUIRED Hardware shown at actual size EQX (x1) AYT (x1) ABD (x1) 5/16”-18 x 3” Hex Bolt 5/16” Hex Nut 5/16” Flat Washer BUF (x1) Washer Collar Link AZQ (x1) AZR (x1) BCA (x1) 2” Expanding Pole Cap 2”...
- Page 15 TOOLS AND HARDWARE REQUIRED FOR THIS PAGE EQX (x1) BUF (x1) ABD (x1) AYT (x1) TETHERBALL TO POLE ASSEMBLY Connect the Top Cap (BCA), Washer Collar Link (BUF), Expanding Pole Cap (AZQ), and Pole Cap Wedge (AZR) together using the hardware shown.
- Page 16 TOOLS AND HARDWARE REQUIRED FOR THIS PAGE NO HARDWARE REQUIRED FOR THIS SECTION Insert the Expanding Pole Cap Assembly into the top of the Pole Assembly. Secure the Expanding Pole Cap Assembly to the top of the Pole by tightening the Pole Cap. WARNING Do not place the system in an upright position until instructed.
- Page 17 TOOLS AND HARDWARE REQUIRED FOR THIS PAGE NO HARDWARE REQUIRED FOR THIS SECTION Attach the Ball/Rope/Clasp Assembly (AZT) to the Washer Collar Link, and secure the clip. WARNING Do not place the system in an upright position until instructed. The system may fall over and could result in serious personal injury or property damage.
- Page 18 FILLING THE BASE HARDWARE REQUIRED Hardware shown at actual size BFA (x1) Ball Needle AEF (x1) Base Plug PARTS REQUIRED Parts are not shown at actual size FIQ (x1) FIR (x1) Base Cap Rubber Gasket TOOLS USED (NOT INCLUDED) Safety Glasses Water Source Funnel 145 lbs (66 kg) Sand...
- Page 19 TOOLS AND HARDWARE REQUIRED FOR THIS PAGE AEF (x1) TWO ADULTS ARE REQUIRED TO COMPLETE ASSEMBLY. TO PREVENT SERIOUS INJURIES, THE POLE SHOULD BE HELD BY ONE ADULT AT ALL TIMES WHILE THE BASE IS BEING FILLED. OPTION A: FILLING WITH SAND 4.1A (145 lbs (66 kg) of sand required) 1.
- Page 20 TOOLS AND HARDWARE REQUIRED FOR THIS PAGE AEF (x1) TWO ADULTS ARE REQUIRED TO COMPLETE ASSEMBLY. TO PREVENT SERIOUS INJURIES, THE POLE SHOULD BE HELD BY ONE ADULT AT ALL TIMES WHILE THE BASE IS BEING FILLED. OPTION B: FILLING WITH WATER 4.1B 1.
- Page 21 TOOLS AND HARDWARE REQUIRED FOR THIS PAGE BFA (x1) Connect Ball Needle (BFA) to a ball pump. Moisten Needle and carefully insert it into the Tetherball. Inflate Tetherball to 2 lb. Check pressure with pressure gauge. CAUTION Use the ball pump provided to infl ate the ball. Do not infl...
-
Page 22: Basic Rules
TETHERBALL BASIC & ADVANCED RULES, & TACTICS BASIC RULES How the Game is Played: Play in matches of 3, 5, or 7 games. Each player takes a turn serving for a whole game. The serving player may serve the ball in either direction. The receiving player must then hit the ball in the opposite direction. - Page 23 ADVANCED RULES How the Game is Played: Play in matches of 3, 5, or 7 games. Each player takes a turn serving for a whole game. The serving player may serve the ball in either direction. The receiving player must allow the ball to swing around the pole at least once before striking the ball.
- Page 24 TETHERBALL TACTICS To win the game, a player must keep the ball under his or her control. The following list explains some of the tactics used to get and keep control of the ball: Serving: Power should not be your only technique. Try to serve the ball at extreme angles. This will help prevent your opponent from hitting the ball or hitting the ball well.
- Page 25 NOTES...
- Page 26 NOTES...
- Page 27 ® ENHANCE YOUR LIFETIME PURCHASE BY ADDING ACCESSORIES OR OTHER GREAT PRODUCTS: To purchase accessories or other Lifetime Products, visit us at: www.lifetime.com Or call: 1-800-424-3865...
- Page 28 All merchandise is sold on this condition, and no representative of the company may waive or change this policy. 5. This product is not intended for institutional or commercial use; Lifetime Products, Inc. does not assume any liability for such use. Institutional or commercial use will void the warranty.
Need help?
Do you have a question about the 90029 and is the answer not in the manual?
Questions and answers