Advertisement
Quick Links
Advertisement

Related Manuals for FLOS CHRYSALIS


Summary of Contents for FLOS CHRYSALIS
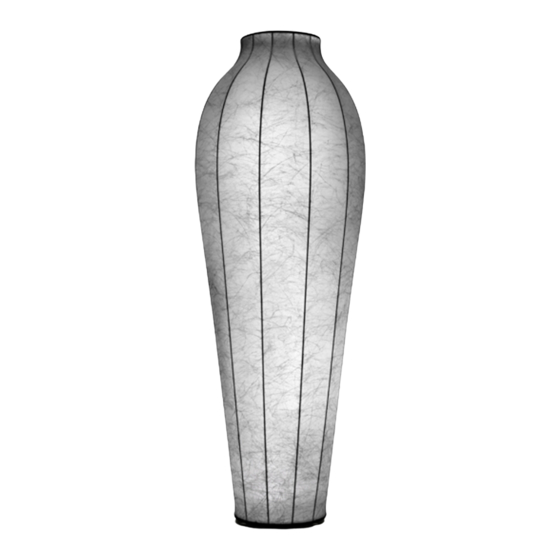
- Page 1 CHRYSALIS DESIGN BY MARCEL WANDERS...
- Page 2 - Si le cordon flexible externe est endommagé, il doit être - Se il cavo flessibile si danneggia, deve essere sostituito be replaced by FLOS or by qualified personnel in order to unsachgemaess behandelte Produkte ab. remplacé par FLOS ou par le personnel qualifié afin d’éviter da FLOS o da personale qualificato al fine di evitare avoid any danger.
- Page 3 - Se o cabo flexível está danificado, deve ser substituído заказчиком. Для получения информации por FLOS o por personal cualificado con el fin de evitar - 器具上の表示 は、 破損防止形または飛散防止 pela FLOS ou por pessoal qualificado para evitar qualquer связаться с компанией FLOS.
- Page 4 <IT> Fig.1 Svitare la ghiera zigrinata in plastica (A). Fig.2 Togliere il riflettore (B) dal suo alloggiamento, in modo da Fig. 1 EUR-USA Fig. 2 EUR-USA consentire lo sfilamento del corpo in “cocoon” (C) dell’apparecchio. <GB> Fig.1 Unscrew the plastic milled ring nut (A). Fig.2 Remove the reflector (B) from its housing so that the body in the “cocoon”...
- Page 5 surface propre et lisse pour ne pas abîmer ni salir le revêtement en “cocoon”. EUR-USA <ES> Fig.3 Separar el cuerpo de “cocoon” (C) de la base (D). ADVERTENCIA: para realizar esta operación sin riesgo de dañar el aparato son necesarias por lo menos dos personas; se aconseja además extender el cuerpo del aparato en un espacio horizontal que mida por lo menos 4 metros y que la superficie sea lisa y esté limpia para no dañar o ensuciar la cobertura de “cocoon”. <PT> Fig.3 Retirar o corpo em forma de casulo (C) do aparelho para fora da sua base (D). ADVERTÊNCIA: para efectuar esta operação sem risco de danificar o aparelho são necessárias pelo menos duas pessoas; aconselha-se Fig.3 também a pousar o corpo do aparelho num espaço horizontal de pelo menos 4 metros tendo o cuidado de o apoiar numa superfície macia e limpa para não o danificar nem sujar o revestimento em forma de casulo.
- Page 6 <IT> Fig.4 Solo versione EUR - Inserire la lampada <GB> Fig.4a USA version only - Insert the fluorescent Fig. 4 Fig. 4a fluorescente (E) nell’apposito alloggiamento (F); lamps (E) in the specific housings (F); then turn quindi ruotarla per bloccarla nella posizione them to lock them into the correct position. corretta.
- Page 7 <IT> Fig.5 Infilare il corpo in “cocoon” (C) dell’apparecchio facendo attenzione a far coincidere i tre incavi a mezzaluna EUR-USA (G) con i tre perni (H). Questa operazione permette al corpo di ancorarsi alla base (D) dell’apparecchio. <GB> Fig.5 Insert the “cocoon” body (C) into the device making sure that the three crescent-shaped indentations (G) meet the three pins (H).
- Page 8 <IT> Fig.6 Riposizionare il riflettore (B) nel suo alloggiamento. Fig.7 Riavvitare la ghiera zigrinata in plastica (A); quindi Fig. 6 EUR-USA Fig. 7 EUR-USA inserire la lampada (I). <GB> Fig.6 Reposition the reflector (B) into its housing. Fig.7 Screw the plastic milled ring nut (A) back on; then insert the lamp (I).
- Page 9 <IT> Fig.8 Montare il diffusore in vetro (M) - Fregio - sul corpo apparecchio avendo cura di fissarlo utilizzando la vite EUR-USA (L) in dotazione. AVVERTENZA: Evitare di serrare la vite (L) con forza per non danneggiare il diffusore in vetro. <GB>...
-
Page 10: Замена Лампы
<IT> Fig.9 SOSTITUZIONE DELLA LAMPADA - Dopo aver svitato la vite di bloccaggio (L) - vedi fig.8 - rimuovere il EUR-USA diffusore in vetro (M) - Fregio - premendo leggermente il lato con la scritta “push here to remove” per facilitare l’operazione. - Page 11 der Helligkeit die Taste gedrückt halten, bis das gewünschte Helligkeitsniveau erreicht ist, dann den Kontakt unterbrechen. Das Ausschalten erfolgt durch erneutes Betätigen der Taste der Leuchte mit leichtem Druck. Beim Ausschalten wird die Helligkeit gespeichert und wird beim nächsten Einschalten wiederhergestellt. Mit der Taste (N) lässt sich die obere Glühbirne ein-/ausschalten, mit der das Zierfries der Leuchte auf die Decke projiziert wird.
- Page 12 Fig. 10a <GB> Fig.10a USA version only - TURNING ON/OFF - The device is turned on/off by means of push buttons (M) and (N) positioned on the switch (L) that acts, respectively, on the fluorescent tubes that illuminate the body of the device (button “M”) and on the top lamp, projecting the device’s decorative frieze onto the ceiling (button “N”). Fig.10a Version USA seulement - ALLUMAGE / EXTINCTION - La lampe s’allume et s’éteint au moyen des boutons (M) et (N) situés sur l’interrupteur (L).
- Page 13 www.flos.com...
Need help?
Do you have a question about the CHRYSALIS and is the answer not in the manual?
Questions and answers