Table of Contents
Advertisement
Quick Links
Advertisement
Table of Contents

Related Manuals for Olimpia splendid COMFORT 14E


Summary of Contents for Olimpia splendid COMFORT 14E
- Page 1 COMFORT 14 E INSTRUCTION FOR USE AND MAINTENANCE Caution: risk of fire...
-
Page 2: Table Of Contents
Contents 1. Safety Awareness .................... 1 2. Name of Parts ....................12 3. Accessories ....................13 4. Appearance and Function of Control Panel ..........14 5. Appearance and Function of Remote Control ..........15 6. Operation Introduction ..................16 7. Installation ...................... 19 8. -
Page 3: Safety Awareness
1. Safety Awareness 1. Safety Awareness VERY IMPORTANT! Please do not install or use your portable air-conditioner before you have carefully read this manual. Please keep this instruction manual for an eventual product warranty and for future reference. Warning Do not use means to accelerate the defrosting process or to clean, other than those recommended by the manufacturer. - Page 4 The appliance must be placed in an area without any continuously sources of ignition (for example: open flames , gas or electrical appliances in operation). Do not puncture and do not burn. This appliance contains Y g (see rating label back of unit ) of R32 refrigerant gas. ...
- Page 5 7. When moving the portable air-conditioner, always turn off and disconnect the power supply, and move it slowly. 8. To avoid the possibility of fire disaster, the portable air-conditioner shall not be covered. 9. The portable air-conditioner socket must comply with safety requirements. If necessary, please check with the relevant authority where required.
- Page 6 17. Contact authorized service technician for repair or maintenance of this unit. 18. Do not pull , deform . or modify the power supply cord , or immerse it in water . Pulling or misuse of the power supply cord can result in damage to the unit and cause electrical shock. 19.
- Page 7 the dealer or a designated repair shop; — Ensure the power chord is always grounded. To avoid the possibility of danger, if the power cord is damaged, please turn off the air switch — and disconnect the power supply. It must be returned to the place of purchase. INSTRUCTIONS FOR REPAIRING APPLIANCES CONTAINING R32 1 GENERAL INSTRUCTIONS 1.1 Checks to the area...
- Page 8 displayed. 1.7 Ventilated area Ensure that the area is in the open or that it is adequately ventilated before breaking into the system or conducting any hot work. A degree of ventilation shall continue during the period that the work is carried out. The ventilation should safely disperse any released refrigerant and preferably expel it externally into the atmosphere.
- Page 9 3 REPAIR TO INTRINSICALLY SAFE COMPONENTS Do not apply any permanent inductive or capacitance loads to the circuit without ensuring that this will not exceed the permissible voltage and current permitted for the equipment in use. Intrinsically safe components are the only types that can be worked on while live in the presence of a flammable atmosphere.
- Page 10 charge is used, the system shall be vented down to atmospheric pressure to enable work to take place.This operation is absolutely vital if brazing operations on the pipework are to take place. Ensure that the outlet for the vacuum pump is not close to any ignition sources and there is ventilation available.
- Page 11 Ensure that there are labels on the equipment stating the equipment contains flammable refrigerant. 11 RECOVERY When removing refrigerant from a system, either for servicing or decommissioning, it is recommended good practice that all refrigerants are removed safely. When transferring refrigerant into cylinders, ensure that only appropriate refrigerant recovery cylinders are employed.
- Page 12 Ventilated enclosure – (see Clause GG.4) Safety of the appliance depends on ventilation of the housing. Switching off the appliance or opening of the enclosure has a significant effect on the safety. Care should be taken to ensure a sufficient ventilation before. Ventilated room –...
- Page 13 • If the safety is affected when the equipment is putted out of service, the refrigerant charge shall be removed before decommissioning. • Ensure sufficient ventilation at the equipment location. • Be aware that malfunction of the equipment may be caused by refrigerant loss and a refrigerant leak is possible.
-
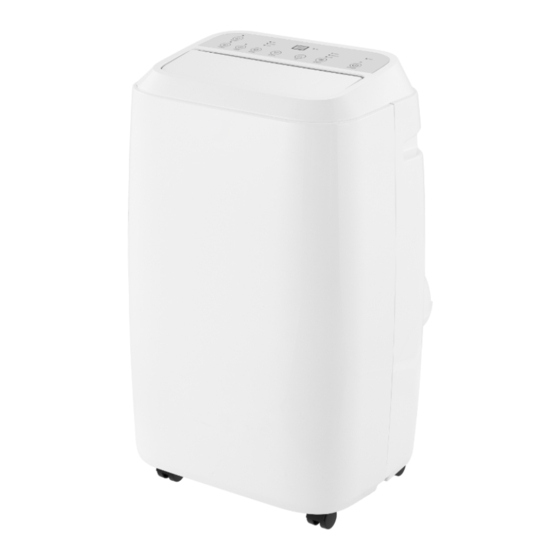
Page 14: Name Of Parts
Storage package protection should be constructed such that mechanical damage to the equipment inside the package will not cause a leak of the refrigerant charge. The maximum number of pieces of equipment permitted to be stored together will be determined by local regulations. 2. -
Page 15: Accessories
3. Accessories 3. Accessories Part Description Quantity Exhaust hose Housing adaptor Window Connector Remote Controller Window Slider Kit After unpacking, please check whether the above-mentioned accessories are included, and check their purposes in the installation introduction in this manual. -
Page 16: Appearance And Function Of Control Panel
4. Appearance and Function of Control Panel 4. Appearance and Function of Control Panel Power on/off Cooling Fan speed Dehumidifying Temperature up Temperature down High fan speed Operation mode Medium fan speed Timer on/off Low fan speed Water full Swing on/off Sleep mode... -
Page 17: Appearance And Function Of Remote Control
5. Appearance and Function of Remote Control 5. Appearance and Function of Remote Control Remote Control 1 POWER Power on/off 2 TIMER Timer on/off 3 MODE Operation MODE 4 TEMP‐ Temperature down 5 TEMP+ Temperature up 6 SPEED Fan speed 7 Sleep Sleep mode 8 SWING Auto swing Notes: - Do not drop the remote. - Do not place the remote control in a location exposed to direct sunlight. -
Page 18: Operation Introduction
6. Operation Introduction 6. Operation Introduction Before starting operations in this section: 1) Find a place where there is power supply nearby. 2) As shown in Fig.5 and Fig.5a, install the exhaust hose, and adjust the window position. Fig.5 Fig.5a 3) Insert the power cord into a grounded AC220~240V/50Hz socket; 4) Press the POWER button to turn on the portable air-conditioner. - Page 19 6.1. Before using Notice: Operation temperature range: Maximum cooling Minimum cooling DB/WB(℃) 35/24 18/12 Check whether the exhaust hose has been installed correctly. Cautions for cooling and dehumidifying modes: When using functions on cooling and dehumidifying, keep an interval of at least 3 minutes between each ON/OFF.
- Page 20 When the portable air-conditioner ON, press “Timer” button and select a desired OFF time using the temperature and time setting buttons. “Preset OFF Time” is displayed on the operation panel. OFF time can be set between 0-24 hours. 6.5 Auto SWING After portable air-conditioner turns on, press the Swing button, the louver will swing continuously left and right;...
-
Page 21: Installation
7. Installation 7.1 Installation: The portable air-conditioner should be used on a flat and stable surface. Don’t block the air outlet, ensure clearance of 30 cm on all sides.(See Fig.8) Do not install in wet areas, such as bathrooms, laundry etc. Socket wiring should be in accordance with the local safety requirements. - Page 22 Twist the housing adaptor and the window connector to the ends of the exhaust hose. Insert the fixing clip of the housing adaptor into the openings at back of the portable air-conditioner.. Put the other end of the exhaust hose to the near windowsill(see Fig.9). Window Kit Installation The window kit can be installed in a vertical or horizontal position.
- Page 23 7.3 Water Full alarm The inner water tray inside the portable air-conditioner monitors the water level. When the water level reaches capacity, water full indicator lights When the water reservoir is full remove the rubber plug at the bottom of the unit, and drain the unit.
-
Page 24: Maintenance
8. Maintenance Declaration 1) Before cleaning, be sure to disconnect the unit from any electric supply outlet; 2) Do not use gasoline or other chemicals to clean the unit; 3) Do not wash the unit directly; 4) If the portable air-conditioner is damaged, return to store of purchase. 8.1 Air Filter If the air filter becomes clogged with dust/dirt, the air filter should be cleaned once every two weeks. -
Page 25: Troubleshooting
9. Troubleshooting 9. Troubleshooting Troubles Possible Causes Suggested Remedies - Water full indicator lamp blinks, Drain the water out of the and water reservoir is full. water tray. - Room temperature is higher than 1.Unit does not start the setting temperature. (Electric Reset the temperature when pressing on/off heating mode) - Page 26 Nel caso di ulteriori domande sul Vostro prodotto o la sua garanzia, si prega di contattarci agli indirizzi sotto indicati. Olimpia Splendid Australia Pty Ltd 80-84 Burlington Oakleigh, Victoria, 3166 Ph: 1300 664 768 sales@olimpiasplendid.com.au...
Need help?
Do you have a question about the COMFORT 14E and is the answer not in the manual?
Questions and answers