Table of Contents
Advertisement
Quick Links
Advertisement
Table of Contents

Related Manuals for fantastic furniture GEO BOOKCASE 9 CUBE


Summary of Contents for fantastic furniture GEO BOOKCASE 9 CUBE
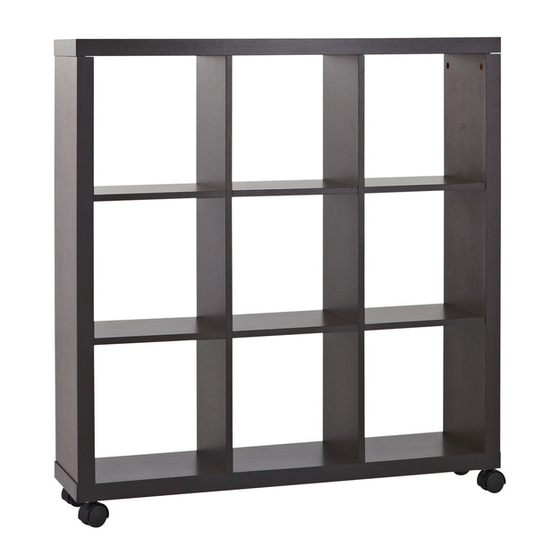
- Page 1 Assembly Instructions BOOKCASE 9 CUBE...
- Page 2 STOP! Before you start... Lay out all of the components on a soft surface Read Instructions carefully. as if you were preparing to do a jigsaw puzzle. Separate and identify each component from the Carefully identify each component, especially hardware pack and rest each one in its proper those that are similar.
- Page 3 What You Need Top Panel (P1) (Tools not provided) Phillips Head Srewdriver Mid Panel Mid Panel Mallet (P4) (P4) Shelf Shelf Shelf (P5) (P5) (P5) Rihgt Side Left Side Panel Panel Shelf Shelf Shelf (P2) (P3) (P5) (P5) (P5) Bottom Panel (P6) 1 x allen key 6 x Cam...
- Page 4 Step 1 (P4) You will need: 8 x Long (P5) (P5) Dowels (H1) (H1) (P5) (P5) (H1) Insert the long dowels (H1) into the dowel holes of the mid panel (P4), connect the shelves (P5) to the douwels which attached to the mid panel. Step 2 (P4) (P4)
- Page 5 Step 3 (P4) (P4) You will need: (P5) (P5) 4 x Short Dowels (H2) (H2) (H2) (P5) (P5) Connect the shelves (P5) to the long dowels that in the mid panel on Setp 2, Iisert the short dowels (H2) into the Shelves (P5). Step 4 (H2) (H2)
- Page 6 Step 5 You will need: 6 x Cam Bolts (H3) (H3) (H3) (P1) Screw the cam bolts (H3) into the top panel (P1). (P1) Step 6 You will need: 6 x Cam (H4) (H4) (H4) Nuts (H4) (P4) (P4) (P2) (P3) Insert the cam nuts (H4) into the panels (P2),(P3) and (P4), cover the top panel (P1) to the those panels.
- Page 7 Step 7 (P4) (P4) (P2) (P3) You will need: 6 x Allen Bolts (H5) (P6) (H5) (H5) (H5) Screw the bottom panel (P6) to the panels (P2),(P3),(P4) using the allen bolts (H5). Step 8 (H6) You will need: (H8) 16 x Screws (H8) (H6) (H7)
- Page 8 Step 9 The job is now complete! In the interest of our environment Please dispose of all packaging thoughtfully. Page 8...
Need help?
Do you have a question about the GEO BOOKCASE 9 CUBE and is the answer not in the manual?
Questions and answers