Table of Contents
Advertisement
Quick Links
Advertisement
Table of Contents

Related Manuals for CYC Motor X1 PRO


Summary of Contents for CYC Motor X1 PRO
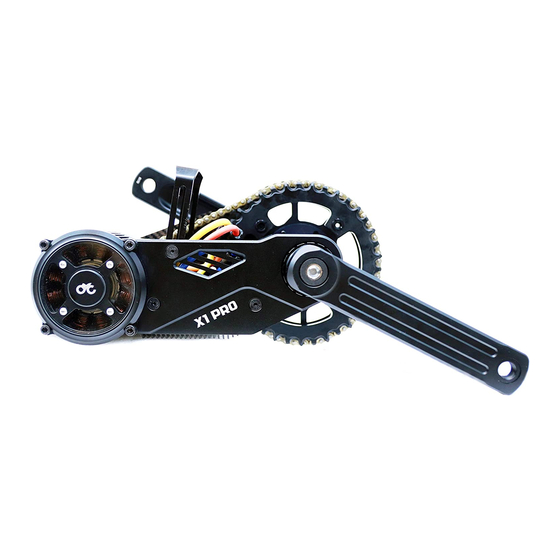
- Page 1 CYC MOTOR LTD X1 PRO USER MANUAL 14S Controller Version 1.0...
-
Page 2: Table Of Contents
07 QUICK START 03 INSTALLATION Required tools 08 TERMS AND CONDITIONS Adjusting the Width of the Bottom Bracket Mounting the X1 pro to the frame PAS Sensor Installation Mounting the Crankset (Gear Version) Mounting the Crankset (Chain Version) Wiring and Connection... -
Page 3: Safety
Check the chains regularly for proper tension. The X1 PRO does not comply with EU or US e-bike regulations, it is for off-road and private-track use only. User please follow Check electrical wires and plugs to see if there’s any dam- all local, state and federal regulations when registering and age. -
Page 4: Proper Use
The X1 PRO is splash proof, rain proof but not water proof, do not submerge it underwater or ride through streams. Never interfere with the movable parts when the drive unit is connected to power supply. -
Page 5: Specification
SPECIFICATION General Specification General Gearbox Rated Voltage 30 - 60V D.C. First-stage 1:6 hardened steel planetary > 180 rpm 1:6 Gear / 1:6 219H Chain Max. rpm Second-stage 3000W 1:36 Rated Power Overall reduction ratio ≥ 180 N.m. Max Torque ≥... -
Page 6: Variants And Dimensions
SPECIFICATION Variants and Dimensions 68-83mm Version A: 93mm B: 186mm C: 200mm D: 31mm E: 110mm F: 83mm G: 247mm H: 188mm I: 33mm... -
Page 7: 100Mm Version
SPECIFICATION Variants and Dimensions 100mm Version A: 93mm B: 186mm C: 200mm D: 31mm E: 110mm F: 100mm G: 247mm H: 188mm I: 33mm J: 2mm K: 12mm... -
Page 8: 120Mm Version
SPECIFICATION Variants and Dimensions 120mm Version A: 93mm B: 186mm C: 197mm D: 31mm E: 110mm F: 120mm G: 247mm H: 188mm I: 33mm J: 22mm K: 32mm... -
Page 9: Motor & Controller
SPECIFICATION Motor & Controller Motor Controller Motor type In-runner Spintrol Chipset 80mm Stator O.D. Rated Voltage 30-60V D.C. 46.4mm Stator I.D. Max. input current 40mm Thickness Bluetooth 0.2mm Stator lamination IOS / Android Mobile App Magnet N45SH (>150°C) Throttle Control mode Current / Power / rpm 0.7mm Wiring... - Page 10 SPECIFICATION Parts List Parts List Common Parts 83mm Version Extra Parts Motor body (includes controller) 3mm, 5mm, 7mm Spacers Chainring 100mm Version Extra Parts ISIS Bottom Bracket Plate and Spacers Crank Arm (left and right) 120mm Version Extra Parts Display Plate and Spacers PAS Sensor Thumb Throttle...
-
Page 11: Installation
INSTALLATION Required tools Hex Keys Wrench Wire Cutter Zip-Ties 3mm hex key for screws & 10mm hex key for crank screws Crank Puller Cutter Bottom Bracket Tool for removing ISIS Drive for removing ISIS 20 splined BB cups bottom bracket spindle inner diameter needs to be at least 24mm to fit through our ISIS BB... -
Page 12: Adjusting The Width Of The Bottom Bracket
3mm spacer on the right as shown Adjusting the Width of the Bottom Bracket In order for the X1 PRO to fit on all different widths of bottom brackets, there are three adaptors that come with the pack, designed to provide the 68mm and 73mm bottom brackets with necessary spacing between the X1 PRO brackets. -
Page 13: Mounting The X1 Pro To The Frame
INSTALLATION Mounting the X1 PRO to the Frame Mounting the X1 PRO to the Frame 1. Pull out the bottom bracket from drive unit. 2. Line up the drive unit with the bike frame bottom bracket, insert the bottom bracket through the drive unit’s right... -
Page 14: Pas Sensor Installation
INSTALLATION PAS Sensor Installation Mounting the PAS Sensor The PAS Sensor is to be installed on the left side of the X1PRO. The outlet of the PAS sensor can be in any direction according to your preference. 1. Plug in the PAS Sensor as shown. 2. -
Page 15: Mounting The Crankset (Gear Version)
INSTALLATION Mounting the Crank Set (Gear Version) Mounting the Crank Set (Gear Version) 1. Tighten the crank arm on to freewheel on the 60T Gear face (only one of the crank arms has the thread). 2. Hook up your bike chain on to the sprocket. 3. -
Page 16: Mounting The Crankset (Chain Version)
INSTALLATION Mounting the Crank Set (Chain Version) Mounting the Crank Set (Chain Version) 1. Tighten the crank arm on to the freewheel on the 219H 72T Sprocket face (only one of the crank arms has the thread). 2. Hook up the crank set with the 219H chain (Tensioner can be pulled down for easier assembly) 3. -
Page 17: Wiring And Connection
INSTALLATION Wiring and Connection Wiring Diagram... -
Page 18: General Maintenance
X1 PRO dealer. Store the bike in a cool and dry place, sheltered from direct Do not attempt to replace the X1 PRO parts with the parts sunlight. you found at your local store as the materials used in the drive unit are specifically selected for their purposes. -
Page 19: Gear Version
MAINTENANCE Gear Version Gear Version The large gear of the gear version can be removed and replaced 1. Remove the crank from the Bottom Bracket 2. Remove all parts of the crank except the crank arm, the gear and the freewheel 3. - Page 20 MOBILE APP Getting Started The CYC Motor App The CYC Motor App is an app designed to control the con- troller via smart phones, users can connect their smart phone to the controller using bluetooth and change the settings according to their preference. The smart phone can also become a dashboard when riding the bike.
- Page 21 1. User Interface: User can change the profile image, user profile, find nearby friends, CYC Motor news, online forum, online store and logout. 2. Electronic Gear: displays your current gear setting. Users may choose your gear preference by pressing up and down.
-
Page 22: Mobile App
MOBILE APP Preset Modes Setting the Preset Modes • Fast Ramp Up Threshold: The threshold current that the fast ramp up rate must reach for it to switch back to Ramp Up Rate. Users may go to Settings > Preset to change the preset •... - Page 23 MOBILE APP Preset Modes Power Limit: Setting the Electronic Gear • Current Limit: Sets the controller’s current limit • Gear Setting: Allows you to change the settings for their • Power Limit: Sets the controller’s power limit respective gear number. •...
-
Page 24: Trip Planner
MOBILE APP Trip Planner Trip Planner Interface • Distance: The total distance of the route. • EST: Your estimated time of the journey based on your Avg. Speed. • Avg. Speed: The average speed of your bike. • Clear: Clears out all the markers on the map. •... - Page 25 MOBILE APP Trip Planner Setting the Trip Planner 1. Go to the Trip Planner interface 2. Enter the Avg. Speed on top right of the screen, this sets your bike speed. (The system records your bike statistics automatically for your reference, it can be found at Set- tings >...
-
Page 26: Data Logger
MOBILE APP Data Logger Data Logger Interface Data Logger allows the controller to record the bikes performance every second, you may choose to save the record at the end of the recording. Record Button: Start and stop the recording of your bike’s performance. -
Page 27: Display
DISPLAY After installation, you can turn on the display by holding down the power button until the display turns on. 1. Speed Meter: Shows the speed of your rear wheel in km/h or mph. 2. Gear: Shows the current gear you are engaged in. 3. -
Page 28: Quick Start
3800 The control of the X1PRO controller is fully flexible, by using our CYC Motor App, you can change the output settings Mode 2, US Legal: This preset is set to limit the motor to satisfy accroding to your preference. To change the preset settings, with the US laws. -
Page 29: Terms And Conditions
We offer a 1-year warranty to our motor, gear box and con- troller. Man-made failure and other parts are excluded from our warranty. For any replacement parts, please visit your X1 PRO dealer or the CYC Motor online store, www.cycmotor.com...
Need help?
Do you have a question about the X1 PRO and is the answer not in the manual?
Questions and answers