Table of Contents
Advertisement
Quick Links
Advertisement
Table of Contents

Subscribe to Our Youtube Channel
Related Manuals for Sentiotec PHONIX-S


Summary of Contents for Sentiotec PHONIX-S
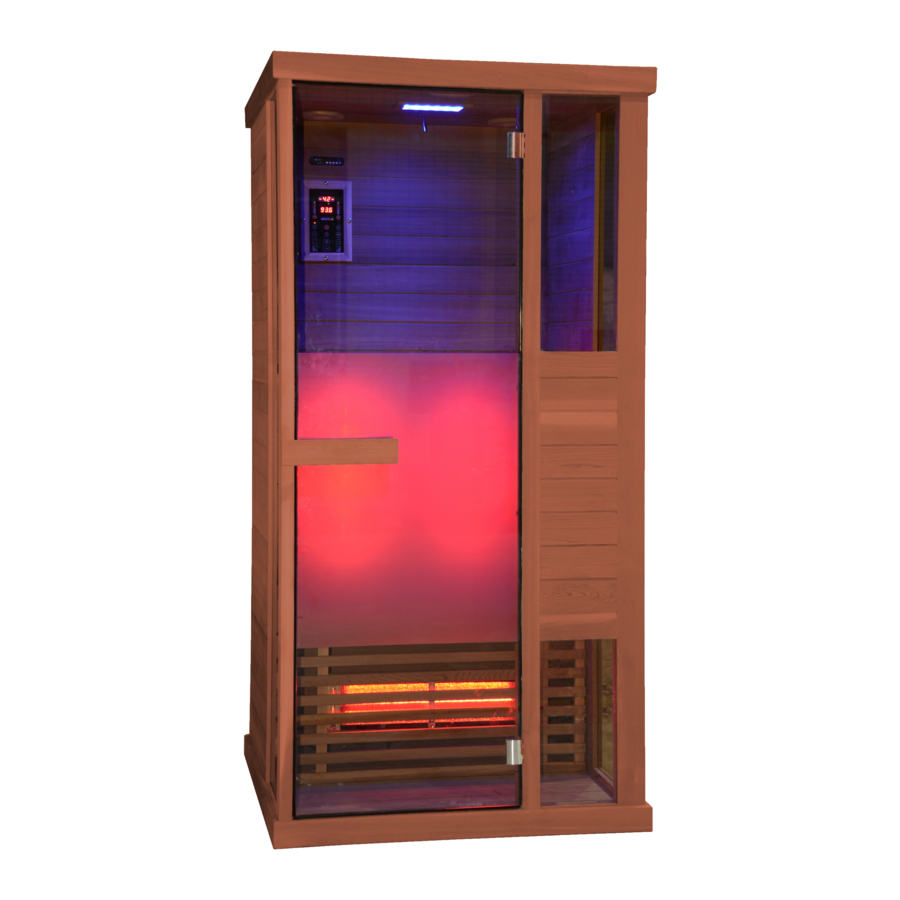
- Page 1 User’s manual Infrared Cabin PHÖNIX-S (1-030-313) 1/12 2017/04...
-
Page 2: Technical Data
PREFACE Thank you very much for purchasing our product. Please read this manual carefully before assembling and save it afterwards. Please write down the control box serial number of the cabin as this number will be required in case of repair or order of spare parts. ATTENTION Check power supply rating and make sure the grounded outlet is correctly connected before installation. - Page 3 PARTS LIST Cabin Individual parts (variations possible) NAME Q’TY 3/12...
-
Page 4: Assemble Instructions
Hardware parts (variations possible) Rubber strip ASSEMBLE INSTRUCTIONS Assemble tips Please remove transport packaging and inspect that your infrared cabin has been delivered complete and intact before beginning assemble. A least 2 persons are required for assemble of the cabin Please check the countersink and hole diameter of the drill holes to avoid damaging the wood. - Page 5 ASSEMBLE INSTRUCTIONS Assemble steps Note: back panel has ventilation slits must keep 5 cm away from the next wall 5/12...
- Page 6 ASSEMBLE INSTRUCTIONS Assemble steps from the bench panel heater cable 4-Φ4*45 6/12...
-
Page 7: Assemble Steps
ASSEMBLE INSTRUCTIONS Assemble steps 4-Φ4*45 Hex screw Hinge surface Hinge bottom Glass door Handle Glass door Rubber Handle Strip Wood cover 7/12... -
Page 8: Circuit Diagram
CIRCUIT DIAGRAM Plug Input Voltage Power Rating Current Rating Safety Grade Model Electric control box Calves Control panel Antenna Back Color light AC12V/7W 8/12... - Page 9 CIRCUIT DIAGRAM TEMP OVERHEAT CONTROL SPOTLIGHT SPEAKER SPEAKER ANTENNA BACK HEATER CONTROL PANEL CALVES HEATER 9/12...
-
Page 10: Operating Intructions
OPERATING INTRUCTIONS Connect the power unit to wall outlet, the LED indicator will start to blink on the display. Now it is possible to switch on the infrared heaters, the light and the music function. 1) Startup Press to switch on the cabin and heaters start to work, the length of time be displayed. -
Page 11: Use Instructions
SERVICE Use instructions Drink plenty of liquids before and after use of the infrared cabin. Dry yourself off completely. After a heating period of an hour at the latest, the cabin should be switched off and a heating brake of It is recommended to take a warm shower and relax after use. -
Page 12: Guarantee Card
SERVICE GUARANTEE CARD ______________________________________________ _______________________________ _________________________________ Control unit label ______________________________ ________________________________________ ________ Please encircle on picture below which heater or which panel has a fault. Attach pictures of the problem and send them through email. 12/12...
Need help?
Do you have a question about the PHONIX-S and is the answer not in the manual?
Questions and answers