Chapters
Table of Contents

Subscribe to Our Youtube Channel
Related Manuals for Sentiotec KASKI-220-P


Summary of Contents for Sentiotec KASKI-220-P
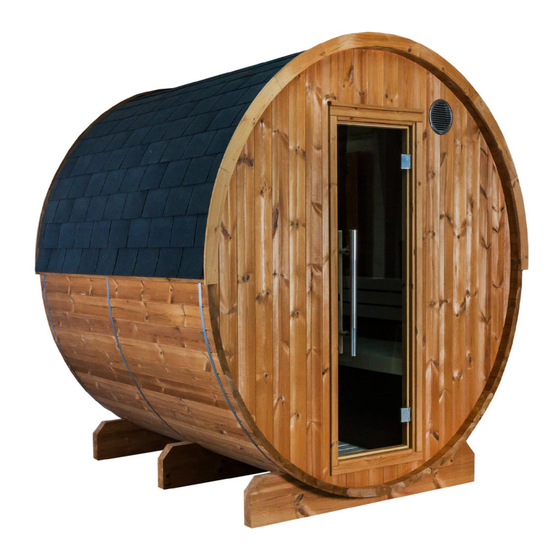
- Page 1 Barrel sauna KASKI / KUUSI 220 PANORAMA Ø 220 × 220 cm ASSEMBLY INSTRUCTIONS English KASKI-220-P Thermo pine KUUSI-220-P Spruce KASKI-220-P Version 04/24 item no. KUUSI-220-P...
-
Page 2: Table Of Contents
Table of Contents 1. Preparing for installation 1.1. Important note 1.2. Foundation 1.3. Anchoring the outdoor sauna 1.4. Tools required 1.5. Maintenance and cleaning 1.6. Disposal 2. Assembling the cabin 2.1. Mounting the feet 2.2. Assembling the barrel staves 2.3. Assembling the front and rear wall 2.4. -
Page 3: Preparing For Installation
Read these assembly instructions carefully and keep them within reach. so that you can look up product information at any time. These assembly instructions can also be found in the downloads section of our website: www.sentiotec.com/downloads. 1.1. Important note ● Check with your local planning authority (municipal office, magistrate) with respect to the building regulations and load standards. -
Page 4: Foundation
Assembly instructions p. 4/8 ● When it rains, water can enter - the sauna barrel is not 100% watertight. To drain water from the floor, two holes are pre-drilled in the groove for the front and back walls of the lowest stave. These should be open at the bottom after the metal bands have been fitted, so that the water can drain away. ● Condensation can cause water stains, especially under the glass pane. Dry the barrel sauna regularly by heating it up without infusion or, in the case of a combi heater, using the post-drying program. ● When using an electric sauna heater, please note - The external sauna control unit should be protection class IP65 or - Installation of the external sauna control unit in a protective housing ●... - Page 5 Assembly instructions p. 5/8 ● Utility knife ● Ladder ● Saw This symbol indicates tips and useful information Pre-drill Cut to correct size Nailing Carry out wiring Check the right angle: 80 cm Handle glass with care: Special care must be taken with the edges of the glass —...
-
Page 6: Maintenance And Cleaning
Assembly instructions p. 6/8 1.5. Maintenance and cleaning ● The sauna should be cleaned inside with a damp cloth. Use warm water only - if required, we recommend Harvia Sauna Cleaner (SAC25040 - Cleaning and disinfection) ● If the sauna will not be used for an extended period, we recommend heating the cabin once a month to prevent the formation of mould. Pitch pockets are not grounds for return. Since they can always appear in spruce wood and thermo pine and it is not possible to recognise at what depth they are located during the sorting-out process. -
Page 7: Assembling The Cabin
Assembly instructions p. 7/8 2. Assembling the cabin ATTENTION! Note the floor plan on Page 10 and illustrations from Page 9 onwards. 2.1. Mounting the feet Place the impregnated feet[1,33] on the foundation (see page 9) as shown in the illustration (see page 12). Fix them temporarily with two staves[3]. Make sure that the feet are fitted parallel to each another. Note the power supply! 2.2. Assembling the barrel staves Start by placing the lower stave in position (with drain — see page 13). Always put the staves together with the round part facing upwards. -
Page 8: Mounting The Door
Assembly instructions p. 8/8 Mount the tensioning bands[24] (see page 19). Before tensioning the metal bands, remove the screws from the staves. Note that the tension rods[23,25,26,27] are positioned in the lower half of the barrel sauna. Tighten the metal bands so that there is no visible gap between the staves. This must be checked regularly and retightened if necessary. 2.5. Mounting the door Place the door frame[13,17] in the opening from the inside. Note that the door opens outwards – the door can be attached on the left or on the right. Fix the door in place from the outside using the cover strips[15]. - Page 9 Fasssauna KASKI / KUUSI 220 PANORAMA Ø 220 x 220 cm MONTAGEANLEITUNG Deutsch KASKI-220-P Thermo-Kiefer KUUSI-220-P Fichte KASKI-220-P Version 04/24 Artikel-Nr. KUUSI-220-P...
- Page 10 Inhaltsverzeichnis 1. Montage Vorbereitung 1.1. Wichtige Hinweise 1.2. Fundament 1.3. Verankerung der Außensauna 1.4. Benötigtes Werkzeug 1.5. Wartung und Reinigung 1.6. Entsorgung 2. Montage Kabine 2.1. Montage Standfüße 2.2. Montage Fassdauben 2.3. Montage Vorder- und Rückwand 2.4. Fertigstellung Fass 2.5. Montage Tür 2.6.
-
Page 11: Montage Vorbereitung
1. Montage Vorbereitung Lesen Sie diese Montageanleitung gut durch und bewahren Sie sie auf. So können Sie jederzeit Produktinformationen nachlesen. Sie finden diese Montageanleitung auch im Downloadbereich unserer Webseite auf www.sentiotec.com/downloads. 1.1. Wichtige Hinweise ● Erkundigen Sie sich bei Ihrer zuständige Baubehörde (Gemeindeamt, Ma- gistrat) bezüglich den Bauvorschriften und Belastungsnormen. -
Page 12: Fundament
Montageanleitung S. 4/8 ● Bei Regen kann es zu Wassereintritt kommen - das Saunafass ist nicht 100% dicht. Zur Wasserableitung am Boden sind in der untersten Daube zwei Löcher in der Nut für Vorder- und Rückwand vorgebohrt. Diese sollen nach der Montage der Stahlbänder nach unten offen sein, damit das Wasser ablaufen kann. ● Durch Kondenswasser kann es zu Wasserflecken, besonders unter der Glas- scheibe kommen. Trocknen Sie die Fasssauna regelmäßig durch aufheizen ohne Aufguss bzw. bei Combi-Ofen mittels Nachtrockenprogramm. ●... - Page 13 Montageanleitung S. 5/8 ● Gabelschlüssel ● Universalmesser ● Leiter ● Säge Dieses Symbol kennzeichnet Tipps und nützliche Hinweise Vorbohren Ablängen auf Naturmaß Annageln Verkabelung vornehmen Überprüfung des rechten Winkel: 80 cm Vorsichtiger Umgang mit Glas: Besondere Vorsicht gilt den Glaskanten - Gehärtetes Glas kann bei Stößen in kleine Scherben zerspringen. Legen Sie ein Schutzpolster (z.Bsp.: Verpackungs-Karton) unter die Glaskante.
-
Page 14: Wartung Und Reinigung
Montageanleitung S. 6/8 1.5. Wartung und Reinigung ● Die Sauna sollte innen mit einem feuchten Tuch gereinigt werden. Verwenden Sie nur warmes Wasser - bei Bedarf empfehlen wir den Harvia Sauna Cleaner (SAC25040 - Reinigung und Desinfektion) ● Wird die Sauna längere Zeit nicht benutzt, empfehlen wir, die Kabine einmal im Monat aufzuheizen, um Schimmelbildung vorzubeugen. Harzgallen sind kein Reklamationsgrund. -
Page 15: Montage Kabine
Montageanleitung S. 7/8 2. Montage Kabine ACHTUNG! Beachten Sie den Grundriss auf Seite 10 und die Abbildungen ab Seite 9. 2.1. Montage Standfüße Legen Sie die imprägnierten Standfüße[1,33] auf das Fundament (siehe Seite 9) wie dies in der Darstellung angezeigt ist (siehe Seite 12). Fixieren Sie diese provisorisch mit zwei Dauben[3]. Beachten Sie, dass die Standfüße parallel montiert werden. Stromzufuhr beachten! 2.2. Montage Fassdauben Beginnen Sie mit der Verlegung der unteren Daube[2] (mit Abfluss - siehe Seite 13). Die Dauben werden immer mit der Rundung nach oben zeigend zusam- mengesteckt. -
Page 16: Montage Tür
Montageanleitung S. 8/8 Montieren Sie die Spannbänder[24] (siehe Seite 19). Vor dem Spannen der Metallbänder entfernen Sie die Schrauben der Dauben. Beachten Sie, dass die Spannstangen [23,25,26,27] in der unteren Hälfte der Fasssauna platziert werden. Spannen Sie die Metallbänder so fest, dass kein Spalt zwischen den Dauben sichtbar ist. Dies muss regelmäßig kontrolliert und ggf. nachgespannt werden. 2.5. Montage Tür Der Türrahmen[13,17] wird von innen in die Öffnung gestellt. Beachten Sie, dass die Türöffnung nach außen erfolgt - der Türanschlag ist links und rechts möglich. Fixieren Sie die Tür von außen mit den Abdeckleisten[15]. Türgriffe[14] werden von innen verschraubt. 2.6. Montage Inneneinrichtung Montieren Sie die Bankauflageleisten[9] in eine Höhe von ca. 52 cm zur unter- en Daube. Legen Sie die Bänke[18] ein und verschrauben diese mit der Daube. Befestigen Sie die Rückenlehnen[19] ca. 20 cm über der Bank. 2.7. Montage Zubehör Legen Sie den Bodenrost[11] waagrecht ein. Montage Ofenschutzgitter[35,36,37,38] Montage Lüftungsteller[29] innen und Insektenschutzgitter[28] außen. Für die Beleuchtung montieren Sie zuerst die Metallklammern auf der Holzleiste. Klemmen Sie die LED-Leiste[22] ein und bohren an gewünschter Stelle die Ka- beldurchführung (Netzgerät darf außerhalb der Sauna platziert werden) Die Kabelabdeckleisten[21a,b] je nach Kabelverlegung verwenden. -
Page 17: Instructions De Montage
Sauna tonneau KASKI / KUUSI 220 PANORAMA Ø 220 x 220 cm INSTRUCTIONS DE MONTAGE Français KASKI-220-P Pin thermique KUUSI-220-P Épicéa KASKI-220-V Version 04/24 Référence KUUSI-220-p... - Page 18 Table des matières 1. Préparation du montage 1.1. Remarques importantes 1.2. Fondation 1.3. Ancrage du sauna extérieur 1.4. Outils requis 1.5. Entretien et nettoyage 1.6. Élimination 2. Montage de la cabine 2.1. Montage des pieds 2.2. Montage des douves de tonneaux 2.3. Montage des parois avant et arrière 2.4.
-
Page 19: Préparation Du Montage
à tout moment aux informations sur le produit. Vous pouvez également trouver ces instructions de montage dans la zone de téléchargement de notre site Web : www.sentiotec.com/downloads. 1.1. Remarques importantes ● Renseignez-vous auprès de l’autorité locale chargée de la construction (bureau municipal, magistrat) sur les règles de construction et les normes... -
Page 20: Fondation
Instructions de montage p. 4/8 ● En cas de pluie, il peut y avoir des infiltrations d’eau - le sauna tonneaux n’est pas étanche à 100%. Pour l’évacuation de l’eau au sol, deux trous sont prépercés dans la rainure de la lame de sol. Ceux-ci doivent être ouverts vers après le montage des bandes d’acier afin que l’eau puisse s’écouler. ● L’eau de condensation peut provoquer des taches sur le bois, en particulier sous la vitre. Séchez régulièrement le sauna à tonneau en le faisant chauffer sans arroser les pierres ou, dans le cas du poêle combi, en utilisant le pro- gramme de séchage nocturne. ● Lorsque vous utilisez un chauffe-sauna électrique, notez: - a commande externe du sauna doit être de classe de protection IP65 ou - Installation de la commande externe du sauna dans un boîtier de protec- tion ●... - Page 21 Instructions de montage p. 5/8 ● Clé à fourche ● Couteau universel ● Échelle ● Scie Ce symbole désigne les conseils et indications utiles. Préalésage Sciage à la bonne longueur Clouage Réalisation du câblage Contrôle de l’angle droit : 80 cm Manipulez le verre avec soin : Faire particulièrement attention avec les bords de la vitre ; en cas de choc, le verre trempé peut se briser en petits morceaux. Placez un rembourrage de protection (par ex., un emballage en carton) sous le bord de la vitre.
-
Page 22: Entretien Et Nettoyage
Instructions de montage p. 6/8 1.5. Entretien et nettoyage ● L’intérieur du sauna doit être nettoyé à l’aide d’un chiffon humide. Utilisez uniquement de l’eau chaude - si nécessaire, nous vous recommandons d’uti- liser le produit Harvia Sauna Cleaner (SAC25040 - nettoyage et désinfection) ● Si le sauna n’est pas utilisé pendant une période prolongée, nous recom- mandons de chauffer la cabine une fois par mois pour prévenir la formation de moisissures. Les poches de résine ne constituent pas un motif de réclamation. Parce que les galles de résine se produisent souvent dans le bois d’épicéa et le pin thermique et que vous ne pouvez pas déterminer à... -
Page 23: Montage De La Cabine
Instructions de montage p. 7/8 2. Montage de la cabine ATTENTION ! Référez-vous au plan de la page Page 10 et aux illustrations à partir de la page Page 9. 2.1. Montage des pieds Posez les pieds imprégnés[1,33] sur la fondation (voir page 9) comme indiqué sur le schéma (voir page 12). Fixez-les provisoirement à l’aide de deux douves[3]. Veillez à ce que les pieds soient montés en parallèle. Faites attention à... -
Page 24: Montage De La Porte
Instructions de montage p. 8/8 Mettez en place les colliers de serrage[24] (voir page 19). Avant de tendre les bandes métalliques, retirez les vis des douves. Veillez à ce que les barres de tension[23,25,26,27] soient placées dans la moitié inférieure du sauna tonneau. Tendez les bandes métalliques de manière à ce qu’il n’y ait aucun espace visible entre les douves. Cela doit être régulièrement contrôlé et resserré si nécessaire. 2.5. -
Page 25: Istruzioni Di Montaggio
Sauna a botte KASKI 220 PANORAMA Ø 220 x 220 cm ISTRUZIONI DI MONTAGGIO Italiano KASKI-220-P Pino termico KUUSI-220-P Abete rosso KASKI-220-P Versione 04/24 Codice articolo KUUSI-220-P... - Page 26 Indice 1. Preparazione per il montaggio 1.1. Indicazioni importanti 1.2. Fondamenta 1.3. Ancoraggio della sauna all’aperto 1.4. Attrezzi necessari 1.5. Manutenzione e pulizia 1.6. Smaltimento 2. Montaggio cabina 2.1. Montaggio dei piedi di appoggio 2.2. Montaggio delle doghe della botte 2.3.
-
Page 27: Preparazione Per Il Montaggio
è possibile controllare in qualsiasi momento le informazioni relative al prodotto. Le presenti istruzioni di montaggio sono disponibili anche nella sezione download del nostro sito web all’indirizzo: www.sentiotec.com/downloads. 1.1. Indicazioni importanti ● Informatevi presso l’autorità edilizia competente locale (ufficio comunale o autorità comunali) per i regolamenti edilizi e gli standard di carico. -
Page 28: Fondamenta
Istruzioni di montaggio P. 4/8 ● In caso di pioggia può entrare dell’acqua: la botte della sauna non è imperme- abile al 100%. Per far defluire l’acqua dal pavimento, nella scanalatura della parete anteriore e posteriore della doga inferiore sono stati praticati due fori. Dopo il montaggio delle cerniere in acciaio, questi fori devono essere aperti sul fondo, in modo che l’acqua possa defluire. ● La condensa può causare macchie d’acqua, soprattutto sotto il vetro. Asciugare regolarmente la sauna a botte riscaldandola senza infusione o, nel caso dei riscaldatori Combi, utilizzando il programma di asciugatura notturna. ● Quando si utilizza un riscaldatore elettrico per sauna, tenere presente che: - L’unità... - Page 29 Istruzioni di montaggio P. 5/8 ● Chiave fissa ● Cutter ● Scala ● Sega Questo simbolo indica consigli e indicazioni utili Preforatura Taglio alla lunghezza effettiva Inchiodamento Cablaggio Verifica dell’ortogonalità: 80 cm Maneggiare il vetro con cura: particolare attenzione deve essere prestata ai bordi del vetro – il vetro temprato può frantumarsi in piccoli pezzi in caso di impatto. Inserire un cuscino di protezione (ad es: scatola di cartone) sotto il bordo del vetro.
-
Page 30: Manutenzione E Pulizia
Istruzioni di montaggio P. 6/8 1.5. Manutenzione e pulizia ● La sauna all’interno deve essere pulita con un panno umido. Utilizzare solo acqua calda, se necessario si consiglia Harvia Sauna Cleaner (SAC25040 - Pulizia e disinfezione) ● Se la sauna non viene utilizzata per un tempo prolungato, si consiglia di riscaldare la cabina una volta al mese per evitare la formazione di muffe. ● Le tasche di resina non sono motivo di reclamo. Perché nel legno di abete rosso e di pino cembro spesso si formano depositi di resina e quando li si seleziona non è... -
Page 31: Montaggio Cabina
Istruzioni di montaggio P. 7/8 2. Montaggio cabina ATTENZIONE! Osservare la pianta a Pagina 10 e le figure da Pagina 9. 2.1. Montaggio dei piedi di appoggio Posizionare i piedi di appoggio impregnati[1,33] sulle fondamenta (vedere pagina 9) come mostrato nell’illustrazione (vedere pagina 12). Fissarli temporaneamente con due doghe[3]. Assicurarsi che i piedi di appoggio siano montati parallelamente. Osservare l’alimentazione elettrica! 2.2. -
Page 32: Montaggio Della Porta
Istruzioni di montaggio P. 8/8 Montare le fasce di tensione[24] (vedere pagina 19). Prima di tendere le fasce metalliche, rimuovere le viti dalle doghe. Si noti che le aste di tensione[23,25,26,27] sono posizionate nella metà inferiore della sauna a botte. Stringere le fasce metalliche in modo che non sia visibile alcuno spazio tra le doghe. Questo deve essere controllato regolarmente e, se necessario, riserrare. 2.5. Montaggio della porta Inserire il telaio della porta[13,17] nell’apertura dall’interno. Si noti che l’apertura della porta è... - Page 33 Vatsauna KASKI / KUUSI 220 PANORAMA Ø 220 x 220 cm MONTAGEHANDLEIDING Nederlands KASKI-220-P Thermo grenen KUUSI-220-P Sparren KASKI-220-P Versie 04/24 Artikel-nr. KUUSI-220-P...
- Page 34 Inhoudsopgave 1. Montagevoorbereiding 1.1. Belangrijke aanwijzingen 1.2. Fundering 1.3. Verankering van de buitensauna 1.4. Vereist gereedschap 1.5. Onderhoud en reiniging 1.6. Afvoer 2. Montage cabine 2.1. Montage voeten 2.2. Montage vatduigen 2.3. Montage voor- en achterwand 2.4. Voltooiing van het vat 2.5.
-
Page 35: Montagevoorbereiding
Lees deze montagehandleiding goed door en bewaar hem goed. Zo kunt u te allen tijde productinformatie nalezen. U vindt deze montagehandleiding ook in de downloadsectie op onze website www.sentiotec.com/downloads. 1.1. Belangrijke aanwijzingen ● Informeer u bij uw verantwoordelijke bouwinstantie (gemeentekantoor, ma- gistraat) naar de bouwvoorschriften en belastingsnormen. -
Page 36: Fundering
Montagehandleiding Pag. 4/8 ● Als het regent kan er water naar binnen komen – de saunabarrel is niet 100% dicht. Om water uit de vloer af te voeren, worden in de groef voor de voor- en achterwanden van de onderste duig twee gaten voorgeboord. Nadat de stalen strips zijn geplaatst, dienen deze aan de onderkant open te zijn zodat het water kan weglopen. ● Condensatie kan watervlekken veroorzaken, vooral onder de ruit. Droog de vatsauna regelmatig door deze op te warmen zonder infusie of, in het geval van een combi-oven, met behulp van het nadroogprogramma. ● Let bij gebruik van een elektrische saunakachel op het volgende: - externe saunabediening moet beschermingsklasse IP65 hebben of - Installatie van de externe saunabesturing in een beschermende behuizing ●... - Page 37 Montagehandleiding Pag. 5/8 Dit symbool kenmerkt tips en nuttige aanwijzingen Voorboren Inkorten op natuurmaat Vastspijkeren Bekabeling monteren Controle van de rechte hoek: 80 cm Voorzichtige omgang met glas: met de glazen randen dient u bijzonder voorzichtig om te gaan – gehard glas kan door stoten in kleine scherven versplinteren. Leg een beschermende ondergrond (bijv.: verpakkingskar- ton) onder de glazen rand.
-
Page 38: Onderhoud En Reiniging
Montagehandleiding Pag. 6/8 1.5. Onderhoud en reiniging ● De sauna moet vanbinnen met een vochtige doek worden gereinigd. Ge- bruik alleen warm water - indien nodig adviseren wij Harvia Sauna Cleaner (SAC25040 - reiniging en desinfectie). ● Als de sauna voor langere tijd niet wordt gebruikt, adviseren wij de cabine een keer per maand te verwarmen om schimmel te voorkomen. Harsbuilen gelden niet als reclamatiereden. Omdat in sparrenhout van nature harsbuilen kunnen voorkomen en bij het sorteren niet kan worden herkend in welke diepte ze zich bevinden. -
Page 39: Montage Cabine
Montagehandleiding Pag. 7/8 2. Montage cabine LET OP! Neem de plattegrond op pagina 10 en de afbeeldingen vanaf pagina 9 in acht. 2.1. Montage voeten Leg de impregneerde standvoeten [1,33] op de fundering (zie pagina 9) zoals aangegeven in de afbeelding (zie pagina 12). Zet deze voorlopig vast met twee duigen [3]. De standvoeten moeten parallel worden gemonteerd. -
Page 40: Montage Deur
Montagehandleiding Pag. 8/8 Monteer de spanbanden [24] (zie pagina 19). Voor het spannen de metaalbanden eerst de schroeven van de duigen verwij- deren. Let op dat de spanstangen [23,25,26,27] in de onderste helft van de vatsauna worden geplaatst. Span de metaalbanden zodanig dat er geen spleet tussen de duigen meer zichtbaar is. Dit moet regelmatig worden gecontroleerd; eventueel moet wor- den nagespannen. - Page 41 Pictures p. 9/23 1600 1600 1600 1600 1600 1600 1600 1600 1600 1600 1600 1600...
- Page 42 Pictures p. 10/23 1600 2200...
- Page 43 Pictures p. 11/23 2095 x 817 x 65 mm 2157 x 1025 x 65 mm 2160 x 1135 x 40 mm 585 x 332 x 65 mm 2095 x 817 x 65 mm 525 x 133 x 65 mm 1660 x 45 x 16 mm 1690 x 28 x 28 mm 650 x 45 x 16 mm 646 x 28 x 28 mm...
- Page 44 S - 12 pcs Pictures p. 12/23 2.1. 36 Pcs. 2,5 x 16 4,5 x 70 A = B mm=mm...
- Page 45 Pictures p. 13/23 2.2. 4,5 x 70...
- Page 46 Pictures p. 14/23 4,5 x 70 2.3. 16 Pcs. 3,5 x 40...
- Page 47 Pictures p. 15/23 3,5 x 50 3 Pcs. 3,5 x 50 4 x 70...
- Page 48 Pictures p. 16/23 3,2 x 40 3 x 25 1 1 2 3...
- Page 49 Pictures p. 17/23 2.4. 4 x 70 4 x 70 Optional 3 x 25 Sensor F1...
- Page 50 Pictures p. 18/23 8 Pcs. 3,5 x 50 4 x 70 Optional...
- Page 51 Pictures p. 19/23 25+26...
- Page 52 Pictures p. 20/23 2.5. 14 Pcs. 4 x 60 4 x 60 3 Pcs. 4,5 x 60 2 x 4 Pcs. 3,2 x 40 4 x 60...
- Page 53 Pictures p. 21/23 2.6. 4 Pcs. 4 x 70 12 Pcs. 5 x 70 2.7. 8 Pcs. 37 38 4 x 60 4 Pcs. 3,5 x 40 3,2 x 40...
- Page 54 Pictures p. 22/23 6 Pcs. 3,5 x 40 4 Pcs. 4 x 60 6 Pcs. 3 x 25 8 Pcs. 3,5 x 50...
- Page 55 Pictures p. 23/23 2.8. 2200 2200 3 x 25 3 x 25 28 Pcs. 4 x 60...
- Page 56 GmbH | Division of Harvia Group | Wartenburger Straße 31, A-4840 Vöcklabruck T +43 (0) 7672/22 900-50 | F -80 | info@sentiotec.com | www.sentiotec.com...
Need help?
Do you have a question about the KASKI-220-P and is the answer not in the manual?
Questions and answers