Advertisement
ZUMMESH-JBOX Series
Zūm™ Mesh Wireless J-Box Load Controllers
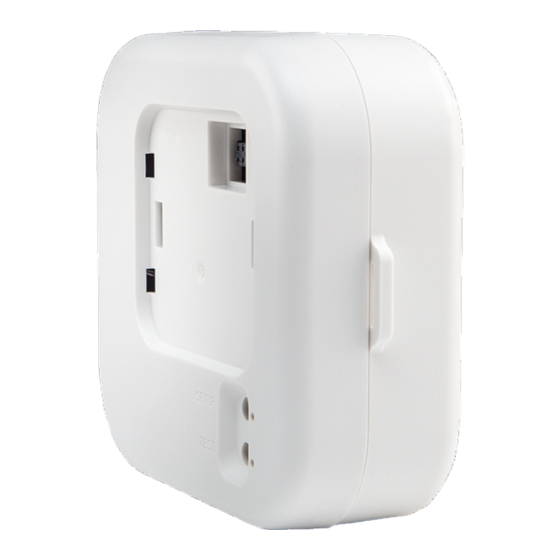
The Crestron® ZUMMESH-JBOX load controller provides sophisticated
lighting control with simple installation. The ZUMMESH-JBOX mounts
directly to a 4 in. square junction box and pairs wirelessly with one or more
Zūm wireless keypads.
The following ZUMMESH-JBOX Devices are available:
ZUMMESH-JBOX-5A-LV: 0-10 V Dimmer, 5 A, 100-277 V
l
ZUMMESH-JBOX-16A-LV: 0-10 V Dimmer, 16 A, 100-277 V
l
ZUMMESH-JBOX-16A-LV-EM: 0-10 V Dimmer, 16 A, 100-277 V,
l
Emergency Load Controller
ZUMMESH-JBOX-20A-SW: High Inrush Switch, 20 A, 100-277 V
l
ZUMMESH-JBOX-20A-PLUG: Plug Load Switch, 20 A, 100-240 V
l
ZUMMESH-JBOX-PSU: Power Supply
l
In the Box
1
ZUMMESH-JBOX, Zūm™ Mesh Wireless J-Box Load
Controller
Additional Items
1
Yellow Wire Nut, 22-10 AWG (2049245)
1
Locknut (2047626)
Quick Start
1
Advertisement
Table of Contents

Related Manuals for Crestron ZUMMESH-JBOX Series


Summary of Contents for Crestron ZUMMESH-JBOX Series
- Page 1 Quick Start ZUMMESH-JBOX Series Zūm™ Mesh Wireless J-Box Load Controllers The Crestron® ZUMMESH-JBOX load controller provides sophisticated lighting control with simple installation. The ZUMMESH-JBOX mounts directly to a 4 in. square junction box and pairs wirelessly with one or more In the Box Zūm wireless keypads.
-
Page 2: Installation
Quick Start ZUMMESH-JBOX Series Zūm™ Mesh Wireless J-Box Load Controllers ZUMMESH-JBOX-5A-LV, ZUMMESH-JBOX-16A-LV, and ZUMMESH-JBOX-20A-SW Wiring Installation WARNING: To avoid fire, shock, or death, turn off the power at the circuit breaker or remove the fuse and test that the power is off... - Page 3 Quick Start ZUMMESH-JBOX Series Zūm™ Mesh Wireless J-Box Load Controllers ZUMMESH-JBOX-20A-PLUG Wiring ZUMMESH-JBOX-PSU Wiring...
- Page 4 Quick Start ZUMMESH-JBOX Series Zūm™ Mesh Wireless J-Box Load Controllers ZUMMESH-JBOX-16A-LV-EM Wiring IMPORTANT SAFEGUARDS: When using electrical equipment, basic safety precautions should always be followed including the following: READ AND FOLLOW ALL SAFETY INSTRUCTIONS. Do not mount near gas or electric heaters.
-
Page 5: Emergency Lighting
Quick Start ZUMMESH-JBOX Series Zūm™ Mesh Wireless J-Box Load Controllers Emergency Lighting The ZUMMESH-JBOX-16A-LV-EM provides emergency load control to Creating and Modifying Zūm Spaces meet UL® 924 standards. Refer to Installation to install the device. The device operates as a standard J-box load controller in normal How to Set Up a Zūm Space and Add Zūm Devices... - Page 6 Quick Start ZUMMESH-JBOX Series Zūm™ Mesh Wireless J-Box Load Controllers Using a J-Box Device or AV Bridge Using a Keypad, Dimmer, or Switch To create a new Zūm space using a J-box device or an AV Bridge: To create a new Zūm space using a keypad, dimmer, or switch: 1.
- Page 7 Quick Start ZUMMESH-JBOX Series Zūm™ Mesh Wireless J-Box Load Controllers Add Zūm Devices to the Zūm Space Adding a Keypad, Dimmer, or Switch To add a keypad, dimmer, or switch to a Zūm space: After a new Zūm space is created, add Zūm devices while the space is in Joining mode.
- Page 8 Quick Start ZUMMESH-JBOX Series Zūm™ Mesh Wireless J-Box Load Controllers Add a Zūm Device to an Existing Zūm Space Using a Keypad, Dimmer, or Switch Add the Zūm device using a keypad, dimmer, or switch: Add new Zūm devices to an existing Zūm space by placing the Zūm space in Joining mode.
- Page 9 Quick Start ZUMMESH-JBOX Series Zūm™ Mesh Wireless J-Box Load Controllers If the J-box module needs to be removed, place your thumb on the side of the J-box module that is closest to the J-box and gently push the module away from the J-box. The module should easily separate from the J-box Attach a J-Box Module device.
- Page 10 Quick Start ZUMMESH-JBOX Series Zūm™ Mesh Wireless J-Box Load Controllers Connect the Network Bridge to the Calibrate and Test the Daylight Zūm Net Wireless Gateway Sensor The Zūm Network Bridge connects wirelessly to the Zūm Net Wireless To enable daylight harvesting, calibrate and then test the daylight sensor Gateway to form a centrally managed, enterprise-wide lighting control after all devices are installed and powered in the Zūm space.
- Page 11 Quick Start ZUMMESH-JBOX Series Zūm™ Mesh Wireless J-Box Load Controllers Calibrate the Daylight Sensor Test the Daylight Sensor To calibrate the Daylight Sensor: Test mode is used to verify that the settings stored during calibration are correct. Changes to the amount of light in the space result in rapid light 1.
- Page 12 Grouping menu will open. All keypads in the selected Zūm room are the keypad: listed. Zūm App Binding configuration: Crestron recommends using the Zūm configuration app to bind keypads to specific loads. A mobile device with the Zūm app installed is needed.
- Page 13 Quick Start ZUMMESH-JBOX Series Zūm™ Mesh Wireless J-Box Load Controllers Local Binding Configuration 4. Tap the check box to the left of the device's name to bind the keypad to that device. When selected, the box will contain a check mark.
- Page 14 Quick Start ZUMMESH-JBOX Series Zūm™ Mesh Wireless J-Box Load Controllers Remote Binding Configuration 2. At each load controller in the space, press and hold the top button until the LED lights (about 7 seconds) to change whether it is bound or not Remote Binding configuration is used when all load controllers in the Zūm...
- Page 15 Quick Start ZUMMESH-JBOX Series Zūm™ Mesh Wireless J-Box Load Controllers 2. Press and hold the bottom button of the keypad until a set of lights in 4. Press the top button of the keypad to assign the load controller as the space starts to flash on and off (about 3 seconds). The flashing bound or not bound to the keypad.
- Page 16 Quick Start ZUMMESH-JBOX Series Zūm™ Mesh Wireless J-Box Load Controllers 4. De-select any devices that the keypad is bound to and tap Save Program Keypad Buttons with the selected associations. When de-selected, no check marks will appear in the check boxes to the left of the device names.
-
Page 17: Manual Method
Quick Start ZUMMESH-JBOX Series Zūm™ Mesh Wireless J-Box Load Controllers Manual Method Manual method to change the scene for On (Scene 1): Change the Default Scene NOTE: Scene 2 and Scene 3 can also be changed. The Zūm keypad buttons recall predefined scenes (light levels) that are stored in the load controllers. -
Page 18: Remote Method
Quick Start ZUMMESH-JBOX Series Zūm™ Mesh Wireless J-Box Load Controllers 4. Repeat steps 2 and 3 for each SCENE button. 5. Press the bottom button on the keypad 3 times to exit Scene Setting mode. Remote Method Remote Method is used to change the scene for On (Scene 1), Scene 2, or 3. -
Page 19: Factory Reset
Quick Start ZUMMESH-JBOX Series Zūm™ Mesh Wireless J-Box Load Controllers Factory Reset a Keypad, Dimmer, or Switch To factory reset a keypad, dimmer, or switch, press and hold the top and Factory Reset bottom buttons until the LED lights (about 5 seconds), and then release both buttons. - Page 20 Crestron, the Crestron logo, and Zūm are either trademarks or registered trademarks of Crestron Electronics, Inc. in the United States and/or other countries. UL is either a trademark or registered trademark of UL LLC in the United States and/or other countries.
Need help?
Do you have a question about the ZUMMESH-JBOX Series and is the answer not in the manual?
Questions and answers