Table of Contents
Advertisement
Quick Links
Advertisement
Table of Contents

Related Manuals for Progression Fitness X-plode BK-3000F


Summary of Contents for Progression Fitness X-plode BK-3000F
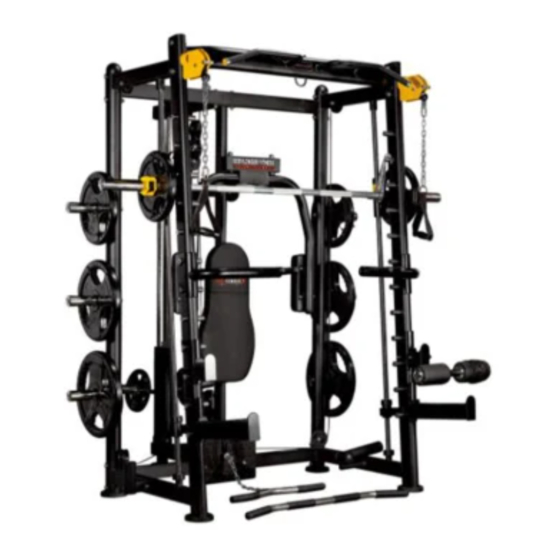
- Page 1 BK-3000F MULTIFUNCTION SMITH Assembly Instructions 综 合 训 练 器...
-
Page 2: Table Of Contents
Table of Contents Spare parts list ..............................3 Spare parts list ..............................4 Assembly step(1) ............................5-6 Assembly step(2) ............................7-8 Assembly step(3) ............................. 9-10 Assembly step(4) ........................... 11-12 Assembly step(5) ........................... 13-14 Assembly step(6) ........................... 15-16 Assembly step(7) ........................... 17-18 Assembly step(8)... -
Page 3: Spare Parts List
Spare parts list Description Note Qty. back ground link tube left frame right frame front up link tube short up link tube left short up link tube right fixing plate t3.0*59*140 hexagon bolt M10*100 washer Φ10 lock nut hexagon bolt M12*75 washer Φ12... - Page 4 Spare parts list Description Note Qty. help cable L=2370mm pulley catch plate help weight hexagon bolt M12*70 short down link tube left short down link tube right hexagon bolt M10*70 sliding sleeve left sliding sleeve right guide tube T shape locking spring pin Φ10 bird up cable L=3542mm...
- Page 5 Fasteners drawing Installation tools 14-17 SPANNER 1PCS 17-19 SPANNER 2PCS 6MM INNER HEXAGON SPANNER 1PC 4MM INNER HEXAGON SPANNER 1PC Bolt length measurement ruler...
-
Page 6: Assembly Step(1
Assembly step(1)explosion drawing No. Description Note Qty. left frame right frame washer Φ10 lock nut washer Φ12 pulley hexagon bolt M10*50 help cable pulley catch plate Φ10 help weight... - Page 7 Assembly step(1)drawing Assembly step(1)assembly instruction 1. Put help cable(47 ) end through Φ12washer(12) fastening on help weight(49),put help weight(49) into left frame and right frame 2. Fix4 pulley(38) respectively fastening on left frame and right frame using::M10*50 hexagon bolt(46), Φ10 washer(9),M10 lock nut (10),pulley catch plate(48)let help cable(47) on pulley above, on pulley catch plate(47) below CAUTION: Please check machine all:...
-
Page 8: Assembly Step(2
Assembly step(2)explosion drawing No. Description Note Qty. back ground link tube front up link tube short up link tube left short up link tube right fixing plate hexagon bolt M10*100 washer φ10 10 lock nut hexagon bolt M12*75 washer Φ12 lock nut back up link tube hexagon bolt... - Page 9 Assembly step(2)drawing Assembly step(2)assembly instruction 1. Connect left frame, right frame with front back up tube ( 28) using: M10*20 hexagon bolt (34), Φ10 washer (9), M10 lock nut (10 ) 2. Connect left frame (2), right frame (3) with back ground link tube (1) using: M10*100 hexagon bolt (8), Φ10 washer (9), fixing plate ( 7 ), M10 lock nut (10 ) 3.
-
Page 10: Assembly Step(3
Assembly step(3)explosion drawing No. Description Note Qty. washer Φ12 barbell bar guide rod barbell bar sleeve hexagon bolt M12*40 barbell bar plug headless hexagon socket bolt M8*10 guide rod lock sleeve sliding sleeve left sliding sleeve right rubber cushion afety hook left safety hook right spring washer Φ12... - Page 11 Assembly step(3)drawing Assembly step(3)assembly instruction 1. Hang outside barbell bar (16) on left frame and right frame 2. Through inside barbell bar(90) into outside baibell bar(16) 3. Guide rod(17) turn into weight stack rubber cushion (25), safety hook left (26), weight stack rubber cushion (25), sliding sleeve left(23), guide rod lock sleeve(22) Plug sliding sleeve left(23) on inside barbell bar (90),plug guide rod(17) on left frame...
-
Page 12: Assembly Step(4
Assembly step(4)explosion drawing No. Description Note Qty. washer Φ10 washer Φ12 headless hexagon socket bolt back guide rod back sliding sleeve rubber cushion footplate hexagon bolt M10*25 hexagon bolt M10*20 hexagon bolt M10*95 hexagon bolt M12*30 spring washer Φ12 back up link tube back sliding sleeve barbell plate hang bar... - Page 13 Assembly step(4)drawing Assembly step(4)assembly instruction 1. Fix back guide rod(29) fastening on back short ground link tube(91) using::M10*20 hexagon bolt(34),Φ10 washer(9) 2. From back guide rod(29) top turn into rubber cushion (31),back sliding sleeve (30) 3. Plug back guide rod(29) with back up link tube(91) Fix back up link tube (88) fastening on front up link tube(28) using: M12*30 hexagon bolt (60), Φ12 spring washer (86), Φ12 washer (12) 4.
-
Page 14: Assembly Step(5
Assembly step(5)explosion drawing No. Description Note Qty. washer Φ10 lock nut short bar 10 section chain + snap hook pulley Φ95*Φ10.5*25.4 low pull cable L=4430mm “-” shape pulley frame hexagon bolt M10*45... - Page 15 Assembly step(5)drawing low pull cable drawing low pull cable end Assembly step(5)assembly instruction 1. Fix 4 pulley(38) on point: A,B,D,E using: M10*45 hexagon bolt(41),Φ10 washer(9),M10 lock nut(10) 2. Fix pulley (38) on “-“shape pulley frame point C using: M10*45 hexagon bolt (41), Φ10 washer (9), and M10 lock nut (10) 3.
-
Page 16: Assembly Step(6
Assembly step(6)explosion drawing No. Description Note Qty. washer Φ10 lock nut pulley Φ95*Φ10.5*25.4 hexagon bolt M10*45 middle cable L=1840mm pulley plate 5 section chain + snap hook... - Page 17 Assembly step(6)drawing Assembly step(6)assembly instruction 1. Put middle cable (42) end through Φ12 washer (12), fix cable hook (43) fastening on double pulley plate (44) 2. Put 5 section chain + hoist hook (45) hang on middle cable (42), other end hang on back ground link tube 3.
-
Page 18: Assembly Step(7
Assembly step(7)explosion drawing No. Description Note Qty. washer Φ10 10 lock nut hexagon bolt M10*25... - Page 19 Assembly step(7)drawing Help cable end Assembly step(7)assembly instruction 1. Fix help cable end on sliding sleeve right and left using::M10*20 hexagon bolt(33),Φ10 washer(9),M10 lock nut (10)
-
Page 20: Assembly Step(8
Assembly step(8)explosion drawing No. Description Note Qty. washer Φ12 lock nut hexagon bolt M12*70 short down link tube left short down link tube right... - Page 21 Assembly step(8)drawing Assembly step(8)assembly instruction 1. Fix short down link tube left (51) fastening on left frame using: M12*70 hexagon bolt (50), Φ12 washer (12), M12 lock nut (13) 2. Fix short down link tube right (52) fastening on right frame using: M12*70 hexagon bolt (50), Φ12 washer (12), M12 lock nut (13) CAUTION: hexagon bolt should be tightening.
-
Page 22: Assembly Step(9
Assembly step(9)explosion drawing No. Description Note Qty. washer Φ10 lock nut hexagon bolt M10*70 sliding sleeve left sliding sleeve right guide tube T shape locking spring pin Φ10 hexagon bolt M10*75... -
Page 23: Assembly Step(10
Assembly step(9)drawing Assembly step(10)assembly instruction 1. Fix sliding sleeve left(54) fastening on guide tube(56) using: T shape locking spring pin (57) Fix guide tube(56) fastening on short up link tube left and short down link tube right using: M10*75 hexagon bolt(71),Φ10 washer(9),M10 lock nut (10) 2. - Page 24 Assembly step(10)explosion drawing No. Description Note Qty. washer Φ10 lock nut hexagon bolt M10*25 pulley Φ95*Φ10.5*25.4 “-” shape pulley frame hexagon bolt M10*45 bird up cable L=3542mm...
- Page 25 Assembly step(10)cable drawing...
-
Page 26: Assembly Step(11
Assembly step(10)drawing Assembly step(11)assembly instruction 1. Fix bird up cable(58)one end fastening on left frame using: M10*25 hexagon bolt(33),Φ10 washer(9),M10 lock nut (10) then fix bird up cable(58) end fastening on sliding sleeve left using: Φ10 washer(9),M10 lock nut (10) 2. - Page 27 Assembly step(11)explosion drawing No. Description Note Qty. washer Φ10 lock nut pulley Φ95*Φ10.5*25.4 hexagon bolt M10*45 bird down cable L=10690mm...
- Page 28 Assembly step(11)cable drawing Bird down cable drawing...
-
Page 29: Assembly Step(12
Assembly step(11)drawing Assembly step(12)assembly instruction 1. Fix 10 pulley(38) respectively fastening on 10 point: I,J,K,L,M,N,O,P,Q,R using: M10*45 hexagon bolt(41), Φ10 washer(9),M10 lock nut (10) 2. Remove bird down cable (59) ball head 3. Put bird down cable(59) headless end from point G in turn through point: H,I,J,K,L,M,N,O,P,Q,R,S,T Put the ball head back to bird down cable(59) - Page 30 Assembly step(12)explosion drawing No. Description Note Qty. barbell plate hang bar butterfly clip hexagon bolt M8*20 washer Φ8...
-
Page 31: Assembly Step(13
Assembly step(12)drawing Assembly step(13)assembly instruction 1. Fix 10 barbell plate hang bar (61) respectively fastening on left frame and right frame using: M8*20 hexagon bolt (64)) Φ8 washer (66) 2. Fix 14 butterfly clips (62) respectively on barbell plate hang bar (61), barbell bar pipe plug &... - Page 32 Assembly step(13)explosion drawing No. Description Note Qty. shield hexagon bolt M8*20 spring washer Φ8 washer Φ8...
-
Page 33: Assembly Step(14
Assembly step(13)drawing Assembly step(14)assembly instruction 1. Fix shield respectively fastening on back ground link tube & back up link tube using: M8*20 hexagon bolt(64), Φ8 spring washer(65), Φ8 washer(66) CAUTION: hexagon bolt should be tightening. - Page 34 Assembly step(14)explosion drawing No. Description Note Qty. 10 section chain + snap hook horizontal bar left horizontal bar right T shape pin Φ10*75 tie-rod quick hook snap hook handle pull belt...
-
Page 35: Assembly Step(15
Assembly step(14)drawing Assembly step(15)assembly instruction...
Need help?
Do you have a question about the X-plode BK-3000F and is the answer not in the manual?
Questions and answers