Table of Contents
Advertisement
Quick Links
Part # 42820-01
ASSEMBLY INSTRUCTIONS, USE & CARE GUIDE AND WARRANTY
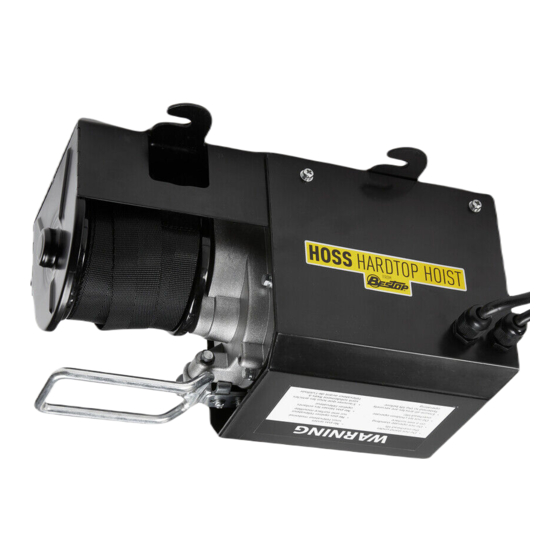
RESIDENTIAL MOTORIZED LIFT SYSTEM
Vehicule application:
ALL JEEP
WRANGLER AND GLADIATOR HARDTOP
®
Watch our installation video at https://www.bestop.com/video-library
We're here to help! Go to: https://www.bestop.com and click on Need Help?
Questions, problems, missing parts? Before returning to the store, call Bestop customer service
1-800-845-3567
8 a.m. – 5 p.m., EST, Monday – Friday / info@bestop.com
BESTOP.COM
Advertisement
Table of Contents

Summary of Contents for Bestop HOSS HARDTOP HOIST
- Page 1 Watch our installation video at https://www.bestop.com/video-library We’re here to help! Go to: https://www.bestop.com and click on Need Help? Questions, problems, missing parts? Before returning to the store, call Bestop customer service 1-800-845-3567 8 a.m. – 5 p.m., EST, Monday – Friday / info@bestop.com...
-
Page 2: Table Of Contents
STEP 12 – Adjust straps and lift roof .......................... 17 STEP 13 – Install the freedom hook to the wall ......................18 Operating instructions ..............................18 Contact information/Maintenance/Specifications ...................... 18 Warranty ..................................19-20 P2 – 4282001 Rev. A 0720 Installation instructions – HOSS HARDTOP HOIST ©BESTOP 2020, inc. -
Page 3: Safety Information
WARNING: THIS IS A DO IT YOURSELF (DIY) PROJECT. DO NOT ATTEMPT THIS INSTALLATION WITHOUT A BASIC UNDERSTANDING OF THE CONTENTS IN THESE ASSEMBLY INSTRUCTIONS. IF YOU ARE NOT CONFIDENT WITH LOCATING AND ANCHORING THE HOSS HARDTOP HOIST TO THE CEILING JOISTS, DO NOT ATTEMPT THIS INSTALLATION WITHOUT SOMEONE WHO IS. -
Page 4: Hardware And Required Tools
Bumper Bolt Drywall screw & plug 30 mm screw ¼ in. (6 mm) lock nut Cable tie 200 mm 15 mm hole saw drill bit P4 – 4282001 Rev. A 0720 Installation instructions – HOSS HARDTOP HOIST ©BESTOP 2020, inc. -
Page 5: Box Contents
Do not attempt installation if parts are damaged or missing. If parts of your hoist are missing or appear damaged call Bestop customer service at 1 888 BESTOP, Monday through Friday, 8:00 AM to 5:00 PM Eastern Time. Before calling carefully check the box as parts may be in the packing material. -
Page 6: Installation
Determine motor mounting location on the ceiling □ Choose a location in your garage where you would like to install your Hoss Hardtop Hoist – an unobstructed operating space of at least 3 feet by 4 feet is required. The motor mounting plate (A) should be installed at least 3 feet away from walls or any other obstructions and close to a power supply (preferably a ceiling outlet). -
Page 7: Step 1 - Prepare Ceiling
THE CENTER OF YOUR JOISTS WILL CAUSE YOUR SPACER BAR TO BE OFFSET FROM CENTER OF JOISTS AND MAY CAUSE YOUR HOSS HARDTOP HOIST TO FALL FROM CEILING. Installation instructions – HOSS HARDTOP HOIST P7 – 4282001 Rev. A 0720... -
Page 8: Step 2 - Install The Motor Mounting Plate To The Ceiling
Do not fasten to drywall, particle board, plaster or other such materials. Failure to do this may result in injury or death. P8 – 4282001 Rev. A 0720 Installation instructions – HOSS HARDTOP HOIST ©BESTOP 2020, inc. -
Page 9: Step 3 - Attach The Motor Hoist To The Motor Mounting Plate
WARNING: Slide the motor hoist until the tabs are firmly against the threaded bolts. Do not leave any space between the bolts and the enclosed end of the mounting tabs. Installation instructions – HOSS HARDTOP HOIST P9 – 4282001 Rev. A 0720 ©BESTOP 2020, inc. - Page 10 24 in. 32 in. 48 in. 48 in. SPACER CHANNEL PULLEY BAR SPACER CHANNEL PULLEY BAR 64 in. 72 in. 80 in. 96 in. 96 in. P10 – 4282001 Rev. A 0720 Installation instructions – HOSS HARDTOP HOIST ©BESTOP 2020, inc.
-
Page 11: Step 4 - Connect And Install The Spacer Channel Pulley Bar
□ Place a lag bolt(s) (K) and using the ratchet fasten the bolt(s) into the joist(s) until the spacer channel bar is securely fastened. 16" Installation instructions – HOSS HARDTOP HOIST P11 – 4282001 Rev. A 0720 ©BESTOP 2020, inc. -
Page 12: Step 5 - Install Straps
Cotter pin Hook THE STRAP THAT GOES ACROSS TO THE SPACER BAR NEEDS TO PASS THROUGH THE CUT OUT SECTION OF THE MOUNTING PLATE. P12 – 4282001 Rev. A 0720 Installation instructions – HOSS HARDTOP HOIST ©BESTOP 2020, inc. -
Page 13: Step 6 - Install The Hand Control Switch Holder
WIRE BACK TO THE MOTOR. THIS WAY YOUR EXCESS CABLE WILL BE UP AT THE MOTOR. □ To prevent unauthorized use, the Hoss Hardtop Hoist is equipped with a key lock USE THE SUPPLIED CLIPS TO ATTACH TO feature. When the key is turned to the “OFF” position or removed from the hand THE WALL. -
Page 14: Step 7 - Level
□ Press and hold the rocker switch on the hand control to raise and lower the hook bar. When the hook bar reaches the uppermost travel point, the stopper plate above the cable hook will trigger the limit switch ceasing upward movement. P14 – 4282001 Rev. A 0720 Installation instructions – HOSS HARDTOP HOIST ©BESTOP 2020, inc. -
Page 15: Step 9 - Position Jeepnunder The Hoist
Repeat for rear strap. ratchet to rotate driver hook side cleat Long end Short end loop cleat loop Installation instructions – HOSS HARDTOP HOIST P15 – 4282001 Rev. A 0720 ©BESTOP 2020, inc. -
Page 16: Step 11 - Attach Straps To Roof
□ Attach each strap (C) to the carabiners with the loops on the straps and attach the carabiner to the bracket. Strap Loop Carabiner Bumper Bolt Wing nut Small and Large washer Rubber Bracket bumper Jeep body P16 – 4282001 Rev. A 0720 Installation instructions – HOSS HARDTOP HOIST ©BESTOP 2020, inc. -
Page 17: Step 12 - Adjust Straps And Lift Roof
□ Tighten each strap while keeping the hooks as centered as possible above the roof. Raise the roof to verify that it is level. If needed, adjust straps to level roof. Adjust straps Unlevel Level Make sure your hooks are centered to ensure the roof will lift level. P17 – 4282001 Rev. A 0720 Installation instructions – HOSS HARDTOP HOIST ©BESTOP 2020, inc. -
Page 18: Step 13 - Install The Freedom Hook To The Wall
□ Voltage: 120 V / 60 HZ / 2.35 amps □ Motor: 280 W 3 / 5 HP □ Capacitor: 35uF □ Duty cycle: 2.5 min On, 7.5min Off P18 – 4282001 Rev. A 0720 Installation instructions – HOSS HARDTOP HOIST ©BESTOP 2020, inc. -
Page 19: Warranty
WHAT BESTOP WARRANTS Subject to the terms and conditions of sale, including any terms and conditions set forth by Bestop, Inc. (“Bestop” or “us” or “we”) in our then-current terms of sale on our website (collectively, the “Terms”), Bestop represents and warrants that: the covered products listed in the “Covered Products and Warranty Periods”... - Page 20 Warranty information Part Number 42820-01 HOSS HARDTOP HOIST COVERED PRODUCTS AND WARRANTY PERIODS: The warranty time periods are as follows for Products manufactured by Bestop: BESTOP® LIMITED LIFETIME WARRANTY Trektop® Pro Twill Fabric Top Sunrider® for Hardtop Twill Fabric Top Trektop®...
Need help?
Do you have a question about the HOSS HARDTOP HOIST and is the answer not in the manual?
Questions and answers