Table of Contents
Advertisement
Quick Links
Advertisement
Table of Contents

Subscribe to Our Youtube Channel
Related Manuals for DMX4ALL AuroraDMX Control


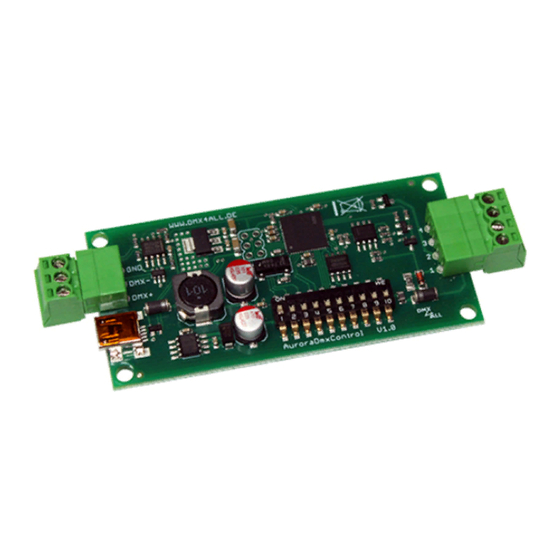
Summary of Contents for DMX4ALL AuroraDMX Control
- Page 1 AuroraDMX Control User Manual...
- Page 2 Up to 128 panels can be run by one AuroraDMX Control. Easy Configuration The starting address is to adjust with the 9 switches at the AuroraDMX Control. TPM2-Protocol The AuroraDMX Control supports the TPM2-Protocol via the USB interface with a virtual COM port (VCP).
-
Page 3: Data Sheet
AuroraDMX Control Data sheet Power supply: 24V DC / 100mA or via USB-Connection Protocol: DMX512 TPM2 via VCP DMX channels: up to 512 DMX-Channels Output: Digital control signal Output protocol: Compatible with Nanoleaf Aurora Panel Color sequence: RGBW Max. Panel number:... - Page 4 AuroraDMX Control Connection View from View from front side ! Back side ! Plugged connector View from View from front side ! back side ! Plugged connector...
- Page 5 AuroraDMX Control Installation with many Panels For a lager installation it is necessary to us a power supply with enough power. According to the manufacturer the power consumption is 2W for each panel. Systems with 30 panels need a power supply at least with 60W.
-
Page 6: Dmx Addressing
AuroraDMX Control DMX-Addressing The DMX-Starting address is adjustable via the DIP-Switches 1-9. Switch 1 has the valency 2 (=1), switch 2 has the valency 2 (=2) and so on, finally switch 9 has the valency 2 (=256). The sum of the switches showing ON, represents the start address. - Page 7 DMX-Start address Automatic Addressing of the panels The panels are addressed automatically by the AuroraDMX Control. The first panel is that, which is directly connected to the AuroraDMX Control. The others are addressed one after the other. DMX IN DMX-...
- Page 8 AuroraDMX Control If all 3 sides are used at one panel so the addressing is according to the clockwise direction and all panels addressed in one path. DMX IN ① DMX- DMX+ DMX OUT ② AuroraDMX Control ② ①...
-
Page 9: Extended Settings
For the extended settings an USB-Connection to a PC with the program DMX-Configurator is needed. The extended settings allow using further functions of the AuroraDMX Control. Please proceed as follows to get the extended settings: Connect the AuroraDMX Control per USB to the PC... -
Page 10: Demo Programs
AuroraDMX Control Demo programs The demo programs available in the AuroraDMX Control can be called up via the switches and without DMX. Switch switch 9 and 10 on ON: Switches 1 up to 4 the demo programs can be selected:... - Page 11 AuroraDMX Control Switches 5, 6 and 7 the color can be selected: White Green Blue Yellow Pink Cyan Black Switches 8 adjust the speed: Fast Slow...
- Page 12 If the DMX start address is set via RDM, all address switches at the AuroraDMX Control must be set to OFF ! A DMX start address set by the address switches is always prior !
- Page 13 AuroraDMX Control Manufacturer depending RDM control commands SERIAL_NUMBER PID: 0xD400 Outputs a text description (ASCII-Text) of the device serial number. Send: PDL=0 Receive: PDL=21 (21 Byte ASCII-Text)
- Page 14 AuroraDMX Control Controlling via TPM2-Protocol With the AuroraDMX Control it is possible to use the TPM2 protocol via USB interface. For this the VCP driver must be installed which creates a virtual COM-Port. The COM-Port-Number can be identified via the device manager.
- Page 15 AuroraDMX Control TPM2 with Jinx! If the AuroraDMX Control is used with Jinx! so the device setting is as shown as follows (here COM10 is used):...
-
Page 16: Factory Reset
Factory Reset Before running the Factory Reset, read all steps carefully. To reset the AuroraDMX Control to delivery state, proceed as follows: Turn off device (Cut the power supply and USB !) Set DIP switch 1 up to 10 to ON Turn on the device The LED lights up 20x during ca. -
Page 17: Firmware Update
No program is allowed to access the USB-Connection. Close the DMX-Configurator and USB-Updater before USB-Cable is connected to the AuroraDMX Control. Do not start the USB-Updater if the DMX AuroraDMX Control is in its update-mode. If an error occurs during the update, you can start from beginning every time. - Page 18 AuroraDMX Control Dimensions All details in mm...
- Page 19 AuroraDMX Control Accessory Nanoleaf Aurora Panel Power supply 24V / 2,5A USB-Cable A-Male / MiniB-Male...
- Page 20 AuroraDMX Control CE-Conformity This assembly is controlled by a microprocessor and uses high frequency. In order to maintain the properties of the module with regard to CE conformity, installation into a closed metal housing in accordance with the EMC directive 2014/30/EU is necessary.
- Page 21 Germany Last changes : 17.06.2020 © Copyright DMX4ALL GmbH All rights reserve. No part of this manual may be reproduced in any form (photocopy, pressure, microfilm or in another procedure) without written permission or processed, multiplied or spread using electronic systems.
Need help?
Do you have a question about the AuroraDMX Control and is the answer not in the manual?
Questions and answers