Table of Contents
Advertisement
Quick Links
Advertisement
Table of Contents

Related Manuals for SolarMax SHT Series


Summary of Contents for SolarMax SHT Series
- Page 1 SolarMax SHT-series 50SHT / 60SHT Instruction Manual...
- Page 2 SolarMax Produktions GmbH Zur Schönhalde 10 D-89352 Ellzee E-Mail: info@solarmax.com © SolarMax Produktions GmbH 2020...
-
Page 3: Table Of Contents
SolarMax Service Center ........ -
Page 5: Notes On The Manual
The plant operator must ensure that this instruction manual is available to the relevant per- sons at all times. If this original document is lost, an up-to-date version of this instruction manual can be downloaded from our website at any time (www.solarmax.com). 1�4... -
Page 6: Safety
Any other use is contrary to the intended use. Inverters of the SHT series may only be used in combination with PV modules which comply with the IEC 61730 standard. Inverters of the SHT series may only be connected to Class II PV generators. -
Page 7: Symbols
Do not open the inverter and do not make modifications or holes of any Removing type. In case these instructions are not observed, then SolarMax does not this label voids the assume any liabilities for damages to persons or properties. -
Page 8: Description
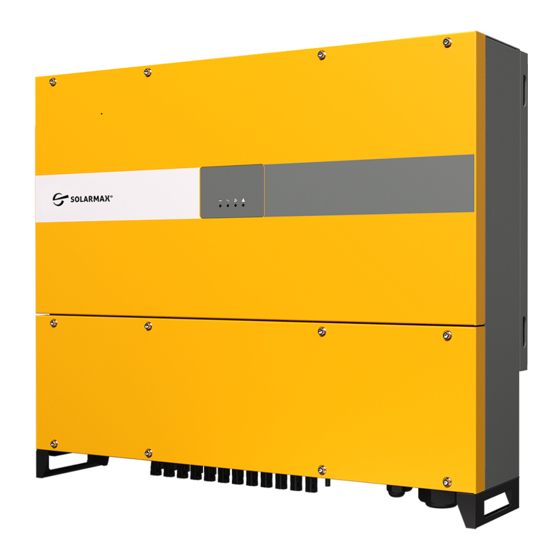
Fig. 1: Label of SolarMax 60SHT 3�2 Function The SolarMax SHT Series inverters have the following characteristics that provide high effi- ciency and high reliability: Wide input DC range, allowing maximum flexibility in the configuration of the PV ■ generator. -
Page 9: Front Panel
Additionally, in the SHT Series inverters integrate the following protection devices: Internal overvoltage ■ DC insulation monitoring ■ Ground fault protection ■ Grid monitoring ■ Current leakage protection ■ DC current monitoring protection ■ DC disconnector integrated ■ Reverse DC polarity protection ■... - Page 10 Warning/Alarm Alarm Grid Comm� Warning Code indicator indicator indicator indicator PV over voltage PV under voltage Weak irradiance PV strings abnormal Inverter overtemperature Internal fan abnormal Insulation resistance abnormal Leakage current abnormal ...
-
Page 11: Connections In The Lower Part
3�4 Connections in the lower part Fig. 3: Connections in the lower part Position Description DC Isolation switch PV Strings terminal Communication interface RS485 interface AC output terminal Vent valve... -
Page 12: Installation
Installation CAUTION! The inverter is a heavy device! To prevent personal injury or device damage, arange two people to move the ■ inverter and handle with care. 4�1 Package contents When the inverter is delivered check and report any damage on the box that may affect its contents. -
Page 13: Selecting The Installation Location
4�2 Selecting the installation location DANGER! Fatal fire or explosion hazard! The inverter is an electrical device with heat generation and the possibility of sparking. Install the inverter in an environment that is free of flammable gases and fluids ■ Never install the inverter near combustible materials. - Page 14 Install the inverter in vertical position with maximum backward inclination of 15°. ■ ≤ 15° OK (max. 15°) Fig. 6: Mounting position of the SHT inverter Make sure the installation base is robust enough to sustain the weight of the inverter. ■...
-
Page 15: Mounting The Inverter
4�3 Mounting the inverter NOTE The SHT series inverters should be mounted on a mounting system or substruc- ture. A mounting system is not included. All commercially available mounting sys- tems are suitable which guarantee permissible mounting. The inverter is attached to the wall or to a mounting system using a mounting plate. The mounting plate and the mounting material are included in the scope of delivery. -
Page 16: Electrical Connection
5�2�1 Integrated RCD and RCM The SHT Series inverters are equipped with integrated RCD (Residual Current Device) and RCM (Residual Current Monitor) according to VDE 0126-1-1. The sensor measures the residual current and compares it to the pre-set value, disconnecting automatically the inverter from the AC grid by means of the integrated RCD in case the value exceeds it. -
Page 17: Connection Instructions For Ac Output Cables
5�2�2 Connection instructions for AC Output Cables ATTENTION! An independent three-phase circuit breaker must be installed on the AC side of each inverter. Do not install one circuit breaker for multiple inverters! ATTENTION! Install a model B leakage curren protection switch with no less than 600 mA current. - Page 18 Fig. 10: Securing the PE cable NOTE The PE wire must be well grounded to ensure that impedance between Neutral and Earth wire be less than 10 Ω. Connection of AC Output Cable In the lower part of the front of the inverter there is an covered AC wiring area. 1.
- Page 19 heat shrink tubing Fig. 12: Connecting the OT terminals to the AC cable 4. Loosen the locking cap from the AC output waterproof cable connector at the bottom of the inverter and remove the plug from the locking cap. 5. Route the AC output power cable into the locking cap and the AC output connector at the inverter bottom and connect the AC cable to L1, L2, L3, N and PE on the AC terminal block, tighten them using screws driver (torque 12 Nm).
-
Page 20: Connecting The Inverter To The Pv Generator
5�2�3 Connecting the inverter to the PV generator DANGER! Fatal electric shock hazard! In daylight the PV generator supplies the inverter with a dangerously high DC voltage. The PV generator voltages are very high. NEVER plug or unplug the DC con- ■... - Page 21 PV1, PV2, PV4, PV5, PV7, PV8, PV10 and PV11 All types PV1, PV2, PV3, PV4, PV5, PV7, PV8, PV10 and PV11 All types PV1, PV2, PV3, PV4, PV5, PV6, PV7, PV8, PV10 and PV11 All types PV1, PV2, PV3, PV4, PV5, PV6, PV7, PV8, PV9, PV10 and PV11 Only for SHT60 PV1, PV2, PV3, PV4, PV5, PV6, PV7, PV8, PV9, PV10, PV11 and PV12 Only for SHT60 Connectors of PV string cabels...
- Page 22 Connection of PV input cable 1. Cut the cable isolation for a length of 8 … 10 mm. Crimp the cable into the metallic terminals provided, observing the correct polarity (red cable goes in the terminal of the female positive pole connector;...
-
Page 23: Communication Interface
5. Insert the connectors into the respective counterparts located at the bottom of the inverter and push them until they are locked by a “click” of the plastic side tabs. P V+ P V– Fig. 21: Connecting the assembled cable to the SHT inverter 6. -
Page 24: Commissioning
Commissioning Follow these steps to start up the inverter: 1. Switch ON the DC isolation switch on the lower part of the inverter (see Fig. 2. Switch on the external switch of the AC feed line connecting the inverter to the grid. 3. -
Page 25: Configuration
Configuration 7�1 Installation of MaxLink App The inverter is provided with the basic configuration to operate in the country where it was sold. In case of operation in a different country, or if changes to other parameters are needed, a communication connection to the inverter must be established. In addition, to change settings and to connect the inverter to a Local Area Network (LAN) for monitoring purposes it is necessary to establish such communication link. -
Page 26: Configuration Of The Inverter
Fig. 23: Start menu at the mobile device for inverter configuration The MaxLinkApp establishes the communication with the inverter and downloads the data. Data are displayed on the screen. Inverter is not available at the App MaxLink If connected inverters are not displayed on your mobile device, follow the steps below to display the inverter data on MaxLink: Make sure inverter is switched on ■... - Page 27 Fig. 24: Overview of the MaxLink App 2. Select „Setting“ in the selection menu (see the following figure). Fig. 25: App MaxLink selection menu...
- Page 28 3. Select the button „Change user“ to get the access menu (see the following figure). Fig. 26: App MaxLink Settings 4. Enter the administrator password to change inverter data. Use the password “admin” (see the following figure). 5. Select buttton „Login as Administrator“. Fig.
- Page 29 Fig. 28: App MaxLink inverter settings CAUTION! Inverter settings have to be conform to the specifications of the local energy provider 7. To change the inverter settings select the selection field „Standard Code“. The following selection menu for standard codes will appear.
-
Page 30: Troubleshooting
Troubleshooting measures In case of abnormal behaviour consult the following table to find the cause and try to reset the proper operating conditions. If the proposed measures do not eliminate the fault, contact the SolarMax Service Centre. Alarm Troubleshooting measures... - Page 31 Alarm Troubleshooting measures Check the number of PV modules and adjust it if need. PV over voltage ■ PV under voltage When sunlight intensity weakens, PV modules voltage ■ decreases. No action is needed. If such phenomena occur when sunlight intensity does not ■...
-
Page 32: Solarmax Service Center
Serial number S / N ■ Installation location ■ Information on the present failure (status message, etc.) ■ Availability The contact details of the SolarMax Service Center can be found overleaf or at www.solarmax.com. SolarMax Produktions GmbH Zur Schönhalde 10 D-89352 Ellzee... -
Page 33: Technical Data
Technical Data 50SHT 60SHT Input MPP voltage range 200…960 V values MPP voltage range at 540 V ... 800 V nominal power Maximum DC voltage 1100 V Maximum DC voltage for 250 V startup Minimum DC voltage for 200 V shutdown Maximum DC current 110 A (33 A / 33 A / 22 A / 22 A) -
Page 34: 10 Disposal
50SHT 60SHT Configura- Display Wireless & App + LED tion Inverter topology transformerless DC disconnector integrated DC polarity inversion integrated protection Residual Current Monitoring integrated Unit (RCMU) Grid protection interface integrated Protection class I (IEC 62103) Overvoltage category DC Type II / AC Type II Stand- CE-compliant ards &... -
Page 35: 11 Warranty
The services of the Basic Guarantee are only provided free of charge in countries released by SOLARMAX at the time of installation. Please clarify this with your dealer. You will find a current list of these countries in the appendix or on our homepage. On request we are happy to send you this list. - Page 36 The battery is considered defective if its remaining capacity is less than 60% of its nominal capacity. SOLARMAX has the right to optimize the operation of the plant at any time in accordance with the war- ranty, i.e. to qualitatively modify key data and functions for operation and life support and adjust system and battery performance or battery discharge depth to optimise battery life by remote maintenance and control means.
- Page 37 SOLARMAX. 5� Assertion of Guarantee For the assertion of the guarantee the SOLARMAX hotline must be contacted by phone or in written form and their instructions must be followed carefully. You will find the Hotline number for your country on our homepage.
- Page 38 9� Applicable Law, Place of Jurisdiction The Law of the Federal Republic of Germany is applicable, Place of Jurisdiction shall exclusively be Augsburg / Germany, as far as this is permitted by law. Appendix Country List: Austria, Belgium, Bulgaria, Czech Republic, Denmark, France, Germany, Greece, Italy, Liechstenstein, Luxembourg, Netherlands, Portugal, Slovakia, Slovenia, Spain, Sweden, Switzerland, United Kingdom (Issued 04/2019 –...
- Page 39 Notes:...
- Page 40 SolarMax Service Center You will find all contact information on our website: www.solarmax.com Hotline: + 49 3733 507840 + 41 315281165 + 34 93 2203859 + 44 20 38080346 + 39 0418520076 + 33 820 420 684 + 49 3733 50784 99 Mail hotline@solarmax.com...
Need help?
Do you have a question about the SHT Series and is the answer not in the manual?
Questions and answers