SolarMax 2000S Instruction Manual
Solar inverter
Hide thumbs
Also See for 2000S:
- Instruction manual (17 pages) ,
- Instruction manual (64 pages) ,
- Installation primer (28 pages)
Table of Contents
Advertisement
SolarMax 2000S/3000S/4200S/6000S
Der Wechselrichter für netzgekoppelte Solarstromanlagen
PV installations
L'onduleur pour les installations électriques solaires couplées au réseau
n
El inversor para sistemas de electricidad solar conectados a la red
solari di corrente collegati alla rete
Gerätedokumentation
Documentación del dispositivo
BAUART
GEPRÜFT
TYPE
TÜV
Rheinland
APPROVED
Product Safety
Instruction Manual
n
Documentazione dell'apparecchio
n
The inverter for grid-connected
n
L'inverter per impianti
n
Documentation d'appareil
n
n
n
Advertisement
Table of Contents
Troubleshooting

Related Manuals for SolarMax 2000S


Summary of Contents for SolarMax 2000S
- Page 1 SolarMax 2000S/3000S/4200S/6000S Der Wechselrichter für netzgekoppelte Solarstromanlagen The inverter for grid-connected PV installations L’onduleur pour les installations électriques solaires couplées au réseau El inversor para sistemas de electricidad solar conectados a la red L’inverter per impianti solari di corrente collegati alla rete Gerätedokumentation...
-
Page 2: Introduction
As a solar system operator you expect reliability and high yield from your system. With our SolarMax range we offer inverters that fully meet these requirements. The SolarMax inverter range is characterised by high efficiency and high availability. -
Page 3: Table Of Contents
Data communication Installation 2.1 Installation 2.2 Electrical connection Technical description 2.3 Overvoltage protection 7.1 Technical configuration SolarMax 2000S/3000S 2.4 Switching on and off 7.2 Technical configuration SolarMax 4200S/6000S 2.5 Removal 7.3 Safety functions 2.6 Configurable limit values and operational settings 7.4 Control functions... -
Page 4: Safety Instructions
(6 x 50 mm) and two wall plugs are included. First install the device from the mains and from the solar generator! the mounting rail on the wall. The SolarMax inverter can then be pushed onto the n Before opening the SolarMax device, the DC and AC feed lines must be mounting rail. - Page 5 If this is not the case, additional overvoltage-limiting elements (varistors) must be installed at the network connection point. If the SolarMax device is installed inside a building, the space should be well ventilated. The inverter must be mounted on a solid surface.
-
Page 6: Electrical Connection
2.2 Electrical connection Assembly of the AC cable socket Sputnik Engineering supplies the SolarMax inverters prewired and ready for con- SM2000S/ 3000S/4200S/ 6000S: nection. All connections are pluggable. The device therefore does not have to be Rear part of socket opened. -
Page 7: Overvoltage Protection 64
2.3 Overvoltage protection and in accordance with the relevant installation regulations. SolarMax inverters feature integrated surge protectors at the input and output. On General information: the DC side 2 surge arresters (varistors) for the plus and minus terminal to earth When connecting several SolarMax devices, distribute the inverters over the are installed. -
Page 8: Switching On And Off
2.6 Configurable limit values and operational settings All SolarMax inverters operate fully automatically and maintenance-free. The In the SolarMax S series the following parameters can be set manually via the inter- isolating switches between the solar generator, the inverter and the 230 V mains face with the MaxTalk software. -
Page 9: Heat Sink Temperature Limit
2.7 Heat sink temperature limit Important: The country must match the location of the inverter in order to For safety reasons the temperature of the heat sink is limited to 80 °C. At ambient ensure that the inverter operates within country-specific limit values. temperatures of more than 45 °C the heat sink temperature may reach 75 °C. -
Page 10: Auto Test
Test option is only available in the main menu if “IT” (Italy) was selected as the SolarMax hotline. installation location. The Auto Test functionality and procedure is described below. 3.1 Auto Test definition according to DK 5940 (Italy) During the Auto Test procedure in mains mode the trigger threshold for AC voltage and frequency monitoring is varied linearly with a ramp of ≤... -
Page 11: Procedure
3. The trigger value, the delay time, the current value and the default voltage PLEASE NOTE: if a fault occurs during the tests or the irradiance is too low the monitoring value (Vac min) are displayed. Auto Test is aborted and the message “Auto Test aborted” appears in the display together with an associated error message. -
Page 12: Operation And Fault Display
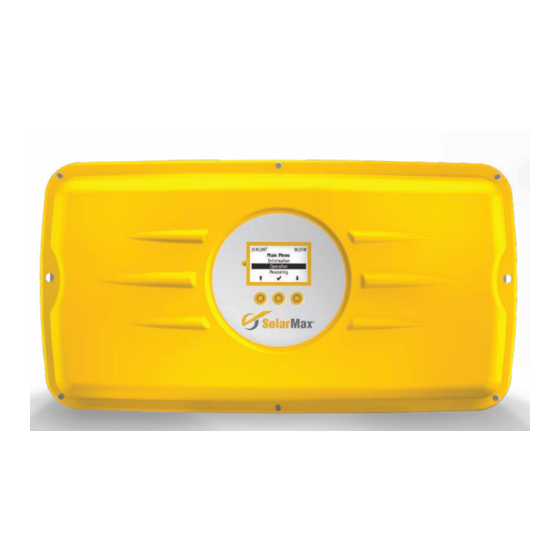
4.1 Graphics display The graphics display at the front is used to display system parameters, status Seven symbols are used for menu prompting: information, and SolarMax fault messages, thereby offering the user convenient Symbol Function / description options for obtaining information about the device status. -
Page 13: Menu Structure
4.4 Menu structure Overview If none of the three keys is pressed for 120 seconds the display automatically The following submenus can be called up from the main menu: switches to the Overview menu, which shows the three main parameters and the Overview operating status. - Page 14 Statistics The following statistics can be displayed: Days ➡ monthly yield Months ➡ maximum power fed to the grid Years ➡ operating hours Total Reset Use the arrow keys to display the yields for the last 12 months. Use the Use the arrow key to select the required menu.
- Page 15 Use the key to confirm resetting of all statistics. Use the key to exit the Use the arrow keys to display any value. Use the key to switch back menu without resetting the statistics. to the main menu. Configuration Settings The following limit values and operating parameters cannot be modified via The following settings can be implemented via the graphics display: the graphics display, because they are part of the country-specific settings (see...
-
Page 16: Communication Activity
Once all digits have been set, exit edit mode with the key. Information This menu shows the following information: Device type (SM2000S, SM3000S, SM4200S, SM6000S) Firmware version Date of commissioning Web address (www.solarmax.com) -
Page 17: Status Messages
4.6 Status messages The following table shows the possible status messages, subdivided into four ca- tegories: Status message Cause Status message Cause Startup Irradiance too low The solar irradiation is too low; feed Malfunction Vdc too high The solar generator voltage is too LED: Flashing mode is not possible LED: Orange... -
Page 18: Alarm Signals
75 °C (see also Section provided in the following subsection. 2.7). 3. Contact our SolarMax hotline if you are unable to rectify the fault with the Failure fan 1 A failure of the internal fan has suggested measures. -
Page 19: Troubleshooting Via The Graphics Display
Irradiance too low Wait until irradiance is high enough Earth leakage or insulation fault on Equipotential bonding between Internal fault Notify SolarMax hotline the DC side inverter and module frame Strings interrupted Rectify interruption Malfunction: Insulation fault... -
Page 20: Maintenance
Check mains voltage Internal fault For recurring faults contact the SolarMax hotline Malfunction: Vdc too high The following error messages can be displayed only during SolarMax initialisation. Possible cause Remedy They indicate a device fault: The solar generator voltage exceeds... -
Page 21: Data Communication
To access your inverter from the local network (LAN), enter a free IP address from them to the SolarMax web portal. In the event of a fault, MaxWeb sends alarm your LAN network. -
Page 22: Technical Description
Block diagram SolarMax 4200S/6000S monitoring 7.3 Safety functions In order to ensure a high safety standard, SolarMax inverters feature integrated fault current monitoring on the DC side. Graphics display Control unit with digital signal processor (DSP) PC interface In the event of an earth fault current, the fault current monitoring system detects the differential current and interrupts the mains operation. -
Page 23: Technical Data Solarmax 2000S/3000S
7.5 Technical data SolarMax 2000S/3000S 7.6 Technical data SolarMax 4200S/6000S SolarMax 2000S SolarMax 3000S SolarMax 4200S SolarMax 6000S Input side (DC) Input side (DC) Maximum generator output *) 2300 W 3300 W Maximum generator output *) 5000 W 6000 W Regelbereich 100…550 V... -
Page 24: Glossary
Maximum permissible DC component of fed-in mains current Ierr Fault current, stray module current Output power relative to rated output [%] Ierr max Maximum permissible fault current (rms value) on the DC side Efficiency SolarMax 2000S η η η Restart delay Restart delay after a shutdown relativ... -
Page 25: Warranty
93.6 93.8 94.5 This guarantee applies only in case of malfunctions/defects which have been dis- covered within five years (for SolarMax 2000S-6000S) after shipment respectively 94.6 95.1 95.8 delivery. The original invoice respectively the delivery receipt serve as proof for 1140 94.8... -
Page 26: Limitation Of Liability And Warranty
if Sputnik has not completed the remedy without significant inconvenience to the buyer. The buyer is not entitled to have the contract rescinded if the lack of conformity is minor. Especially in the following cases, this guarantee does not apply and any liability on the part of Sputnik is excluded: unauthorised technical intrusions, modifications or repairs of the devices by the buyer himself;... - Page 27 être consultés dans la zone de téléchargement, à l‘adresse www.solarmax.com Certificados y documentos de conformidad específicos del país pueden verse en la zona de descarga en www.solarmax.com I certificati e le dichiarazioni di conformità nazionali si possono consultare nella rubrica „Downloads“ del sito www.solarmax.com...
- Page 28 www.solarmax.com...
Need help?
Do you have a question about the 2000S and is the answer not in the manual?
Questions and answers