Table of Contents
Advertisement
Quick Links
Download this manual
See also:
Instruction Manual
Advertisement
Table of Contents
Troubleshooting

Related Manuals for SolarMax 360TS-SV


Summary of Contents for SolarMax 360TS-SV
- Page 1 SolarMax TS-SV 330TS-SV / 360TS-SV Bedienungsanleitung Operating manual Notice d’emploi Documentación del dispositivo Istruzioni per l’uso...
-
Page 2: Table Of Contents
Contents About this operating manual Scope Target group Where to keep this manual Symbols used in this manual Safety instructions Description Operating elements 3.2.1 Inverter 3.2.2 Master Control Unit (MCU) Operation How the main switch works How the DC and AC power switches work Switching on the inverter Switching off the inverter Operating the graphics display... - Page 3 Troubleshooting SolarMax Service Center Diagnosis & corrective steps 8.2.1 General troubleshooting 8.2.2 Warnings 8.2.3 Malfunctions 8.2.4 Error 8.2.5 Blockages Maintenance Inspections by the plant operator Maintenance by a qualified electrician Testing grid monitoring Disposal...
-
Page 4: About This Operating Manual
The system operator must ensure that this operating manual is available to those respon- sible for the system at all times. If this original document is lost, an up-to-date version of the operating manual can be downloaded from our website (www.solarmax.com). Symbols used in this manual... -
Page 5: Safety Instructions
In daylight the PV generator supplies the inverter with a dangerously high DC voltage. ■ SolarMax inverters and accessories may only be installed or opened by qualifi ed electricians who have completely read and understood this instruction manual in advance. -
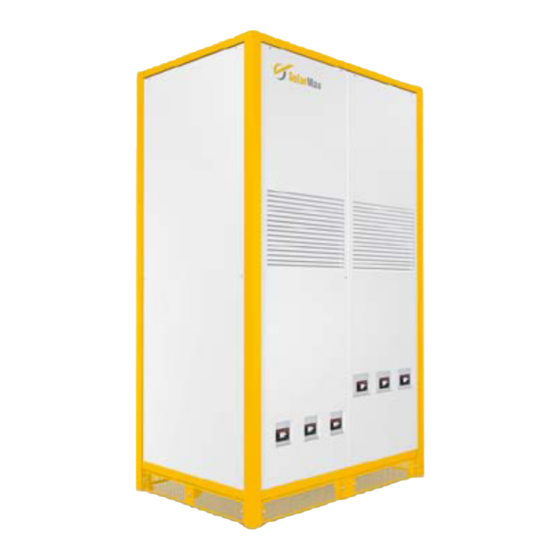
Page 6: Description
Description All SolarMax inverters work completely automatically. The DC and AC power switches (Q4-Q6 and Q1-Q3) as well as the main switch (Q7) are always on during normal opera- tion. The inverter starts when there is enough input power and continues to operate until the available input power from the PV generator drops below the necessary minimum. -
Page 7: Inverter
3.2.1 Inverter Legend: AC power switch Q1 DC power switch Q4 AC power switch Q2 DC power switch Q5 AC power switch Q3 DC power switch Q6... -
Page 8: Master Control Unit (Mcu)
3.2.2 Master Control Unit (MCU) Legend: Main switch Q7 Status LED Graphics display Lock Push-buttons... -
Page 9: Operation
Operation The inverter is operated using the external MCU. The MCU allows all the connected invert- ers to be operated simultaneously, only the DC and AC power switches must be operated directly on the respective inverter. For all other functions described below the MCU is the shared interface for all the con- nected inverters. -
Page 10: Switching On The Inverter
Switching on the inverter Procedure Action Reaction 1. Switch off main switch Q7 (to “OFF” position) 2. Switch on DC power switch Q4, Q5 & Q6 The graphics display is activated after a (to “ON” position) maximum of 20 seconds (if there is enough sunlight). -
Page 11: Switching Off The Inverter
Switching off the inverter DANGER ■ Even when the inverter is switched off, the connections for the DC and AC feed lines in the inverter remain live! ■ Before the inverter or the MCU is opened, the DC and AC feed lines must be dis- connected according to the instructions and secured against being reconnected accidentally. -
Page 12: Operating The Graphics Display
Operating the graphics display The graphics display on the front of the MCU shows the system dimensions, status infor- mation and the malfunction messages of the connected inverters. The display allows you to learn the current device status, access the integrated data logger and enter various system settings. -
Page 13: Menu Structure
4.5.2 Menu structure... -
Page 14: Main Menu
4.5.2.1 Main menu The main menu is the starting point for all the submenus and displays, see 4.5.2 “Menu structure”. Use the arrow keys to select a menu. Click to confi rm your selection. 4.5.2.2 Overview If none of the three buttons is pushed for 120 seconds, the display returns automatically to the Overview menu which shows the three most important values as well as the current operating status of the system (all the inverters connected to the MCU). - Page 15 The “Measured values” menu allows the display of currently measured values in relation to the system or the power unit selected. NOTE ■ The number of power units listed in the “Measured values” menu depends on the number of inverters connected to the MCU. ■...
- Page 16 The following measured values can be accessed for the system: Measured value Description DC Input voltage (only in single MPPT operation) DC Input current (only in single MPPT operation) Vac (L1L2, L2L3, L3L1) Mains voltage (Phase to Phase) Iac (L1, L2, L3) AC Input current (per Phase) Active output power Reactive power (+: overexcited / −: underexcited)
- Page 17 4.5.2.4 Statistics In the Statistics menu you can access the MCU’s internal data logger. The accessible statistics are for the most recent 31 days, 12 months or 10 years. The displayed statistical values each refer to the system as a whole. Use the button to highlight a statistic category.
- Page 18 Monthly statistics This menu provides access to the data from the most recent 12 months. Use the buttons to select a monthly statistic. Press the left button return to the Statistics menu. The displayed values correspond to those in the daily statistics; but the values refer to the month displayed.
- Page 19 Total This menu lists the total yield and the total number of operating hours of the inverter or the system since it was commissioned. Press the left button to return to the Statistics menu. Reset In this menu you can delete all the entries in the Statistics menu. NOTE Once deleted these data are irretrievably lost! Press the...
- Page 20 The required “TS se- ries/TS-SV parameter confi guration using MaxTalk 2 Pro” instruction manual can be found on our website www.solarmax.com (Downloads area). You can request MaxTalk 2 Pro from the SolarMax service centre. The contact details can be found overleaf. Parameter Description...
- Page 21 Parameter Description Unit Restart delay Delay time before mains reconnection upon previous failure-related mains disconnection. Pac Progression Maximum increase of the effective power during mains %/Minute reconnection upon previous failure-related mains disconnection. Soft Start Maximum increase of the effective power at mains con- nection.
- Page 22 4.5.2.6 Settings This menu can be used to set different communication parameters and monitoring functions. All settings can also be implemented with MaxTalk (menu: Devices/Settings). NOTE The term “system” comprises all TS-SV inverters connected to the MCU. Parameter Description Language Selection of the display language (German, English, French, Italian, or Spanish).
- Page 23 Fuse failure PAS The equipotential bonding kit (PAS) is an accessory component and serves for earthing the PV generator. The behaviour of the system during fuse failure on the equipotential bonding kit can be controlled. For this, the function “Fuse failure PAS” offers three dif- ferent settings: Setting Description...
- Page 24 Setting Description The AC insulation monitoring is switched off. Select this setting for test purposes only. Warning The warning message “Insulation failure DC” (MaxTalk: “DC insulation failure (AC)”) is displayed. The system will continue to feed into the mains. The status signalling contact of the MCU will be closed (factory setting). Error The malfunction message “Insulation failure DC”...
-
Page 25: Data Communication
Data communication For PV power plants equipped with SolarMax inverters Sputnik Engineering provides the MaxComm communications platform. This provides many ways of recording data and monitoring your PV power plant. Below is an overview of the current products. NOTE You can fi nd detailed information on our website at www.solarmax.com. -
Page 26: Configuration Of The Data Communications Interfaces
TCP port must be greater than 1023 since this range is reserved for predefi ned applica- tions (referred to as “well known services”). NOTE You will fi nd more details about data communications in the technical information “MaxComm network”. This document can be downloaded from our website at: www. solarmax.com; downloads/data communication/MaxComm. -
Page 27: Options
Options MaxControl 6.1.1 Scope of services MaxControl is a service package for your solar system with SolarMax central inverters. It is based on the MaxComm communications system and includes: ■ Automatic yield control including monthly analysis ■ Forwarding of malfunction reports to the client via email and/or SMS ■... -
Page 28: Operating Status
MaxCount Unit which records meter fi gures with S0-interface MaxDisplay Interface for large display to visualise PV power plant data Potential equalization set The potential equalization set enables the earthing of the PV generator Operating status NOTE The term “system” comprises all TS-SV inverters connected to the MCU. Status messages and status LED The status message on the graphical display of the MCU describes the current operating status of the system. -
Page 29: Booting
Booting Status message Description Irradiance too low The solar irradiation or rather the available output is too low for mains operation. Startup… The system checks the internal hardware and software components before connecting to the mains. Restart delay The system disconnected from the mains and is delaying re-connection to the mains. -
Page 30: Troubleshooting
Section 8.2, “Diagnosis & corrective steps” explains possible ways of correcting malfunctions. 4. If you cannot correct the malfunction using the recommended procedures, or you are not sure what sort of fault is involved, please contact our SolarMax Service Centre. -
Page 31: Solarmax Service Center
■ Installation location ■ Information about the malfunction you are experiencing (status message, etc.) Availability The contact details of the SolarMax Service Center can be found overleaf. Sputnik Engineering AG Länggasse 85 CH-2504 Biel/Bienne Diagnosis & corrective steps The following tables describe how to troubleshoot malfunctions. If the steps suggested do not correct the malfunction please contact the SolarMax Service Centre immediately. - Page 32 SolarMax service centre. is restarted in the morning. Flash error A fl ash error has occurred. Contact the SolarMax service centre. Ief too high The earth fault current in the Correct the insulation fault in potential equalisation set the PV generator.
-
Page 33: Malfunctions
8.2.3 Malfunctions Status message Cause Measure Vdc too high The DC input voltage of an Switch off all DC circuit- individual power unit or the breakers immediately and then system is too high. disconnect the PV generator from the system. Check the PV generator’s dimensioning. -
Page 34: Error
Status message Cause Measure Fuse failure PAS Fuse failure in the potential Contact the SolarMax service equalisation set (PAS) (can centre. Note: Check the set- only be displayed when using ting of the fuse failure PAS the PAS). function. Incorr. rotation dir. -
Page 35: Maintenance
Maintenance All SolarMax inverters work completely automatically. However, to ensure perfect op- eration over the course of several years, in addition to regular controls of the operating and yield data via the inverter display or remote monitor we also recommend having the simple maintenance work described below performed at regular intervals. -
Page 36: Testing Grid Monitoring
8. Switch on the DC and AC feed lines and the inverter. 9. If the PV power plant has the MaxControl option, a communications test is advisable. For this purpose contact our SolarMax Service Centre. Testing grid monitoring With the help of the test contacts the grid monitoring of the system can be tested. The test can be carried out for both single MPPT operation and multi-MPPT operation. - Page 37 nal block “LT1” secured by means of slotted-head screws. [power unit LT2: terminal block “LT2”], [power unit LT3: terminal block “LT3”]. 4. Slide all 4 slide switches downwards and secure the slide switches by tightening the slotted screws. 5. Connect the three-phase AC generator to the test contacts U°L1, U°L2, and U°L3 on terminal block “LT1”...
- Page 38 8. Switch on the DC circuit-breaker Q4 [power unit LT2: Q5], [power unit LT3: Q6]. The other DC circuit-breakers and all AC circuit-breakers in the system remain switched off. 9. Switch on the AC generator. The external conductor voltages must correspond to the nominal mains voltage and frequency (3 x 280 U / 50Hz).
-
Page 39: 10 Disposal
10 Disposal Please dispose of the inverter at the end of its service life in compliance with the disposal regulations currently valid where it is installed. You can also return the inverter at your own cost for professional disposal to Sputnik Engineering (address as stated in the sec- tion on “Troubleshooting”). - Page 40 SolarMax Service Center Deutschland +49 180 276 5 276 Schweiz / Svizzera / Suisse +41 32 346 56 06 France +33 4 72 79 17 97 Italia +39 0362 312 279 España +34 902 160 626 Benelux +32 2 535 77 32 Česká...
Need help?
Do you have a question about the 360TS-SV and is the answer not in the manual?
Questions and answers