
Subscribe to Our Youtube Channel
Related Manuals for SolarMax 5G Series


Summary of Contents for SolarMax 5G Series
- Page 1 User Manual ON-GRID/GRID TIED THREE PHASE MPPT STRING PV INVERTER SM-5K-G3P SM-6K-G3P SM-7K-G3P SM-8K-G3P SM-10K-G3P www.solarmax.pk Ver: 1.0, 2020-01...
-
Page 2: Table Of Contents
Contents 1. Introduction - 01 - ………………………………………………………… 1.1 Appearance Introduction - 01 - ………………………………………… 1.2 Parts list - 01 - ………………………………………………………… 2. Safety warnings and instructions - 02 - ……………………………………… 2.1 Safety signs - 02 - ………………………………………………………… 2.2 Safety instructions - 03 - …………………………………………………... -
Page 3: Introduction
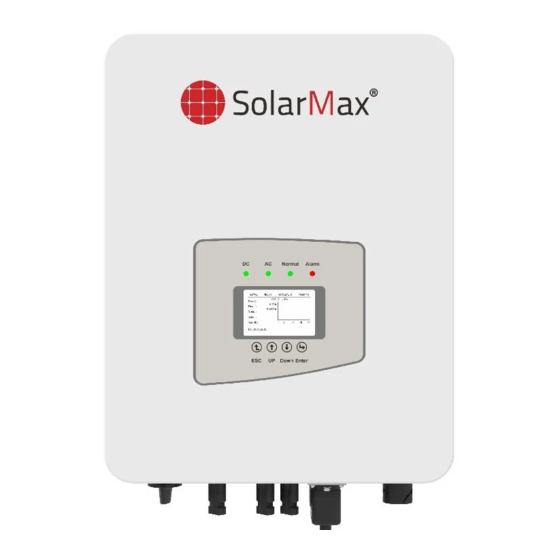
Photovoltaic Grid-connected System USER MANUAL PV strings Metering device Power grid Inverter Pic1.3 Accessories drawing Family load Description Application of inverter in photovoltaic power system Grid-tied PV String Inverter 1. Introduction Wall mounting bracket 1.1 Appearance Introduction Mounting stainless steel screws M4×12 Three Phase String Power Inverter can convert solar panel DC power into AC power AC power connectors which can directly input to the grid. -
Page 4: Safety Instructions
Warning: Shock Hazard: Safety warning——Indifference of the signs in the manual may cause When PV module is exposed to sunlight, the output will generate DC injury or even death. voltage.Prohibit touching to avoid shock hazard. Shock Hazard: Shock Hazard: Shock warning sign——Incorrect follow of this sign may get shocked. After disconnecting the input and output of the inverter, it takes at least 5 minutes for the inverter to completely release the residual energy and waits for at least 5 minutes before it can be overhauled. -
Page 5: Operation Interface
7. When starting the inverters, first close the circuit breaker at the grid side, then close the DC side; when closing the inverters, first disconnect the circuit breaker at the AC side, Indicator status Explanation then disconnect the DC side. Inverter detects DC input ●DC 8. -
Page 6: Product Installation
4. Product installation ● Please select the wall with certain bearing capacity. ● When doing the installation, vertical slope cannot exceed +/-15°.Make sure no lateral 4.1 Select installation location tilt. Otherwise it will affect the function of the heat sink. Cause the output power lower than expected. -
Page 7: Inverter Installation
≥500mm Inverter should be vertically installed, as shown in pic 4.5,installation procedure shows below: 1. Position the bolts on the appropriate wall according to the bolt positions on the mounting shelves and mark the holes. On the brick wall, the installation must be suitable for the expansion bolt installation. -
Page 8: Electrical Connection
a). Make sure that the polarity of the output voltage of the solar panel is consistent with the polarity identified by the inverter b). Connect DC positive and negative to the inverter input terminal.(see picture 5.1 and picture 5.2) Pic 5.1 DC “+ ”connector (MC4) Pic 5.2 DC“-”connector (MC4) c).Making DC connection line Strip off the DC wire about 7mm, disassemble the connector cap nut(Picture 5.3) -
Page 9: Ac Input Terminal Connection
2). Insert the contact pin into the connector housing until it locks in place. Screw the cap NOTE: nut onto the connector housing. Torque to 2.5-3Nm(as shown in Picture 5.5) Sunlight shines on the panels will generate voltage, high voltage in series may cause danger to life. - Page 10 1. Matching socket 2.Sleeve 3.Sealing core 4.Sealing nut Pic 5.9 AC Connector Hole Pattern Pic 5.7 AC connector structure Safety Hint: The AC output connector is divided into three parts: matching ocket, sleeve sand sealing sleeve, as shown in Picture 5.7, the steps are as fand sealing sleeve, as shown in Picture 5.7, The AC cable line L1 is connected to socket 1;...
-
Page 11: The Connection Of The Ground Line
5.3 The connection of the ground line Good grounding is good for resisting surge voltage surge and improving EMI performance. Therefore, before connecting AC, DC, and communication cables, you need to ground the cable firstly. For a single system, just ground the PE cable; For multiple machine systems, Phone all PE cables of the inverter need to be connected to the same grounding copper platoon to ensure the equipotential connection. -
Page 12: Startup And Shutdown
6.1 Start up the inverter When start up the three phase string inverter, should fellow below steps: 1. First switch on the AC breaker. 2. Turn on the DC switch of the photovoltaic module,and if the panel provides sufficient starting voltage and power, the inverter will start. 3. -
Page 13: Limiter Function Wiring Diagram
L1(L) Solar panels L1(K) L2(L) L2(K) L3(L) L3(K) Limiter Control signal Distribution Box Control signal Load Pic 7.2 Wiring diagram L1(L)L1(K)L2(L)L2(K)L3(L)L3(K) 7.2 Connect the limiter to inverter Pic 7.1 Limiter view The limiter will measure the voltage and current of three phases separately, and this manual only introduces the installation steps of one phase, the other two phases are 7.1 Limiter function wiring diagram - 20 -... -
Page 14: Use Of Anti-Backflow Function
Pic7.3 Clamp Senor Pic7.4 Clamp Senor internal arrow (3)After you finish the installation in process 1 and 2, connect the N line (N) to the N terminal of the limiter and tighten the line. 7.3 Use of anti-backflow function (4)Connect the control line. There are two numbers 1 and 2 on the interface of limiter, When the connection is completed, the following steps should be referenced to use this and the same on the waterproof terminal of the inverter. -
Page 15: Notes While Using Limit Function
7.4 Notes while using limit function For your safety and the operation of limiter function of the inverter, we put forward the << System Param following Suggestions and precautions: Param Warning: In limit function we strongly recommend that the two photovoltaic Pic7.8 Parameter setting arrays are formed by the same number of photovoltaic panels of the same size, which will make the inverter more responsive to limit the... -
Page 16: General Operation
8. General Operation Power: 108W State: Normal During normal operation, the LCD shows the current status of the inverter,including the current power, total generation, a bar chart of power operation and inverter ID,etc. Press the Up key and the Down key to see the current DC voltage, DC current, AC voltage, AC Pic8.2 The initial interface current, inverter radiator temperature,software version number and Wifi connection state of the inverter. -
Page 17: Fault Record
8.2 Statistics information 8.5 Parameter setting There are five submenus in the statistics. Setting includes system param, run param, protect param, comm:param. All of these << Device Info. information for maintenance reference. Fault Record 8.5.1 System Param << Pic8.7 Statistics System Param Into each submenu through cursor. - Page 18 8.5.1.1 Time set 8.5.3 Protect Param Note: 20181017 OK 08:45:57 Cancel Engineer Only. We will set the param depends on the safety requirements, so customers don’t need to reset it. The password is same as 8.5.2 Pic8.15 Time set Running param. 8.5.1.2 Language set <<...
-
Page 19: Repair And Maintenance
<< 10.1 Error code AC OverFreq 51.50Hz In the case of failure the LCD screen will display an alarm message. In this case the inverter may stop feeding energy into the grid. The alarm description and their corresponding alarm messages are listed Table 9.1. Error code Description <<... -
Page 20: Troubleshooting
Inverter 1 DC high fault Reactor C phase over current IGBT heat sink high temperature AC load switch failure AC main contactor failure Table10.1 Error code AC secondary contactor failure 10.2 Troubleshooting Inverter 2 dc high fault AC over current F41~F48 Grid voltage exceed the nomal working range AC current over load... -
Page 21: Specification
11.Specification General Data Model 5K-G3P 6K-G3P 7K-G3P 8K-G3P 10K-G3P Size(mm) 330W×430H×177D Energy source Grid-connected PV Weight(kg) Input Side Topology Transformerless 10.4 Max.DC Power(kW) Internal consumption <1W(Night) Max.DC Input Voltage(V) Operating temperature -25 ~ 60℃ Start-up DC Input Voltage(V) Ingress protection IP65 MPPT Operating Range(V) 200~800...
Need help?
Do you have a question about the 5G Series and is the answer not in the manual?
Questions and answers