Grizzly G5913Z Owner's Manual
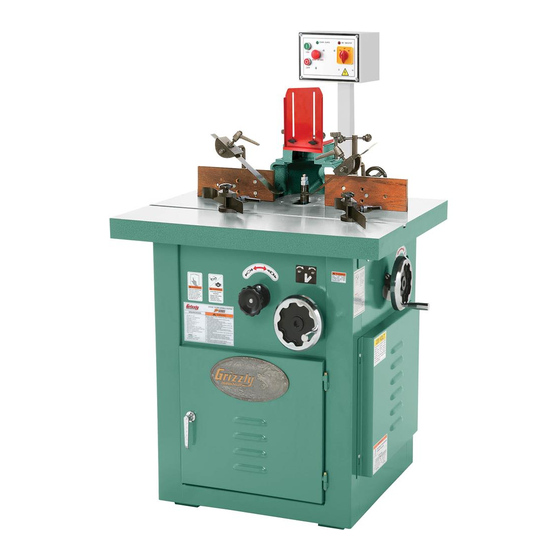
Heavy-duty shaper
Hide thumbs
Also See for G5913Z:
- Owner's manual (58 pages) ,
- Parts breakdown (9 pages) ,
- Manual (50 pages)
Table of Contents
Advertisement
Quick Links
For questions or help with this product contact Tech Support at (570) 546-9663 or techsupport@grizzly.com
The following change was made since the owner's manual was printed:
•
Switch assembly changed.
Aside from this information, all other content in the owner's manual applies and MUST be read and under-
stood for your own safety. IMPORTANT: Keep this update with the owner's manual for future reference.
For questions or help, contact our Tech Support at (570) 546-9663 or techsupport@grizzly.com.
Revised Parts Breakdown
6V2-2
6V2-1
6V2-4
6V2-3
6V2-5
6V2-6
REF
PART #
DESCRIPTION
6V2
P5913Z006V2
SWITCH ASSY 5 HP V2.03.06
6V2-1
P5913Z006V2-1
E-STOP BUTTON
6V2-2
P5913Z006V2-2
ROUND GREEN ON SWITCH
6V2-3
P5913Z006V2-3
ROUND RED OFF SWITCH
6V2-4
P5913Z006V2-4
F/O/R SWITCH KEDU ZH-HC-31-BY (G5913Z)
F/O/R SWITCH KEDU ZH-HC-433-BY (G7215Z)
6V2-4
P7215Z006V2-4
6V2-5
P5913Z006V2-5
CONTACTOR (G5913Z)
6V2-5
P7215Z006V2-5
CONTACTOR (G7215Z)
6V2-6
P5913Z006V2-6
OVERLOAD RELAY (G5913Z)
6V2-6
P7215Z006V2-6
OVERLOAD RELAY (G7215Z)
WARNING: NO PORTION OF THIS MANUAL MAY BE REPRODUCED IN ANY SHAPE
OR FORM WITHOUT THE WRITTEN APPROVAL OF GRIZZLY INDUSTRIAL, INC.
READ THIS FIRST
6V2
5
COPYRIGHT © MAY, 2020 BY GRIZZLY INDUSTRIAL, INC.
#CS21113 PRINTED IN TAIWAN
Model G5913Z/G7215Z
***IMPORTANT UPDATE***
For Machines Mfd. Since 03/06
and Owner's Manual Revised 03/07
Advertisement
Table of Contents

Related Manuals for Grizzly G5913Z


Summary of Contents for Grizzly G5913Z
- Page 1 ***IMPORTANT UPDATE*** For Machines Mfd. Since 03/06 and Owner's Manual Revised 03/07 For questions or help with this product contact Tech Support at (570) 546-9663 or techsupport@grizzly.com The following change was made since the owner's manual was printed: • Switch assembly changed.
- Page 2 EXPERIENCING DIFFICULTIES. If you are expe- the requirements at the beginning of this manual riencing difficulties understanding the information when connecting your machine to a power source. included in this section, contact our Technical Support at (570) 546-9663. Model G5913Z/G7215Z (Mfd. Since 03/06)
- Page 3 (Replaces Page 34) G5913Z Wiring Diagram READ ELECTRICAL SAFETY Model G5913Z/G7215Z (Mfd. Since 03/06) ON PAGE 2 OF UPDATE...
- Page 4 (Replaces Page 35) G7215Z Wiring Diagram READ ELECTRICAL SAFETY Model G5913Z/G7215Z (Mfd. Since 03/06) ON PAGE 2 OF UPDATE...
- Page 5 For Machines Mfd. Since 1/17 and Owner's Manual Printed 2001 For questions or help with this product contact Tech Support at (570) 546-9663 or techsupport@grizzly.com The following changes were recently made to this machine since the owner's manual was printed: •...
- Page 6 To minimize the risk of injury, the spindle enclo- guard (for G5913Z/G7215Z, see Pages 18–19; sure guard must be adjusted so it encloses as for G8622, see Pages 14–15).
- Page 7 MODEL G5913Z/G7215Z HEAVY-DUTY SHAPER OWNER'S MANUAL COPYRIGHT © 2001 BY GRIZZLY INDUSTRIAL, INC. REVISED MARCH, 2007 (TR) WARNING: NO PORTION OF THIS MANUAL MAY BE REPRODUCED IN ANY SHAPE OR FORM WITHOUT THE WRITTEN APPROVAL OF GRIZZLY INDUSTRIAL, INC. #TR3250 PRINTED IN TAIWAN...
- Page 8 This manual provides critical safety instructions on the proper setup, operation, maintenance, and service of this machine/tool. Save this document, refer to it often, and use it to instruct other operators. Failure to read, understand and follow the instructions in this manual may result in fire or serious personal injury—including amputation, electrocution, or death.
-
Page 9: Table Of Contents
SECTION 5: OPERATION ......25 Foreword ............2 Rotation ............25 Contact Info............ 2 Cutter Installation ......... 26 G5913Z Machine Data Sheet ......3 Spindle Height..........27 G7215Z Machine Data Sheet ......5 Straight Shaping .......... 27 Rub Collars ..........29 SECTION 1: SAFETY ........ -
Page 10: Introduction
Foreword Contact Info If you have any comments regarding this manual, We are proud to offer the Model G5913Z/G7215Z Name of Machine. This machine is part of a grow- please write to us at the address below: ing Grizzly family of fine woodworking machinery. -
Page 11: G5913Z Machine Data Sheet
G5913Z Machine Data Sheet MACHINE DATA SHEET Customer Service #: (570) 546-9663 · To Order Call: (800) 523-4777 · Fax #: (800) 438-5901 MODEL G5913Z 5 HP PROFESSIONAL TILTING SPINDLE SHAPER ‐ Z SERIES Product Dimensions: Weight................................665 lbs. Width (side-to-side) x Depth (front-to-back) x Height..............35-1/2 x 39 x 43 in. - Page 12 The information contained herein is deemed accurate as of 10/26/2017 and represents our most recent product specifications. Model G5913Z PAGE 2 OF 2 Due to our ongoing improvement efforts, this information may not accurately describe items previously purchased. G5913Z/G7215Z Heavy-Duty Shaper...
-
Page 13: G7215Z Machine Data Sheet
The information contained herein is deemed accurate as of 10/26/2017 and represents our most recent product specifications. Model G7215Z PAGE 1 OF 2 Due to our ongoing improvement efforts, this information may not accurately describe items previously purchased. G5913Z/G7215Z Heavy-Duty Shaper... - Page 14 The information contained herein is deemed accurate as of 10/26/2017 and represents our most recent product specifications. Model G7215Z PAGE 2 OF 2 Due to our ongoing improvement efforts, this information may not accurately describe items previously purchased. G5913Z/G7215Z Heavy-Duty Shaper...
-
Page 15: Section 1: Safety
Use a ground fault circuit interrupter if tools. Never operate under the influence of drugs operation is unavoidable in damp locations. Avoid or alcohol, when tired, or when distracted. touching grounded surfaces when operating tool. G5913Z/G7215Z Heavy-Duty Shaper... - Page 16 Contact our to operate the tool. Technical Support at (570) 546-9663. GUARDS & COVERS. Guards and covers reduce accidental contact with moving parts or flying debris. Make sure they are properly installed, undamaged, and working correctly. G5913Z/G7215Z Heavy-Duty Shaper...
-
Page 17: Additional Safety Instructions For Shapers
Failure to do so could result in serious per- operator injury. If normal safety precautions sonal injury, damage to equipment, or poor are overlooked or ignored, serious personal injury may occur. work results. G5913Z/G7215Z Heavy-Duty Shaper... -
Page 18: Section 2: Circuit Requirements
DO NOT connect the machine to the power source until instructed to do so. Full Load Amperage Draw G5913Z 5 HP 220V Single-Phase ..25 Amps G7215Z 7.5 HP 220V 3-Phase ....20 Amps G7215Z 7.5 HP 440V 3-Phase ....10 Amps... -
Page 19: Rewiring To 440V
Replace the existing magnetic switch assem- bly (Figure 2) with the magnetic switch assembly from the 440V conversion kit. Magnetic Switch Assembly Figure 2. Magnetic switch assembly G5913Z/G7215Z Heavy-Duty Shaper -11-... -
Page 20: Section 3: Setup
Hex Wrench 4mm ........1 cess! Unpacking Some machine compo- nents are very heavy. DO The Model G5913Z/G7215Z was carefully packed NOT over-exert yourself for safe transporting. If you discover the machine while unpacking or mov- is damaged after you have signed for delivery, ing your machine—get... -
Page 21: Piece Inventory
Piece Inventory Model G5913Z/G7215Z Hardware • ⁄ " Spindle ..........1 • 1" Spindle ..........1 When you are completely satisfied with the con- • ⁄ " Spindle ..........1 dition of your shipment, you should inventory its • ⁄... -
Page 22: Hardware Recognition Chart
Hardware Recognition Chart -14- G5913Z/G7215Z Heavy-Duty Shaper... -
Page 23: Clean Up
Refer to the Machine Data Sheet for the weight this protective coating with a solvent cleaner or and footprint specifications of your machine. citrus-based degreaser such as Grizzly’s G7895 Some residential floors may require additional Citrus Degreaser. To clean thoroughly, some parts reinforcement to support both the machine and must be removed. -
Page 24: Switch Pedestal
These the bolts. Parts Spindle The Model G5913Z/G7215Z comes with three interchangeable spindles like those in Figure 6. The spindles must be inserted correctly and Figure 7. Installing spindle into the cartridge. remain stable in order to produce quality work. -
Page 25: Handles
Figure 9. Bar into shaft guide. Tighten the shaft setscrew into the groove to lock the bar in place as shown in Figure 10. Groove Shaft Groove Figure 12. Wheel onto adjustment guide. Figure 10. Tightening setscrew with hex key. G5913Z/G7215Z Heavy-Duty Shaper -17-... -
Page 26: Guard
Figure 14. Do not completely tighten the bolt. This will allow the shaft to spin without coming out. Figure 16. Adjustment handle. Figure 14. Tightening bolt into shaft groove. -18- G5913Z/G7215Z Heavy-Duty Shaper... -
Page 27: Guard Cover
Thread the knobs into the guard body and secure the cover. Figure 18. Installing guard cover. Figure 17. Attach wooden fence assembly. Handwheel Handle Thread the crank handle onto the handwheel. Figure 19. Handwheel mounted to shaper. G5913Z/G7215Z Heavy-Duty Shaper -19-... -
Page 28: Hold-Downs
Figure 21. Tighten these in place with the knob on top of each miter hold- down. Position the hold-downs according to the size of your workpiece. Tighten the handles to secure the hold- downs. Figure 21. Overview of hold-downs in place. -20- G5913Z/G7215Z Heavy-Duty Shaper... -
Page 29: Section 4: Adjustments
Figure 22. If the pulleys are parallel with each other, but not in line, the motor needs to be adjusted. G5913Z/G7215Z Heavy-Duty Shaper -21-... -
Page 30: V-Belt Tension
You should be able to deflect the belt ⁄ " with The Model G5913Z/G7215Z is equipped with a V- moderate finger pressure, as shown in Figure 23. belt drive system that controls the speeds. This may seem tight compared to most other V-... -
Page 31: Fence Adjustment
Fence Adjustment Tilting Spindle The fence is a two-piece adjusting system. Each The Model G5913Z/7215Z has a tilting spin- fence is independently adjustable to compensate dle feature to allow a wider variety of profiles. for different cutting thicknesses and special shap- Spindles can be tilted as needed as long as the ing applications. -
Page 32: Test Run
FORWARD position. Run the the barrel screws clockwise or counterclock- Model G5913Z/G7215Z for a short time to ensure wise to level the larger table insert with the that the moving parts are working properly with no table (Figure 27). -
Page 33: Section 5: Operation
WE STRONGLY RECOMMEND that you read books, trade magazines, or get formal training to maximize the potential of your shaper. G5913Z/G7215Z Heavy-Duty Shaper -25-... -
Page 34: Cutter Installation
Figure 29. Always use a spindle lock nut during oper- ation. If this warning is ignored, the cut- ter may fly off the spindle during use and cause severe personal injury. -26- G5913Z/G7215Z Heavy-Duty Shaper... -
Page 35: Spindle Height
Adjust the infeed fence by turning the adjust- ment knobs until the workpiece contacts the cutter in the desired location. Lock the infeed fence in position with the locking handle. Use a test piece to determine the best setting. G5913Z/G7215Z Heavy-Duty Shaper -27-... - Page 36 Set the right and left wood faces so the ends barely clear the cutter. This allows the maximum support possible for the workpiece while passing the cutter. Remember to tight- en down the wood facing before starting the shaper. -28- G5913Z/G7215Z Heavy-Duty Shaper...
-
Page 37: Rub Collars
There are two types of rub collars—solid and ball-bearing. We recommend against the use of solid rub collars. Grizzly carries an extensive line of ball bearing rub collars designed for use with Grizzly shapers. See the current catalog for list- ings. -
Page 38: Pattern Work
Build your jig from a material that will smooth- be used. Also, unless your jig is designed to touch ly follow the rub collar or fence. the rub collar before contacting the blade, a start- ing fixture MUST be used to begin your cut. -30- G5913Z/G7215Z Heavy-Duty Shaper... -
Page 39: Freehand Shaping
If you MUST perform free- hand operations, get formal training and read a book that details freehand operations, their inher- ent dangers, and ways to avoid those dangers! G5913Z/G7215Z Heavy-Duty Shaper -31-... -
Page 40: Section 6: Accessories
There are tips on freehand shaping as well as jig and fixture shaping. 256 pages. T20503 T20452 T20456 T20451 Figure 78. Assortment of basic eye protection. Figure 43. Our most popular safety glasses. Figure 41. G3030 Shaper Handbook. -32- G5913Z/G7215Z Heavy-Duty Shaper... -
Page 41: Section 7: Maintenance
Check the V-belt, as part of a monthly inspection • Lubricate worm gears, elevation slide, and for proper tension and belt condition. Cracking quill. and glazing could result in belt failure. Replace the belt if such conditions appear. G5913Z/G7215Z Heavy-Duty Shaper -33-... -
Page 42: G5913Z Wiring Diagram
G5913Z Wiring Diagram -34- G5913Z/G7215Z Heavy-Duty Shaper... -
Page 43: G7215Z Wiring Diagram
G7215Z Wiring Diagram G5913Z/G7215Z Heavy-Duty Shaper -35-... -
Page 44: Cabinet Parts Breakdown
Cabinet Parts Breakdown -36- G5913Z/G7215Z Heavy-Duty Shaper... - Page 45 FLAT WASHER 3/8 P5913Z023 HEX NUT 10-24 P5913Z010 HEX NUT 3/8-16 P5913Z024 TABLE BRACE (L) P5913Z011 STAND ASSEMBLY P5913Z147 P5913Z012 HEX NUT 3/8-16 P5913Z148 COVER P5913Z013 LOCK WASHER 3/8 P5913Z149 COVER HANDLE P5913Z014 FLAT WASHER 3/8 G5913Z/G7215Z Heavy-Duty Shaper -37-...
-
Page 46: Motor Parts Breakdown
Motor Parts Breakdown -38- G5913Z/G7215Z Heavy-Duty Shaper... - Page 47 HEX BOLT 3/8-16 X 3/4 P5913Z032A TRUNNION BRACKET P5913Z074 HEX BOLT 5/16-18 X 1-1/4 P5913Z034 CAP SCREW 3/8-16 X 1-1/4 P5913Z075 MOTOR 5 HP (G5913Z) P5913Z035 TRUNNION SUPPORT (R) P7215Z075 MOTOR 7-1/2 HP (G7215Z) P5913Z036 HEX SHAFT 5/8-11 P5913Z076 MOTOR PULLEY...
-
Page 48: Spindle Parts Breakdown
Spindle Parts Breakdown 111A 112A 113A 113B 114A 115A 115B 116A 116B 117A 117B 109A 108A 108B -40- G5913Z/G7215Z Heavy-Duty Shaper... - Page 49 HEX NUT 1-14 (FOR 1" AND 1-1/4" SPINDLES) P5913Z164 INNER DUST COVER 112A P5913Z112A HEX NUT 3/4-16 (FOR 3/4" SPINDLE) P5913Z165 ALTERNATING RING P5913Z113 COLLAR 1-1/4" X 1/4" (1PC) P5913Z166 WAVY RING 113A P5913Z113A COLLAR 1" X 1/4" G5913Z/G7215Z Heavy-Duty Shaper -41-...
-
Page 50: Fence Guard Breakdown
Fence Guard Breakdown -42- G5913Z/G7215Z Heavy-Duty Shaper... - Page 51 HOLD-DOWN BRACKET P5913Z126 GUIDESCREW 142A P5913Z142A KNOB BOLT 3/8-16 X 1 126A P5913Z126A HANDWHEEL P5913Z143 HEX NUT P5913Z127 KNOB P5913Z144 FENCE BRACKET ASSY LH P5913Z128 GUIDE SHAFT P5913Z145 KNOB P5913Z129 P5913Z146 HOLD-DOWN BRACKET P5913Z130 KNOB P5913Z155 KNOB G5913Z/G7215Z Heavy-Duty Shaper -43-...
-
Page 52: Safety Label Parts Breakdown
MUST maintain the original location and readability of the labels on the machine. If any label is removed or becomes unreadable, REPLACE that label before using the machine again. Contact Grizzly at (800) 523-4777 or www.grizzly.com to order new labels. -44-... -
Page 53: Warranty And Returns
WARRANTY AND RETURNS Grizzly Industrial, Inc. warrants every product it sells for a period of 1 year to the original purchaser from the date of purchase. This warranty does not apply to defects due directly or indirectly to misuse, abuse, negligence, accidents, repairs or alterations or lack of maintenance. - Page 54 -46- G5913Z/G7215Z Heavy-Duty Shaper...
- Page 55 Would you recommend Grizzly Industrial to a friend? _____ Yes _____No Would you allow us to use your name as a reference for Grizzly customers in your area? Note: We never use names more than 3 times. _____ Yes _____No 10.
- Page 56 FOLD ALONG DOTTED LINE Place Stamp Here GRIZZLY INDUSTRIAL, INC. P.O. BOX 2069 BELLINGHAM, WA 98227-2069 FOLD ALONG DOTTED LINE Send a Grizzly Catalog to a friend: Name_______________________________ Street_______________________________ City______________State______Zip______ TAPE ALONG EDGES--PLEASE DO NOT STAPLE...
Need help?
Do you have a question about the G5913Z and is the answer not in the manual?
Questions and answers