Table of Contents
Advertisement
Quick Links
Advertisement
Table of Contents
Troubleshooting

Related Manuals for AG Neovo P-17


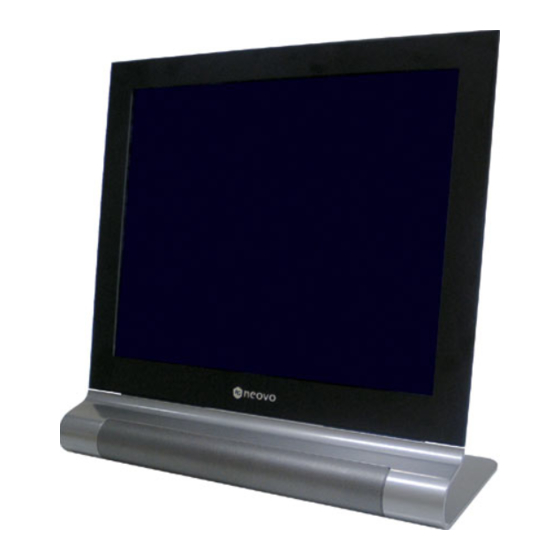
Summary of Contents for AG Neovo P-17
-
Page 2: Table Of Contents
WARNING MESSAGES AND TROUBLESHOOTING ... 42 ... 42 ARNING ESSAGES ROUBLESHOOTING UIDE TECHNICAL SPECIFICATIONS ... 44 ... 44 PECIFICATIONS P-19... 44 P-17... 44 REGULATION ... 45 ... 45 COMPLIANCE WEEE... 46 TCO'99 ... 47 TCO'03 ... 49 ... 2 ... 2 ... 2... -
Page 3: Precautions
Warning on installation Do not cover or block the ventilation holes in the case. • Do not install the monitor near heat sources such as radiators or air ducts, or in a • place subject to direct sunlight, excessive dust, mechanical vibration or shock. Warning on power connection Use an appropriate power cord for your local power supply. -
Page 4: Wall Mount
Wall Mount If you want to mount your LCD display on the wall, please follow the below instructions. First, fold the base If you want to hang this LCD monitor on the wall, please push the blue key on the bottom of base to the direction as in the illustration below. -
Page 5: Warning On Maintenance
Warning on Maintenance Clean the cabinet, glass, and controls with a soft cloth lightly moistened with a mild • detergent solution. Do not use any type of abrasive pad, scouring powder or solvent, such as alcohol or benzene. Do not rub, touch, or tap the surface of the screen with sharp or abrasive items such •... -
Page 6: Package Contents
Package Contents Before using this monitor, check the following items are included in your carton box: Monitor (*1) • Power adapter (*1) • (For use only with the power supply Li-shin LSE0452B1280 or Linearity LAD10PFKB6) Power cord (*1) • D-sub 15-pin signal cable (*1) •... -
Page 7: Control Buttons
Control Buttons Key Controls located on the bottom center of the base ON/OFF Push once to turn your LCD display ON (green color). Push again for 3 seconds to turn it OFF (amber color). Menu Push once to turn on the OSD menu. The six blue keys surrounding will light on. The blue buttons and green on the OSD menu. -
Page 8: Installation
Installation Remove all the packages from the panel. • Place your LCD display in a suitable place. Make sure that there is enough space • for adjustment, especially the rear of the panel. Connecting LCD Display to PC (Analog)— Turn off your PC and connect the D-sub 15-pin VGA cable included in the package to the VGA port on your PC. -
Page 9: Adjusting Your Lcd Display
In the OSD menu, you will find all kinds of features to help you adjust your LCD display to the optimal performance. Important! Though manual adjustment of the LCD display is available, we strongly recommend that you use the panel’s auto adjustment function. This will automatically tune your LCD display to the optimal performance. -
Page 10: Auto Adjustment
Auto Adjustment Automatically adjust to the best user viewing condition. But timing resolution fewer than 800x600 can only be manually adjusted. Input Select Loop among input modes D-SUB, DVI, CVBS and S-Video signal. Volume – and Volume + Adjust speaker volume Reduce the volume Increase the volume... - Page 11 Mute Loop on/off function to mute speaker and earphone volume. Luminance Loop among luminance levels Light, Normal and Dark. If sRGB function is on, user cannot adjust Luminance Light N orm al D ark...
- Page 12 (II) Page 2: Main Menu The main menu categorizes the functions of the monitor into six groups. Each of the area will go to its corresponding sub-menu. Geometric Audio Tools Geometric allows adjustment in terms of respective measurement (1) Horizontal Position (3) Clock Video Color...
- Page 13 Video (1) Brightness If sRGB function is on, user cannot adjust Brightness (3) Hue / Saturation Hue / Saturation does not work with D-SUB input signal. (4) Sharpness: If the timing resolution of the PC is 1280 x 1024, sharpness will not perform. allows adjustment in terms of respective measurement.
- Page 14 Audio (1) 3D: (2) Subwoofer: Loops between “On” and “Off”. Loops between “On” and “Off”. (3) Bass: (4) Treble: allows adjustment in terms of respective measurement.
- Page 15 Color (1) Auto Color: Automatically adjust to user’s optimal color. (2) User Color: Loops among Red, Green and Blue color. allows adjustment in terms of respective measurement.
- Page 16 (3) sRGB: Loops between “On” and “Off”. If sRGB function is on, user cannot adjust Luminance , Brightness and Contrast (4) Color Temperature: Loops between temperature 6500 c and 9300 Tools...
- Page 17 (1) OSD Timer: allows adjustment in terms of respective measurement. (2) OSD H Position/ OSD V Position / OSD Transparency: Loops among OSD H Pos., OSD V Pos. and OSD Transparency. adjustment in terms of respective measurement. (3) Recall: Recall to manufacturing default value. allows...
- Page 18 (4) Mode: Loop between Graphic and Text mode. Only works in DOS mode (does not work with other operation system such as Windows). Language allows language selection by scrolling. OSD language option has two versions: (1) Europe & USA: English, German, French, Spanish, Italian, Holland, Russian, Czech, Polish, Romanian.
-
Page 19: Dvi Input
DVI Input (I) Page 1: Hot key Once the function key is being pressed, the frame color will become red. Once the user press the “Menu” button, the first page will show all the hot keys that are mostly used. When pressing Main menu. - Page 20 Volume – and Volume + Adjust speaker volume Reduce the volume Mute Loop on/off function to mute speaker and earphone volume. Luminance Loop among luminance levels Br Light, Normal and Dark. If sRGB function is on, user cannot adjust Luminance Light Increase the volume Normal...
- Page 21 (II) Page 2: Main Menu The main menu categorizes the functions of the monitor into six groups. Each of the area will go to its corresponding sub-menu. Geometric Audio Tools Geometric Geometric does not work with DVI input singal. Video If sRGB function is on, user cannot adjust Video (1) Brightness (3) Hue / Saturation...
- Page 22 Hue / Saturation does not work with DVI input signal. Audio (1) 3D: Loops between “On” and “Off”. (3) Bass: allows adjustment in terms of respective measurement. Sharpness does not work with DVI input signal. (2) Subwoofer: Loops between “On” and “Off”. (4) Treble:...
- Page 23 Color (1) Auto Color: Auto color does not work with DVI input signal. (2) User Color: Loops among Red, Green and Blue color. respective measurement. (3) sRGB: Loops between “On” and “Off”. If sRGB function is on, user cannot adjust Video and Luminance allows adjustment in terms of...
- Page 24 (4) Color Temperature: Loops between temperature 6500 c and 9300 Tools (1) OSD Timer: allows adjustment in terms of respective measurement.
- Page 25 (2) OSD H Position/ OSD V Position / OSD Transparency: Loops among OSD H Pos., OSD V Pos. and OSD Transparency. adjustment in terms of respective measurement. (3) Recall: Recall to manufacturing default value. (4) Mode: Loop between Graphic and Text mode. Only works in DOS mode (does not work with other operation system such as Windows).
- Page 26 Language allows language selection by scrolling. OSD language option has two versions: (1) Europe & USA: English, German, French, Spanish, Italian, Holland, Russian, Czech, Polish, Romanian. (2) Rest of the world: English, German, French, Spanish, Traditional Chinese, English German Czech Polish Simplified Chinese, Japan.
-
Page 27: Cvbs Input
CVBS Input (I) Page 1: Hot key Once the function key is being pressed, the frame color will become red. Once the user press the “Menu” button, the first page will show all the hot keys that are mostly used. When pressing Main menu. - Page 28 Volume – and Volume + Adjust speaker volume Reduce the volume Mute Loop on/off function to mute speaker and earphone volume. Luminance Loop among luminance levels Light, Normal and Dark. Light Increase the volume Normal D ark...
- Page 29 (II) Page 2: Main Menu The main menu categorizes the functions of the monitor into six groups. Each of the area will go to its corresponding sub-menu. Geometric Audio Tools Geometric allows adjustment in terms of respective measurement. (1) Horizontal Position (3) Clock Clock does not work with CVBS input signal.
- Page 30 (1) Brightness (2) Contrast (3) Hue / Saturation Loop between “Hue” and “Saturation” mode. (4) Sharpness:...
- Page 31 Audio (1) 3D: Loops between “On” and “Off”. (3) Bass: allows adjustment in terms of respective measurement. (2) Subwoofer: Loops between “On” and “Off”. (4) Treble:...
- Page 32 Color (1) Auto Color Auto Color does not work with CVBS input signal. (2) User Color: Loops among Red, Green and Blue color. respective measurement. (3) sRGB sRGB does not work with CVBS input signal. (4) Color Temperature: Loops between temperature 6500 allows adjustment in terms of c and 9300...
- Page 33 Tools (1) OSD Timer: allows adjustment in terms of respective measurement. (2) OSD H Position/ OSD V Position / OSD Transparency: Loops among OSD H Pos., OSD V Pos. and OSD Transparency. allows adjustment in terms of respective measurement.
- Page 34 (3) Recall: Recall to manufacturing default value. (4) Mode Mode does not work with CVBS input signal. Language allows language selection by scrolling. OSD language option has two versions: (1) Europe & USA: English, German, French, Spanish, Italian, Holland, Russian, Czech, Polish, Romanian.
-
Page 35: S-Video Input
S-Video Input (I) Page 1: Hot key Once the function key is being pressed, the frame color will become red. Once the user press the “Menu” button, the first page will show all the hot keys that are mostly used. When pressing Main menu. - Page 36 Volume – and Volume + Adjust speaker volume Reduce the volume Mute Loop on/off function to mute speaker and earphone volume. Luminance Loop among luminance levels Light, Normal and Dark. Light Increase the volume Normal D ark...
- Page 37 (II) Page 2: Main Menu The main menu categorizes the functions of the monitor into six groups. Each of the area will go to its corresponding sub-menu. Geometric Audio Tools Geometric allows adjustment in terms of respective measurement. (1) Horizontal Position (3) Clock Clock does not work with S-Video input signal.
- Page 38 (1) Brightness (2) Contrast (3) Hue / Saturation Loop between “Hue” and “Saturation” mode (4) Sharpness:...
- Page 39 Audio (1) 3D: (2) Subwoofer: Loops between “On” and “Off”. Loops between “On” and “Off”. (3) Bass: (4) Treble: allows adjustment in terms of respective measurement.
- Page 40 Color (1) Auto Color Auto color does not work with S-Video input signal. (2) User Color: Loops among Red, Green and Blue color. respective measurement. (3) sRGB sRGB does not work with S-Video input signal. (4) Color Temperature: Loops between temperature 6500 allows adjustment in terms of c and 9300...
- Page 41 Tools (1) OSD Timer: allows adjustment in terms of respective measurement. (2) OSD H Position/ OSD V Position / OSD Transparency: Loops among OSD H Pos., OSD V Pos. and OSD Transparency . allows adjustment in terms of respective measurement.
- Page 42 (3) Recall: Recall to manufacturing default value. (4) Mode Mode does not work with S-Video input signal. Language allows language selection by scrolling. OSD language option has two versions: (1) Europe & USA: English, German, French, Spanish, Italian, Holland, Russian, Czech, Polish, Romanian.
-
Page 43: Warning Messages And Troubleshooting
Warning Messages and Troubleshooting Warning Messages When a warning message appears on the screen, check the following items to locate the problem affecting your LCD display. NO SIGNAL INPUT SIGNAL FROM ANALOG INPUT SIGNAL FROM DIGITAL INPUT When no input signal is detected from any input ports. •... -
Page 44: Troubleshooting Guide
Troubleshooting Guide Symptoms • No display • Power LED is off • No display • Power LED is amber • Blurred text display • No center screen • Missing lines • Red, green, blue or black spots on the screen Check •... -
Page 45: P-19
Electrical characteristics Screen size Pixel format Horizontal frequency Vertical frequency Maximum pixel clock Connections Power Consumption Physical characteristics Weight Tilt angle P-17 Electrical characteristics Screen size Pixel format Horizontal frequency Vertical frequency Maximum pixel clock Connections Power Consumption Physical characteristics Weight Tilt angle *The above specifications are subject to change without notice. -
Page 46: Regulation
FCC compliance This device complies with Part 15 of the FCC Rules. Operation is subject to the following two conditions: (1) this device may not cause harmful interference, and (2) this device must accept any interference received, including interference that may cause undesired operation. -
Page 47: Weee
WEEE Information for users applicable in European Union countries The symbol on the product or its packaging signifies that this product has to be disposed separately from ordinary household wastes at its end of life. Please kindly be aware that this is your responsibility to dispose electronic equipment at recycling centers so as to help conserve natural resources. -
Page 48: Tco'99
TCO'99 Congratulations! You have just purchased a TCO'99 approved and labeled product! Your choice has provided you with a product developed for professional use. Your purchase has also contributed to reducing the burden on the environment and also to the further development of environmentally adapted electronics products. Why do we have environmentally labeled computers? In many countries, environmental labeling has become an established method for encouraging the adaptation of goods and services to the environment. - Page 49 Email (Internet): development@tco.se Current information regarding TCO'99 approved and labeled products may also be obtained via the Internet, using the address: http://www.tco-info.com/ Environmental requirements Flame retardants Flame retardants are present in printed circuit boards, cables, wires, casings and housings. Their purpose is to prevent, or at least to delay the spread of fire.
-
Page 50: Tco'03
TCO'03 Some of the features of the TCO’03 Display requirements: Ergonomics • Good visual ergonomics and image quality in order to improve the working environment for the user and to reduce sight and strain problems. Important parameters are luminance, contrast, resolution, reflectance, colour rendition and image stability. Energy •...
Need help?
Do you have a question about the P-17 and is the answer not in the manual?
Questions and answers