SCHUNK SWS 001 Assembly And Operating Manual
Quick-change system
Hide thumbs
Also See for SWS 001:
- Installation and operating manual (40 pages) ,
- Installation and operating manual (40 pages)

Subscribe to Our Youtube Channel
Related Manuals for SCHUNK SWS 001


Summary of Contents for SCHUNK SWS 001
- Page 1 Translation of the original manual Assembly and Operating Manual Quick-Change System...
- Page 2 Imprint Copyright: This manual is protected by copyright. The author is SCHUNK GmbH & Co. KG. All rights reserved. Any reproduction, processing, distribution (making available to third parties), translation or other usage - even excerpts - of the manual is especially prohibited and requires our written approval.
-
Page 3: Table Of Contents
Max. permissible offset when mounting the SWA with end effector .... 19 Design and description.................... 20 Description ...................... 20 4.1.1 Functional principle ................ 21 Design ......................... 22 4.2.1 SWS 001.................... 22 4.2.2 SWS 005.................... 23 4.2.3 SWS 007.................... 24 4.2.4 SWS 011.................... 25 4.2.5 SWS 011HM .................... 26... - Page 4 4.2.10 SWS 076 / 110 / 160 ................ 31 Assembly ........................ 32 Installing and connecting.................. 32 Mechanical connection .................. 33 5.2.1 SWS 001.................... 34 5.2.2 SWS 005 / 011 .................. 36 5.2.3 SWS 007.................... 38 5.2.4 SWS 011HM .................... 40 5.2.5 SWS 020 / 021 / 041 / 060.............. 43 5.2.6 SWS 020HM / 021HM................ 46...
- Page 5 7.9.1 Clean electric feed-through module............. 114 7.9.2 Replace V-ring seal on electric feed-through module ...... 115 7.9.3 Change rubber bushing on the fluid feed-through module.... 116 7.10 Assembly drawings ................... 117 7.10.1 SWS 001.................... 117 7.10.2 SWS 005.................... 118 7.10.3 SWS 007.................... 119 7.10.4 SWS 011.................... 120 7.10.5 SWS 011HM .................. 121...
-
Page 6: General
General 1 General 1.1 About this manual This manual contains important information for a safe and appropriate use of the product. This manual is an integral part of the product and must be kept accessible for the personnel at all times. Before starting work, the personnel must have read and understood this operating manual. -
Page 7: Definition Of Terms
SWO-F • Catalog data sheet for SWM storage racks The documents marked with an asterisk (*) can be downloaded on our homepage schunk.com 1.2 Warranty If the product is used as intended, the warranty is valid for... -
Page 8: Accessories
• Adapter plates for screwing to the robot For information regarding which accessory articles can be used with the corresponding product variants, see catalog data sheet. 1.4.1 Seal kit Size ID.-No. of the seal kit SWS 001 available from SCHUNK on request SWS 005 0370819 SWS 007 1371094 SWS 011 0370977 SWS 011HM... -
Page 9: Basic Safety Notes
Basic safety notes 2 Basic safety notes 2.1 Intended use • The quick-change system SWS consists of a quick-change master SWK and a quick-change adapter SWA. It is exclusively intended for the automated changing of tools, e.g. grippers or other end effectors on robots. -
Page 10: Constructional Changes
Use of unauthorized spare parts Using unauthorized spare parts can endanger personnel and damage the product or cause it to malfunction. • Use only original spare parts or spares authorized by SCHUNK. 2.5 Ambient conditions and operating conditions Required ambient conditions and operating conditions... -
Page 11: Personnel Qualification
Basic safety notes 2.6 Personnel qualification Inadequate qualifications of the personnel If the personnel working with the product is not sufficiently qualified, the result may be serious injuries and significant property damage. • All work may only be performed by qualified personnel. •... -
Page 12: Personal Protective Equipment
Basic safety notes 2.7 Personal protective equipment Use of personal protective equipment Personal protective equipment serves to protect staff against danger which may interfere with their health or safety at work. • When working on and with the product, observe the occupational health and safety regulations and wear the required personal protective equipment. -
Page 13: Transport
Basic safety notes 2.9 Transport Handling during transport Incorrect handling during transport may impair the product's safety and cause serious injuries and considerable material damage. • When handling heavy weights, use lifting equipment to lift the product and transport it by appropriate means. •... -
Page 14: Protection During Handling And Assembly
Basic safety notes 2.12.1 Protection during handling and assembly Incorrect handling and assembly Incorrect handling and assembly may impair the product's safety and cause serious injuries and considerable material damage. • Have all work carried out by appropriately qualified personnel. •... -
Page 15: Protection Against Dangerous Movements
Basic safety notes 2.12.3 Protection against dangerous movements Unexpected movements Residual energy in the system may cause serious injuries while working with the product. • Switch off the energy supply, ensure that no residual energy remains and secure against inadvertent reactivation. •... -
Page 16: Notes On Particular Risks
Basic safety notes 2.13 Notes on particular risks WARNING Risk of injury due to unexpected movements! If the power supply is switched on or residual energy remains in the system, components can move unexpectedly and cause serious injuries. Before starting any work on the product: Switch off the power •... -
Page 17: Technical Data
Technical data 3 Technical data 3.1 Basic data Recommended Weight [kg] Max. moment [Nm] handling and M weight [kg] 0.03 0.02 3.45 0.27 0.09 37.5 0.16 0.08 0.13 0.09 011HM 0.29 0.09 20.3 12.4 0.69 0.32 169.5 020HM 0.68 0.32 56.5 169.5 021HM... -
Page 18: Ambient Conditions And Operating Conditions
* For use in dirty ambient conditions (e.g. sprayed water, vapors, abrasion or processing dust) SCHUNK offers corresponding product options as standard. SCHUNK also offers customized solutions for special applications in dirty ambient conditions. 12.00 | SWS | Assembly and Operating Manual | en | 389456... -
Page 19: Max. Permissible Offset When Mounting The Swa With End Effector
Technical data 3.3 Max. permissible offset when mounting the SWA with end effector Angular offset X/Y Axial offset Z Lateral offset X/Y Torsional offset Z Offset definition Max. Max. axial Max. lateral Max. angular torsional offset Z offset XY offset XY [°] offset Z [°] [mm] * [mm] **... -
Page 20: Design And Description
SWA. The unused tools are stored by the robot in a storage rack during when not being used. Storage racks are optionally available as accessories from SCHUNK. 12.00 | SWS | Assembly and Operating Manual | en | 389456... -
Page 21: Functional Principle
Design and description 4.1.1 Functional principle Schematic diagram of locking mechanism Locking piston Male coupling Locking ball Bearing race The cam (3) is attached to the locking piston (1) and has two Locking bevels. When the locking piston (1) is actuated, the cam (3) with the bevel A presses the locking balls (4) under the hardened bearing race (5). -
Page 22: Design
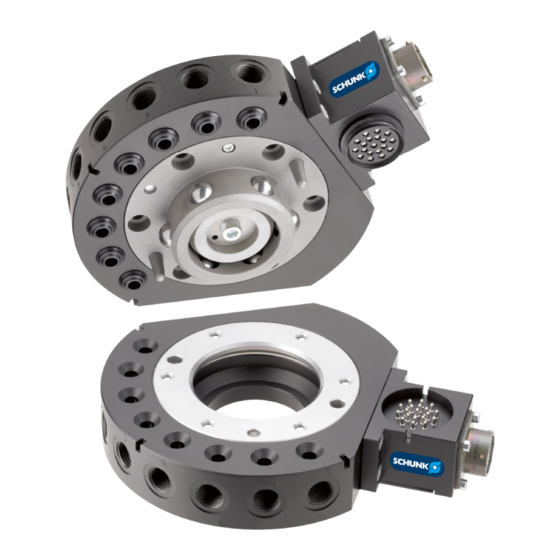
Design and description 4.2 Design 4.2.1 SWS 001 SWK robot side SWA locking interface Design SWK 001 1 Pneumatic feed-through with O-ring 2 Optional module 3 Alignment pin 4 Locking mechanism 5 Dowel pin 6 Air supply lock and unlock... -
Page 23: Sws 005
Design and description 4.2.2 SWS 005 Design SWK 005 1 Locking mechanism 2 Alignment pin bushing 3 Air supply lock and unlock (observe reverse piston direction) 4 Cover plate 5 Pneumatic feed-through with rubber bushing 6 Locking ball Design SWA 005, A = view from above 1 Alignment pin 2 Bearing race 3 Pneumatic feed-through... -
Page 24: Sws 007
Design and description 4.2.3 SWS 007 Design SWK 007 1 Alignment pin bushing 2 Pneumatic feed-through with rubber bushing 3 Air supply lock 4 Cover plate 5 Integrated piston stroke control 6 Locking mechanism 7 Locking ball Design SWA 007 1 Alignment pin 2 Pneumatic feed-through 3 Port for pneumatic feed-through... -
Page 25: Sws 011
Design and description 4.2.4 SWS 011 Design SWK 011 1 Locking mechanism 2 Alignment pin bushing 3 Air supply lock and unlock 4 Cover plate 5 Pneumatic feed-through with rubber bushing 6 Locking ball Design SWA 011 1 Alignment pin 2 Bearing race 3 Pneumatic feed-through 4 Port for pneumatic feed-through 12.00 | SWS | Assembly and Operating Manual | en | 389456... -
Page 26: Sws 011Hm
Design and description 4.2.5 SWS 011HM SWK robot side SWK locking interface Design SWK 011HM 1 Locking mechanism 2 Pneumatic feed-through with rubber bushing 3 Alignment pin bushing 4 Locking ball 5 Air supply lock and unlock 6 Integrated piston stroke control Design SWA 011 1 Alignment pin 2 Bearing race... - Page 27 Design and description 4.2.6 SWS 020 / 021 / 041 / 060 NOTE The rubber bushings are located at the SWS 020 in SWA and not, as shown here, in SWK. Exemplary design shown on SWK 021 1 Alignment pin 2 Locking mechanism 3 Locking ball 4 Pneumatic feed-through with rubber bushing 5 Air supply lock and unlock...
-
Page 28: Sws 020Hm / 021Hm
Design and description 4.2.7 SWS 020HM / 021HM SWK robot side SWK locking interface Exemplary design shown on SWK 021HM 1 Locking mechanism 2 Alignment pin 3 Pneumatic feed-through with rubber bushing 4 Integrated piston stroke control 5 Locking ball 6 Air supply lock and unlock 7 Port for pneumatic feed-through Exemplary design shown on SWA 021... -
Page 29: Sws 040Q / 071
Design and description 4.2.8 SWS 040Q / 071 Exemplary design shown on SWK 071 1 Locking mechanism 2 Alignment pin 3 Pneumatic feed-through with rubber bushing 4 Locking ball 5 Air supply lock and unlock Exemplary design shown on SWA 071 1 Bearing race 2 Alignment pin bushing 3 Pneumatic feed-through 4 Port for pneumatic feed-through... -
Page 30: Sws 046
Design and description 4.2.9 SWS 046 Design SWK 046 1 Integrated piston stroke control 2 Locking ball 3 Locking piston 4 Locking mechanism 5 Alignment pin 6 Air supply lock and unlock Design SWA 046 1 Alignment pin bushing 2 Bearing race 12.00 | SWS | Assembly and Operating Manual | en | 389456... -
Page 31: Sws 076 / 110 / 160
Design and description 4.2.10 SWS 076 / 110 / 160 Exemplary design shown on SWK 110 1 Alignment pin 2 Locking mechanism 3 Locking ball 4 Integrated piston stroke control 5 Pneumatic feed-through with rubber bushing 6 Air supply lock and unlock 7 Locking piston Exemplary design shown on SWA 110 1 Port for pneumatic feed-through... -
Page 32: Assembly
Assembly 5 Assembly 5.1 Installing and connecting WARNING Risk of injury due to unexpected movements! If the power supply is switched on or residual energy remains in the system, components can move unexpectedly and cause serious injuries. Before starting any work on the product: Switch off the power •... -
Page 33: Mechanical Connection
Assembly 5.2 Mechanical connection NOTE • Secure all screws with Loctite®. To do this, apply adhesive to the exposed screw threads. ð Use adhesive only once. Always apply new adhesive if reusing fastening elements. • Mounted screws may not protrude above the surface! Select screws so that they are flush with the surfaces and screw them together without washers. -
Page 34: Sws 005 / 011
Assembly 5.2.1 SWS 001 Mounting on robot for SWK 001 Clean the mounting patterns on the robot (1) and SWK (2). Ø Mount optional adapter plate between the robot and SWK. Ø Insert the SWK (2) with integrated dowel pins into the bores on Ø... - Page 35 Assembly Mount the end effector to SWA 001 Clean the mounting patterns on the SWA (1) and end effector (2). Ø Mount optional adapter plate between SWA and end effector. Ø Secure the end effector (2) with screws (3). Ø Observe the tightening torque for the mounting screws. ✓...
-
Page 36: Sws 007
Assembly 5.2.2 SWS 005 / 011 NOTE Observe requirements when using an adapter plate, Mechanical connection 33]. Further information on the adapter plate design and precise manufacturing instructions can be found in the catalog data sheet, Applicable documents 7]. Mounting on robot, shown as an example on SWK 011 Clean the mounting patterns on the robot (1), adapter plate (3) Ø... - Page 37 Assembly In the event that the cover plate (6) has to be removed: Ø Remove the cover plate (6) from the SWK (7). IMPORTANT! Product may leak! When removing the cover plate, ensure that the O-ring remains in the SWK Insert dowel pin (5) into bore on cover plate / SWK. Ø...
- Page 38 Assembly 5.2.3 SWS 007 NOTE The product in this size has an ISO flange as standard. When using a robot without ISO flange interface, the product can be mounted to the robot using an adapter plate. Mounting on robot for SWK 007 Clean the mounting surfaces on the robot (1) and SWK (3).
- Page 39 Assembly Mount adapter plate (shown as an example) to SWA 007 (A = mounting from below; B = mounting from above) NOTE If the axial pneumatic feed-throughs are to be used on SWA 007, observe chapter Axial pneumatic feed-throughs 62]. Clean mounting patterns on SWA (2) and adapter plate (4). Ø...
-
Page 40: Sws 011Hm
Assembly 5.2.4 SWS 011HM NOTE Observe requirements when using an adapter plate, Mechanical connection 33]. Further information on the adapter plate design and precise manufacturing instructions can be found in the catalog data sheet, Applicable documents 7]. Mounting on robot for SWK 011HM Clean the mounting patterns on the robot (1), adapter plate (3) Ø... - Page 41 Assembly Insert dowel pin on SWK (6) into the bores on the adapter Ø plate (3). Apply screw lock to screws (7). Ø Fasten SWK (6) to adapter plate (3) with screws (7). Ø Observe the tightening torque for the mounting screws. ✓ Item Mounting SWK 011HM Mounting screw according to M3 x 30, standard...
- Page 42 Assembly Mount adapter plate (shown as an example) to SWA 011 Clean mounting surfaces on SWA (1) and adapter plate (2). Ø Insert the adapter plate (2) with two alignment pins and/or with Ø one alignment pin and the centering collar on the adapter plate (4) into the holes provided for this purpose.
- Page 43 Assembly 5.2.5 SWS 020 / 021 / 041 / 060 NOTE Observe requirements when using an adapter plate, Mechanical connection 33]. Further information on the adapter plate design and precise manufacturing instructions can be found in the catalog data sheet, Applicable documents 7].
- Page 44 Assembly Insert dowel pins (6) on the cover plate / SWK into the bores on Ø the adapter plate. Apply screw lock to screws (8). Ø Secure SWK (7) to adapter plate (3) with screws (8). Ø Observe the tightening torque for the mounting screws. ✓ Item Mounting SWK 020 SWK 021 SWK 041 SWK 060 Alignment pin Ø 4 x 14...
- Page 45 Assembly Mount adapter plate (shown as an example) to SWA, illustrated on SWA 021 Clean mounting surfaces on SWA (1) and adapter plate (2). Ø Insert the adapter plate (2) with two alignment pins and/or with Ø one alignment pin and the centering collar on the adapter plate (4) into the holes provided for this purpose.
-
Page 46: Sws 020Hm / 021Hm
Assembly 5.2.6 SWS 020HM / 021HM NOTE Observe requirements when using an adapter plate, Mechanical connection 33]. Further information on the adapter plate design and precise manufacturing instructions can be found in the catalog data sheet, Applicable documents 7]. Mounting on robot shown as an example on SWK 021HM Clean the mounting patterns on the robot (1), adapter plate (3) Ø... - Page 47 Assembly Insert dowel pin on SWK (6) into the bores on the adapter Ø plate (3). Apply screw lock to screws (7). Ø Fasten SWK (6) to adapter plate (3) with screws (7). Ø Observe the tightening torque for the mounting screws. ✓ Item Mounting SWK 020HM / 021HM Mounting screw according to M4 x 30, standard...
- Page 48 Assembly Mount adapter plate (shown as an example) to SWA, illustrated on SWA 021 Clean mounting surfaces on SWA (1) and adapter plate (2). Ø Insert the adapter plate (2) with two alignment pins and/or with Ø one alignment pin and the centering collar on the adapter plate (4) into the holes provided for this purpose.
-
Page 49: Sws 040Q / 071
Assembly 5.2.7 SWS 040Q / 071 NOTE Observe requirements when using an adapter plate, Mechanical connection 33]. Further information on the adapter plate design and precise manufacturing instructions can be found in the catalog data sheet, Applicable documents 7]. Mounting on robot for SWK 040Q Clean the mounting patterns on the robot (1), adapter plate (3) Ø... - Page 50 Assembly Insert the SWK (6) with dowel pins (5) into the bores on the Ø adapter plate. Apply screw lock to screws (7). Ø Fasten SWK (6) to adapter plate (3) with screws (7). Ø Observe the tightening torque for the mounting screws. ✓ Item Mounting SWK 040Q Alignment pin Ø 6 x 20...
- Page 51 Assembly Mounting on robot for SWK 071 Clean the mounting patterns on the robot (1), adapter plate (3) Ø and SWK (7). Insert dowel pin (2) into adapter plate (3). Ø Apply screw lock to screws (4). Ø Insert the adapter plate (3) with dowel pin (2) into the bore on Ø...
- Page 52 Assembly Insert dowel pins (6) on the cover plate / SWK into the bores on Ø the adapter plate. Apply screw lock to screws (8). Ø Secure SWK (7) to adapter plate (3) with screws (8). Ø Observe the tightening torque for the mounting screws. ✓ Item Mounting SWK 071 Alignment pin Ø 6 x 20...
- Page 53 Assembly Mount adapter plate (shown as an example) to SWA, shown as an example on SWA 040Q Clean mounting surfaces on SWA (1) and adapter plate (2). Ø Insert the adapter plate (2) with two alignment pins and/or with Ø one alignment pin and the centering collar on the adapter plate (4) into the holes provided for this purpose.
-
Page 54: Sws 046
Assembly 5.2.8 SWS 046 NOTE The product in this size has an ISO flange as standard. When using a robot without ISO flange interface, the product can be mounted to the robot using an adapter plate. Mounting on robot for SWK 046 Clean the mounting surfaces on the robot (1) and SWK (3). - Page 55 Assembly Mount adapter plate (shown as an example) to SWA 046 Clean mounting surfaces on SWA (1) and adapter plate (2). Ø Insert the adapter plate (2) with two alignment pins and/or with Ø one alignment pin and the centering collar on the adapter plate (4) into the holes provided for this purpose.
- Page 56 Assembly 5.2.9 SWS 076 / 110 / 160 NOTE The product in this size has an ISO flange as standard. When using a robot without ISO flange interface, the product can be mounted to the robot using an adapter plate. Mounting on robot shown as an example on SWK 110 Clean the mounting surfaces on the robot (1) and SWK (3).
- Page 57 Assembly Mount adapter plate (shown as an example) to SWA, illustrated on SWA 110 Clean mounting surfaces on SWA (1) and adapter plate (2). Ø Insert the adapter plate (2) with two alignment pins and/or with Ø one alignment pin and the centering collar on the adapter plate (4) into the holes provided for this purpose.
-
Page 58: Pneumatic Connection
Assembly 5.3 Pneumatic connection CAUTION Material damage due to loss of compressed air! The SWA can become loose in the event of a loss of compressed air, but the connection between SWK and SWA is ensured by a patented self-locking mechanism. The SWK can then no longer decouple a coupled SWA or accept a new SWA. -
Page 59: Sws 001
Assembly 5.3.2 SWS 001 Dimensions of the compressed air connections Pneumatic feed-throughs Air supply lock and unlock 4x M5 Pneumatic connection SWK 001 1 Air supply lock 2 Air supply unlock 3 Port for pneumatic feed-through 12.00 | SWS | Assembly and Operating Manual | en | 389456... -
Page 60: Sws 007
Assembly 5.3.3 SWS 005 CAUTION Damage to the product due to lack of compensation possible! The piston of the SWK 005 moves in the opposite direction when unlocked, i.e. in the direction of the SWA. The end effector is actively repelled with the aid of the release bolt in the SWA. If there is no possibility for displacement due to the tool rack or the robot, the product can wear out faster or become damaged beyond repair after a short time. - Page 61 Assembly 5.3.4 SWS 007 Dimensions of the compressed air connections Pneumatic feed-throughs Air supply lock and unlock 5x M5 Pneumatic connection SWK 007 1 Air supply lock with pneumatic screw connection * 2 Port for pneumatic feed-through 3 Air supply unlock with pneumatic screw connection * * contained in accessory kit 12.00 | SWS | Assembly and Operating Manual | en | 389456...
- Page 62 Assembly 5.3.4.1 Axial pneumatic feed-throughs The SWA 007 has axial ports for pneumatic feed-through, which can optionally be used instead of the radial connections. Axial pneumatic feed-throughs on SWA 007 1 Axial port for pneumatic feed-through 2 Radial port for pneumatic feed-through Remove screws on the bottom of the SWA from the axial ports Ø...
- Page 63 Assembly 5.3.5 SWS 011 Dimensions of the compressed air connections Pneumatic feed-throughs Air supply lock and unlock 6x M5 Pneumatic connection SWK 011 1 Air supply lock 2 Air supply unlock 3 Port for pneumatic feed-through 4 Pneumatic feed-through with rubber bushing 12.00 | SWS | Assembly and Operating Manual | en | 389456...
-
Page 64: Sws 011
Assembly 5.3.6 SWS 011HM Dimensions of the compressed air connections Pneumatic feed-throughs Air supply lock and unlock 011HM 6x G1/8" G1/8" Pneumatic connection SWK 011HM 1 Air supply lock with pneumatic screw connection 2 Air supply unlock with pneumatic screw connection 3 Port for pneumatic feed-through with pneumatic screw connection 12.00 | SWS | Assembly and Operating Manual | en | 389456... -
Page 65: Sws 020 / 021 / 041 / 060
Assembly 5.3.7 SWS 020 / 021 / 041 / 060 Dimensions of the compressed air connections Pneumatic feed-throughs Air supply lock and unlock 12x M5 8x G1/8" 6x G3/8", 4x G1/8" G1/8" 8x G1/8" G1/8" NOTE The rubber bushings are located at the SWS 020 in SWA and not, as shown here, in SWK. -
Page 66: Sws 020Hm / 021Hm
Assembly 5.3.8 SWS 020HM / 021HM Dimensions of the compressed air connections Pneumatic feed-throughs Air supply lock and unlock 020HM 12x G1/8" G1/8" 021HM 6x G1/8", 2x G1/4" G1/8" SWK 020HM SWK 021HM Pneumatic connection SWS 020HM / 021HM 1 Air supply lock with pneumatic screw connection 2 Air supply unlock with pneumatic screw connection 3 Port for pneumatic feed-through with pneumatic screw connection... -
Page 67: Sws 040Q / 071
Assembly 5.3.9 SWS 040Q / 071 Dimensions of the compressed air connections Pneumatic feed-throughs Air supply lock and unlock 040Q 8x G1/8" G1/8" 8x G1/4" G1/8" SWK 040Q SWK 071 Pneumatic connection SWK 040Q / 071 1 Air supply lock 2 Air supply unlock 3 Port for pneumatic feed-through 12.00 | SWS | Assembly and Operating Manual | en | 389456... -
Page 68: Sws 046
Assembly 5.3.10 SWS 046 Dimensions of the compressed air connections Pneumatic feed-throughs Air supply lock and unlock - * G1/8" * Pneumatic feed-through possible with optional modules Pneumatic connection SWK 046 1 Air supply unlock 2 Air supply lock 12.00 | SWS | Assembly and Operating Manual | en | 389456... -
Page 69: Sws 076 / 110 / 160
Assembly 5.3.11 SWS 076 / 110 / 160 Dimensions of the compressed air connections Pneumatic feed-throughs Air supply lock and unlock 5x G3/8" G1/8" 8x G3/8" G1/8" 5x G3/8", 4x G1/2" G1/8" SWK 076 SWK 110 SWK 160 Pneumatic connection SWK 076 / 110 / 160 1 Air supply lock 2 Air supply unlock 3 Port for pneumatic feed-through... -
Page 70: Mounting The Sensor
• For technical data for the suitable sensors, see Assembly and Operating Manual and catalog datasheet – which can be found at schunk.com. • Information on handling sensors is available at schunk.com or from SCHUNK contact persons. 5.4.1 Overview of sensors The piston stroke control checks whether the locking mechanism is locked or unlocked. -
Page 71: Check Integrated Piston Stroke Control
If the integrated piston stroke control is required later for these sizes, the piston stroke control can be retrofitted. For more information, please contact SCHUNK. 12.00 | SWS | Assembly and Operating Manual | en | 389456... - Page 72 Assembly Integrated piston stroke control shown as an example on SWK 160 Sensors for unlocking (1) and locking (2) monitoring are ■ mounted and preset at the factory. In case of retrofitting: Mount and check sensors, ■ Change sensors 103] Connect the sensor cable to the robot control system. Ø...
- Page 73 Assembly SWS for hollow wrist robots SWK 011HM SWK 020HM / SWK 021HM Integrated piston stroke control for hollow wrist robots Sensors for unlocking (1) and locking (2) monitoring are ■ mounted and preset at the factory. In case of retrofitting: Mount and check sensors, ■...
-
Page 74: Mount And Check External Piston Stroke Control
Assembly 5.4.3 Mount and check external piston stroke control CAUTION The sensor adjustment can be lost! Do not move or remove sensors from the sensor assembly. The sensors are preset at the factory. NOTE For the sizes SWS 011, SWS 020, SWS 021, SWS 041, SWS 060 and SWS 071, an external piston stroke control can be attached to the SWK. - Page 75 Assembly Prepare sensor assembly Check the O-ring (2) in the sensor assembly (1) and lubricate if Ø necessary, Lubricants/greasing areas 89]. Mount sensor assembly on SWK Mount sensor assembly on SWK Push the sleeve for detection shaft (4) into the sensor Ø assembly (1) up to the stop. Apply the primer for the screw lock to the detection shaft (5) Ø...
- Page 76 Assembly Tighten the detection shaft Fix the cam of the SWK with a hexagon socket wrench (1) and Ø tighten the detection shaft from above with a hexagon socket wrench (2). Max. tightening torque: 1.36 Nm ✓ Check and adjust sensors Check detection shafts and sensors Look at the sensor assembly from above.
- Page 77 Assembly Mount SWK with sensor assembly to the robot Mount SWK with adapter plate on the robot Mount the adapter plate for the sensor assembly (3) to the Ø robot (1) with the dowel pin (2) and screws (4). The dowel pin and screws depend on the robot and are not ✓...
- Page 78 Assembly 5.4.3.2 SWS 041 / 060 / 071 Prepare sensor installation Place the SWA in the storage rack, secure and uncouple it. Ø Switch off the power supply and ensure that there is no residual Ø energy in the system. Remove the compressed air hose.
- Page 79 Assembly Mount sensor assembly on SWK Mount sensor assembly on SWK Protect the threads of the detection shaft (6) from lubricant Ø with a strip of adhesive tape. Lubricate the detection shaft (5), Ø Lubricants/greasing areas 89]. Carefully push the detection shaft (5) into the sensor Ø...
- Page 80 Assembly Tighten the detection shaft Fix the cam of the SWK with a hexagon socket wrench (1) and Ø tighten the detection shaft from above with a hexagon socket wrench (2). Observe the wrench size of the hexagon socket wrenches (1) ✓ and (2) and the max. tightening torque of the mounting screws for each size, see table "Mounting detection shaft", Wrench sizes and tightening torques 84].
- Page 81 Assembly Make sure that the detection shaft and sensors are not touching Ø each other, readjust the distance if necessary. Connect sensor cable Connect sensor cables (1) and (2) to sensors and to robot Ø control system. Connect all compressed air lines. Ø...
- Page 82 Assembly Mount SWK with sensor assembly to the robot Mount SWK with adapter plate to the robot Mount the adapter plate for the sensor assembly (3) to the Ø robot (1) with the dowel pin (2) and screws (4). The dowel pin and screws depend on the robot and are not ✓...
-
Page 83: Mount Sensor Ready-To-Lock
For the sizes SWS 076, SWS 110 and SWS 160, presence monitoring can be mounted to the SWK. The associated sensor target on the SWA is integrated as standard. For more information, please contact SCHUNK. SWK 076 SWK 110 / SWK 160 Mount presence monitoring Place the SWA in the storage rack, secure and uncouple it. -
Page 84: Wrench Sizes And Tightening Torques
Assembly 5.4.5 Wrench sizes and tightening torques Installing detection shaft Wrench size (SW) of hexagon socket Max. tightening wrench [mm] torque [Nm] Detection shaft 1.36 1.36 1.36 1.69 1.69 1.69 Mount SWK to adapter plate for sensor assembly Wrench size (SW) of Fastening Max. -
Page 85: Mount The Optional Module
Assembly 5.5 Mount the optional module CAUTION Damage to pin block possible! The pin block of the electric feed-through module at the SWK must always exactly match the pin block of the electric feed- through module on the SWA to avoid malfunctions and short circuits. -
Page 86: Troubleshooting
91] Locking balls or locking piston tilted. Clean and lubricate product. Clean and lubricate product 91] Locking ball missing. Send damaged products to SCHUNK for repair. Pressure drops below minimum. Check compressed air lines. Pneumatic connection 58] Check seals, disassemble product if necessary and replace seals. -
Page 87: Electrical Signals Are Not Transmitted
Troubleshooting 6.2 Electrical signals are not transmitted Possible cause Corrective action Pin block dirty or damaged. Clean or replace the pin block. Maintain option modules 114] Spring contact jammed in pin block or Loosen or replace spring contact. damaged. Maintain option modules 114] Cable damaged or connection loose Check cables and connections for damage... -
Page 88: Maintenance
Maintenance 7 Maintenance 7.1 Notes Original spare parts Use only original spare parts of SCHUNK when replacing spare and wear parts. 7.2 Maintenance intervals CAUTION Material damage due to hardening lubricants! Lubricants harden more quickly at temperatures above 60°C, leading to possible product damage. -
Page 89: Lubricants/Greasing Areas
Avoid skin contact with lubricants • Wear safety goggles and protective gloves. • Wash hands thoroughly after contact with grease. • SCHUNK recommends the listed lubricant. Lubricant point Lubricant Male coupling Mobilgrease® XHP 222 Special Centering / locking sleeve Locking ball... -
Page 90: Removing The Product From The Robot Arm
Maintenance 7.4 Removing the product from the robot arm WARNING Risk of injury due to unexpected movements and falling tools! If the energy supply is switched on or if residual energy is still present in the system, this can cause components to move unexpectedly or fall, which may result in serious injuries. -
Page 91: Clean And Lubricate Product
Disassemble the SWK from the robot and safely set the SWK Ø aside, Removing the product from the robot arm 90]. Clean and lubricate SWS 001 Remove lubricant residues and dirt from the centering / locking Ø sleeve (1) on the SWA and the locking mechanism (2) and alignment pin (3) on the SWK. - Page 92 Maintenance Place the SWA in the storage rack, secure and uncouple it. SWS 005 Ø SWS 011 Switch off the power supply and ensure that there is no residual Ø energy in the system. Remove the compressed air hose. Ø Disassemble the SWK from the robot and safely set the SWK Ø...
- Page 93 Maintenance Clean SWS with a lint-free cloth Remove lubricant residues and dirt from the alignment pin (1), Ø bearing race (2), alignment pin bushings (3) and locking mechanism (4). Generously lubricate the locking mechanism (4) and alignment Ø pin (1), Lubricants/greasing areas 89]. NOTE The alignment pin bushings and the bearing race are sufficiently lubricated at the factory and do not need to be relubricated.
- Page 94 Maintenance Place the SWA in the storage rack, secure and uncouple it. SWS 020‑SWS 160 Ø Switch off the power supply and ensure that there is no residual Ø energy in the system. Remove the compressed air hose. Ø Disassemble the SWK from the robot and safely set the SWK Ø...
- Page 95 Maintenance SWA 020, 021, 040Q, 041, 060, 071 SWA 046, 076, 110, 160 Clean the locking mechanism on the SWA Clean the alignment pin bushing (1) and bearing race (2) and Ø remove lubricant residues and dirt. Lubricate locking mechanism and alignment pin on SWK Generously lubricate the locking mechanism (1) and alignment Ø...
-
Page 96: Replace Seals
Maintenance 7.6 Replace seals 7.6.1 Overview of the seals NOTE Information on the available seal kits in chapter Accessories 8]. The seals on the pneumatic feed-throughs in the SWK may look as follows: • O‑ring (A) • Rubber bushings (B) • Rubber bushings with sleeve (C) Seals on the pneumatic feed-throughs 011HM 020HM... -
Page 97: Change O-Ring
Maintenance 7.6.2 Change O-ring Change O-ring Place the SWA in the storage rack, secure and uncouple it. Ø Switch off the power supply and ensure that there is no residual Ø energy in the system. Remove the compressed air hose. Ø... -
Page 98: Change Rubber Bushing
Maintenance 7.6.3 Change rubber bushing Change rubber bushing Place the SWA in the storage rack, secure and uncouple it. Ø Switch off the power supply and ensure that there is no residual Ø energy in the system. Remove the compressed air hose. Ø... -
Page 99: Replace Rubber Bushing With Sleeve
Maintenance 7.6.4 Replace rubber bushing with sleeve Replace rubber bushing with sleeve Place the SWA in the storage rack, secure and uncouple it. Ø Switch off the power supply and ensure that there is no residual Ø energy in the system. Remove the compressed air hose. -
Page 100: Change Alignment Pins
Maintenance 7.7 Change alignment pins NOTE External alignment pins can be ordered as spare parts from SCHUNK. 7.7.1 External alignment pins NOTE The sizes SWS 007, SWS 046, SWS 076, SWS 110 and SWS 160 are mounted with external alignment pins. 7.7.1.1 Disassemble external alignment pins Remove alignment pins Place the SWA in the storage rack, secure and uncouple it. - Page 101 Maintenance Observe wrench size: ✓ Wrench size of ratchet used [mm] NOTE If the alignment pin (3) cannot be loosened, remove the alignment pin (3) from below, Disassemble external alignment pins from below 101]. 7.7.1.2 Disassemble external alignment pins from below Alternative option for disassembly of the alignment pin Turn SWK (4) over.
-
Page 102: Internal Alignment Pins
The sizes SWS 005, SWS 011, SWS 020, SWS 021, SWS 040Q, SWS 041, SWS 060 and SWS 071 are mounted with internal alignment pins. They are installed in the male coupling. Please contact SCHUNK for the replacement of internal Ø alignment pins. 12.00 | SWS | Assembly and Operating Manual | en | 389456... -
Page 103: Change Sensors
The integrated piston stroke control can be retrofitted if required. The installation for retrofitting is carried out in the same way as for replacement. Contact SCHUNK for ordering retrofit parts. 12.00 | SWS | Assembly and Operating Manual | en | 389456... - Page 104 Maintenance Change integrated piston stroke control Place the SWA in the storage rack, secure and uncouple it. Ø Switch off the power supply and ensure that there is no residual Ø energy in the system. Remove the compressed air hose. Ø...
- Page 105 Maintenance SWS for hollow SWS 011HM wrist robots SWS 011HM: Change integrated piston stroke control Remove defective sensor assembly Place the SWA in the storage rack, secure and uncouple it. Ø Disassemble the SWK from the robot and safely set the SWK Ø...
- Page 106 Maintenance Mount new sensor assembly Carefully screw the new sensor (6) or (7) into SWK (4) until the Ø sensor (6) or (7) touches the detection shaft. Unscrew sensor (6) or (7) by half a turn. Ø Hold sensor (6) or (7) in this position and connect sensor cable. Ø...
- Page 107 Maintenance SWS 020HM / 021HM SWS 020HM / 021HM: Change integrated piston stroke control Remove defective sensor assembly Place the SWA in the storage rack, secure and uncouple it. Ø Disassemble the SWK from the robot and safely set the SWK Ø aside, Removing the product from the robot arm 90].
- Page 108 Maintenance Mount new sensor assembly Screw hexagon nut (6) onto new sensor (2) or (5). Ø Screw new sensor (2) or (5) into SWK (3) until sensor (2) or (5) Ø touches the detection shaft. Unscrew sensor (2) or (5) by half a turn. Ø Hold sensor (2) or (5) in this position and connect sensor cable. Ø...
-
Page 109: Change External Piston Stroke Control
Maintenance 7.8.2 Change external piston stroke control SWS 011 / 020 / 021 Change external piston stroke control, A = View from above, shown as an example on SWK 011 Remove defective sensor assembly Place the SWA in the storage rack, secure and uncouple it. Ø... - Page 110 Maintenance Mount new sensor assembly Screw new sensor (5) into SWK (3) until sensor (5) touches the Ø detection shaft. Turn the sensor (5) half a turn out of its fitting. Ø Look at the sensor assembly from above. Ø Ensure that the detection shaft (7) and sensors (5) do not touch Ø...
- Page 111 Maintenance SWS 041 / 060 / 071 Change external piston stroke control, A = View from above, shown as an example on SWK 041 Remove defective sensor assembly Place the SWA in the storage rack, secure and uncouple it. Ø Loosen screws (4) and remove SWK (3) from the adapter plate Ø...
- Page 112 Maintenance Mount new sensor assembly Screw hexagon nut (7) onto new sensor (6). Ø Screw the new sensor (6) with washer (8) into the sensor Ø assembly (2) until sensor (6) touches the detection shaft (9). Unscrew sensor (6) again by half a turn. Ø Look at the sensor assembly from above. Ø...
-
Page 113: Change Sensor Ready-To-Lock
Maintenance 7.8.3 Change sensor ready-to-lock SWK 076 SWK 110, 160 Change sensor ready-to-lock Place the SWA in the storage rack, secure and uncouple it. Ø Disassemble the SWK from the robot and safely set the SWK Ø aside, Removing the product from the robot arm 90]. -
Page 114: Maintain Option Modules
Maintenance 7.9 Maintain option modules 7.9.1 Clean electric feed-through module CAUTION Damage to pins and spring contacts possible! Only use non-abrasive materials to clean the pin block, e.g. a nylon brush or a vacuum suction unit. Place the SWA in the storage rack, secure and uncouple it. Ø... -
Page 115: Replace V-Ring Seal On Electric Feed-Through Module
Example illustration for damage to the spring contacts Loosen wedged spring contacts carefully by applying light Ø pressure with a blunt tip. Contact SCHUNK if the pins are damaged. Either individual pins Ø can be exchanged or a new electric feed-through module is required. -
Page 116: Change Rubber Bushing On The Fluid Feed-Through Module
Maintenance 7.9.3 Change rubber bushing on the fluid feed-through module Place the SWA in the storage rack, secure and uncouple it. Ø Switch off the power supply and ensure that there is no residual Ø energy in the system. Remove the compressed air hose. Ø... -
Page 117: Assembly Drawings
Maintenance 7.10 Assembly drawings 7.10.1 SWS 001 Assembly of SWK 001 (top) and SWA 001 (bottom) 12.00 | SWS | Assembly and Operating Manual | en | 389456... -
Page 118: Sws 005
Maintenance 7.10.2 SWS 005 Assembly of SWK 005 (top) and SWA 005 (bottom) 12.00 | SWS | Assembly and Operating Manual | en | 389456... -
Page 119: Sws 007
Maintenance 7.10.3 SWS 007 Assembly of SWK 007 (top) and SWA 007 (bottom) 12.00 | SWS | Assembly and Operating Manual | en | 389456... -
Page 120: Sws 011
Maintenance 7.10.4 SWS 011 Variant without piston stroke control Variant with external piston stroke control Assembly of SWK 011 (top) and SWA 011 (bottom) 12.00 | SWS | Assembly and Operating Manual | en | 389456... -
Page 121: Sws 011Hm
Maintenance 7.10.5 SWS 011HM Assembly of SWK 011HM (top) and SWA 011 (bottom) 12.00 | SWS | Assembly and Operating Manual | en | 389456... -
Page 122: Sws 020
Maintenance 7.10.6 SWS 020 Variant without piston stroke control Variant with external piston stroke control Assembly of SWK 020 (top) and SWA 020 (bottom) 12.00 | SWS | Assembly and Operating Manual | en | 389456... -
Page 123: Sws 020Hm
Maintenance 7.10.7 SWS 020HM Assembly of SWK 020HM (top) and SWA 020 (bottom) 12.00 | SWS | Assembly and Operating Manual | en | 389456... -
Page 124: Sws 021
Maintenance 7.10.8 SWS 021 Variant without piston stroke control Variant with external piston stroke control Assembly of SWK 021 (top) and SWA 021 (bottom) 12.00 | SWS | Assembly and Operating Manual | en | 389456... -
Page 125: Sws 021Hm
Maintenance 7.10.9 SWS 021HM Assembly of SWK 021HM (top) and SWA 021 (bottom) 12.00 | SWS | Assembly and Operating Manual | en | 389456... -
Page 126: Sws 040Q
Maintenance 7.10.10 SWS 040Q Assembly of SWK 040Q (top) and SWA 040Q (bottom) 12.00 | SWS | Assembly and Operating Manual | en | 389456... -
Page 127: Sws 041
Maintenance 7.10.11 SWS 041 Variant without piston stroke control Variant with external piston stroke control Assembly of SWK 041 (top) and SWA 041 (bottom) 12.00 | SWS | Assembly and Operating Manual | en | 389456... -
Page 128: Sws 046
Maintenance 7.10.12 SWS 046 Assembly of SWK 046 (top) and SWA 046 (bottom) 12.00 | SWS | Assembly and Operating Manual | en | 389456... -
Page 129: Sws 060
Maintenance 7.10.13 SWS 060 Variant without piston stroke control Variant with external piston stroke control Assembly of SWK 060 (top) and SWA 060 (bottom) 12.00 | SWS | Assembly and Operating Manual | en | 389456... -
Page 130: Sws 071
Maintenance 7.10.14 SWS 071 Variant without piston stroke control Variant with external piston stroke control Assembly of SWK 071 (top) and SWA 071 (bottom) 12.00 | SWS | Assembly and Operating Manual | en | 389456... -
Page 131: Sws 076
Maintenance 7.10.15 SWS 076 Assembly of SWK 076 (top) and SWA 076 (bottom) 12.00 | SWS | Assembly and Operating Manual | en | 389456... -
Page 132: Sws 110
Maintenance 7.10.16 SWS 110 Assembly of SWK 110 (top) and SWA 110 (bottom) 12.00 | SWS | Assembly and Operating Manual | en | 389456... - Page 133 Maintenance 7.10.17 SWS-160 Assembly of SWK 160 (top) and SWA 160 (bottom) 12.00 | SWS | Assembly and Operating Manual | en | 389456...
-
Page 134: Translation Of Original Declaration Of Incorporation
8 Translation of original declaration of incorporation in terms of the Directive 2006/42/EG, Annex II, Part 1.B of the European Parliament and of the Council on machinery. Manufacturer/ SCHUNK GmbH & Co. KG Clamping and gripping technology Distributor Bahnhofstr. 106 - 134 D-74348 Lauffen/Neckar... -
Page 135: Annex To Declaration Of Incorporation
Translation of original declaration of incorporation 8.1 Annex to Declaration of Incorporation according 2006/42/EG, Annex II, No. 1 B 1.Description of the essential health and safety requirements pursuant to 2006/42/EC, Annex I that are applicable and that have been fulfilled with: Product designation Quick-Change System Type designation To be provided by the System Integrator for the overall machine ⇓... - Page 136 Translation of original declaration of incorporation Protection against mechanical hazards 1.3.7 Risks related to moving parts 1.3.8 Choice of protection against risks arising from moving parts 1.3.8.1 Moving transmission parts 1.3.8.2 Moving parts involved in the process 1.3.9 Risks of uncontrolled movements Required characteristics of guards and protective devices 1.4.1 General requirements...
- Page 137 Translation of original declaration of incorporation Information 1.7.1 Information and warnings on the machinery 1.7.1.1 Information and information devices 1.7.1.2 Warning devices 1.7.2 Warning of residual risks 1.7.3 Marking of machinery 1.7.4 Instructions 1.7.4.1 General principles for the drafting of instructions 1.7.4.2 Contents of the instructions 1.7.4.3...
Need help?
Do you have a question about the SWS 001 and is the answer not in the manual?
Questions and answers