Table of Contents
Advertisement
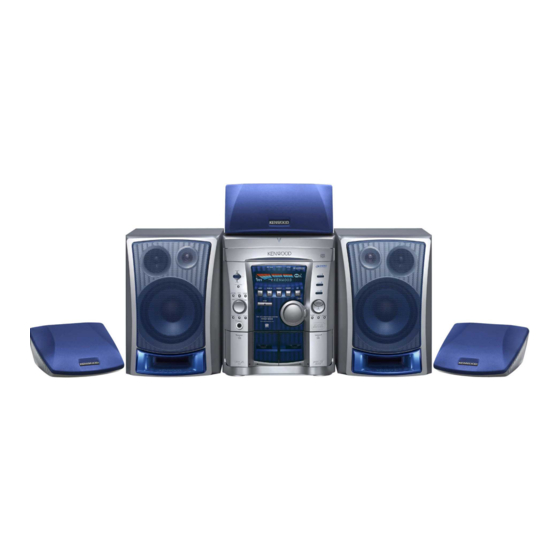
COMPACT HI-FI SYSTEM
XD-SERIES
XD-853
XD-803
XD-A83
INSTRUCTION MANUAL
KENWOOD CORPORATION
This instruction manual is used to describe multiple models listed above.
Model availability and features (functions) may differ depending on the country
and sales area.
COMPACT
DIGITAL AUDIO
TEXT
B60-4573-00 (EN)
‰
Advertisement
Table of Contents

Related Manuals for Kenwood XD-853


Summary of Contents for Kenwood XD-853
-
Page 1: Instruction Manual
COMPACT HI-FI SYSTEM XD-SERIES XD-853 XD-803 XD-A83 INSTRUCTION MANUAL KENWOOD CORPORATION This instruction manual is used to describe multiple models listed above. Model availability and features (functions) may differ depending on the country and sales area. COMPACT DIGITAL AUDIO TEXT B60-4573-00 (EN) ‰... -
Page 2: Before Applying Power
Before applying power Units are designed for operation as follows. U.S.A. and Canada ... AC 120 V only Australia ... AC 240 V only For the United Kingdom Factory fitted moulded mains plug 1.The mains plug contains a fuse. For replacement, use only a 13-Amp ASTA-approved (BS1362) fuse. -
Page 3: Table Of Contents
Recording on TAPE ... 28 Copying tape (Tape dubbing) ...31 As an NERGY ® Partner, Kenwood Corporation has determined that this products meets the ® guidelines for energy efficiency. This product can save energy. Saving energy reduces air pollution and lowers utility bills. -
Page 4: Special Features
Special features Dolby Pro Logic Surround, Dolby 3 Stereo Surround and Dolby Virtual Surround Dolby Pro Logic Surround, Dolby 3 Stereo Surround and Dolby Virtual Surround are top-level surround modes that can reproduce the world of 3-dimensional audio. Simplified operations using large-sized, Jog Dial Multi-control jog dial (For use in selecting a function) This dial allows you to set the CD program and timer-related operations while observing the operating conditions shown by the display. -
Page 5: System Connection
System connection Accessories FM indoor antenna AC plug adaptor (1) Use to adapt the plug on the power cord to the shape of the wall outlet. (Accessory only for regions where use is necessary.) Unpacking Unpack the unit carefully and make sure that all accessories are put aside so they will not be lost. -
Page 6: Front Speakers
• Leave a space around the unit (from the largest outside dimension including projection) equal or greater than, shown below. Top panel : 50 cm Side panel : 10 cm System Name XD-A83 Speaker (left) XD-853 XD-803 ª · Twist Malfunction of microcomputer If operation is not possible or erroneous display appears even though all connections have been made properly, reset the microcomputer. - Page 7 ÷ Before installation, check the wall or ceiling well to confirm that it is strong enough to withstand the weight of the speaker. KENWOOD cannot assume the responsibility against accidents caused by the drop of speaker due to insufficient mounting strength or to any defect in installation.
-
Page 8: Connection With Other Components (Optional Or Com- Mercially-Available Equipment)
Connection with other components CAUTION Note on Connection Connect the components as shown in the diagram. Only plug the power cord into a power outlet once connec- tions are completed. The rear panel configuration is varies depending on the model (countries or area). DVD player, Video recorder, MD recorder, etc. -
Page 9: Power Cord
Super woofer Extremely low sound is played back powerfully. (SW-500/optional) Power cord To wall AC outlet FM outdoor antenna Lead the 75 coaxial cable connected to the FM out- door antenna into the room and connect it to the FM 75 terminal. -
Page 10: Controls And Indicators
Controls and indicators Main unit STANDBY TIMER DISPLAY/DEMO SOUND MENU CONTROL BACK SELECT PHONES PUSH OPEN DECK PLAY CD player unit # STOP (7) key Operation key for the CD player and cassette deck. ) CD (6) key Press to select the CD and start playback. £... - Page 11 Receiver 1 STANDBY indicator The indicator lights up when the power is set to the STANDBY mode. 2 STANDBY ( ) key STANDBY (POWER) key (For U.S.A. Canada) Power ON/OFF switching is executed. 3TIMER indicator The indicator lights up when the power is set to the STANDBY mode after having activated a timer pro- gram.
-
Page 12: Display
Display The displays given in this manual are approximations only. They may differ from what actually appears on the display. 1 2 3 1 Timer-related indicators 2 Sound level meter The display varies according to the music or the opera- tions of the CD, tape, etc. -
Page 13: Remote Control Unit
Remote control unit POWER DISC 1 DISC 2 DISC 3 TUNER/BAND TAPE A TAPE B P.CALL MENU SELECT ENTER BACK STOP TAPE EQ REV.MODE TUNING REPEAT RANDOM TIME TEXT DISP LISTEN SOUND MODE EX.BASS CONTROL SLEEP MUTE VOLUME RC - 853 RC - 853E : (For U.K. -
Page 14: Operation Of Remote Control Unit
Operation of remote control unit Loading batteries 1 Remove the cover. Operation Plug the power cord into the mains power outlet and press the on/standby POWER) key of the remote control unit to turn power ON. After the power has been turned ON, press the desired key. -
Page 15: Operation Of The Jog Dial
Operation of the jog dial This unit has a jog dial named the MULTI CONTROL jog dial. The MULTI CONTROL jog dial makes it possible to set (establish) many functions in a simple procedure. When the MENU key is pressed, the items appears in the display according to the MULTI CONTROL jog dial operation so you can select the desired mode based on a more intuitive method. -
Page 16: Clock Adjustment
Clock adjustment This unit incorporates a clock function. Be sure to adjust to the correct time before using the timer function. The time can be displayed only while the power is off. Switching the power ON (OFF). STANDBY TIMER Select “Clock Options”. MENU Select “Adjust Time”. -
Page 17: Changing The Display Language
Changing the display language You can change the display language manually. Select “Language Options”. MENU Select the desired language. ENTER When you do not recognize which language is displayed: ÷ Press the MENU key so that the display shows “Language Options” (English), “Options de langue” (French),“Sprach- Einstellungen”... -
Page 18: Let's Have Sound
Let’s have sound Basic operation PHONES Muting the sound temporarily (MUTE) STANDBY TIMER VOLUME CONTROL Listening through headphones Insert the headphone plug into the PHONES jack. ÷ The sounds from all speakers are cut off. Reproducing sound with enhanced bass (EX.BASS) 1. -
Page 19: Standby Mode
Muting the sound temporarily (Remote control unit only) D 0 1 MUTE ÷ Press again to resume the original volume. ÷ The sound muting is also canceled when the volume is controlled. Reproducing sound with enhanced bass (Main unit) (Remote control unit) Lights BASS ÷... -
Page 20: Playback Of Cd
Playback of CD Playback from desired track (DISC 1 – 3, Nu- meric keys) TIME High-speed search in forward and reverse directions (1 ¡) OPEN/ CLOSE The tray opens when the key is pressed and closes when the key is pressed again. -
Page 21: Playback From Desired Track
Skipping tracks To skip backward ÷ The tracks in the direction the dial is rotated are skipped, and the selected track will be played from the beginning. ÷ When the jog dial is rotated a little in the direction of counterclockwise once during playback, the track being played will be played from the beginning. -
Page 22: Tape Playback
Tape playback Start playback (TAPE A 2 3) (TAPE B 2 3) To stop playback (7 STOP) PUSH OPEN When the power is off: By loading a tape in the cassette deck to be used in playback beforehand, simply pressing the play key auto- matically turns the power ON and starts playback. -
Page 23: To Wind Tape At High Speed
To wind tape at high speed To fast wind in direction | ÷ Press the 7 key to stop fast winding. Selection of reverse mode REVERSE MODE Each press switches the modes as follows. “ ” ... Playback stops after having played both sides of tape in a deck. -
Page 24: Relay Play
Relay play When tapes are set in the decks A and B and the re- verse mode is set to “ ” (play of both sides), play of the second deck will be started automatically after play of the first deck has been completed. Tape play will be repeated alternately. -
Page 25: Channel Space Setting
CHANNEL SPACE setting The space between radio channels has been set to the one that prevails in the area to which the system is shipped. However, if the current channel space setting does not match the setting in the area where the sys- tem is to be used, for instance when you move from area 1 or area 2 shown in the following table or vice versa, proper reception of AM/FM broadcasts cannot... -
Page 26: Receiving Broadcast Station
Receiving broadcast station It is also possible to receive them by one-touch operations. 1 TUNING ¡ TUNER / BAND 4 ¢ One-by-one presetting (ENTER) TUNING MODE Collective presetting of stations (TUNING MODE) 1. Select the broadcast band. Each press changes the band. 1 FM 1 FM 2 AM... -
Page 27: Collective Presetting Of Stations
Collective presetting of stations Keep the TUNING MODE key depressed (about 2 seconds). TUNING MODE (For U.K. and Europe) u t o AUTO (Other countries) A . P r e s e t AUTO ÷ Some stations may not be able to be preset if their reception conditions are weak. -
Page 28: Let's Record
Let's record Recording on TAPE PUSH OPEN REVERSE MODE Note that this cassette deck cannot record onto Note Note Metal tapes. 1. Load a cassette tape. 1 Open the cassette holder of deck B. 2 Insert a tape. 3 Close the door. 2. -
Page 29: Start Recording
To pause recording (Main unit only) Lights REC/ARM T.EQ ÷ Pressing the key pauses recording after leaving a non-recorded space of about 4 seconds. ÷ If the key is pressed again in less than 4 seconds after it has been pressed, recording resumes from that instant. Select an input source other than “TAPE A or B”... - Page 30 Tips in CD recording When recording CD tracks onto a tape, if you leave the cassette deck in record-pause mode beforehand, the cassette deck recording can be started at the same time as the CD starts to be played (synchronous re- cording function).
-
Page 31: Copying Tape (Tape Dubbing)
Copying tape (Tape dubbing) The contents of the tape in deck A can be copied onto the tape in deck B. Load tapes in the decks. Playing tape 1 Select “ ” (double-side recording) or “ ” (one-side recording). REVERSE MODE 2 Select “Tape Dubbing”. -
Page 32: Playback Of Cd
Playback of CD Listening in the desired sequence Any titles on the discs in the tray can be listened to in the desired sequence. (Max. 32 titles) Select the “CD” input. Check that the CD player is in the stop mode. If it is in play mode Select “CD Program Play”. - Page 33 Check the programmed tracks (and replace, add or delete tracks as required). To check: To replace a track in the program: 1 Select the programmed disc or track to be replaced and press the SELECT key. 2 Select a disc or track to re- SELECT place the disc or track selected above (step 3-1and 2).
-
Page 34: Repeated Playback
Repeated playback Desired titles or discs can be played back repeatedly. Select the “CD” input. To repeat only one track Cancel “PGM”. If the “PGM” indicator is lit, make sure to turn it off. Select the disc. DISC 1 DISC 2 DISC 3 Select the track. - Page 35 To repeat all discs Cancel “PGM”. If the “PGM” indicator is lit, make ‹ sure to turn it off. Select the disc to be played first. DISC 1 DISC 2 DISC 3 Select “All Repeat”. (Remote control unit only) REPEAT Press the key repeatedly to switch the display.
-
Page 36: Random Playback
Random playback As the titles are selected randomly each time, the music can be enjoyed of it. Random playback can play tracks in one to three discs. Select the “CD” input. Cancel “PGM”. Select the RANDOM mode. (For “One Disc Random” playback, select the disc in advance.) (Remote control unit only) RANDOM... -
Page 37: Radio Data System) (For U.k. And Europe)
R.D.S. (Radio Data System) (For U.K. and Europe) RDS is a system which transmits useful informa- tion (digital data) for FM broadcasts together with the broadcast signal. Tuners and receivers designed for RDS reception can extract the in- formation from the broadcast signal for use with various functions such as automatic display of the station name. -
Page 38: Searching For A Desired Program Type (Pty Search)
Searching for a desired program type By specifying the type of program (genre) you want to listen to, the tuner automatically searches for a station which is currently broad- casting a program of the specified type. Set the reception band to FM. Preset RDS stations with the auto memory function. Select the PTY search mode. - Page 39 Start the search. (Remote control unit only) TIME (Press the key again during search to cancel it.) ÷ No sound is heard while “PTY” is blinking. ÷ If a program of the desired type cannot be found, “No Program” is displayed (blinking), then after several seconds the display returns to the original display.
-
Page 40: Convenient Cd Recording
Convenient CD recording Selection of the recording type With this unit, the following edit recording is possible according to the purpose. If you want to select the track to be recorded while playing a CD Recording only desired titles CD ONE TRACK RECORDING If you want to record a CD in order of track numbers Recording of an entire CD CD DIRECT RECORDING... -
Page 41: Recording Only Desired Titles (Cd One Track Recording)
Recording only desired titles At the time of CD playback, any desired title can be selected immediately for recording. Recording preparations are required. • Playback of CD. Select “Recording Options”. MENU Select “CD-One Track Recording” . SELECT Start recording. ENTER When recording has been completed, a non-recorded portion of 4 seconds will be produced and the cassette deck part will stop. -
Page 42: Recording Of An Entire Cd (Cd Direct Recording)
Recording of an entire CD Perform the following operation while the CD player is in stop mode to start recording at the same time as the start of playback. Recording preparations are required. • Select “Recording Options”. MENU Select “CD Direct Recording”. SELECT Select the disc. -
Page 43: Recording The Programmed Titles (Cd Program Recording)
Recording the programmed titles Program the desired tracks from up to 3 CD discs in the desired order and record the programmed playback onto tape. Recording preparations are required. • Select “Recording Options” . MENU Select “CD Program Recording”. SELECT Program the desired tracks. -
Page 44: Effective Sound Adjustment
Effective sound adjustment This unit permits selection of the levels of the equalizer and sound field reproduction effects. Please select the equalizer as desired according to the music genre. Select the sound field mode according to the desired atmosphere. Balance adjustment Adjusts the balance of left and right volume. -
Page 45: Input Level Adjustment
Input level adjustment The input level from an external component connected to the AUX or 6CH. INPUT jacks, such as a MD recorder, DVD player, VCR or analog turntable can be adjusted as desired. Adjust so that the volume of the DVD/VIDEO input source sounds at an equivalent level to the CD . -
Page 46: Listening To Music With Desired Tone And Sound Field
Listening to music with desired tone and sound field This unit permits selection of a variety of preset equalizer patterns as well as registration of equalizer patterns created by the user. The “S.direct” (Source direct) mode allows you to reproduce pure sound by bypassing the sound processing circuitry such as the EX.BASS (Extra Bass) and equalizer circuits. -
Page 47: Equalizer Pattern Setting And Saving
Equalizer pattern setting and saving You can edit desired patterns manually and store them in memory. Select “Audio Options”. MENU Select the number to be used for storage. (Custom EQ1 ~ EQ3) SELECT Adjust the equalizer pattern. SELECT To decrease To increase the level the level... -
Page 48: Surround Setting
Surround setting Select “Surround Setup”. MENU Select the center speaker size (or select “No” if no center speaker is used at all). Select “Yes” if you use the surround speakers. Speakers used and selected surround play modes Center Surround speaker speakers “Small”... -
Page 49: Select The Delay Time
Select the delay time. SELECT Adjust the volume balance. 1 Turn the MULTI CONTROL key while “Test C” or “Test S” is displayed. 2 Adjust the surround speaker volumes equal to the volume of the test tone from the left and right front speakers. To decrease To increase Display for the center speaker volume adjust-... -
Page 50: Switching The Aux Input
Switching the AUX Input When playing the source component connected to the AUX jacks (2ch.) or that connected to the 6CH. INPUT jacks (DVD, VIDEO,etc), it is required to switch the AUX input. With “6ch. Input”, the audio from the surround L/ R channels becomes monaural. - Page 51 Dolby Pro Logic Surround When video (LD) software carrying round effect, similar to movie theaters. Dolby Pro Logic is a specially encoded 2 channel surround format designed to provide theater-like surround sound from Dolby Surround encoded sources (such as video and Laserdisc software marked This unit is equipped with a Dolby Surround decoder to let you enjoy the wide variety of currently available Dolby Sur-...
-
Page 52: Timer Operation
Timer operation Sleep timer The power is turned OFF automatically after the specified period has elapsed. Timer programming Timer playback : Plays (or receives) the selected source in the set time range. AI timer playback (When timer playback starts, the volume increases gradually.) Timer recording : Records the selected source in the set time range. -
Page 53: Timer Programming
Timer programming The program timer can set either timer playback or timer recording. Either “Everyday” (executing a timer program once every day) or “One Time” (executing it only once) can be selected for each timer program. Once the time range and content of a timer program has been set, it can be activated or deactivated as desired. -
Page 54: Auto Power Save
Select “Everyday” or “One Time”. SELECT The saved contents cannot be cleared. The con- tents are cleared only when they are changed. Enter the ON time. SELECT The time is The time is returned advanced Enter the OFF time. SELECT The time is The time is returned... - Page 55 Make the desired reservation. For timer playback or AI timer playback Select the mode. Select “Timer Play” or “AI Play”. 1 “Timer Play” .. Timer play 2 “AI Play” .. SELECT 2 Select the input source. Select the source to be played. 1 “TUNER”...
-
Page 56: Handling Of Discs And Tapes
Handling of discs and tapes Disc handling precautions Handling Hold the discs so that you do not touch the playing surface. Label side Playing side Do not attach paper or tape to either Sticker the playing side or the label side of the discs. -
Page 57: Important Items
Important Items Maintenance Cleaning the head section Cleaning the heads and peripheral components For maintaining the best condition of the deck and for longer service life, always keep Cotton swab the heads (recording / playback / erase), capstan and pinch roller clean.To clean them, Capstan perform the following: 1. -
Page 58: In Case Of Difficulty
In case of difficulty What seems to be a malfunction is not always so. Before calling for service, check the following table according to the symptom of your trouble. Operation to reset The microcomputer may fall into malfunction (impos- sibility to operate, erroneous display, etc.) when the power cord is unplugged while power is ON or due to an external factor. -
Page 59: Cassette Deck
÷ Car ignition noise. Noise interferes. ÷ Influence of an electric appliance. ÷ A TV set is installed near the system. ÷ The frequency of the preset station is No station can be received by preset call operation. not tunable. ÷... - Page 60 ÷ The head is dirty. Sound is harsh or high fre- quencies are not repro- ÷ The tape is stretched or shrunk. duced. ÷ The tape being played was recorded Sound is distorted. ÷ A tape which has been recorded with ÷...
-
Page 61: Note To Catv System Installer
KENWOOD CORPORATION 2967-3, ISHIKAWA-CHO, HACHIOJI-SHI,TOKYO, JAPAN KENWOOD CORP. CERTIFIES THIS EQUIPMENT CONFORMS TO DHHS REGULATIONS NO. 21 CFR 1040.10, CHAPTER 1, SUBCHAPTER J. Location: Back Panel FCC WARNING This equipment may generate or use radio frequency energy. -
Page 62: Specifications
6ch. SUB WOOFER ... 47 mV / 33 k Output Level / inpedance SUPER WOOFER ... 2.0V / 600 k 1.KENWOOD follows a policy of continuous advancements in development. For this reason specifications may be changed without notice. Notes Notes Notes 2.Sufficient performance may not be possible at very low temperatures (0°C or less). - Page 63 Fronts Speakers (LS-N573/LS-N523) Enclosure ... Bass-reflex type (magnetically shielded) Speaker configuration Woofer ... 160 mm (6-1/2”), cone type Tweeter ... 65 mm (2-1/2”), cone type Super-tweeter ... 15 mm (9/16”), dome type Impedance ... 6 Peak input level ... 140 W Dimensions ...
-
Page 64: For Your Records
DIGITAL OUT OPTICAL jack 6CH. INPUT º Beat cancel function ‡ R.D.S XD-A83 XD-853 ( Except for U.K. and Europe ) ( For U.K.) ( For U.K. and Europe ) For your records Record the serial number, found on the back of the unit, in the spaces designated on the warranty card, and in the space provided below.
Need help?
Do you have a question about the XD-853 and is the answer not in the manual?
Questions and answers