
Related Manuals for FIBARO FGS-214


Summary of Contents for FIBARO FGS-214
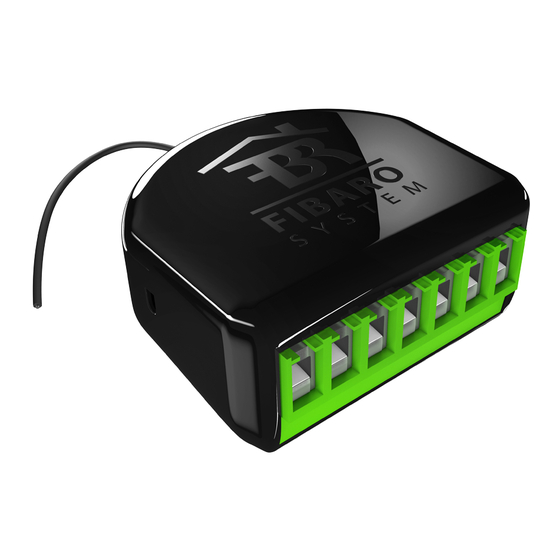
- Page 1 O P E R A T I N G M A N U A L SMART MODULE (FGS-214) DOUBLE SMART MODULE (FGS-224) v1.0...
-
Page 3: Table Of Contents
Table of contents 1: Important safety information 2: Description and features 2.1: Description 2.2: Main features 3: Specifications 4: Installation 4.1: Before installation 4.2: Electrical connection 5: Adding to Z-Wave network 5.1: Adding manually 5.2: Adding using SmartStart 6: Removing from Z-Wave network 7: Operating the device 7.1: Controlling channels with inputs 7.2: Visual indications 7.3: Menu 7.4: Resetting to factory defaults 8: Z-Wave range test... -
Page 4: 1: Important Safety Information
1: Important safety information Read this manual before attempting to install the device! Failure to observe recommendations included in this manual may be dangerous or cause a violation of the law. The manu- facturer, Fibar Group S.A. will not be held responsible for any loss or damage resulting from not following the instructions of operating manual. -
Page 5: 2: Description And Features
2: Description and features 2.1: Description The remotely operated FIBARO Smart Module and Double Smart Module are designed to turn electrical devices or circuits on and off. Smart Module allows to control one device or circuit and the Double Smart Module allows to control two devices or circuits. -
Page 6: 3: Specifications
3: Specifications Power supply 100-240V~ 50/60Hz or 24-30V Rated load current Smart Module (FGS-214): 6.5A Double Smart Module (FGS-224): 6A per one channel 9.5A total Compatible load types resistive or incandescent only Active element micro-gap relay μ Maximum length of wires... -
Page 7: 4: Installation
4: Installation 4.1: Before installation Connecting the device in a manner inconsistent with this manual may cause risk to health, life or material damage. Do not power the device before fully assembling it in the protect- • ed environment, • Check the operating/maintenance manual of the device you want to control to make sure the connection is safe and allowed, •... -
Page 8: Electrical Connection
1. Switch off the mains voltage (disable the fuse) or disable the power supply. 2. Connect with one of the diagrams below: 100-240V AC 24-30V DC S1 S2 SMART MODULE FGS-214 Diagram 1: Example connection of Smart Module 100-240V AC 24-30V DC S1 S2 DOUBLE SMART MODULE... -
Page 9: 5: Adding To Z-Wave Network
5: Adding to Z-Wave network Adding (Inclusion) – Z-Wave device learning mode, allowing to add the device to existing Z-Wave network. 5.1: Adding manually To add the device to the Z-Wave network manually: 1. Power the device. 2. Set the main controller in (Security/non-Security Mode) add mode (see the controller’s manual). -
Page 10: 6: Removing From Z-Wave Network
5. Adding result will be confirmed by the Z-Wave controller’s message and the LED: • Green – successful (non-secure, S0, S2 non-authenticated), Magenta – successful (Security S2 Authenticated), • • Red – not successful. In case of problems with adding the device, please re- set the device and repeat the adding procedure. -
Page 11: 7: Operating The Device
7: Operating the device 7.1: Controlling channels with inputs Momentary switch (parameter 20 set to 0): 1x click – change the state of the channel to the opposite one Toggle switch without memory (parameter 20 set to 1): 1x switch – change the state of the channel to the state of the switch (OFF if contacts opened, ON if contacts closed) Toggle switch with memory (parameter 20 set to 2): 1x switch –... -
Page 12: Menu
• Blinking magenta – entering the menu (added as Security S2 Authenticated), • Blinking red – entering the menu (not added to a Z-Wave network), • Magenta – test Z-Wave network range, • Yellow – reset to factory defaults. 7.3: Menu Menu allows to perform Z-Wave network actions. -
Page 13: 8: Z-Wave Range Test
8: Z-Wave range test The device has a built in Z-Wave network main controller’s range tester. To make Z-Wave range test possible, the device must be added to the Z-Wave controller. Testing may stress the network, so it is recommended to perform the test only in special cases. -
Page 14: 9: Activating Scenes
9: Activating scenes The device can activate scenes in the Z-Wave controller by sending scene ID and attribute of a specific action using Central Scene Com- mand Class. By default all action are activated, change settings of parameters 40 and 41 to disable scene activation for selected actions. Switch Action Scene ID... -
Page 15: 10: Configuration
10: Configuration 10.1: Associations Association (linking devices) – direct control of other devices with- in the Z-Wave system network. Associations allow: • reporting the device status to the Z-Wave controller (using Lifeline group), • creating simple automations by controlling other devices without participation of the main controller (using groups assigned to ac- tions on the device). - Page 16 Values sent to association groups depending on settings Values are sent using Basic Command Class. Values below are de- fault but can be adjusted using parameters 156-161. Parameter Parameter Double Click 150/151 152/153 Click Momentary or toggle switches with memory (parameter 20/21 set to 0 or 2) 255 (ON) if turned OFF 0, 1 or 3...
-
Page 17: Advanced Parameters
The settings can be adjusted via Z-Wave controller to which the de- vice is added. The way of adjusting them might differ depending on the controller. In the FIBARO interface parameters are presented as simple options in Advanced Settings of the device. Available parameters:... - Page 18 S2 input – switch type This parameter defines as what type the device Description should treat the switch connected to the S2 terminal. Parameter size 1B Default value 0 (momentary switch) 0 – momentary switch 1 – toggle switch synchronized (contact closed - Available ON, contact opened - OFF) values...
- Page 19 Alarm configuration - 1st slot This parameter determines to which alarm frames and how the device should react. The Description parameters consist of 4 bytes, three most sig- nificant bytes are set according to the official Z-Wave protocol specification. Parameter size 4B Default value [0x00, 0x00, 0x00, 0x00] (disabled) 1B [MSB] –...
- Page 20 Alarm configuration - 3rd slot This parameter determines to which alarm frames and how the device should react. The Description parameters consist of 4 bytes, three most sig- nificant bytes are set according to the official Z-Wave protocol specification. Parameter size 4B [0x01, 0xFF, 0x00, 0x00] Default value (Smoke Alarm, any notification, no action)
- Page 21 Alarm configuration - 5th slot This parameter determines to which alarm frames and how the device should react. The Description parameters consist of 4 bytes, three most sig- nificant bytes are set according to the official Z-Wave protocol specification. Parameter size 4B [0x04, 0xFF, 0x00, 0x00] Default value (Heat Alarm, any notification, no action)
- Page 22 S2 input – scenes sent This parameter determines which actions result in sending scene IDs assigned to them. Values can be combined (e.g. 1+2=3 means that scenes Description for single and double click are sent). Enabling scenes for triple click disables entering the device in learning mode by triple clicking.
- Page 23 First channel – reaction to input change in delayed/ 152. auto OFF modes This parameter determines how the device Description reacts when changing state of S1 input in timed modes for first channel. Parameter size 1B Default value 0 (cancel mode) 0 –...
- Page 24 Second channel – time parameter for delayed/auto 155. OFF and flashing modes Only in Double Smart Module This parameter allows to set time parameter used in timed modes for second channel. For Description delayed/auto OFF modes it determines duration, for flashing mode it determines cycle period. Parameter size 2B Default value 5 (0.5s)
- Page 25 S2 input – Switch ON value sent to 3rd association 159. group Only in Double Smart Module This parameter defines value sent with Switch Description ON command to devices in 3rd association group when using S2 input. Parameter size 2B Default value 0 –...
- Page 26 162. Q/Q1 output type Description This parameter determines type of Q/Q1 output. Parameter size 1B Default value 0 (Normally Open) 0 – Normally Open (relay contacts opened turned off, closed when turned on) Available values 1 – Normally Closed (relay contacts closed turned off, opened when turned on) 163.
-
Page 27: 11: Z-Wave Specification
11: Z-Wave specification Generic Device Class: GENERIC_TYPE_SWITCH_BINARY Specific Device Class: SPECIFIC_TYPE_POWER_SWITCH_BINARY Supported Command Classes Command Class Version Secure COMMAND_CLASS_ZWAVEPLUS_INFO [0x5E] COMMAND_CLASS_SWITCH_BINARY [0x25] COMMAND_CLASS_ASSOCIATION [0x85] COMMAND_CLASS_MULTI_CHANNEL_ASSOCIA- TION [0x8E] COMMAND_CLASS_ASSOCIATION_GRP_INFO [0x59] COMMAND_CLASS_TRANSPORT_SERVICE [0x55] COMMAND_CLASS_VERSION [0x86] COMMAND_CLASS_MANUFACTURER_SPECIFIC [0x72] COMMAND_CLASS_DEVICE_RESET_LOCALLY [0x5A] COMMAND_CLASS_POWERLEVEL [0x73] COMMAND_CLASS_SECURITY [0x98] COMMAND_CLASS_SECURITY_2 [0x9F] COMMAND_CLASS_CONFIGURATION [0x70] COMMAND_CLASS_CRC_16_ENCAP [0x56]... - Page 28 Multichannel Command Class (only in FGS-224) Endpoint 1 Generic Device Class: GENERIC_TYPE_SWITCH_BINARY Specific Device Class: SPECIFIC_TYPE_POWER_SWITCH_BINARY Description: 1st channel Command Classes: COMMAND_CLASS_ZWAVEPLUS_INFO [0x5E] COMMAND_CLASS_SWITCH_BINARY [0x25] COMMAND_CLASS_ASSOCIATION [0x85] COMMAND_CLASS_MULTI_CHANNEL_ASSOCIATION [0x8E] COMMAND_CLASS_ASSOCIATION_GRP_INFO [0x59] COMMAND_CLASS_SECURITY [0x98] COMMAND_CLASS_SECURITY_2 [0x9F] COMMAND_CLASS_SUPERVISION [0x6C] COMMAND_CLASS_PROTECTION [0x75] COMMAND_CLASS_NOTIFICATION [0x71] COMMAND_CLASS_APPLICATION_STATUS [0x22] Endpoint 2 Generic Device Class: GENERIC_TYPE_SWITCH_BINARY...
- Page 29 Notification Command Class The device uses Notification Command Class to report different events to the controller using “Lifeline” group (only in Root / Endpoint 1). Notification Event Parameter Status Type Heartbeat (Notifica- 0xFF – enable System [0x09] – tion CC V5) [0x05] (non-changeable) Protection CC Protection Command Class allows to prevent local or remote control...
-
Page 30: 12: Regulations
FIBARO and Fibar Group logo are trademarks of Fibar Group S.A. All other brands and product names referred to herein are trademarks of their respective holders.
Need help?
Do you have a question about the FGS-214 and is the answer not in the manual?
Questions and answers