Table of Contents
Advertisement
Available languages
Available languages
Item
#
1001516521
Model #
53701101
USE AND CARE GUIDE
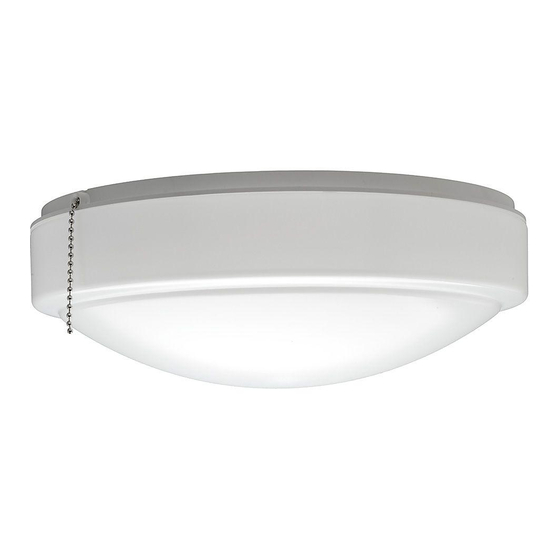
LED UNIVERSAL CEILING FAN LIGHT KIT
Questions, problems, missing parts? Before returning to the store,
call Hampton Bay Customer Service
8 a.m. – 7 p.m., EST, Monday - Friday
9 a.m. – 6 p.m., EST, Saturday
1-855-HD-HAMPTON
HAMPTONBAY.COM
THANK YOU
We appreciate the trust and confidence you have placed in Hampton Bay through the purchase of this LED
Universal Ceiling Fan Light Kit. We strive to continually create quality products designed to enhance your home.
Visit us online to see our full line of products available for your home improvement needs.
Thank you for choosing Hampton Bay!
Advertisement
Chapters
Table of Contents

Subscribe to Our Youtube Channel
Related Manuals for HAMPTON BAY 53701101


Summary of Contents for HAMPTON BAY 53701101
- Page 1 HAMPTONBAY.COM THANK YOU We appreciate the trust and confidence you have placed in Hampton Bay through the purchase of this LED Universal Ceiling Fan Light Kit. We strive to continually create quality products designed to enhance your home. Visit us online to see our full line of products available for your home improvement needs.
-
Page 2: Table Of Contents
Table of Contents Table of Contents........2 Package Contents ........ 4 Safety Information........2 Installation Option #1 - Center Mounted ... 5 Warranty ............. 2 Installation Option #2 - Screw Mounted..7 Pre-Installation........... 3 Installation Option #3 - Thread In ....9 Planning Installation...... -
Page 3: Pre-Installation
Pre-Installation PLANNING INSTALLATION Read all instructions before assembly. Before starting installation of this fixture or removal of a previous fixture, disconnect the power by turning off the circuit breaker or by removing the fuse at the fuse box. To avoid damaging this product, assemble it on a soft, non-abrasive surface, such as carpet or cardboard. -
Page 4: Package Contents
Pre-Installation (continued) PACKAGE CONTENTS Color Temp Slide Switch (Select a warm or cool light simply by moving the switch to the proper position.) Part Description Quantity Threaded Base Fixture Body Pull Chain Lens The Three Mounting Options Center Thread 2 Mounting Screws Thread In... -
Page 5: Installation Option #1 - Center Mounted
Installation Option #1 - Center Mounted Before beginning assembly, installation or operation of the product, make sure all parts are present. Compare parts with the package contents list on the previous page. If any part is missing or damaged, do not attempt to assemble, install or operate the product. - Page 6 Option #1 - Center Mounted (continued) Positioning the Pull Chain Connecting the Wires Guide Rod Connect the connector from the ■ porcelain socket to the connector from Put the pull chain guide rod (BB) to the ■ ceiling fan mounting box. (If needed, use ceiling fan pull chain drop down position, and place the plastic loop (DD) over the the wire nuts to make the connection.)
- Page 7 Installation Option #2 - 2 Screw Switch Housing Before beginning assembly, installation or operation of the product, make sure all parts are present. Compare parts with the package contents list on the previous page. If any part is missing or damaged, do not attempt to assemble, install or operate the product.
- Page 8 Option #2 - 2 Screw Switch Housing (continued) Positioning the Pull Chain Guide Rod Put the pull chain guide rod (BB) to the ■ ceiling fan pull chain drop down position, and place the plastic loop (DD) over the pull chain guide rod (BB), using PB 2.9 X 5 screws (FF) to fix the plastic loop (DD) on the back of the fixture body (B).
- Page 9 Installation Option #3 - No Wiring Required Remove the Glass from the Light Kit Fitter Remove the existing glass globe ■ and incandescent light bulb. Installing the Light Kit Screw the threaded base (A) ■ into the E26 socket of the ceiling fan tightly.
-
Page 10: Care And Cleaning
Care and Cleaning CAUTION: Before attempting to clean the fixture, disconnect the power to the fixture by turning the breaker off or removing the fuse from the fuse box. Clean the fixture with a soft, dry cloth. ■ Do not use any cleaners with chemicals, solvents, or harsh abrasives. ■... - Page 11 Questions, problems, missing parts? Before returning to the store, call Hampton Bay Customer Service 8 a.m. – 7 p.m., EST, Monday - Friday, 9 a.m. – 6 p.m., EST, Saturday 1-855-HD-HAMPTON HAMPTONBAY.COM Retain this manual for future use.
- Page 12 HAMPTONBAY.COM GRACIAS Apreciamos la confianza que ha puesto en Hampton Bay a través de la compra de esta luces LED. Nos esforzamos por crear constantemente productos diseñados para dar realce a su hogar. Visítenos en línea para ver nuestra gama completa de productos disponibles para sus necesidades al momento de hacer mejoras en su hogar.
- Page 13 Contenido Contenido..........12 Contenido del paquete .......14 Informacíon sobre seguridad....12 Opción de Instalación # 1-Centro Montado..15 Garantía ..........12 Opción de Instalación # 2-Tornillo Montado...17 Antes de la instalacíon......13 Opción de Instalación # 3-Roscada en (no cable requisito)....19 Planificacíon de la instalacíon ..13 Herramientas necesarias ....13 Cuidado y limpieza ..........20 Solucíon de problemas........20...
-
Page 14: Antes De La Instalacíon
Antes de la instalacíon Esta instalación se puede instalar de dos maneras: 1) Sobre una caja de salida 2) Montaje en ventilador del techo . Esta guía se muestra primero es cómo instalar el aparato en una caja de salida. Esta guía le mostrará cómo instalar a un ventilador de techo. - Page 15 Interruptor deslizado de temperatura de color (Seleccionar una luz cálida o fría simplemente moviendo el interruptor a la posición correcta.) Part Description Quantity Base roscada Cuerpo del aparato Cadena de tiro Tulipa Las tres opciones de montaje 2 Montaje Tornillo Centro Roscada Roscada en...
-
Page 16: Opción De Instalación # 1-Centro Montado
Opción de Instalación # 1-Centro Montado Antes de comenzar el montaje, la instalación o la operación del producto, asegurar de que todas las partes están presentes.Comparar las partes con el contenido del paquete listando en la página anterior. Si alguna parte falta o está... - Page 17 Opción de Instalación # 1-Centro Montado (continuacíon) Conectar los cables Poner la barra de guía de la cadena Conectar el conector del enchufe de ■ porcelana al conector de la caja de montaje del ventilador de techo. (Si es necesario, Poner la barra de guía de la cadena (BB) a la ■...
-
Page 18: Opción De Instalación # 2-Tornillo Montado
Opción de Instalación # 2-Tornillo Montado Before beginning assembly, installation or operation of the product, make sure all parts are present. Compare parts with the package contents list on the previous page. If any part is missing or damaged, do not attempt to assemble, install or operate the product. - Page 19 Opción de Instalación # 2-Tornillo Montado (continuacíon) Poner la barra de guía de la cadena Poner la barra de guía de la cadena (BB) a la ■ cadena del ventilador de techo, y colocar el lazo plástico (DD) sobre la barra de guía de la cadena (BB), usando los tornillos de PB 2.9 X 5 (FF) para fijar el lazo plásticoDD) en la parte posterior del cuerpo de instalación(B).
-
Page 20: Opción De Instalación # 3-Roscada En
Opción de Instalación # 3-Roscada en (no cable requisito) Quitar el cristal del ajustador de equipo de luz Quitar el globo de cristal existente y la ■ bombilla de la luz incandescente. Instalación del equipo de luz Atornillar de la base roscada (A) en el ■... - Page 22 Preguntas, problemas, piezas faltantes? Antes de devolver el producto a la tienda, llame al Centro de Atención al Cliente de Hampton Bay en el horario de 8 a.m. – 6 p.m., Hora del Este de EE.UU., 9 a.m. – 6 p.m., de lunes a viernes.
Need help?
Do you have a question about the 53701101 and is the answer not in the manual?
Questions and answers