Table of Contents
Advertisement
Advertisement
Table of Contents

Related Manuals for Haier HD90-A636


Summary of Contents for Haier HD90-A636
- Page 1 User manual Heat-Pump-Dryer HD90-A636...
- Page 2 Thank you Thank you for purchasing a Haier Product. Please read these instructions carefully before using this appliance. The instructions con- tain important information which will help you get the best out of the appliance and ensure safe and proper installation, use and maintenance.
-
Page 3: Table Of Contents
Content Safety information ..........................4 Intended use ............................7 Product description ..........................8 Control panel ............................9 Programmes............................13 Consumption ............................14 Suggestions and tips ...........................15 Daily use ..............................17 Care and cleaning ..........................21 Troubleshooting ...........................25 Installation ..............................28 Accessories ............................29 Technical data ............................30 Customer Service ..........................32... -
Page 4: Safety Information
Safety information WARNING! Before first use ▶ Make sure there is no transport damage. ▶ Remove all packaging and keep out of children´s reach. ▶ Handle the appliance always with at least two persons because it is heavy. Daily use ▶... - Page 5 Safety information WARNING! Daily use ▶ Do not dry following items in the appliance: ▶ Items which are unwashed. ▶ Items which have been contaminated with inflammable sub- stances such as cooking oil, acetone, alcohol, benzine, petrol, kerosene, spot removers, turpentine, waxes, wax removers or other chemicals.
- Page 6 Safety information WARNING! Maintenance / cleaning ▶ Clean the lint filter and the condenser filter after each pro- gramme (see CARE AND CLEANING). ▶ Do not use water spray or steam to clean the appliance. ▶ Do not use industrial chemicals to clean the appliance. ▶...
-
Page 7: Intended Use
Intended use Intended use This appliance is intended for drying items which have been washed in a water solution and are marked on the manufacturer‘s care label as being suitable for tumble drying. It is designed exclusively for domestic use inside the house. It is not intended for commer- cial or industrial use. -
Page 8: Product Description
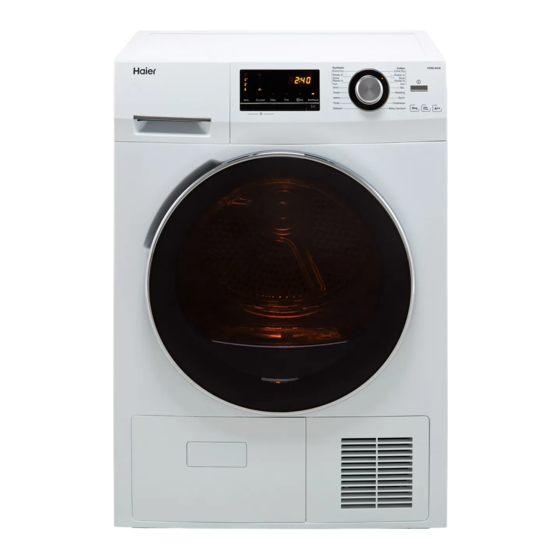
Product description VORDERANSICHT This drawing may be slightly different from the layout of the drying machine you have just purchased. Fig.1: appliance front Fig.2: appliance backside 1 Water tank Ventilation slots 2 Rating plate Power cord 3 Service flap Back cover 4 Control panel Drainage outlet 5 Door... -
Page 9: Control Panel
Control panel Ready to Iron Bedding Temp. Dry Level Intense Extra rinse Delay Start/Pause Timer Heat Refresh Pump Fig.4: control panel Time ±button Maintenance indicators On/Off button Child-lock indicator Temperature button 10 Memo button Display Dry Level button 11 Start/Pause button Programme selector Delay button 1-Maintenance indicators... - Page 10 Control panel 3-Display During any selection the display (fig.:6) shows related information like ▶ Programme cycle time ▶ Programme start delay time ▶ Error codes (see TROUBLESSHOOTING) After start of an operation it displays: ▶ Remaining time in hours of a delayed programme starts, e.g.
- Page 11 Control panel Meaning of the symbols: Illuminated LED Term Meaning High temperature For heavy fabrics. Middle temperature For normal fabrics. Low temperature For easy-care fabrics. Cool air For airing of dry, worn cloths. 7-Dry Level button With this button (fig. 10), the desired dryness level can be selected for some programs.
- Page 12 Control panel 9-Time ± button With this button the programme duration of pro- gramme TIMER can be selected. 1. Set programme Timer (fig.12).The default time is 30 min. Timer Start/Pause 2. By pressing the Time ± button (fig.13) the time can Refresh be increased or decreased with steps of 10 min- utes.
-
Page 13: Programmes
Programmes Max. Temperature Dry level Programme Laundry load in kg Cotton • • Laundry of varying thickness and Extra Dry multi-layered garments, such as bathrobes, however no shirts. • • Cotton Ready to Store Terry towels, shirts. Cotton • • Bed linen, table linen, kitchen tow- Ready to Iron els, which should still be ironed. -
Page 14: Consumption
Consumption The indicated consumption values may accordingly differ to local conditions. Programme Spin speed Restidual Time Energy in rpm * moisture in h:min consumption in % in kWh Cotton 9 kg 1400 approx. 50 4:11 2.10 Extra Dry 1000 approx. 60 4:40 2.34 1400... -
Page 15: Suggestions And Tips
Suggestions and tips Starched laundry Starched laundry leaves a film of starch in the drum and is not suitable for the dryer. Softener Do not use softener when washing, because the laundry will become soft and fluffy in the dryer. Soft care cloths The use of “soft care cloths”... - Page 16 Suggestions and tips Extra large pieces ... tend to wind up. If therefore the desired dry level could not be reached, loosen up the laundry and dry again with the time programme (TIMER). Especially delicate fabrics Textiles which can easily shrink or lose their shape, as well as e.g. silk stockings, lingerie etc.
-
Page 17: Daily Use
Daily use Preparing the appliance 1. Connect the appliance to a power supply (220V to 240V~/50Hz) (fig. 16) Please refer also to sec- tion INSTALLATION. 2. Make sure: ▶ the water tank is empty and properly installed. (fig. 17). ▶ the lint filter is clean and properly installed. (fig. 18). - Page 18 Daily use Tips: ▶ Separate white clothes from coloured ones. ▶ Unfold large items such as bed sheets, table cloths, etc. ▶ Bed linen and pillowcases should be button, so that small parts cannot collect inside. ▶ Close zippers and hooks, and tie loose belts without metal parts, apron strings etc. together.
- Page 19 Daily use Switch on the appliance Press the „on/off“- button to switch on the appliance. (fig.: 22). Select a programme To get the best drying results, select a programme which fits the dry level and sort of laundry type. Turn the programme knob to select the right pro- gramme (fig.: 23).
- Page 20 Daily use After drying The tumble dryer stops operation automatically when a dry cycle is complete. The display END. shows Notice The last part of the drying cycle occurs without heat (cool down cycle) to ensure re- maining the garments at a temperature which does not damage them. 1.
-
Page 21: Care And Cleaning
Care and cleaning CAUTION! Following maintenance activities must be carried out after each drying cycle. ▶ Empty the water tank ▶ Clean the lint filter ▶ Clean the condenser filter Empty the water tank During operation, steam condenses to water which is collected in the water tank. The tank must be emptied after each drying cycle. - Page 22 Care and cleaning Clean the lint filter Fiber abrasion results because of wearing and washing the laundry. These fibers (fluff) will be collected during the drying process in the lint filter. The lint filter in the filling opening must be cleaned after each drying cycle to ensure proper air circulation.
- Page 23 Care and cleaning Clean the front of the heat exchanger Approximately all 10 drying cycles the front of the heat exchanger should be cleaned from fluff by using a sponge or vacuum cleaner (fig.: 47/48). Please use household gloves. The fluff can remove easily when they have been sprayed with water previously.
- Page 24 Care and cleaning Long periods of disuse If the appliance is not in use for a long time : 1. Empty the tank. 2. Set any programme. 3. Start the programme. The residual water will be pumped into the tank. 4.
-
Page 25: Troubleshooting
Troubleshooting Many occuring problems could be solved by yourself without specific expertise. In case of a problem please check all shown possibilities and follow below instructions before you contact an after sales service. See CUSTOMER SERVICE. WARNING! ▶ Before maintenance, deactivate the appliance and disconnect the mains plug from the mains socket. - Page 26 Troubleshooting Troublesshooting without display-codes Problem Possible cause Possible solution Tumble dryer • Programme is not yet started? • Check programme and start it. fails to operate. • Delay function is activated? • Cancel the delay start. • Door is not properly closed? •...
- Page 27 Troubleshooting Problem Possible cause Possible solution Drying time is • The load was too small? • For single items or small too short. amount of laundry the TIMER programme should be selected. • The laundry was too dry? • Select the TIMER programme or a higher dry level.
-
Page 28: Installation
Installation Preparation ▶ Remove all packaging material. While opening the package, water drops may be seen. This normal phenomenon results from water tests in the factory. ▶ Remove all packaging material including the polystyrene base. Notice Dispose of the packaging in an environmentally friendly manner. For information refer- ing current disposal routes, consult your retailer or the local authorities. -
Page 29: Accessories
Accessories Connection of a drain hose With the drain hose (included or optional available at the customer service; fig.:55) the condensed wa- ter can be redirected to the drain (sink, trap or gully; fig.:56). The draining of the water tank is eliminated. Nevertheless the tank must be installed in the control panel correctly. -
Page 30: Technical Data
Technical data Productfiche (acc. to EU 392/2012) Trade mark Haier Model identifier HD90-A636 Rated capacity (kg) Kind of tumble drier Condenser Energy efficiency class Weighted Annual Energy Consumption (AE in kWh/year) Tumble dryer with or without automatic with automatic Energy consumption of the standard cotton programme 1.98... - Page 31 Technical data Additional data Dimensions - HxDxW in mm 845 x 650 x 595 220-240 V~50 Hz/ 2.4A/ Power supply (refer to rating plate) - voltage / current / input 550 W Permissible ambient temperature 5°C to 35°C Fluorinated greenhouse gas HFKW-134a Volume 0.42 kg...
-
Page 32: Customer Service
If you cannot find a solution there, please contact ▶ your local dealer or ▶ the Service & Support area at www.haier.com where you can find telephone numbers and FAQs and where you can activate the service claim. To contact our Service, ensure that you have the following data available.
Need help?
Do you have a question about the HD90-A636 and is the answer not in the manual?
Questions and answers