Table of Contents
Advertisement
Quick Links
Advertisement
Table of Contents

Subscribe to Our Youtube Channel
Related Manuals for unicraft EWH Series


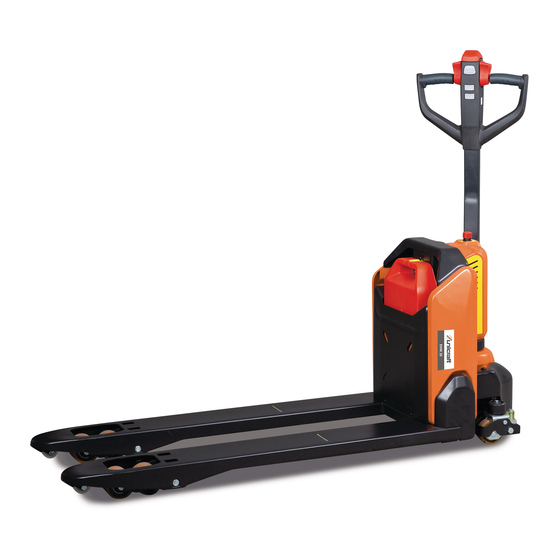
Summary of Contents for unicraft EWH Series
- Page 1 Instruction Manual Electric lift truck EHW 12 EHW 15 EHW 20 EHW 15...
-
Page 2: Table Of Contents
5.1 Transport ............7 5.2 Packaging ............8 5.3 Storage ............... 8 Fax: 0049 (0) 951 96555 - 55 6 Description of the device ......8 E-Mail: info@unicraft.de 7 Commissioning ........8 Internet: www.unicraft.de 7.1 Operating conditions........... 8 7.2 Operation ............9 7.3 Pin-Code-Display..........10 7.4 Errors .............. -
Page 3: Introduction
You have made an excellent choice in purchasing a All data in these operating instructions has been com- UNICRAFT Electric lift truck. piled on the basis of the state-of-the-art, valid standards and guidelines as well as our many years of expertise Carefully read the operating instructions prior to and experience. -
Page 4: Operator Responsibility
Safety Obligations of the operator: CAUTION! If the machine is used for commercial purposes, opera- tors are subject to the legal stipulations in terms of occu- This combination of symbol and signal term indi- pational safety. For this reason, the safety instructions in cates a potentially hazardous situation which may these operating instructions as well as the safety, acci- cause minor or light injuries if it is not averted. -
Page 5: Operating Staff Qualification
Safety 2.3 Operating staff qualification The personal protective equipment is described in the following section: The different tasks described in these operating instruc- tions require different levels of skills in terms of the quali- fications of operating staff working with the machine. Head protection The industrial helmet protects the head against fal- WARNING! -
Page 6: General Safety Instruction
Intended Use 2.6 General safety instruction 3.1 Foreseeable misuse The valid accident prevention regulations must be follo- If the electric pallet truck is used as intended, no reaso- wed. If the Electric lift truck is intended for use by em- nably foreseeable misuse is possible which could lead to ployees, the relevant labour law regulations must also be dangerous situations with personal injury. -
Page 7: Technical Data
Technical Data Technical Data 4.1 Type plate EHW 12 EHW 15 EHW 20 Dimensions 1537 x 1530 x 1536 x (LxWxH) ca. 540 x 540 x 540 x 700 mm 700 mm 540 mm Weight 124 kg 123 kg 149 kg Load-bearing 1,2 T 1,5 T... -
Page 8: Packaging
Description of the device Description of the device Transport on a truck: Figures in these operating instructions may deviate Lower the forks and place the lift truck securely on the from the original. truck carrier surface. Attach the lift truck as shown in Fig. 4 by inserting special fastening straps into the wheel ho- les on the fork of the electric lift truck and fasten the other side of the strap to the truck. -
Page 9: Operation
Commissioning 7.2 Operation DANGER! Before using the electric lift truck, please read the chapter "Safety. Wear protective gloves! Fig. 7: Operation Step 1: Turn the emergency stop switch (item 5, Fig. 5) clockwise and insert the key (item 4, Fig. 5). Wear safety shoes! Step 2: Press the horn button (item 15, Fig. -
Page 10: Pin-Code-Display
Commissioning Press the Turtle button (item 18, fig.7) to switch 4. The safety button (pos. 1, fig. 5) prevents the operator to slow speed mode. Drive slowly by moving from being squeezed. When this button is activated, the gas button (item 14, fig.7), press the turtle the vehicle decelerates and/or begins to travel in re- button again to return to normal mode. -
Page 11: Errors
Care, Maintenance and Repair 7.4 Errors 8.2 Maintenance and repair In case of malfunction or failure of the electric lift truck, please stop the lift truck and activate the emergency stop DANGER! switch (pos. 5, fig. 5) by pressing it. If possible, park the lift truck in a safe place and remove the key (pos. - Page 12 Care, Maintenance and Repair 8.2.1Battery The first green LED from the left lights up and indicates 75% -100% of the battery charge. The second blue LED from the left is on and indicates DANGER! 50% -75% of the battery charge. - Only qualified personnel may service or charge the The third yellow LED from the left is on and indicates batteries.
- Page 13 Care, Maintenance and Repair - The room where you are charging must be ventilated 8.2.2Lubrication points by ventilation. Smear the marked areas. The required grease specifica- - The exact charge level can only be checked at the tion is: DIN 51825, standard grease. discharge door.
-
Page 14: Charging Socket
Care, Maintenance and Repair 8.4 Maintenance intervals 8.2.4Check the electrical fuses Remove the main cover. The fuses are arranged as shown in Fig. 12. Interval (Month) Hydraulic Check the hydraulic cylinder(s), the piston for damage noises and leaks. Check the hydraulic connections for damage and leaks. -
Page 15: Troubleshooting
Care, Maintenance and Repair 8.5 Troubleshooting Interval (Month) If the operating results are not satisfactory, check the following points before systematic checks and before no- tifying the service center: Test the warning signal. Fault Possible cause Solution Check the contactor(s). 1. -
Page 16: Error Code
Care, Maintenance and Repair 8.6 Error code EHW 15 Code Description Possible cause Part LOW POWER Battery low Control sy- stem PUMP ERROR The switch for lifting or lowering was activated earlier than the key Control sy- switch stem SRO ERROR Operating sequence of direction, locking and key switch is not cor- Control sy- rect. - Page 17 Care, Maintenance and Repair Code Description Possible cause Part Motor short circuit Motor short circuit Control sy- stem 1. Engine cable defect. Engine error 2. Faulty motor wiring. Control sy- 3. Controller defective. stem CONTROL OVER- Controller defective. Control sy- LOAD stem ENGINE TEMPERA-...
- Page 18 Care, Maintenance and Repair Code Description Possible cause Part Operating mode Fault Turtle switch does not work Drawbar Lifting error Lifting knob does not work Drawbar Error of the lower po- Lowering button does not work Drawbar sition Failure of the BMS Communication with battery was interrupted: communication 1.
- Page 19 Care, Maintenance and Repair EHW 20 Code Description Possible reasons Part Operating mode Fault Turtle switch does not work Drawbar Lifting error The lift button was activated before the lift truck was switched on. Drawbar Error of the lower posi- The lowering button is activated before the lift truck is switched on.
- Page 20 Care, Maintenance and Repair Code Description Possible reasons Part Pump The lift button was not closed before the lift truck was switched on. Control sy- stem Valve fault Control valve failure: Control sy- 1. The controller port J3-2- is defective stem 2.
-
Page 21: Disposal, Reusing Used Machines
Disposal, Reusing used Machines Disposal, Reusing used Ma- 9.3 Disposal via municipal collection points chines Disposal of used electrical and electronic equipment In your own interest and to protect the environment make (Applicable in the countries of the European Union and sure that all machine components are exclusively dis- other European countries with a separate collection sys- posed of in as intended and permitted. -
Page 22: Spare Parts
Spare parts 10 Spare parts Example The Swivel castors for the Electric lift truck EHW 12 must DANGER! be ordered. The Swivel castors has the number 5 in the Risk of injury caused by the use of spare parts drawing 2. incorrect spare parts! The use of incorrect or faulty spare parts may cause By ordering spare parts, send a copy of the spare parts... -
Page 23: Spare Parts Drawing
Spare parts 10.2Spare parts drawing 10.2.1 Spare parts drawing EHW 12 Spare parts drawing Spare parts drawing 2 Fig. 14: Spare parts drawing 1 and 2 EHW-Series | Version 1.02... - Page 24 Spare parts Spare parts drawing Spare parts drawing Spare parts drawing Fig. 15: Spare parts drawing 3,4 and 5 EHW-Series | Version 1.02...
- Page 25 Spare parts Spare parts drawing Spare parts drawing Spare parts drawing Fig. 16: Spare parts drawing 6, 7 and 8 EHW-Series | Version 1.02...
- Page 26 Spare parts Spare parts drawing Spare parts drawing Fig. 17: Spare parts drawing 9 and 10 EHW-Series | Version 1.02...
- Page 27 Spare parts Spare parts drawing Spare parts drawing Fig. 18: Spare parts drawing 11 and 12 EHW-Series | Version 1.02...
- Page 28 Spare parts Spare parts drawing Fig. 19: Spare parts drawing 13 EHW-Series | Version 1.02...
- Page 29 Spare parts Spare parts drawing Fig. 20: Spare parts drawing 14 EHW-Series | Version 1.02...
- Page 30 Spare parts 10.2.2 Spare parts drawing EHW 15 Spare parts drawing Spare parts drawing 2 Fig. 21: Spare parts drawing 1 and 2 EHW-Series | Version 1.02...
- Page 31 Spare parts Spare parts drawing Spare parts drawing Spare parts drawing Fig. 22: Spare parts drawing 3,4 and 5 EHW-Series | Version 1.02...
- Page 32 Spare parts Spare parts drawing Spare parts drawing Spare parts drawing Fig. 23: Spare parts drawing 6, 7 and 8 EHW-Series | Version 1.02...
- Page 33 Spare parts Spare parts drawing Spare parts drawing Fig. 24: Spare parts drawing 9 and 10 EHW-Series | Version 1.02...
- Page 34 Spare parts Spare parts drawing Spare parts drawing Fig. 26: Spare parts drawing 11 and 12 EHW-Series | Version 1.02...
- Page 35 Spare parts Spare parts drawing Fig. 27: Spare parts drawing 13 EHW-Series | Version 1.02...
- Page 36 Spare parts Spare parts drawing Fig. 28: Spare parts drawing 14 EHW-Series | Version 1.02...
- Page 37 Spare parts 10.2.3 Spare parts drawing EHW 20 Spare parts drawing Spare parts drawing 2 Fig. 29: Spare parts drawing 1 and 2 EHW-Series | Version 1.02...
- Page 38 Spare parts Spare parts drawing Spare parts drawing Spare parts drawing Fig. 30: Spare parts drawing 3,4 and 5 EHW-Series | Version 1.02...
- Page 39 Spare parts Spare parts drawing Spare parts drawing Fig. 31: Spare parts drawing 6 and 7 EHW-Series | Version 1.02...
- Page 40 Spare parts Spare parts drawing Spare parts drawing Fig. 32: Spare parts drawing 8 and 9 EHW-Series | Version 1.02...
- Page 41 Spare parts Spare parts drawing Spare parts drawing Fig. 33: Spare parts drawing 10 and 11 EHW-Series | Version 1.02...
- Page 42 Spare parts Spare parts drawing Spare parts drawing Fig. 34: Spare parts drawing 13 EHW-Series | Version 1.02...
- Page 43 Spare parts Spare parts drawing Fig. 35: Spare parts drawing 13 EHW-Series | Version 1.02...
-
Page 44: Circuit Diagrams
Circuit diagrams 11 Circuit diagrams 11.1Wiring EHW 12, EHW 15 and EHW 20 Fig.36: Wiring EHW-Series | Version 1.02... -
Page 45: Circuit Diagrams Ehw 12
Circuit diagrams 11.2 Circuit diagrams EHW 12 Electric circuit diagram 1: Models without speed reduction Fig. 37: Electrical circuit diagram 1 EHW-Series | Version 1.02... - Page 46 Circuit diagrams Electric circuit diagram 2: Models with speed reduction Fig. 38: Electrical circuit diagram 2 EHW-Series | Version 1.02...
-
Page 47: Electrical Diagrams Ehw 15 And Ehw 20
Circuit diagrams 11.3Electrical diagrams EHW 15 and EHW 20 Electric circuit diagram 1: Models without speed reduction Fig. 39: Electrical circuit diagram 1 EHW-Series | Version 1.02... - Page 48 Circuit diagrams Electric circuit diagram 2: Models with speed reduction Fig. 40: Electrical circuit diagram 2 EHW-Series | Version 1.02...
-
Page 49: Ec-Declaration Of Conformity
According to Machinery Directive 2006/42/EC Annex II 1.A Manufacturer / Distributor: Stürmer Maschinen GmbH Dr.-Robert-Pfleger-Str. 26 D-96103 Hallstadt hereby declares that the following product ® Product group: Unicraft Werkstatttechnik Type of machine: Electric lift truck Designation of the machine*: Item number: EHW 12 6160112... - Page 50 www.unicraft.de...
Need help?
Do you have a question about the EWH Series and is the answer not in the manual?
Questions and answers