
Related Manuals for Vimar Elvox 69AM/T


Summary of Contents for Vimar Elvox 69AM/T
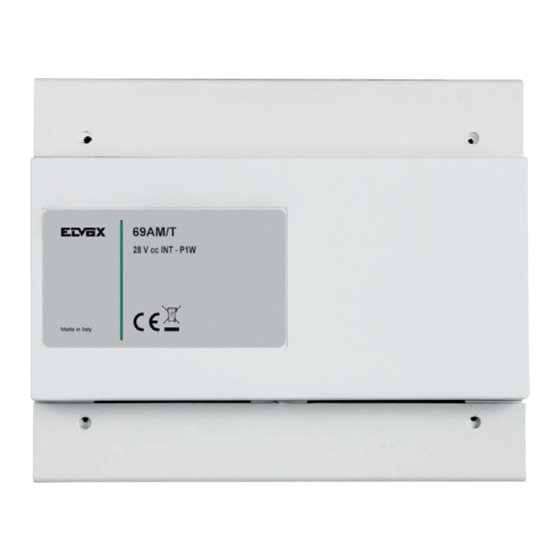
- Page 1 Manuale installatore Installer guide 69AM/T Selettore video per 4 telecamere Video selector for 4 cameras...
-
Page 2: Installazione Elettrica
Il numero massimo di telecamere in funzione dei moduli 69AM/T4 aggiuntivi (Fig. 2), è riportato nella seguente tabella: MODULI AGGIUNTIVI NUMERO MASSIMO TELECAMERE Il manuale istruzioni è scaricabile dal sito www.vimar.com 2. Installazione Elettrica Regole di installazione L’installazione deve essere effettuata da personale qualificato con L’interfaccia si collega all’impianto per mezzo della morsettiera... - Page 3 69AM/T CN10 CN15 Fig.1 Art. 69AM/T EXP. IN EXP. OUT Fig. 2 Art. 69AM/T4 Max. 3 moduli Fig. 3 69AM/T4 Art. 69AM/T4 Art. 69AM/T4 Art. 69AM/T4 Art. 69AM/T...
-
Page 4: Configurazione Hardware
69AM/T 3. Configurazione hardware 4. Configurazioni software Nel seguito si farà riferimento a CN10 posizionato in alto a Le configurazioni possono essere condotte per mezzo del pro- sinistra. grammatore 950C collegato a CN9 posto in alto a destra e che è accessibile anche esternamente al coperchio. - Page 5 69AM/T Tabella A Parametro Voce successiva Voce Precedente Sotto Voce Default Lingua Italiano (Lingua locale) ID come Targa (non assegnato) ID come Dispositivo (non assegnato) TVCC Centralino Installazione Bus Verticale ID Iniziale (+) (Compare per installazione orizzontale) ID Finale (+) 1000 (Compare per installazione orizzontale)
- Page 6 69AM/T la l’incongruenza: Il tasto non ha funzione perché il programmatore è alimenta- to dal bus. Per lo stesso motivo non è presente la funzione di auto spegnimento. Utilizzando i tasti del programmatore, selezionare la voce seguente del menù principale: Con il tasto si passa alla voce precedente del menù...
- Page 7 69AM/T ID dei (video)citofoni per i quali possono essere eseguite alcune configurazioni nell’unità elettronica. Esse sono: abilitazioni all’uso di F1 / F2, autoaccensione. In caso di identificativo fuori limite, la prima riga del display segnala Default: 1 l’incongruenza: 4.3D - ID finale Con il tasto si passa alla voce precedente del menù...
- Page 8 69AM/T quale si può modificare il tempo per il quale viene attivata l’uscita Default: 200 Quanto è mostrato corrisponde al valore corrente: Distribuzione PI per Router (vedi Tabella riportata nelle pagine in seguito) Digitando delle cifre, il tempo può essere cambiato a passi di 4.4 - Tempo conversazione un secondo: Premendo il tasto...
- Page 9 69AM/T 4.7A - Invio Presenza Il commutatore invia nel bus un'informazione riguardo la propria presenza affinchè i PE che si occupano della gestione dell'autoac- Digitare le cifre in modo da comporre un numero compreso tra censione ne siano costantemente informati. 1 e 15 (1 a 8248 configurazione orizzontale), cioè...
- Page 10 69AM/T L’accettazione del comando, come per tutti gli altri, viene indicata nella prima riga del display: Per cambiare identificativo del monitor o citofono utilizzare i tasti . In alternativa digitare il numero del monitor o citofono, da 1 a 200 per i (video)citofoni e da 201 a 204 per i centralini di In caso di identificativo fuori limite, la prima riga del display segna- portineria: la l’incongruenza:...
- Page 11 Nota: Non compare per installazione orizzontale. correttamente, deve almeno conoscere l’identificativo del P.E. In unione con il Pulsante di Chiamata Vimar type xx577 (xx sta a lui associato e che governa tutta la procedura di accensione. per il prefisso identificativo della serie, es. 20577 pulsante di Per lasciare un minimo di flessibilità, tali P.E.
-
Page 12: Reset Totale
69AM/T 5. Funzionamento 4.14 - Audio alimentato (valido solo per 69AM) Alcune telecamere da TVCC hanno anche un microfono incorpo- Per prima cosa assicurarsi di aver eseguito a dovere l’installazio- rato. Per alcune l’alimentazione è interna, per altre no. Per queste ne elettrica e di aver assegnato un ID unico per tutti i dispositivi ultime bisogna usare la programmazione seguente. - Page 13 69AM/T Distribuzione PI per Router Tabella 3 Table 3 ROUTER ROUTER MIN MAX MIN MAX MIN MAX MIN MAX MIN MAX MIN MAX MIN MAX MIN MAX MIN MAX MIN MAX MIN MAX MIN MAX MIN MAX MIN MAX MIN MAX MIN MAX 200 201 400 401 600 601 800 801 1000 166 201 366 401 566 601 766 801 966 1001 1166 1201 1204 142 201 342 401 542 601 742 801 942 1001 1142 1201 1342 1401 1406...
-
Page 14: General Information
ADDITIONAL MAXIMUM NUMBER OF CAMERAS MODULES The instructions manual can be downloaded from the website: www.vimar.com 2. Electrical Installation Installation rules Installation must be carried out by qualified persons in compliance with The interface is connected to the system by means of the terminal the current regulations regarding the installation of electrical equipment block CN10 located to the upper left (Fig. - Page 15 69AM/T CN10 CN15 Fig.1 Art. 69AM/T EXP. IN EXP. OUT Fig. 2 Art. 69AM/T4 Max. 3 69AM/T4 Fig. 3 modules Art. 69AM/T4 Art. 69AM/T4 Art. 69AM/T4 Art. 69AM/T...
-
Page 16: Hardware Configuration
69AM/T 3. Hardware configuration 4. Software configurations Reference is made to CN10 positioned to the upper left hereafter. The configurations can be made using programmer 950C con- nected to CN9 situated at the top right and which is also acces- 3.1. - Page 17 69AM/T Table A Parameter Subsequent item Previous item Sub-item Default Language Italian (Local language) ID as Entrance Panel (not assigned) ID as Device (not assigned) Switchboard CCTV Installation Vertical Bus Initial ID (+) (Appears for horizontal installation) Final ID (+) 1000 (Appears for horizontal installation) IU per router (+)
-
Page 18: Message Language
69AM/T button has no function because the programmer is Use the button to move to the previous item in the program- powered via the bus. For the same reason the auto-shutdown ming menu. function is not available. The programmer buttons enable selection of the following item from the main menu: 4.3 - Switch ID as device N.B.: this does not appear if the installation is Horizontal. - Page 19 69AM/T 4.3D - Final ID This is the same thing as paragraph 4.3C except that it refers to the last ID in the same range. Use the button to move to the previous item in the programming Default: 1000 menu. N.B.: the range of the ensuing window must be equal to or less N.B.: to operate correctly, all the other configurations must be set to than 1000 internal units managed in accordance with the number...
- Page 20 69AM/T 4.4 - Conversation time To cancel, press . To confirm, press . Acceptance of the Press the button to go to the next item in which the user can command, as in all cases, is shown on the first line of the display: modify the time for which the conversation with switch lasts on the (video)entryphone.
- Page 21 69AM/T used to indicate the enabled status of indirect control signals, i.e. to To cancel the assignment, enter a single ‘0’ as the ID. be activated at the same time as others, for instance activation of It is also possible to navigate from one index to another using the Function F1 or F2 of another electronic unit (see F1 / F2 Common).
-
Page 22: Number Of Cameras
69AM/T means of the button. Press once to enter a ‘?’ symbol instead of a digit: 4.10 - Number of cameras Next, press a button between to enter the ID from 10 Press the button to move to the next item, to enable program- to 16. -
Page 23: Total Reset
69AM/T 4.12 - Call button camera Note: Does not appear for horizontal installation. In conjunction with the Vimar Call Button type xx577 (xx is the ID Press followed by the ID number between 1 and 200 to prefix of the series, for example 20577 Eikon series call button), choose the corresponding O.U.. -
Page 24: Operation
69AM/T 5. Operation This message is always only in English. Use to delete every- First of all, make sure you have performed the electrical installa- tion properly and that you have assigned a unique ID for all the thing, use once more to cancel. - Page 25 69AM/T IU distribution per Router Tabella 3 Table 3 ROUTER ROUTER MIN MAX MIN MAX MIN MAX MIN MAX MIN MAX MIN MAX MIN MAX MIN MAX MIN MAX MIN MAX MIN MAX MIN MAX MIN MAX MIN MAX MIN MAX MIN MAX 200 201 400 401 600 601 800 801 1000 166 201 366 401 566 601 766 801 966 1001 1166 1201 1204 142 201 342 401 542 601 742 801 942 1001 1142 1201 1342 1401 1406...
- Page 26 69AM/T Key for wiring diagrams Legenda per schemi di collegamento BUS TERMINATION TERMINAZIONE BUS This note applies to all devices with Due Fili Plus technology equipped with “BUS Questa nota si applica a tutti i dispositivi della tecnologia Due Fili Plus dotati del termination connector or dip-switch”, which is identified by the screen-printed “connettore o dip-switch di terminazione BUS”...
- Page 27 69AM/T Impianto videocitofonico con interfaccia 69AM/T Video door entry system with interface 69AM/T Wi-Fi Rete Mains Alimentatore Power Supply +U +I Monitor Smartphone Router Monitor Internet 6923 Monitor Monitor Monitor Monitor Monitor Monitor 40507 app Video Door 40507 7549 7539 40505 7549 7539...
- Page 28 +U +I +U +I 6582.1 6582.1 6582.1 Video Video Telecamera Telecamera Telecamera Telecamera Telecamera Telecamera Cavo Cavo Camera Camera Camera 732H Vimar Vimar Vimar 732H 732I Vimar Vimar Vimar 732I (20565/14565) (20565/14565) (20565/14565) (20565/14565) (20565/14565) (20565/14565) Telecamera TVCC Telecamera Rete Alimentatore...
- Page 29 69AM/T Impianto videocitofonico con due centralini 40510, interfaccia 69RS e selettore video 69AM/T Video door entry system with two switchboards 40510, interface 69RS and video selector 69AM/T Nota: Il FW del 69AM deve essere >= 8.30. A partire dal default va configurato solo il parametro "TVCC Centralino" ed eventualmente installazione Verticale / Orizzontale. Niente altro. Note: The FW of the 69AM must be >= 8.30.
- Page 30 69AM/T...
- Page 31 69AM/T...
- Page 32 Viale Vicenza, 14 36063 Marostica VI - Italy 49401592A0 00 2007 www.vimar.com...
Need help?
Do you have a question about the Elvox 69AM/T and is the answer not in the manual?
Questions and answers