Cooper & Hunter Nordic Series Service Manual
Hide thumbs
Also See for Nordic Series:
- Service manual (53 pages) ,
- Service manual (57 pages) ,
- Service manual (50 pages)
Advertisement
Quick Links
EN
Change for Life
For proper operation, please read and keep this manual carefully.
Designed by Cooper&Hunter International Corporation, Oregon, USA
SERVICE MANUAL
Split Air Conditioner
Nordic
Generation III
M ODELS :
www.cooperandhunter.com
Series
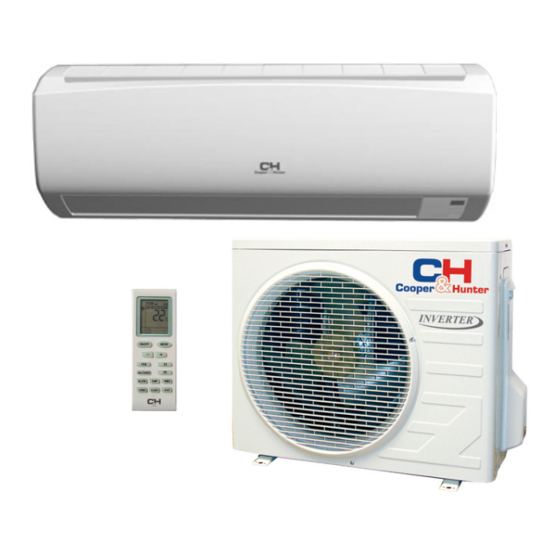
CH-S09FTX N
CH-S12FTX N
Advertisement

Related Manuals for Cooper & Hunter Nordic Series


Summary of Contents for Cooper & Hunter Nordic Series
- Page 1 SERVICE MANUAL Change for Life Split Air Conditioner Nordic Series Generation III M ODELS : CH-S09FTX N CH-S12FTX N For proper operation, please read and keep this manual carefully. Designed by Cooper&Hunter International Corporation, Oregon, USA www.cooperandhunter.com...
- Page 2 ....14 ..31...
- Page 4 CH-S09FTXN CH-S12FTXN ON/OFF CH-S12FTXN CH-S09FTXN AUTO HEALTH X-FAN HUMIDITY FILTER TURBO HOUR ON/OFF ON/OFF MODE X-FAN TEMP TIMER TURBO SLEEP LIGHT...
- Page 5 Value Parameter Unit CH-S09FTXN Model Product Code CB146030603 Rated Voltage 220-240 Power Rated Frequency Supply Phases Power Supply Mode Outdoor Cooling Capacity(Min~Max) 2700(440~3260) 3600(440~4200) Heating Capacity(Min~Max) Cooling Power Input(Min~Max) 680(200~1350) Heating Power Input(Min~Max) 870(200~1450) Cooling Current Input 3.09 Heating Current Input 3.95 Rated Input 1550...
- Page 6 Outdoor Unit Model CH-S09FTXN Outdoor Unit Product Code CB146W0303 Compressor Manufacturer ZHUHAI LANDA COMPRESSOR CO.,LTD. QXA-B096ZC190G2 Compressor Model Compressor Oil 68EP Compressor Type Rotary Compressor LRA. Compressor RLA Compressor Power Input Compressor Overload Protector 1NT11L-6233 Throttling Method Capillary Set Temperature Range ºC 16~30 Cooling Operation Ambient Temperature...
- Page 7 Value Parameter Unit CH-S12FTXN Model Product Code CB146016403 Rated Voltage 220-240 Power Rated Frequency Supply Phases Power Supply Mode Outdoor 3600(600~4050) Cooling Capacity(Min~Max) 4120(600~5250) Heating Capacity(Min~Max) Cooling Power Input(Min~Max) 900(220~1450) Heating Power Input(Min~Max) 990(220~1550) Cooling Current Input 4.09 Heating Current Input 4.50 Rated Input 1550...
- Page 8 Outdoor Unit Model CH-S12FTXN Outdoor Unit Product Code CB146W0313 Compressor Manufacturer ZHUHAI LANDA COMPRESSOR CO.,LTD. QXA-B096ZC190G2 Compressor Model Compressor Oil 68EP Compressor Type Rotary Compressor LRA. Compressor RLA Compressor Power Input Compressor Overload Protector 1NT11L-6233 Throttling Method Capillary Set Temperature Range ºC 16~30 Cooling Operation Ambient Temperature...
- Page 9 220V Conditions 220V Indoor:DB27°C/WB19°C Outdoor:DB35°C/WB24°C Indoor air flow:Super High 230V Pipe length:5m 230V 240V Conditions Indoor:DB20°C/WB15°C 240V Outdoor:DB7°C/WB6°C Indoor air flow:Super High Pipe length:5m 10 20 30 40 50 60 70 80 90 100 Compressor speed (rps) Compressor speed (rps) Condition Conditions Conditions...
- Page 10 Outdoor side noise Indoor side noise Middle High Supper High Indoor fan motor rotating speed Compressor frequency/Hz...
- Page 11 2XΦ55...
- Page 12 CH-S09FTXN CH-S12FTXN...
-
Page 13: Indoor Unit
Indoor unit Outdoor unit Gas pipe side Valve 4-Way valve Di s charge Heat Accumlator Suction exchanger Compressor (evaporator) Heat exchanger Liquid pipe (condenser) side Valve Capillary Strainer Strainer COOLING HEATING... - Page 14 CH-S09FTXN CH-S12FTXN CH-S09FTXN CH-S12FTXN TUBE ROOM DISCHARGE REACTOR TEMP. TEMP. TEMP. SENSOR SENSOR SENSOR YEGN LX1-1 LX1-2 TERMINAL AC-L2 BLOCK AC-L5 PCB1 N(1) AC-L4 AC-L3 PCB2 AC-L1 AC-L AC-N1 AC-N AC-L YEGN AC-N2 COMU AC-N3 OVC-COMP OFAN YEGN HEAT-L HEAT-N1 HEAT-N2 CLAPBOARD ELECTRICAL...
- Page 15 8...
- Page 17 ON/OFF Button AUTO HEALTH X-FAN MODE Button HUMIDITY FILTER +/- Button TURBO HOUR FAN Button ON/OFF Button Button ON/OFF MODE HEALTH SAVE Button X-FAN Button TEMP Button TIMER Button X-FAN TEMP TIMER TURBO Button TURBO SLEEP LIGHT SLEEP Button LIGHT Button Set fan speed Air mode AUTO...
- Page 18 AUTO COOL DRY HEAT Operation indicator is ON. high speed. Pressing this button can set fan speed circularly as: auto (AUTO),low( ),medium( ), high( Auto Under AUTO Speed,IDU fan motor will adjust the fan speed (high, medium or low speed) according to ambient temperature. Fan speed under dry mode is low speed.
- Page 19 no display (horizontal louvers (swing angle is stops at current position) displayed dynamically) (swing angle is displayed dynamically) This function is applicable to partial of models. no display...
- Page 20 Signal sender Battery Reinstall Cover of Remove battery box...
- Page 24 Frequency FCG 3 FCG3 FCG 2 FCG2 FCG 1 FCG1 TCG1 TCG2 Time TCG 1sec TCG 2sec TCG 3sec TCG3 Stop zone Drooping zone Keep zone Up zone Heat exchanger Reset zone thermistor temperature 2 Hz drooping 1.0second after After 2.5 seconds rushing in the Compressor stops drooping zone...
- Page 25 Heat exchanger thermistor temperature Return/Reset zone Up zone Keep zone Drooping zone Stop zone Stop zone Drooping zone Keep zone Up zone Heat exchanger Reset zone thermistor temperature...
- Page 26 PI control Frequency 60sec. 50sec. 600sec. 50sec. Compressor Four way valve 5sec. 5sec. 450pps 350pps 450pps Electronic expansion valve opening Initial opening...
- Page 29 Space to the wall Space to the wall At least 15cm At least 15cm Drainage pipe...
- Page 30 Start installation Preparation before installation Read the requirements select installation Prepare tools for electric connection location Select indoor unit Select outdoor unit installation location installation location Install the support of outdoor unit Install wall-mounting (select it according to the actual situation) frame, drill wall holes Connect pipes of indoor Fix outdoor unit...
-
Page 32: Outlet Pipe
Wall Wall Level meter Mark in the middle of it Space Space Open-end to the to the wrench wall wall above above Union nut 150mm 150mm Pipe Pipe joint Union nut Pipe Torque wrench Right Left Φ55mm Φ55mm Indoor pipe Rear piping hole Rear piping hole Insulating pipe... - Page 33 Panel Screw Wiring cover Indoor and outdoor power cord Indoor unit pipe Liquid Cable-cross pipe Band hole Drain hose Power connection Drain hose wire Connection pipe Band Indoor power cord Wiring Cover yellow- brown green outdoor unit connection Outdoor Indoor Wall pipe Sealing gum Upper hook...
- Page 34 Indoor 1 power yellow- connect blue black brown green wire 1 Outdoor Handle Drain vent Chassis Outdoor drain join t Drain hose At least 3cm above the floor Foot holes Handle Foot holes The drain hos can't raise upwards Wall U-shaped curve Drain hose Liquid pipe...
- Page 35 The drain hose can't be fluctuant The water outlet can't be placed The drain hose in water can't be fluctuant The water outlet can't be fluctuant Liquid valve Piezometer Gas valve Valve cap Refrigerant charging vent Nut of refrigerant Charging vent Vacuum pump Inner hexagon spanner...
- Page 38 (1)Indoor fan does not rotate without feedback Main detection point: ● Is the control panel reliably connected with the electromotor? Is it loose? Is the connecting sequence correct? ● Is the input voltage within the normal range (measure the voltage between L and N of the wiring block XT with AC voltage gauge.) Malfunction diagnosis process: Energize the unit and start it...
- Page 39 (2)Temperature sensor malfunction Main detection point: ● Is outdoor ambient temperature within the normal range? ● Is indoor and outdoor fan running normally? ● Is the radiating environment inside and outside the unit good enough? Malfunction diagnosis process: Energize the unit and start it Check connecting Indoor unit...
- Page 40 (3)Malfunction diagnosis of startup failure Main detection point: ● Is wiring of compressor correct. ● Is the stop time of compressor enough? ● Is compressor damaged? Malfunction diagnosis process: Energize the unit and start it Is the stop time of compressor more Start it 3 min later than 3min Startup failure?
- Page 41 (4)Diagnosis of losing synchronism for compressor Main detection point: ● Is pressure of the system too high? ● Is voltage too low? Malfunction diagnosis process: Losing synchronism Losing synchronism upon startup of during running the unit Is the stop time Is fan well Is outdoor fan normal? of compressor...
- Page 42 (5)Diagnosis of overload and discharge malfunction Main detection point: ● Is electric expansion valve well connected? Is it damaged? ● Is refrigerant leaked? ● Is overload wire connection normal? Malfunction diagnosis process: 20min after de-energization of complete unit Is electric expansion valve well connected? Is overload wire reliably connected?
- Page 43 (6)Process of outdoor unit communication circuit detection E6 communication error is displayed Is connecting wire reliably connected? Replace main Adjust board of indoor unit connecting wi re Remove malfunction? Replace parts of outdoor electric box Finish...
- Page 44 Turn on the unit and wait 1 minute Use DC voltmeter to measure the voltage on the two ends of electrolytic capacitor Fault with the voltage Replace the control testing circuit on Voltage higher than 200V? panel AP1 control panel AP1 Measure the AC voltage between terminal L and N on wiring board XT(power supply)
- Page 45 Energize and switch on Use AC voltmeter If the voltage Check the supply to measure the IPM protection between terminal L voltage and voltage between occurs after the and N on wiring machine has run for terminal L and N restore it to board XT is within a period of time?
- Page 46 Anti-high temperature, overload protection Normal protection, please use If the outdoor ambient temperature is it after improve the outdoor higher than 53 ºC? ambient temperature After the unit de- energized for 20min Improve the If the radiating of outdoor radiating environment of and indoor unit is well? unit...
- Page 47 Energize the unit and start it If the stop time is not enough and the If the stop time of compressor high and low pressure of system is not is more than 3min? balance , please start it after 3min Improve the connection situation If the compressor wire COMP(UVW) is of control board AP1 and...
- Page 48 Synchronism Synchronism after energize the unit occurred during and start it operation Check if the fan Replace fan If the stop time of If the outdoor fan works terminal OFAN is capacitor C1 compressor is more than normally? connected well 3min Replace Improve the radiating...
- Page 49 After the unit de-energized for 20min If the overload protector SAT is well connected? Under ambient temperature, test the resistance of overload protector with ohmic Connect wire If the wiring terminal FA of electron well with wiring expansion is well connected? diagram The resistance value of firs t 4 l e ad fo ot an d th e...
- Page 50 Start Check the connection wire of reactor (L) of outdoor unit and PFC capacity Replace connection If there is damaged If the malfunction is wire with circuit short circuit removed? diagram Remove PFC capacity and test resistance of two terminals Capacity is Re-energize short...
- Page 51 Start If the unit is operation normal before malfunction Check connection wire of indoor and outdoor unit with circuit diagram Check built- in wiring of Connection indoor and correct? outdoor unit Malfunction of Check connection circuit is If the wiring is wire of indoor and detected with outdoor unit with...
- Page 52 Start Test voltage value with Test 12 position in diagram with voltage meter Number jumping Test voltage value with Test 13(18K) 11(24K) position in diagram with voltage meter Number jumping Outdoor unit Test voltage malfunction value with Test 10 position in diagram with voltage meter Number jumping...
- Page 55 CH-S09FTXN CH-S12FTXN AUTO HEALTH X-FAN HUMIDITY FILTER TURBO ON/OFF HOUR ON/OFF MODE X-FAN TEMP TIMER TURBO SLEEP LIGHT...
- Page 56 CH-S09FTXN CH-S12FTXN...
- Page 57 CH-09FTXN...
- Page 58 CH-09FTXN 02803098P...
- Page 59 CH-S12FTXN...
- Page 60 CH-S12FTXN...
- Page 67 CH-S12FTXN 1. Remove the Handle The stop valve cover has 6 hooks. Remove the connection screw fixing the big handle and then remove the handle. Handle 2. Remov e the top panel T op panel Loosen the 3 screws (front, right, left) and lift the top panel.
- Page 68 3.Remove grille and front pane l Loosen one screw and remove th e discharge grille . grille Lift the front panel an d remove it while pushing Loosen the 5 screws o f th e right side panel inwards . the front panel .
- Page 69 M4X16 Remove the 4 tapping screws fixing the motor. DC fan motor Fan motor fixing frane Pull out the lead-out wire and remove the motor. Remove the 2 tapping screws fixing the motor support. Lift to remove the motor support. Fan motor 6.Remove the electri c box.
- Page 70 8.Remove the sound blanket. Since the piping ports on Lift and remove the the sound blanket are sound blanket (top). torn easily, remove the blanket carefully. Untie the strings and open the sound blanket. Lift and remove the sound blanket (body) as it is opened.
- Page 71 10.Remove compressor Remove the 2 screws fixing the gas valve. Solder off the weld spot connecting gas valve and air return pipe and remove the gas valve. (Note: it is necessary to warp the gas valve when soldering off the welding spot.) Remove the 2 screws fixing liquid valve.
- Page 72 CH-S09FTXN 1. Remove the Handle The stop valve cover has 6 hooks. Loosen the screw of the stop valve cover. Pull down the stop valve cover and remove Handle 2. Removing the top panel Top panel Loosen the 3 screws (front, right, left) and lift the top panel.
- Page 73 3.Remove discharge grille and Front panel Loosen the 1 screws and remove the discharge grille. Lift the front panel and remove it while pushing the right side panel inwards. Step Procedure Points discharge grille. Loosen the 5 screws of the front panel. Front panel.
-
Page 74: Dc Fan Motor
M4X16 Remove the 4 tapping screws fixing the motor. DC fan motor Fan motor fixing frane Pull out the lead-out wire and remove the motor. Remove the 2 tapping screws fixing the motor support. Lift to remove the motor support. Fan motor 6.Remove the electrical box. - Page 75 8.Remove the sound blanket. Since the piping ports on Lift and remove the the sound blanket are sound blanket (top). torn easily, remove the blanket carefully. Untie the strings and open the sound blanket. Lift and remove the sound blanket (body) as it is opened.
- Page 76 10.Remove compressor Remove the 2 screws fixing the gas valve. Solder off the weld spot connecting gas valve and air return pipe and remove the gas valve. (Note: it is necessary to warp the gas valve when soldering off the welding spot.) Remove the 2 screws fixing liquid valve.
- Page 78 Pipe Pipe cutter Leaning Uneven Burr Pipe Shaper Downwards Union pipe Pipe Hard mold Expander Pipe Smooth surface Improper expanding damaged leaning crack uneven surface thickness The length is equal...
- Page 82 Designed by Cooper&Hunter International Corporation, Oregon, USA www.cooperandhunter.com E-mail: info@cooperandhunter.com...
Need help?
Do you have a question about the Nordic Series and is the answer not in the manual?
Questions and answers