
Related Manuals for ITT Flygt 5150.350


Summary of Contents for ITT Flygt 5150.350
- Page 1 Water & Wastewater Installation, Operation, and Maintenance Manual Flygt 5150.350, 5150.360...
-
Page 3: Table Of Contents
Connect the motor cable to the pump........................19 Connect the motor cable to the starter and monitoring equipment..............19 Cable charts...................................20 Check the impeller rotation............................25 Operation...................................26 Precautions..................................26 Distance to wet areas..............................26 Noise level..................................26 Start the pump.................................26 Flygt 5150.350, 5150.360 Installation, Operation, and Maintenance Manual... - Page 4 The pump does not stop when a level sensor is used....................41 The pump starts-stops-starts in rapid sequence......................41 The pump runs but the motor protection trips......................41 The pump delivers too little or no water........................42 Technical Reference................................44 Motor data..................................44 Application limits................................44 Flygt 5150.350, 5150.360 Installation, Operation, and Maintenance Manual...
-
Page 5: Introduction And Safety
• All service and repair work is done by ITT-authorized personnel. • Genuine ITT parts are used. • Only Ex-approved spare parts and accessories authorized by ITT are used in Ex-approved products. Limitations The warranty does not cover faults caused by these situations: •... -
Page 6: Safety
This includes any modification to the equipment or use of parts not provided by ITT. If there is a question regarding the intended use of the equipment, please contact an ITT representative before proceeding. -
Page 7: User Safety
Electrical connections Electrical connections must be made by certified electricians in compliance with all international, national, state, and local regulations. For more information about requirements, see sections dealing specifically with electrical connections. Flygt 5150.350, 5150.360 Installation, Operation, and Maintenance Manual... -
Page 8: Ex-Approved Products
ATEX compliance is fulfilled only when you operate the unit within its intended use. Do not change the conditions of the service without the approval of an ITT representative. When you install or maintain ATEX- compliant equipment, always comply with the directive and applicable standards in IEC/EN 60079–14. -
Page 9: Environmental Safety
Follow local laws and regulations regarding recycling if the unit or parts are accepted by an authorized recycling company. If the first guideline is not applicable, then return the unit or parts to your ITT representative. Waste and emissions regulations Observe these safety regulations regarding waste and emissions: •... -
Page 10: Transportation And Storage
Lifting equipment Lifting equipment is always required when handling the pump. It must fulfill the following requirements: • The minimum height (contact ITT for information) between the lifting hook and the floor must be sufficient to lift the pump. • The lifting equipment must be able to hoist the pump straight up and down, preferably without the need for resetting the lifting hook. -
Page 11: Freezing Precautions
• Before operating the pump after storage, it must be inspected with special attention to the seals and the cable entry. • The impeller/propeller must be rotated every other month to prevent the seals from sticking together. Flygt 5150.350, 5150.360 Installation, Operation, and Maintenance Manual... -
Page 12: Product Description
• Modifications to the unit or installation should only be carried out after consulting with ITT. • Original spare parts and accessories authorized by ITT are essential for compliance. The use of other parts can invalidate any claims for warranty or compensation. For more information contact your ITT representative. -
Page 13: Parts
For more information about the monitoring equipment, see Monitoring equipment equipment (page 12). Flow diffuser Provides heat transfer from the coolant to the pumped media (liquid). Impeller The impeller is a shrouded three-channel H-impeller. Flygt 5150.350, 5150.360 Installation, Operation, and Maintenance Manual... -
Page 14: External Cooling
NOTICE: Thermistor must never be exposed to voltages higher than 2.5 V. If the voltage exceeds this value, for example when the control circuit is tested, the thermistors will be destroyed. Flygt 5150.350, 5150.360 Installation, Operation, and Maintenance Manual... -
Page 15: The Data Plate
Approvals This section describes the EN and FM approvals that explosion-proof products have. For more information, please contact your ITT representative. In addition to the data plate, explosion-proof products also have either an EN or a FM approval plate. • European Norm •... - Page 16 II 2 G or IM2 EEx d IIC or EEx dI This illustration describes the approval plate for Factory Mutual (FM) and the information contained in its fields. Temperature class Maximum ambient temperature Figure 5: FM approval plate Flygt 5150.350, 5150.360 Installation, Operation, and Maintenance Manual...
-
Page 17: Product Denomination
The serial number is used for identification of an individual product, and is divided into four parts. This is an example of a serial number, and an explanation of its parts. NP 3085.183 - 951 0163 Product code Production year Production cycle Running number Flygt 5150.350, 5150.360 Installation, Operation, and Maintenance Manual... -
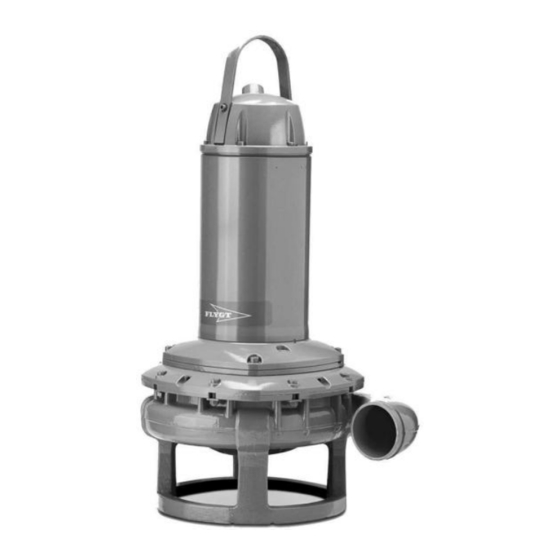
Page 18: Installation
In the S-installation, the pump is transportable and intended to operate either completely or partially submerged in the pumped liquid. The pump is equipped with a connection for hose or pipe and stands on a base stand. Flygt 5150.350, 5150.360 Installation, Operation, and Maintenance Manual... -
Page 19: Make The Electrical Connections
• There is a risk of electrical shock or explosion if the electrical connections are not correctly carried out or if there is fault or damage on the product. CAUTION: If the pump is equipped with automatic level control and/or internal contactor, there is a risk of sudden restart. Flygt 5150.350, 5150.360 Installation, Operation, and Maintenance Manual... -
Page 20: Requirements
If the outer sheath of the cable is damaged, then replace the cable. Contact an ITT service shop. • The voltage drop in long cables must be taken into account. The drive unit’s rated voltage is the voltage measured at the terminal board in the upper part of the pump. -
Page 21: Connect The Motor Cable To The Pump
Fasten the screws on the entrance flange so that the cable insertion assembly bottoms out. Connect the motor cable to the starter and monitoring equipment WARNING: Do not install the starter equipment in an explosive zone or in the sump. Flygt 5150.350, 5150.360 Installation, Operation, and Maintenance Manual... -
Page 22: Cable Charts
Colors and marking of the mains leads Mains SUBCAB 7GX SUBCAB 4GX SUBCAB AWG SUBCAB (screened) Black 1 Brown Brown Black 2 Black Black Black Black 3 Grey White Grey Black 4 Flygt 5150.350, 5150.360 Installation, Operation, and Maintenance Manual... - Page 23 This table shows the connection diagrams for the SUBCAB 7GX (3-phase power cables), with Y/D connection. Y/D connection L1 L2 L2 L3 ® ® SUBCAB SUBCAB 7Gx ___ 7x1.5 T1 T2 T16 T15 T2 T1 U1 W2 V1 U2 W1 V2 W1 V2 Flygt 5150.350, 5150.360 Installation, Operation, and Maintenance Manual...
- Page 24 1 2 3 4 5 6 7 T1T2 L1 L2 L3 T1T2 L1 L2 L3 T16 T15 T2 T16 T15 T2 U1 W2 V1 U2 W1 V2 U1 W2 V1 U2 W1 V2 Flygt 5150.350, 5150.360 Installation, Operation, and Maintenance Manual...
- Page 25 T1 T2 T3T4 L2 L3 T1 T2 T3T4 L2 L3 T16 T15 T2 T1 U1 W2 V1 U2 W1 V2 T16 T15 T2 T1 U1 W2 V1 U2 W1 V2 W1 V2 W1 V2 Flygt 5150.350, 5150.360 Installation, Operation, and Maintenance Manual...
- Page 26 Figure 10: FLS10 and Thermal contact 24 V AC/DC Pump contactor CC Control circuit L1 Caution light (leakage) L2 Caution light (stator over- temperature) Pump main supply 12 VDC Reset switch FLS10 Figure 11: MiniCAS II Flygt 5150.350, 5150.360 Installation, Operation, and Maintenance Manual...
-
Page 27: Check The Impeller Rotation
The correct direction of impeller rotation is clockwise when you look at the pump from above. If the impeller rotates in the wrong direction, transpose two phase leads (3-phase) and do this procedure again. Flygt 5150.350, 5150.360 Installation, Operation, and Maintenance Manual... -
Page 28: Operation
Remove the fuses or open the circuit breaker, and check that the impeller can be rotated freely. Conduct insulation test phase to ground. To pass, the value must exceed 5 megohms. Check that the monitoring equipment works. Start the pump. Flygt 5150.350, 5150.360 Installation, Operation, and Maintenance Manual... -
Page 29: Maintenance
9.3 (6.9) 22 (16) 44 (32) 76 (56) 187 (138) 364 (268) 629 (464) 1240 Nm (ft- (915) lbs) Carbon steel and alloyed steel Property class 70 is torque tightened as class 80. Flygt 5150.350, 5150.360 Installation, Operation, and Maintenance Manual... -
Page 30: Change The Coolant
266 (196) 519 (383) 896 (661) Change the coolant This image shows the plugs that are used to change the coolant. Figure 13: Without a cooling jacket Figure 12: With a cooling jacket Inspection plug Coolant plugs Flygt 5150.350, 5150.360 Installation, Operation, and Maintenance Manual... -
Page 31: Empty The Coolant
Replace the inspection plug and O-ring and tighten. Tightening torque: 44 Nm (33 ft-lbs) Empty the coolant: a) Place the pump in a horizontal position, or leave it upright to use a pump to empty the coolant. Flygt 5150.350, 5150.360 Installation, Operation, and Maintenance Manual... -
Page 32: Fill With Coolant
Fill with coolant until it overflows through the opposite hole, as shown here. Quantity: approximately • 11 liters (12 US quarts) without cooling jacket • 47 liters (50 US quarts) with cooling jacket) Flygt 5150.350, 5150.360 Installation, Operation, and Maintenance Manual... -
Page 33: Replace The Hydraulic Parts
Do not remove the round sling. b) Thread a chain through the impeller and pump housing outlet. c) Lock the chain so the impeller cannot rotate. Remove the impeller from the shaft: Flygt 5150.350, 5150.360 Installation, Operation, and Maintenance Manual... - Page 34 Prevent the wearing cover from falling off when removing the impeller by attaching a round sling. Remove the impeller: a) Remove the impeller screw. b) Remove the impeller and the conical sleeve. Flygt 5150.350, 5150.360 Installation, Operation, and Maintenance Manual...
- Page 35 Adjust the adjustment screw so that it is flush with the sleeve. Mount the impeller: a) Assemble the wearing cover to the drive unit and secure it with a round sling. Flygt 5150.350, 5150.360 Installation, Operation, and Maintenance Manual...
- Page 36 Remove the impeller screw. b) Using a hexagon-bit adapter, turn the adjustment screw clockwise until the impeller makes contact with the pump housing. c) Tighten it a further 1/8 turn (45°). Flygt 5150.350, 5150.360 Installation, Operation, and Maintenance Manual...
- Page 37 Tighten it a further 1/8 turn (45°). d) Fit the wear protection/plug. Check that the impeller can rotate freely. The clearance between the impeller and the pump housing should be 0.4 – 1.3 mm (0.015–0.05 in.). Flygt 5150.350, 5150.360 Installation, Operation, and Maintenance Manual...
-
Page 38: Replace The Agitator
Place the washer on the top of the propeller screw, and insert the retaining ring into the groove in the propeller. c) Undo the propeller screw. This causes the head of the propeller screw to press the propeller outward. Flygt 5150.350, 5150.360 Installation, Operation, and Maintenance Manual... -
Page 39: Service The Pump
(liquid) temperatures >40°C. Inspection Service item Action Cable If the outer jacket is damaged, replace the cable. Check that the cables do not have any sharp bends and are not pinched. Flygt 5150.350, 5150.360 Installation, Operation, and Maintenance Manual... -
Page 40: Major Overhaul
Service in case of alarm Regardless of individual applications, the inspection chamber should not be inspected less frequently than the intervals for normal applications and operating conditions at media (liquid) temperatures <40°C. Flygt 5150.350, 5150.360 Installation, Operation, and Maintenance Manual... - Page 41 Change the mechanical seal unit. Replace with new coolant. The thermistor/Thermal contact 1. Check the coolant level. Check the start and stop levels. The overload protection Check that the impeller can rotate freely. Flygt 5150.350, 5150.360 Installation, Operation, and Maintenance Manual...
-
Page 42: Troubleshooting
• The sump in order to prevent the impeller from clogging again. If the problem persists, refer to the Flygt Service Guide on the web or contact the local ITT service shop. Always state the serial number of your pump when you contact ITT, see Product Description (page 10). -
Page 43: The Pump Does Not Stop When A Level Sensor Is Used
The stop level is set too low. Raise the stop level. If the problem persists, refer to the Flygt Service Guide on the web or contact the local ITT service shop. Always state the serial number of your pump when you contact ITT, see Product Description (page 10). -
Page 44: The Pump Delivers Too Little Or No Water
Replace the overload protection. overload protection. If the problem persists, refer to the Flygt Service Guide on the web or contact the local ITT service shop. Always state the serial number of your pump when you contact ITT, see Product Description (page 10). - Page 45 • Depending on the installation type, add a means for priming the pump, such as a foot valve. If the problem persists, refer to the Flygt Service Guide on the web or contact the local ITT service shop. Always state the serial number of your pump when you contact ITT, see Product Description (page 10).
-
Page 46: Technical Reference
5.5–14 (liquid) Depth of immersion 20 m (65 ft) maximum Other For the specific weight, current, voltage, power ratings, and speed of the pump, see the data plate of the pump. Flygt 5150.350, 5150.360 Installation, Operation, and Maintenance Manual... - Page 48 ITT Water & Wastewater AB Gesällvägen 33 174 87 Sundbyberg Sweden Tel. +46-8-475 60 00 Fax +46-8-475 69 00 © 2009 ITT Corporation. The original instruction is in English. All non-English instructions are translations of the original instruction. 894524_5.0_en.US_2009-12_IOM.5150.350/360...
Need help?
Do you have a question about the Flygt 5150.350 and is the answer not in the manual?
Questions and answers