Advertisement
Quick Links
Advertisement

Related Manuals for Fein CCG 18-115 BL


Summary of Contents for Fein CCG 18-115 BL
- Page 1 CCG 18-115 BL; CCG 18-115 BLPD; CCG 18-125 BL; CCG 18-125 BLPD Repair instructions C-SC_CSSM Version 1.0 2017-12-12 All rights reserved by FEIN, especially in case of property rights applications. Page 1 of 38 FEIN retains all rights of disposal, such as copying and circulation...
-
Page 2: Table Of Contents
CCG 18-115 BL; CCG 18-115 BLPD; CCG 18-125 BL; CCG 18-125 BLPD Contents 1. Models described 2. Technical data 3. Notes and requirements 4. Tools required 5. Lubricants and auxiliary substances required 6. Removal 7. Fitting 8. Connection diagram C-SC_CSSM Version 1.0... -
Page 3: Models Described
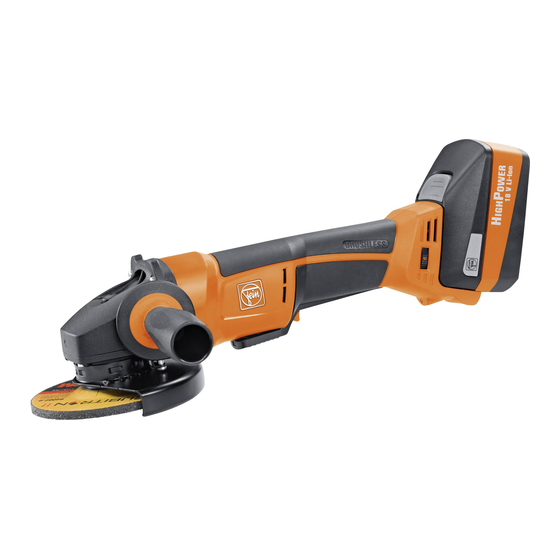
CCG 18-115 BL; CCG 18-115 BLPD; CCG 18-125 BL; CCG 18-125 BLPD 1. Models described These repair instructions describe how to repair the following models: Model Order number CCG 18-115 BL 7 120 01 ..CCG 18-125 BL 7 120 02 .. -
Page 4: Technical Data
Up-to-date test data for all models can be found on the FEIN Extranet (Customer Service → Repair Guides). Lubricants The lubricants and container sizes available from FEIN can be found on the FEIN Extranet (Customer Service → Repair Guides). Lists of spare parts Lists of spare parts and exploded views are available online at www.fein.com... -
Page 5: Notes And Requirements
CCG 18-115 BL; CCG 18-115 BLPD; CCG 18-125 BL; CCG 18-125 BLPD 3. Notes and requirements Please note These instructions are only intended for persons with suitable technical training. It is assumed that the reader has mechanical and electrical training. -
Page 6: Tools Required
CCG 18-115 BL; CCG 18-115 BLPD; CCG 18-125 BL; CCG 18-125 BLPD 4. Tools required Standard tools Special tools Plastic hammer Drawing-off socket cap 6 41 04 150 00 8 Slotted screwdriver (small) Chuck cone 19 mm 6 41 07 019 00 7 Torx screwdriver T15;... - Page 7 CCG 18-115 BL; CCG 18-115 BLPD; CCG 18-125 BL; CCG 18-125 BLPD 4. Tools required Standard tools • 13 mm inner diameter Sleeve 26 mm inner diameter 8 mm inner diameter • 19 mm outer diameter 2x square support L= 80 mm; H= 17 mm C-SC_CSSM Version 1.0...
-
Page 8: Lubricants And Auxiliary Substances Required
CCG 18-115 BL; CCG 18-115 BLPD; CCG 18-125 BL; CCG 18-125 BLPD 5. Lubricants and auxiliary substances required Lubricants Grease 0 40 101 01 00 4 21 g Gearbox Auxiliary substances Loctite 573 Washer C-SC_CSSM Version 1.0 2017-12-12 All rights reserved by FEIN, especially in case of property rights applications. -
Page 9: Removal
CCG 18-115 BL; CCG 18-115 BLPD; CCG 18-125 BL; CCG 18-125 BLPD 6. Removal Removing the housing 1. Cut through the type plate (1). Tools: 2. Cut through the information sign (2). - Blade 3. Unscrew the seven screws (3). - Page 10 CCG 18-115 BL; CCG 18-115 BLPD; CCG 18-125 BL; CCG 18-125 BLPD 6. Removal Removing the housing (applies to: CCG 18-115 BL; CCG 18-125 BL) 1. Remove the switch (1). Tools: - Slotted screwdriver C-SC_CSSM Version 1.0 2017-12-12 All rights reserved by FEIN, especially in case of property rights applications.
- Page 11 CCG 18-115 BL; CCG 18-115 BLPD; CCG 18-125 BL; CCG 18-125 BLPD 6. Removal Removing the gearbox housing 1. Unscrew the screw (1). Tools: 2. Remove the lever (2). - Torx T20 3. Remove the seal (3). C-SC_CSSM Version 1.0 2017-12-12 All rights reserved by FEIN, especially in case of property rights applications.
- Page 12 CCG 18-115 BL; CCG 18-115 BLPD; CCG 18-125 BL; CCG 18-125 BLPD 6. Removal Removing the gearbox housing 1. Remove the four screws (1). Tools: 2. Take off the bearing plate (2). - Torx T15 3. Remove the washer(s) (3).
- Page 13 CCG 18-115 BL; CCG 18-115 BLPD; CCG 18-125 BL; CCG 18-125 BLPD 6. Removal Removing the housing (applies to: CCG 18-115 BL; CCG 18-125 BL) 1. Remove the housing (1). 2. Remove the pressure piece (2). 3. Remove the control rod (3).
- Page 14 CCG 18-115 BL; CCG 18-115 BLPD; CCG 18-125 BL; CCG 18-125 BLPD 6. Removal Removing the housing (applies to: CCG 18-115 BL; CCG 18-125 BL) 1. Remove all components from the housing half. 2. Remove the two pressure pieces (1) [on both sides].
- Page 15 CCG 18-115 BL; CCG 18-115 BLPD; CCG 18-125 BL; CCG 18-125 BLPD 6. Removal Removing the housing (applies to: CCG 18-115 BLPD; CCG 18-125 BLPD) 1. Remove the housing (1). 2. Remove the pressure piece (2). 3. Remove all components from the housing half.
- Page 16 CCG 18-115 BL; CCG 18-115 BLPD; CCG 18-125 BL; CCG 18-125 BLPD 6. Removal Removing the control rod (applies to: CCG 18-115 BLPD; CCG 18-125 BLPD) 1. Remove the spring (1). 2. Remove the lever (2). Push it in the direction of the arrow and lift.
- Page 17 CCG 18-115 BL; CCG 18-115 BLPD; CCG 18-125 BL; CCG 18-125 BLPD 6. Removal Removing the motor 1. Remove the four terminals (1). Tools: 2. Remove the motor (2). - Plastic hammer C-SC_CSSM Version 1.0 2017-12-12 All rights reserved by FEIN, especially in case of property rights applications.
- Page 18 CCG 18-115 BL; CCG 18-115 BLPD; CCG 18-125 BL; CCG 18-125 BLPD 6. Removal Removing the motor 1. Remove the pinion (1). Tools: 2. Pull off the grooved ball bearing (2). - Punch, 6 mm - Drawing-off socket cap diameter 3.
- Page 19 CCG 18-115 BL; CCG 18-115 BLPD; CCG 18-125 BL; CCG 18-125 BLPD 6. Removal Removing the gearbox housing 1. Remove the air guide ring (1). C-SC_CSSM Version 1.0 2017-12-12 All rights reserved by FEIN, especially in case of property rights applications.
- Page 20 CCG 18-115 BL; CCG 18-115 BLPD; CCG 18-125 BL; CCG 18-125 BLPD 6. Removal Removing the gearbox housing 1. Remove the pushbutton (1). Tools: 2. Remove the spiral spring (2) and the bolt (3) with sealing ring (4). - Slotted screwdriver 3.
- Page 21 CCG 18-115 BL; CCG 18-115 BLPD; CCG 18-125 BL; CCG 18-125 BLPD 6. Removal Removing the gearbox housing 1. Remove the plate (1). Tools: 2. Press out the grooved ball bearing (2). - Arbor press - Sleeve 14 mm inner diameter...
-
Page 22: Fitting
CCG 18-115 BL; CCG 18-115 BLPD; CCG 18-125 BL; CCG 18-125 BLPD 7. Fitting Fitting the gearbox housing 1. Press the grooved ball bearing (1) into the bearing plate. Tools: 2. Press in the shaft (2). - Arbor press 3. Insert plate (3). - Page 23 CCG 18-115 BL; CCG 18-115 BLPD; CCG 18-125 BL; CCG 18-125 BLPD 7. Fitting Fitting the gearbox housing 1. Insert the spiral spring (1) and the bolt (2) with sealing ring (3). 2. Fit the pushbutton (4). C-SC_CSSM Version 1.0 2017-12-12 All rights reserved by FEIN, especially in case of property rights applications.
- Page 24 CCG 18-115 BL; CCG 18-115 BLPD; CCG 18-125 BL; CCG 18-125 BLPD 7. Fitting Fitting the motor 1. Position the plate (1). Tools: 2. Press on the grooved ball bearing (2). - Arbor press 3. Press on the pinion (3).
- Page 25 CCG 18-115 BL; CCG 18-115 BLPD; CCG 18-125 BL; CCG 18-125 BLPD 7. Fitting Fitting the motor 1. Insert the air guide ring (1). Tools: 2. Press in the motor (2) in the correct position. - Arbor press Ensure that plate lies in air guide ring’s recess.
- Page 26 CCG 18-115 BL; CCG 18-115 BLPD; CCG 18-125 BL; CCG 18-125 BLPD 7. Fitting Fitting the motor (applies to: CCG 18-115 BL; CCG 18-125 BL) 1. Insert the two pressure pieces (1) [in both housing halves]. 2. Place all components in the correct position.
- Page 27 CCG 18-115 BL; CCG 18-115 BLPD; CCG 18-125 BL; CCG 18-125 BLPD 7. Fitting Fitting the motor (applies to: CCG 18-115 BL; CCG 18-125 BL) 1. Push the motor into the assembly position (1). C-SC_CSSM Version 1.0 2017-12-12 All rights reserved by FEIN, especially in case of property rights applications.
- Page 28 CCG 18-115 BL; CCG 18-115 BLPD; CCG 18-125 BL; CCG 18-125 BLPD 7. Fitting Fitting the control rod (applies to: CCG 18-115 BL; CCG 18-125 BL) 1. Position the spring (1). 2. Place the control rod (2) in the correct position.
- Page 29 CCG 18-115 BL; CCG 18-115 BLPD; CCG 18-125 BL; CCG 18-125 BLPD 7. Fitting Fitting the control rod (applies to: CCG 18-115 BLPD; CCG 18-125 BLPD) 1. Insert the spring (1). 2. Insert the lever (2). 3. Insert the spring (3).
- Page 30 CCG 18-115 BL; CCG 18-115 BLPD; CCG 18-125 BL; CCG 18-125 BLPD 7. Fitting Fitting the motor (applies to: CCG 18-115 BLPD; CCG 18-125 BLPD) 1. Place all components in the correct position. Ensure that all cables are routed neatly.
- Page 31 CCG 18-115 BL; CCG 18-115 BLPD; CCG 18-125 BL; CCG 18-125 BLPD 7. Fitting Fitting the housing 1. Position the housing (1). Tools: 2. Slide the gearbox head onto the housing. - Torx T15 3. Screw in the seven screws (2) [1.5 Nm].
- Page 32 CCG 18-115 BL; CCG 18-115 BLPD; CCG 18-125 BL; CCG 18-125 BLPD 7. Fitting Fitting the housing (applies to: CCG 18-115 BL; CCG 18-125 BL) 1. Position the switch (1). C-SC_CSSM Version 1.0 2017-12-12 All rights reserved by FEIN, especially in case of property rights applications.
- Page 33 CCG 18-115 BL; CCG 18-115 BLPD; CCG 18-125 BL; CCG 18-125 BLPD 7. Fitting Fitting the housing 1. Place the pressure piece (1) in the correct position. C-SC_CSSM Version 1.0 2017-12-12 All rights reserved by FEIN, especially in case of property rights applications.
- Page 34 CCG 18-115 BL; CCG 18-115 BLPD; CCG 18-125 BL; CCG 18-125 BLPD 7. Fitting Fitting the gearbox 1. Fill the gearbox housing with 21 g of grease. Tools: 2. Coat both sides of the washer(s) (1) with Loctite 573 and position the washer(s) on the gearbox housing.
- Page 35 CCG 18-115 BL; CCG 18-115 BLPD; CCG 18-125 BL; CCG 18-125 BLPD 7. Fitting Fitting the gearbox 1. Position the screw (1). Tools: 2. Position the disc (2). - Torx T20 3. Position the spring (3). 4. Position the lever (4).
- Page 36 CCG 18-115 BL; CCG 18-115 BLPD; CCG 18-125 BL; CCG 18-125 BLPD 7. Fitting Setting gearbox clearance 1. Check gearbox clearance by turning shaft (1). If there is no gearbox clearance, another disc must be placed between bearing plate and gearbox housing [see "Assembling gearbox"].
-
Page 37: Connection Diagram
CCG 18-115 BL; CCG 18-115 BLPD; CCG 18-125 BL; CCG 18-125 BLPD 8. Connection diagram C-SC_CSSM Version 1.0 2017-12-12 All rights reserved by FEIN, especially in case of property rights applications. Page 37 of 38 FEIN retains all rights of disposal, such as copying and circulation... - Page 38 CCG 18-115 BL; CCG 18-115 BLPD; CCG 18-125 BL; CCG 18-125 BLPD 8. Connection diagram C-SC_CSSM Version 1.0 2017-12-12 All rights reserved by FEIN, especially in case of property rights applications. Page 38 of 38 FEIN retains all rights of disposal, such as copying and circulation...
Need help?
Do you have a question about the CCG 18-115 BL and is the answer not in the manual?
Questions and answers