Table of Contents
Advertisement
Quick Links
Advertisement
Table of Contents

Related Manuals for Bresser Saurus 2010300


Summary of Contents for Bresser Saurus 2010300
- Page 1 Beginner WLAN 3D Printer with Filament Bundle Art. Nr. 2010300 User manual...
-
Page 2: Table Of Contents
Chapter 6: Information about the software ............43 6.1 software installation ................43 6.2 First steps with REXprint ..............44 Chapter 7: Basic printing functions ..............74 7.1 Creating a Gcode file ................. 74 7.2 printing methods ................77 Chapter 9: Warranty and service ..............90 www.bresser.de... - Page 3 www.bresser.de...
-
Page 4: Introduction
Bresser GmbH would like to take this manual as an opportunity to thank the technicians of Bresser GmbH as well as the users of this 3D printer for their tireless efforts and the ( the braucht man nicht ) extremely important support. -
Page 5: General Information
The operating instructions consist of the following parts: Introduction, general and safety information, operation and product service. For service requests, please have ready: Art.-No.: 2010300 Product reference BRESSER SAURUS beginners WLAN 3D printer with filament bundle Manual: Manual_2010300_WLAN-3D-Drucker- SAURUS_en_BRESSER_v092020a.docx www.bresser.de... -
Page 6: Safety Instructions
3D Printer. ② Do not operate the 3D printer in a hazy or humid environment. Do not expose the 3D printer to direct sunlight. ③ Do not use the power cord for any purpose other than its intended use. www.bresser.de... - Page 7 50 mm) ④ Operate the device in a well-ventilated environment. ⑤ Do not use the device for unlawful purposes. ⑥ Do not use the appliance to make containers for storing food. www.bresser.de...
- Page 8 TEMPERATURE: Room temperature 15 to 30 °C Moisture: 20% to 70% • Filament specifications Use filament only for the intended purpose! Use only the BRESSER filament or filament of the brands authorised by BRESSER! • Filament storage A certain degree of decay can be observed in all polymers over time. Only unpack the filament when you need it.
- Page 9 EC DECLARATION OF CONFORMITY Bresser GmbH hereby declares that the 3D printer with article number: 2010300 complies with Directive 2014/30/EU. The full text of the EC declaration of conformity is available at the following Internet address www.bresser.de/download/2010300/CE/2010200_CE.pdf...
- Page 10 This document contains information protected by copyright. Copyright © 2020 BRESSER GmbH. All rights reserved. The reproduction of this documentation - even in extracts - in any form (e.g. photocopy, print, etc.) as well as the use and distribution by means of electronic systems (e.g.
-
Page 11: Chapter 1: 3D Printing Technology
1.1 procedure 3D printing involves three steps: 1.) Create or download a 3D model 2.) Slicing and exporting the 3D model 3 Building the 3D model www.bresser.de... - Page 12 These are then transferred to the 3D printer via USB cable, USB stick or W-LAN. 1.1.3 Structure of the 3D model After the output file is sent to the 3D printer, the printer begins to transfer the 3D model into a physical object by applying layers of filament over each other. www.bresser.de...
-
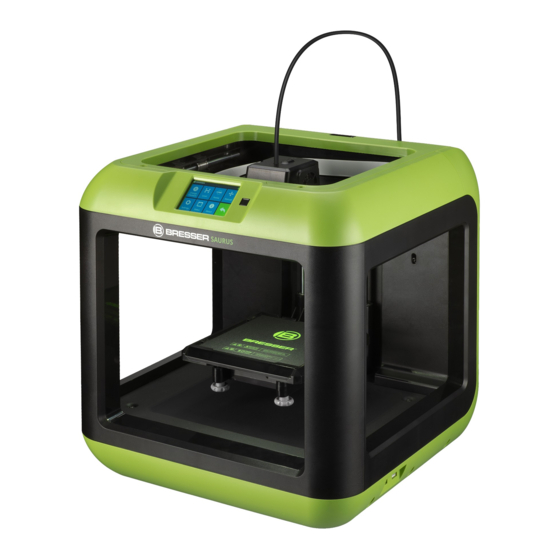
Page 13: Chapter 2: About The 3D Printer
2. Touch screen key 7. Filament cartridge 12. Input USB cable 3. Nozzle 8. Extruder 13. Input USB stick 4. Z-axis guide rod 9. Filament supply 14. Power consumption 5. Pressure plate 10. Z-axis guide rod 16. Power switch www.bresser.de... - Page 14 Filament supply An opening located on the top of the extruder. A black plastic part that guides the filament from the Filament guide tube filament container to the feeder. Filament container A box to accommodate the BRESSER filament. www.bresser.de...
- Page 15 0,05-0,4 mm Printing accuracy ±0.2 mm Positioning accuracy Z-axis: 0.0025 mm, XY axis: 0,011 mm Filament diametre 1.75 mm (±0.07) Nozzle diametre 0,4 mm Print speed < 30 m/s Software REXprint, Simplify3D support Input: 3MF/STL/OBJ/FPP/BMP/PNG/JPG/JPEG Supported file formats Output: GX/G www.bresser.de...
- Page 16 Windows XP/Vista/7/8/10、Mac OS、Linux Unit dimensions 420 x 420 x 420 mm Net weight 9 kg Input voltage: Input voltage: 24 VDC, 2.71 A, 65 W Supply voltage USB cable, USB stick, W-LAN, Ethernet Connections Bresser GmbH Cloud, Polar Cloud www.bresser.de...
- Page 17 2.1.4 Touch screen menus "Build" Read the print file from the local memory card the USB stick Bresser Cloud or PolarCloud printing Arrow back Selection of the print files. 1. Touch and hold to select the file.
- Page 18 Tap the [-] or [+] button to adjust the temperature. Tap the [Yes] button to save the setting. Press [No] to leave the settings unchanged. www.bresser.de...
- Page 19 "Cancel: To exit the tools and return to the print menu Set print speed Tap the [-] or [+] button to adjust the print speed. Tap the [Yes] button to save the setting. With [No] you leave the settings unchanged www.bresser.de...
- Page 20 Set the warm-up temperature as follows: Press [Yes] to save the setting, or press [No] to cancel the setting. The picture shows the warm-up menu. The current temperature and the target temperature are displayed. Press the [Abort] button to cancel the warm-up. www.bresser.de...
- Page 21 X, Y and Z axes "Manual: For manual adjustment of the X, Y and Z axis positions "Setting." To set up important relevant functions "Status": To check the printer status in real time "About." Information about the printer. Arrow back www.bresser.de...
- Page 22 "„Z+“: The pressure plate moves downwards. „Z-“: The pressure plate moves upwards. Arrow back The picture shows the warm-up menu. The current temperature and the target temperature are displayed. Press the [Abort] button to cancel the warm-up. www.bresser.de...
- Page 23 LAN hotspot on/off "Extruder Calibration." For adjusting the initial distance between extruder and pressure plate "Filament Check Off": To switch the filament test on/off "Factory reset: To restore the factory settings "Update." To update the firmware version Arrow back www.bresser.de...
- Page 24 On/off: To switch the W-LAN hotspot on/off "Set up wireless hotspot." To set the SSID and password " SSID name." The name of the hotspot "Password": The hotspot password "Save: To save the setting Arrow back www.bresser.de...
- Page 25 Therefore, heat the extruder to about 200° C with "Preheat". Naviagate via the integrated touch screen by selecting "Tools > Settings > Sheets (down arrow) > Extruder calibration". Once the printer has finished moving, you www.bresser.de...
- Page 26 Flash Forge cloud connection. Start Sound "Start up Sound." Tap to turn the sound on or off when the printer restarts. Power saving mode "Off "Power Saving Mode." Power save mode is off by default. Automatic shutdown is de-activated. www.bresser.de...
- Page 27 "Factory reset: Resets the printer to its factory defaults. "Update." Update of the firmware version. Arrow back Real time status "Status": Display of real-time status of extruder temperature and XYZ coordinates. www.bresser.de...
- Page 28 "About." First page Displays basic information about the printer. "About." Second page Displays basic information about the printer. Licence Display basic information about the licence. Arrow back www.bresser.de...
-
Page 29: Accessories
2.2 Accessories Filament spool (2x) Power cable USB cable Filament guide tube Allen key Quickstart guide Fat (Grease) Screwdriver (M2,0/2,5) Glue stick Open-end Pin tool Power adapter wrench • Warranty/Service PTFE tube card www.bresser.de... - Page 30 First instructions on how to operate the printer and for first successes in printing. Grease Lubricate the X, Y and Z axes or other parts. Please contact the Bresser GmbH support team before starting the maintenance and regarding the protection against printer damage and personal injury.
- Page 31 Open-end wrench Tighten and loosen nozzles, teflon tube and other parts during maintenance work. Please contact the Bresser GmbH support team before the first maintenance of the printer and regarding the protection against printer damage and personal injury.
-
Page 32: Chapter 3: Unpack
This chapter describes how to unpack completely the 3D Printer. Note: Please read the unpacking guide completely. Place the outer carton on a clean surface. (3-2) Open the outer packaging and then lift your Saurus out of the box. (3-2) Remove the side insert. www.bresser.de... - Page 33 (3-3) Remove the top insert. (3-4) You will see the Quick Start Guide, power cord, service card, yarn guide tube and tool bag. www.bresser.de...
- Page 34 (3-6) Cut the four packing tapes from the guide rod. Then check the condition of the extruder. (3-7) Remove the middle insert. Remove the filament spool. (3-8) Lift up the design platform and remove the adhesive, power supply and USB cable. www.bresser.de...
- Page 35 (3-9) Remove the two tabs from the Z-axis guide rods. Congratulations! You unpacked your Saurus. Now we want to assemble the hardware of the Saurus. www.bresser.de...
-
Page 36: Chapter 4: Hardware Structure
(4-2) Remove the filament and guide it through the filament detection. Note: The filament must be passed from the bottom of the bobbin to the top. After the filament is installed, replace the filament container back into the printer. www.bresser.de... -
Page 37: Starting The Printer
4.3 Inserting the filament The filament guide tube must be inserted correctly so that the filament is stuck and the device is not damaged. (4-5) Remove the filament guide tube and feed the filament from the filament spool through the tube www.bresser.de... - Page 38 (4-6) Insert the filament from the filament guide tube into the filament holder. Note: Lower the pressure platform so that the distance between the nozzle and pressure platform is at least 50 mm to avoid jamming the nozzle. (4-7) Press [Tools]. (4-8) Touch [Filament] > [Load]. www.bresser.de...
- Page 39 4-10 (4-10) Insert the filament vertically into the filament feeder as shown. The filament is then drawn in by the extruder. Note: Do not touch [Cancel] until the filament has been drawn a little bit into the extruder. www.bresser.de...
-
Page 40: Loading/Unloading Filament
Note: Do not pull out the filament by force, as this may damage the gear wheels. When the molten filament has cooled down in the extruder, repeat the above steps if necessary. www.bresser.de... -
Page 41: Chapter 5: Levelling The Printing Platform
Follow further instructions on the touch screen. (5-2) After touching [Yes], the extruder moves to the start position and the sheet moves up and down to check the distance between the nozzle and the platform again. www.bresser.de... - Page 42 If the distance is still not suitable, follow the further prompts to make another adjustment until the [OK] button is displayed. (5-5) Repeat steps 2 to 4 to complete the levelling of the second and third points. Then press [Finish] to finish the adjustment. www.bresser.de...
-
Page 43: Chapter 6: Information About The Software
Method 2: Internet download Access the 3D printer product page on the Internet via the following link: http://www.bresser.de/P2010300 The software packages can be found under the tab "Downloads" and can be downloaded from there. 6.1.2 Installing and setting up the software 1. -
Page 44: First Steps With Rexprint
6.2.1 Selecting the device type After starting REXprint, select the device type. A dialogue box opens when you start REXprint. Select "BRESSER SAURUS" from the list of device types and click on [OK]. The device type can also be changed via the software menu [Print] > [Machine type] (see 6-2) - Page 45 Print directly via the 3D printer or export files to a USB stick View the REXprint start screen from one of six viewing angles Move the model in the XY plane, press Shift and click to move in the Z axis Turn and rotate the model www.bresser.de...
- Page 46 "Shape": includes the shapes "Plane", "Tube", "Canister" and "Lamp". "Fashion": includes "darker is higher" and "lighter is brighter". "Maximum Thickness": Z-value of the model "Base Thickness: The minimum thickness of the base plate, the default value is 0.5 mm. www.bresser.de...
- Page 47 "Bottom Thickness." To set the lower thickness for the "Tube", "Canister" and "Lamp" shapes "Top Diametre." To set the upper diametre for the "Tube", "Canister", "Lamp" and "Seal" shapes "Bottom Diametre." To define the lower diametre for the "Tube", "Canister", "Lamp" and "Seal" shapes Tarpaulin (6-5) www.bresser.de...
- Page 48 Tube (6-6) Canister (6-7) www.bresser.de...
- Page 49 Lamp (6-8) Seal (6-9) www.bresser.de...
- Page 50 [View] button. The drop-down list then lists six views. Method 2: Click on the [View] button and then click again to open a submenu with the six views available for selection. ③ Reset the view There are the following two ways to reset views: www.bresser.de...
- Page 51 Click [Reset] to reset the distance values. Note: After adjusting the position, you should click [Centre] and [On Platform] to ensure that the models are in the print area and on the print platform. If a specific position is required, click only [On Platform]. www.bresser.de...
- Page 52 Click [Reset] to reset the size of the model. Note: If you clicked the [Uniform Scaling] radio button, the model will be scaled to scale when you change any value of the model's positioning. Otherwise, only the corresponding item value is changed. www.bresser.de...
- Page 53 6.2.8 Cutting Left-click the model to select it, then double-click the "Cut" icon to set the cut plane. You can set the direction and the position. ① Draw with mouse ② X plane ③ Y-plane ④ Z-level www.bresser.de...
- Page 54 www.bresser.de...
- Page 55 [OK], a linear structure is created. If the model already has supports and you select one of the support options, the software will assess whether the existing supports need to be deleted. This decision is made on the basis of the www.bresser.de...
- Page 56 Release the left mouse button. If the support column is not suitable for a model, the support is created at the starting and end points (the highlighted support in the preview does not create a support structure). www.bresser.de...
- Page 57 The current column and its subnodes are highlighted. Press the left mouse button to delete the highlighted support. 6.2.10 Printing ① Preview: You can open the preview menu. ② Print When Slice Done: Recommendation: Select the check box when www.bresser.de...
- Page 58 Top solid layer: The maximum value for the top solid layer is 10 and the minimum value is 1. b. Bottom Solid Layer: The maximum value for the lowest solid layer is 10 and the minimum value is 1. www.bresser.de...
- Page 59 Travel Speed is used to control the speed at which the extruder moves when no printing is in progress. A value of 100 ( 100 was ?? ) is recommended for PLA printing. Note: For a better printing result, adjust the parametres, as different models require different parametres. www.bresser.de...
- Page 60 Break At Heights: Setting for the height at which the pressure is automatically interrupted. This function is useful when the filament is to be changed at a certain point. 6-14 (6-14) Click [Edit] to insert or remove a height. www.bresser.de...
- Page 61 STL or OBJ format. With the STL and OBJ file formats, the models are integrated into a single model (including the supports). When re-loading these file formats, only the position of the model is saved, but not the print parametres. www.bresser.de...
- Page 62 6.2.12 Editing menus ① Undo The following two options are available to cancel the last changes made: Method 1: Click at [Edit] > [Undo]. Method 2: Press the key combination Ctrl+Z. www.bresser.de...
- Page 63 Delete object using one of the following two methods: Method 1: Click on [Edit] > [Delete]. Method 2: Press the Del key. ⑦ Surface to Platform After you have selected the model, you can use the following procedure to place the model surface on the platform. www.bresser.de...
- Page 64 6.2.13 Print menus ① Connect Machine You can connect the 3D Printer to a computer with a USB cable or via wireless LAN. Note: The device icon in the lower right corner indicates the connection status: Connected www.bresser.de...
- Page 65 [Rescan] button to search for the device. Then select the appropriate device. Finally, click the [Connect] button to connect to the printer. If you cannot find the desired device even after a new search, this means that the corresponding driver is not installed in the software. www.bresser.de...
- Page 66 Select the W-LAN signal "SAURUS" and click [Connect] to complete the network connection. d. In REXprint, click [Print] > [Connect Machine]. This opens the following dialogue box. “WiFi" must be selected for the connection mode. Enter the IP address displayed in the dialogue box and click [Connect]. 6-19 www.bresser.de...
- Page 67 After the connection between the computer and the 3D Printer is established, open the Internet browser and enter "10.10.100.254" and default user name (Administrator) and password (Administrator). 6-20 The following user interface for the W-LAN settings opens: www.bresser.de...
- Page 68 SSID (name of the wireless LAN) and password, select [Enable] to retrieve the IP address under DHCP, and then click [Save]. The following dialogue box appears. 6-22 e Click the [Restart] button. A restart of the SAURUS W-LAN is required. After www.bresser.de...
- Page 69 Z-axis buttons control the movement of the pressure plate. If you click on "X-", the extruder moves to the left by a fixed distance. If, on the other hand, you click on "X+", the extruder moves to the right by a fixed distance. Clicking "Y-" moves the extruder www.bresser.de...
- Page 70 ● LED Color: Use this button to change the LED colours of the 3D printer. ● Extruder Controls: The extruder controls allow you to set the value for "Motor Speed (RPM)", i.e. the rotational speed of the filament spool. The www.bresser.de...
- Page 71 Step 1: Click at [Tools] > [Update firmware]. Before updating the firmware, all existing connections must be terminated. If the software and the printer are already connected, you will be reminded that the connection must be terminated. Select [Yes] and proceed to the next step. www.bresser.de...
- Page 72 When the computer and printer are connected, you can check the printer name by clicking [Tools] > [On Board Preferences]. ④ Machine Information When the computer and printer are connected, you can check the device type, device name, firmware, etc. by clicking [Tools] > [Machine information]. www.bresser.de...
- Page 73 ② Check for updates: Click [Help] > [Check for Update] to check online for available updates. ③ About REXprint: Click [Help] > [About REXprint]. This opens the field with information about the software. This field displays the current software version and copyright information. www.bresser.de...
-
Page 74: Chapter 7: Basic Printing Functions
7.1 Creating a Gcode file (7-1) Double-click the REXprint icon to launch the software. 7-1% (7-2) Click [Print] > [Machine Type] to select Bresser SAURUS. (7-3) Click the [Load] icon to load an STL model file. The object is displayed in the print area. - Page 75 Platform] and [Center] to make sure that the model is on the platform. Note: If you have placed the model in the correct position, you can skip the step described above. (7-5) Click the [Print] icon at the top. You can make the necessary settings for your print job. www.bresser.de...
- Page 76 When printing via USB, selecting this option is not recommended. Machine type: Bresser SAURUS Supports: When printing a model with supports, you should click the downward triangle and select [Enable].
-
Page 77: Printing Methods
② Turn on the 3D printer, adjust the height of the printing plate and insert the filament. ③ Click [Print] and send the Gcode file to the 3D printer. After the transfer is completed, the printer will warm up automatically. When the warm-up is completed, the printer starts to create the model. www.bresser.de... - Page 78 To print a Gcode file from a local folder, simply load the file into REXprint via a USB or W-LAN connection and then click the [Print] button in the upper right corner. ● Download the desired Gcode file into REXprint www.bresser.de...
- Page 79 Abort: To stop the warm-up process and printing. When you press [Abort], the operation is canceled permanently. Pause: To stop the print job, tap again to resume. This function is useful when you want to change the filament during the print job. www.bresser.de...
- Page 80 ① Activate the W-LAN connection in the printer settings and connect the printer to the Internet via WLAN. (The printer must be connected to the internet to use the Bresser GmbH Cloud Service). Activate the [Flash Forge Cloud] connection in the printer settings.
- Page 81 Printer] > [Add printer] Enter a name for your printer in the Name form field. Enter the registration number of your printer in the form field Register Code. You can find this number in the printer menu via the [About] button. 7-12 www.bresser.de...
- Page 82 With the help of the Flash Forge Cloud printers and print jobs can be managed in "batches". 7-14 ⑥ Select a model from the cloud library or upload your own model (.stl file). Click [Print] and open the model interface to edit the model. www.bresser.de...
- Page 83 [Print] to start printing. The selected printer starts printing immediately. This website displays the remaining printing time for the job, the actual temperature of the extruder/design platform and other printing details. Here you can also pause or cancel the printing process at any time. 7-16 www.bresser.de...
- Page 84 7-17 7.2.5 Printing via the PolarCloud connection ① Register for a PolarCloud account at the following address https://polar3d.com/ Register your account using four different options, such as Microsoft Live, to create your new PolarCloud account 7-18 www.bresser.de...
- Page 85 ② After you create your PolarCloud account, visit the PolarCloud homepage. Click on the symbol marked in red in Fig. 7-20. Click on [Settings] here you will find your access data e-mail address = ID, and the PIN for the PolarCloud connection device in your printer. 7-20 www.bresser.de...
- Page 86 Navigate on the printer touchscreen via [Tools] > [Settings] > [PolarCloud Connection] and enter your e-mail address in the "ID:" form field and your PIN in the "PIN:" form field. Press the [Save] button to save your entries in the printer. 7-22 www.bresser.de...
- Page 87 Now click the [3D PRINT] button. 7-24 Click the [Print] button. The printer downloads the print file automatically. After the download is complete, you can control the printer interactively through the PolarCloud web page, including filament change, pause, stop, and so on. www.bresser.de...
- Page 88 You can also adjust the extruder temperature or use other cloud functions. 7-25 7-26 ⑥ If other users want to use the same printer for another PolarCloud account, you must first delete the printer from your PolarCloud account, otherwise the printer will not be available to third parties. www.bresser.de...
- Page 89 On the next page, click the [SETTINGS] button. 7-29 Scroll to the bottom of the page and click the [DELETE PRINTER] button. After the deletion process is complete, other users can use this printer with their own PolarCloud account. www.bresser.de...
-
Page 90: Chapter 9: Warranty And Service
Flooding, snow damage, frost and other effects of animals, etc.) The warranty is also void if a damaged and/or illegible or incomplete proof of purchase is presented. The rights from the guarantee exist independently of the legal warranty claims. www.bresser.de... - Page 91 Fill out the Service Form and enclose it with the proof of purchase. Service You can contact the BRESSER service team if you have problems with the 3D printer. If questions or problems are not covered in this manual, you can search for solutions on our official website or contact us by phone.
- Page 92 E-Mail: service@bresser.de E-Mail: sav@bresser.fr Telefon*: +49 28 72 80 74 210 Téléphone*: 00 800 6343 7000 BRESSER GmbH BRESSER France SARL Kundenservice Pôle d’Activités de Nicopolis Gutenbergstr. 2 314 Avenue des Chênes Verts 46414 Rhede 83170 Brignoles Deutschland France *Lokale Rufnummer in Deutschland (Die Höhe der Gebühren je...
Need help?
Do you have a question about the Saurus 2010300 and is the answer not in the manual?
Questions and answers