Table of Contents
Advertisement
Quick Links
Advertisement
Table of Contents

Related Manuals for Bresser T-REX


Summary of Contents for Bresser T-REX
- Page 1 3D printer Art. No. 2010500 Quickstart Guide WARNING! • Hot surfaces! Do not touch the heat nozzle and the construction platform in operation! • Danger! Moving parts in printer may cause injury. Do not wear gloves or other sources of entanglement in operation!
-
Page 2: Warranty
• Article number and Product description • Date of purchase and dealer Contact details: e-Mail: service.3d@bresser.de (preferred communication) Internet: www.bresser.de/c/de/service Phone*: 00 800 – 63 43 7000 Service hours: Monday to Friday (except national public holidays) 9:00 a.m. to 3:00 p.m. CET... -
Page 3: Set Contents
Set contents 3D printer Filament spool (2x) Top cover Service card Quickstart guide Power cable USB cable SD card Guide tube (2x) Spool holder (2x) Build tape Leveling card Tool bag including: Allen wrench (2x), knob, M3x8 bolt (2x), PTFE tube (2x), grease, pin tool, wrench Extruder's accessory kit including: M3x8 bolt (2x), M3x6 bolt, turbofan baffl... - Page 4 Unpacking This 3D printer set was packed with care. Please follow the unpacking steps laid out below. CAUTION! • Remove the package and take out accessories carefully! Do not use force! 1. Open the box and remove the top 2. The foam contains: guide tubes (2x), foam shape.
- Page 5 7. Take the remaining accessories out 8. Use a scissors to cut off the three of the foam: power cable, USB cable, ties on both sides of X-axis guide rail spool holder (2x), tool bag and and remove them. extruder’s accessory kit. 9.
- Page 6 Unpacking 13. Carefully lift up the build plate to 14. Remove the foam block under the its limit by hand. build plate. 15. Unpacking is completed. It is recommended to keep the packaging material for further transportation or storage. - 6 -...
-
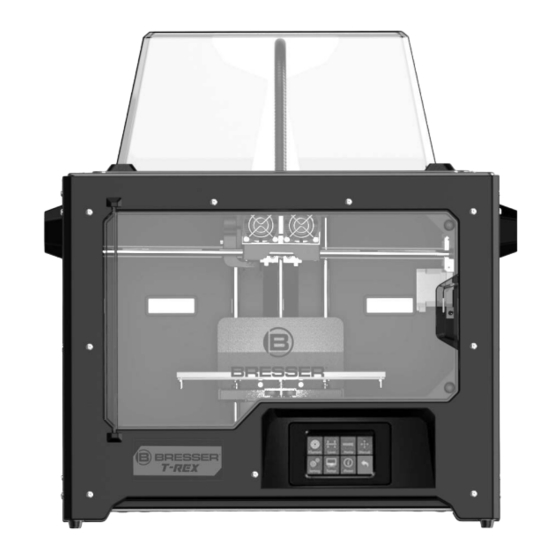
Page 7: Parts Overview
Parts overview 1. Z-axis guide rail 9. SD card slot 17. Guide tube buckle 2. Extruder cable bunch 10. Cooling fan 18. Spool holder 3. Slot 11. Spring presser 19. Power input 4. Y-axis guide rail 12. Turbofan 20. Power switch 5. -
Page 8: Installation
Installation Assembling the extruder Extruder 1. Place the dual extruder on the extruder bracket. 2. Take the M2.5 Allen Wrench from the tool bag and two M3x8 bolts from the accessory kit. 3. Adjust the extruder above the extruder bracket to align the holes for the bolts. - Page 9 Assembling the turbofan baffle Remove turbofan bolts 1. Use the M2.5 Allen wrench to remove the turbofan bolts. 2. Take the turbofan baffle from the extruder's accessory kit. 3. Insert the baffle into the slot at the turbofan as shown. - 9 -...
- Page 10 Mounting plate Align nose and hole 1. Align the hole in the baffle and the nose at the extruder's mounting plate. 2. Place the turbofan with the attached baffle besides the mounting plate to align the nose and the hole. 3.
- Page 11 Installing guide tube and filament 1. Level the spool holder and insert it with its plate facing forward into the corresponding opening at the printer's backside. 2. Turn down the spool holder to make the holder bottom cleave to the printer's backside.
- Page 12 Important tips 1. The filament spool must be oriented corectly (see below illustrations) Correct installation Wrong installation NOTE: Pay attention to extend the guide tube to the inside of the spool to prevent the filament from being wrapped outside the spool. Make sure that the two filament strands are installed in crossed position.
-
Page 13: Power Supply
Filament intake Press spring presser 4. After the guide tube fixation is 5. After filament is inserted into the completed, press the left spring filament intake, insert the guide presser of the extruder, put the tube into the intake to fix . filament vertically into the left filament intake from the other end of the guide tube. - Page 14 Leveling Using the thumb screw Rotating the thumb screw clockwise will lift up the build plate and for that reducing the distance to the nozzle. Rotating the thumb screw counterclockwise will lower the build plate and for that expanding the distance to the nozzle. Leveling process IMPORTANT NOTE: This needs to be done to avoid scratches to the build plate by the extruder!
- Page 15 Start the adjustment process with the right nozzle, then use the distance between the right nozzle and build plate as a reference. 5. Take leveling card out, on the basis of right side extruder, put leveling card between right nozzle and build plate. Slide leveling card back and forth and adjust thumb screw in the meantime.
-
Page 16: Loading/Unloading Filament
Loading/Unloading filament Loading filament Filament Level Home Manual Print Preheat Setting Status About 1. Tap [Tools]. 2. Tap [Filament]. Load Left Unload Left L Extruder ℃ / 230℃ Load Right Cancel Unload Right 3. Tap [Load Left] (or [Load Right]). 4. - Page 17 Unloading filament ATTENTION! If the extruder is not able to unload over a longer time, check if the filament is correctly inserted into the bottom of the extruder. Filament Level Home Manual Print Preheat Setting Status About 1. Tap [Tools]. 2.
- Page 18 Unloading filament Withdraw filament Press spring 6. When filament is coming out of presser the nozzle, quickly pull out the filament vertically and release spring presser. Tap [Finish] to finish unloading. Tap return arrow to go back to home screen. Assembling/Disassembling top cover NOTE: Install the top cover...
-
Page 19: First Print
First print NOTE: Ensure that the build plate has been leveled correctly before you start printing. Ensure that the fi lament has been loaded in an appropriate approach. USEFUL TIPS: • Load the fi lament for a while to extrude all the melted fi lament you printed last time out of the extruder. - Page 20 Bresser GmbH Gutenbergstr. 2 · DE-46414 Rhede Germany www.bresser.de · service@bresser.de Errors and technical changes reserved. Quickstart_2010500_T-REX-3D-printer_en_BRESSER_082020a...
Need help?
Do you have a question about the T-REX and is the answer not in the manual?
Questions and answers