Table of Contents
Advertisement
Quick Links
Advertisement
Table of Contents

Related Manuals for logos biosystems LUNA FX7 Series


Summary of Contents for logos biosystems LUNA FX7 Series
- Page 1 User Manual LBSM-SM-ML-LU7-001 www.logosbio.com VL2005-02...
- Page 2 It is not a medical, therapeutic, or in vitro diagnostics device. Do not disassemble the device on any occasion as this will invalidate your warranty. TRADEMARKS The trademarks used in this document are the property of Logos Biosystems, Inc. © 2020 Logos Biosystems, Inc. All rights reserved.
-
Page 3: Table Of Contents
Table of Contents SAFETY PRECAUTIONS ·········································································································· 5 Instrument Safety ·················································································································· 5 Operating conditions ··········································································································· 5 Instrument disposal & disassembly ························································································· 5 Personal Safety ···················································································································· 5 Waste disposal ·················································································································· 5 1. PRODUCT INTRODUCTION ································································································ 6 Product Contents ·················································································································· 6 Product Description ··············································································································· 7 LUNA-FX7™... - Page 4 Reviewing Data ··················································································································· 15 Review images ················································································································ 15 Reanalyze ······················································································································ 16 Previous counts ··············································································································· 16 5. PROTOCOLS ······················································································································· 17 Protocol Selection ··············································································································· 17 Protocol Parameters ············································································································ 18 Brightfield cell counting parameters ······················································································ 18 Fluorescence cell counting parameters ················································································· 20 6. BIOPROCESS FEATURE ··································································································· 21 Bioprocess Feature ··············································································································...
- Page 5 9. DATA TRANSFER VIA NETWORK ···················································································· 35 FTP freeware ····················································································································· 35 FileZilla FTP Client ··········································································································· 35 10. MAINTENANCE AND TROUBLESHOOTING ································································ 36 Maintenance ······················································································································ 36 Powering on/off ················································································································ 36 Cleaning ························································································································· 36 Troubleshooting ·················································································································· 36 Inaccurate cell count ········································································································· 36 Data transfer and saving ····································································································...
-
Page 6: Safety Precautions
Use components provided or authorized by Logos Biosystems. If the proper combination of components is not used, product safety cannot be guaranteed. Use only the power cord and AC adapter provided by Logos Biosystems. If the proper power cord and AC adapter are not used, electrical safety of the product cannot be guaranteed. -
Page 7: Waste Disposal
Quick Start Guide Inspect the product package upon delivery to ensure that all components have been included. Contact your local distributor or Logos Biosystems if anything is missing. Damage that may occur during shipping and handling is not covered by warranty... -
Page 8: Product Description
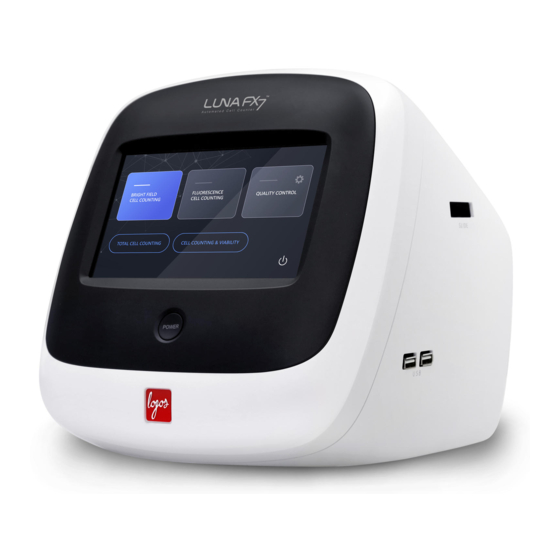
Product Description The LUNA-FX7™ is an automated, image-based cell counting device that features LUNA-FX7™ Automated Cell Counter an accurate counting algorithm and increased counting volume and represents a fully automated solution for cell counting and viability analysis. The LUNA-FX7™ also provides flexible counting slide options from a single chamber slide to a higher throughput, 8-chamber slide. -
Page 9: Luna-Fx7™ Cell Counting Slides
The LUNA-FX7™ gives you the flexibility to use various counting slide formats. The LUNA-FX7™ Cell Counting LUNA-FX7™ is compatible with the LUNA™ 1-, 3- , and 8-Channel Slide formats in Slides addition to the standard LUNA™ Cell Counting Slides and PhotonSlides™. With ™... -
Page 10: Luna-Fx7™ Startup
Cell lines & Primary cell mode may also be used to count cells expressing GFP and/or RFP. Quality Control - Quality Control mode is only functional upon registration of Logos Biosystems brightfield or fluorescent validation slides. - The Quality Control menu is used to monitor the accuracy and variability of the instrument. -
Page 11: Counting Cells
3. Counting Cells Sample Preparation Sample staining Brightfield cell counting For Total and viability cell counting, prepare a cell suspension according to standard procedures. Mix the sample, 1:1, with Trypan Blue Stain, 0.4% (T13001) or Erythrosin B (L13002). Mix gently, but thoroughly to ensure a homogenous suspension. -
Page 12: Viewing Images
To remove the slide, press EJECT. The slide holder will automatically extend out of the instrument and the slide may be removed. Viewing images By default, upon slide insertion, the viewing light will automatically turn on and the LUNA-FX7™ will perform an initial autofocus. Whether or not autofocus is performed upon slide insertion may be changed within SETTINGS (Section 8). -
Page 13: Cell Counting
Navigation To view different slide chambers within a slide, select the chamber to be viewed by pressing a chamber on the slide image just under the COUNT button. To see different fields of view within a chamber, use the arrows located above the manual focus adjustment. -
Page 14: Histograms
Press TAG to identify live (green circles) or dead (red circles) cells. After fluorescence cell counting, BF, GF, and RF images can be viewed separately or in overlay. Histograms Press HISTOGRAM & GATING to open the histogram window. Cell concentration or number can be graphed according to cell size. Cell size gating parameters may be changed by pressing the slider rectangles. -
Page 15: Dilution Calculator
Dilution calculator Press DILUTION to open the Dilution Calculator. Enter the values for the desired concentration and final volume. Press CALCULATE and dilution instruction will appear in the grey message box. Save Press SAVE & PRINT to open the save window. Select the desired saving options: Save Options File Type... -
Page 16: Print
To print a text summary of the counting results, connect a LUNA-FX7™ Thermal Print Printer (P17001) to the instrument and press Print. Quick save Press QUICK SAVE to save results with a default name and suffix designation. The appended suffix may be a sequential number or the date/time. Default Quick save preferences may be pre-set in SETTINGS: SAVE &... -
Page 17: Reanalyze
Scroll through the captured images using the arrows. Press the PROTOCOL tab to check the protocol used. To transfer files to a USB drive or delete files from the internal drive, press < Results to return to the main Results window. Use the command buttons at the bottom of the screen: COPY, PASTE, or DELETE. -
Page 18: Protocols
Press ERASE ALL to delete all stored counts. This will not delete reports or images of the corresponding count, if they were saved to the internal drive. 5. Protocols Protocol Selection Default Protocol Customized protocols for specific cell types may be created. Each counting mode comes with a pre-set Default counting protocol. -
Page 19: Protocol Parameters
Load protocol Select the desired protocol and press LOAD. The current active protocol name can be seen in the upper right hand corner of the screen. Protocol Parameters Brightfield cell counting Parameters for [Brightfield cell counting-Total cell counting] parameters Parameter Range DEFAULT* Min. - Page 20 Parameter Range DEFAULT* Min. search size (μm) 1-89 Max. search size (μm) 2- 90 Cell detection sensitivity 1-10 Live cell sensitivity 1-10 Noise reduction Dilution factor 1-100 Min./ Max. search Size Search size refers to the approximate cell size that the algorithm recognizes as potential cell objects.
-
Page 21: Fluorescence Cell Counting Parameters
Fluorescence cell counting Parameters for [Fluorescence cell counting-Cell lines & primary cells] parameters Parameter Range DEFAULT* GF exposure level 0.1-10 RF exposure level 0.1-10 Min. cell size 1-89 Max. cell size 2-90 GF threshold level 1-10 RF threshold level 1-10 Dilution factor 1-10 1.11... -
Page 22: Bioprocess Feature
6. Bioprocess Feature Bioprocess Feature The LUNA-FX7™ bioprocess feature enables automated tracking of multiple bioprocessing activities. The bioprocess feature tracks individual batches according to protocol and will calculate and chart growth rates, doubling times, and viabilities based on count data. Creating a bioprocess protocol To create a new bioprocess, press PROTOCOL and create a new protocol. -
Page 23: Review/Export Bioprocess Data
Review/Export bioprocess data 1. Select REVIEW 2. Press REVIEW BIOPROCES. 3. From the protocol list on the left, select the protocol used to create your bioprocess data. 4. To export bioprocess data as a .CSV file, press – EXPORT TO USB. 5. -
Page 24: Quality Control
Quality control mode Quality Control mode is used to monitor the performance of the LUNA-FX7™. The Quality Control features may only be used in conjunction with the Logos Biosystems fluorescence or brightfield validation slides. Validation slides contain a pre-spotted pattern (brightfield) or pre-fixed beads (fluorescence) of known concentration and viability. - Page 25 Press NEW. Enter a Name, then press the right arrow key [>] to move to ‘Product key’. Enter the 20 digit Product key. Press the ‘space’ icon to advance. Press OK. Confirm control type: Fluorescence or Brightfield and Expiration date. ...
- Page 26 Press the right arrow key [>] to move to ‘Assay value’. Confirm that the Assay value is correct. If the Assay value differs from what was provided with the validation slide, check to ensure the product key was entered correctly. If entered, correctly, contact sales@logosbio.com. Set Acceptance limits (%).
-
Page 27: Performing Quality Control
After completing registration, the validation slide information may be viewed by selecting the appropriate registered control in the REGISTER main page, and pressing Load. Performing Quality Control Navigate to Quality Control mode and press REGISTER. Select a validation slide from the list of Registered controls. Press LOAD. Press RUN QC in the main Quality Control screen, insert the validation slide, and press the COUNT button. - Page 28 Press RESULTS to see the counting data. If the results are not within the acceptance range, redo RUN QC steps. If not met again, contact your local distributor or Logos Biosystems. To re-run QC, press NEXT COUNT, then press the COUNT button.
-
Page 29: Review
Review Press REVIEW. Select a validation slide from the File list on the left. Press GRAPH to view a graphical representation. Press the Y-axis title box to switch between ‘Concentration’, ‘Total cell counts’, and ‘Viability’. Press ‘Day’, ‘Month’ or ‘Year’ to alter X-axis scale. Press EXPORT to export a .CSV file with count data and graph images to a USB drive. -
Page 30: Settings
8. Settings LUNA-FX7™ Settings Screen settings Navigate to either Brightfield or Fluorescence counting window and press SETTINGS. Within SETTINGS, software updates, date and time changes, and background calibrations may be performed. Additionally, options for ‘Cell Counting’, ™ ‘Save & Review’, ‘Network’, ‘Server Setting’ (only with CountWire package) and options may be adjusted. -
Page 31: Save & Review
Select On or Off to autofocus when the slide is inserted. Save & Review Press Save & review on the right menu. Quick save Name This name will serve as the prefix for all saved counts. Suffix Select Sequence to automatically add sequential numbers to the prefix name;... -
Page 32: Network
Network The LUNA-FX7™ may be connected to a local network via Ethernet cable or WiFi. Within SETTINGS, press NETWORK. Ethernet connection Connect an Ethernet cable to the instrument. When connected, an IP address will appear on the screen in blue color. WiFi connection Insert the supplied WiFi dongle to a LUNA-FX7™... -
Page 33: Server Setting
This setting is required to use the CountWire™ software. Server setting Press SERVER SETTING. Device name Required to distinguish the device for the CountWire™ software. The default device name is the serial number of the device, but the name may be changed. -
Page 34: Calibration
The LUNA-FX7™ is calibrated prior to shipping. Calibration only needs to be Calibration performed 1) after any software/firmware updates, and 2) after switching trypan blue or erythrosin B brands or formulations. To perform calibration: 1. Press DATE & CALIBRATION. 2. Press Start calibration. The Calibration Step 1 window will appear. Remove any counting slide from slide port. -
Page 35: Software
Logos Biosystems continually provides software updates to ensure optimal performance. The current software version is displayed in SETTINGS: SOFTWARE. 1. The most recent version may be downloaded from the Logos Biosystems website (www.logosbio.com) into the root directory of a compatible USB drive. -
Page 36: Data Transfer Via Network
9. Data Transfer via Network FTP freeware FileZilla FTP Client Download and install the FileZilla FTP Client from filezilla-project.org to a compatible computer. Connect the LUNA-FX7™ to a network. Make note of the LUNA-FX7™ IP address in the SETTINGS: NETWORK screen. Open the FileZilla FTP Client on the computer. -
Page 37: Maintenance And Troubleshooting
Do not over- or under-fill the slide chambers. Optical components malfunctioning Optical components may be dirty or damaged. Please contact your local distributor or Logos Biosystems. Damaged or contaminated slide Use a new slide if it is disposable. Make sure that the counting area of the slide is transparent before loading the sample. -
Page 38: Data Transfer And Saving
Download the file again into the root directory of the USB drive. Insert the USB drive and press Software update in the SETTINGS: SOFTWARE. If the problem persists, contact your local distributor or Logos Biosystems. 11. Product Specifications LUNA-FX7™ Automated Cell Counter LUNA-FX7™... -
Page 39: Luna™ Slides
Instrument type Benchtop cell counter Display 7-inch TFT LCD multi-touch screen, 1024 x 600 pixels Data format PDF, .CSV, TIFF Data export USB, WiFi, Ethernet Printer External printer (optional) CountWire™ software (optional) 21 CFR Part 11 CountWire™ software (optional) User management IQ/OQ Yes (optional) Dimensions... - Page 40 PhotonSlide™, 500 Slides L12006 10 boxes PhotonSlide™, 1000 Slides L12007 20 boxes L72030 Cell Counter Validation Slide-FL 1 unit L72040 Cell Counter Validation Slide-BF 1 unit T13001 Trypan Blue Stain, 0.4% 2 x 1 mL T13011 Trypan Blue Stain, 0.4%, Sterile-filtered 2 x 1 mL L13002 Erythrosin B Stain...
-
Page 41: Purchaser Notification
(d) resale of this product or its components whether or not such product and its components are resold for use in research. Logos Biosystems, Inc. (“Company”) will not claim any consideration against the purchaser of infringement of patents owned or controlled by the Company which cover the product based... - Page 42 cost of shipping the Instrument to and from the service facility and, if necessary, the travel cost of a service engineer after 30 calendar days of purchase, only replace or repair the Instrument for up to the Warranty Period without issuing a credit.
- Page 43 Logos Biosystems HEADQUARTERS FL 2 & 3 28 Simindaero 327beon-gil, Dongan-gu Anyang-si, Gyeonggi-do 14055 OUTH OREA Tel: +82 31 478 4185 Fax: +82 31 360 4277 Email: info@logosbio.com 7700 Little River Turnpike STE 207 Annandale, VA 22003 Tel: +1 703 622 4660...
Need help?
Do you have a question about the LUNA FX7 Series and is the answer not in the manual?
Questions and answers