Table of Contents
Advertisement
Quick Links
Advertisement
Table of Contents
Troubleshooting

Related Manuals for logos biosystems LUNA-II


Summary of Contents for logos biosystems LUNA-II
- Page 1 User Manual LBSM-MD-ML-LUC-001 VL1712-01 www.logosbio.com...
- Page 2 It is not a medical, therapeutic, or in vitro diagnostics device. Do not disassemble the device on any occasion as this will invalidate your warranty. TRADEMARKS The trademarks used in this document are the property of Logos Biosystems, Inc. © 2017 Logos Biosystems, Inc. All rights reserved.
-
Page 3: Table Of Contents
Table of Contents Chapter 1 – Introduction ----------------------------------------------------------------------- 1.1 Product Overview --------------------------------------------------------------------------------- 1.2 Key Features --------------------------------------------------------------------------------------- 1.3 Product Contents --------------------------------------------------------------------------------- 1.4 Product Specifications --------------------------------------------------------------------------- 1.5 Product Description ------------------------------------------------------------------------------- 1.6 General Guidelines ------------------------------------------------------------------------------- Chapter 2 – Setting up --------------------------------------------------------------------------- 2.1 Installation ------------------------------------------------------------------------------------------ 2.2 Startup/Main Menu ------------------------------------------------------------------------------- 2.3 Settings ---------------------------------------------------------------------------------------------- Chapter 3 –... -
Page 4: Chapter 1 - Introduction
The LUNA-II automatically saves results as CSV files and provides the option to generate comprehensive PDF reports ™ with the date, time, protocol used, cell images, and relevant histograms. The LUNA-II also provides the option to review previous data. ™... -
Page 5: Product Contents
The warranty does not cover damage that may occur during shipping and handling. Any damage claims must be filed with the carrier. Contact your local distributor or Logos Biosystems if anything is missing. 1.4 Product Specifications ™... -
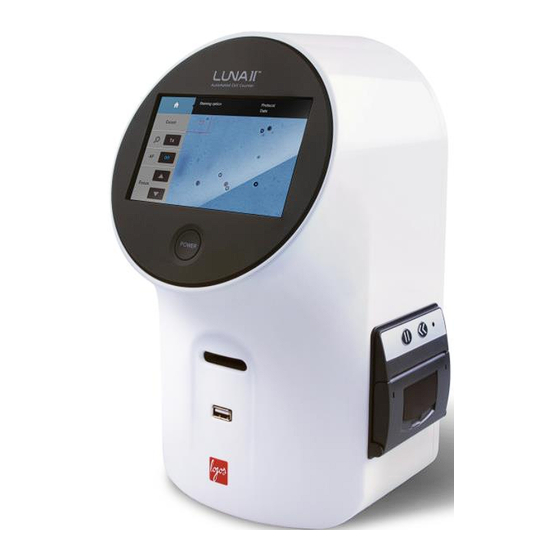
Page 6: Product Description
™ ™ Slides or the LUNA Reusable Slide, and a USB port for easy data transfer. The right side of the LUNA-II has a built-in printer (L40001 models only), allowing the user to print results immediately. 1.5.2 Rear View of the LUNA-II ™... -
Page 7: Chapter 2 - Setting Up
Chapter 2 – Setting up 2.1 Installation ™ Place the LUNA-II on a clean and level surface. Connect the power cord to the AC adapter. Connect the power cord to an electrical outlet after checking the outlet configuration in your local area. -
Page 8: Settings
2.3 Settings The instrument is preset at the time of manufacture and may be used immediately. Users may adjust the settings of the instrument as desired. Select settings from the main menu. The Settings screen displays: a home icon: press this icon to return to the main menu, ... - Page 9 2.3.1 Settings: Staining Options ™ ™ Users can select for the use or absence of a stain for cell counting with the LUNA-II . The LUNA-II is optimized for use with trypan blue or Erythrosin B. Option Description This option is used when cell samples are mixed with trypan blue or Erythrosin B for regular With Trypan Blue bright field counting.
- Page 10 Logos Biosystems continually provides software updates to ensure optimal performance. The existing version of software is displayed in the startup screen and the Settings screen. Download the most recent version from the Logos Biosystems website (www.logosbio.com) into the root directory of a compatible USB drive.
- Page 11 Users must recalibrate the background after each software update or when using a ™ different brand, concentration, or type of stain. The LUNA-II is optimized for use with trypan blue or Erythrosin B. Press [Background Calibration] in the Settings screen.
-
Page 12: Chapter 3 - Setting The Count Protocol
Chapter 3 – Setting the Count Protocol ™ The LUNA-II provides a default protocol that can be used for most common cell lines. Users may create and save up to 300 unique protocols. 3.1 Protocol Parameters ™ The LUNA-II protocols have the following modifiable parameters:... -
Page 13: Creating And Editing Protocols
3.2 Creating and Editing Protocols Select protocol from the main menu. The Protocol screen includes a list of saved protocols. The selected protocol is highlighted in blue. The parameters of the selected protocol are displayed in the right panel. The DEFAULT and PBMC protocols cannot be modified or deleted. To create a new protocol, select New Protocol and press Load. -
Page 14: Protocol Selection
3.3 Protocol Selection Select the desired protocol in the Protocol screen. Press Load to apply the selected protocol. Now the instrument is ready to count cells with the selected protocol. Important! Merely selecting a protocol does not mean that it has been put into effect. To apply the selected protocol, make sure to press Load. -
Page 15: Chapter 4 - Counting Cells
Chapter 4 – Counting Cells 4.1 Instrument Preparation Select count from the main menu. The staining option, set protocol, date, and time appear in the panel at the top of the Count screen. Set the protocol, dilution factor, and staining option appropriately prior to counting. 4.2 Sample Preparation Prepare a cell suspension according to standard procedures. -
Page 16: Slide Insertion
4.3 Slide Insertion ™ ™ Insert the slide face up and sample-side first into the counting slide port of LUNA-II . The LUNA-II can only analyze the inserted chamber. Important! Do not insert the slide facedown. A live image of the cells will appear on the screen. If not, the slide might not be inserted correctly. -
Page 17: Cell Counting
Press the magnifier button to zoom in and out of the image. Press [Count] to start counting. ™ The LUNA-II counts the cells in 0.5 µL, which is comparable to five (1 mm x 1 mm) squares on a standard hemocytometer. -
Page 18: Results
4.6 Results ™ The LUNA-II has onboard data analysis software that allows users to analyze cell count and viability data immediately. 4.6.1 Results: Image View Press [Image] to view the captured image of the analyzed cell sample. Use a finger or a stylus to navigate the image. - Page 19 4.6.2 Results: Histogram and Gating Press [Histogram & Gating] to see a graphical representation of the cell count results. Users can review the distribution of cells according to their sizes. Green bars represent live cells and red bars represent dead cells. The Total/on button indicates that live and dead cells are both represented.
- Page 20 ™ The LUNA-II provides a gating function that can be controlled by the gating bar on the bottom of the screen. Select the desired light grey limit icon. The selected icon will become red. Press the arrows on either end of the size to alter the minimum and maximum size limits. The gating function is helpful for monitoring co-cultured cells with distinct sizes and the exclusion of noncellular particles.
- Page 21 4.6.3 Results: Dilution Calculator Users may use the onboard dilution calculator to compute dilutions for subsequent experiments. Press [Dilution] and the dilution calculator will appear. The dilution calculator starts out with the concentration of total cells (live and dead) as the current concentration. The current concentration options are Total, Live, Dead, and Custom, allowing users to set the current concentration to be the total cell concentration, live cell concentration, dead cell concentration, or a custom cell concentration by pressing the black box below the Current Concentration value.
- Page 22 4.6.4 Results: Saving and Printing ™ The LUNA-II provides the option of saving and/or printing results. Press [Save/Print] in the Results screen. The Save/Print screen has three saving options. Saving Options Description Analyzed Image Tagged image of live and dead cells...
- Page 23 HL60.pdf HL60_RAW.tif HL60_TAG.tif...
- Page 24 ™ A summary of each count performed is automatically saved to the LUNA-II ™ The LUNA-II stores up to 1000 counts onboard. Alternatively, press Print. The printed report will contain the cell count results and protocol details. Cell Count Report File name: HL60 Date: 16 Apr., 2017 14:35...
-
Page 25: Chapter 5 - Review Previous Results
Select review from the main menu. The review screen has two options: [Review Files] and [Previous Counts]. [Review Files] brings up data from a USB ™ drive and [Previous Counts] looks up data stored directly on the LUNA-II ™ ™... -
Page 26: Chapter 6 - Maintenance And Troubleshooting
6.2 Cleaning ™ Turn the LUNA-II off and disconnect the power cable before cleaning. Make sure that liquids do not enter any part of the instrument during cleaning. Clean the surfaces of the instrument with a soft cloth dampened with distilled water. Wipe dry immediately. Do not pour or spray liquids directly onto the instrument. -
Page 27: Troubleshooting
USB drive. Insert the USB and press damaged software [Software Updates] in the Settings screen. If the problem persists, contact your local distributor or Logos Biosystems. Check to see there is enough paper in the printer. If there is not, replace LED on printer Paper receptacle empty it (see Section 6.3: Installing Printer Paper). -
Page 28: Chapter 7 - Safety Information
Always use the power cord and AC adapter and provided by Logos Biosystems. If the proper power cord and AC adapter are not used, the electrical safety of the product cannot be guaranteed. - Page 29 Users must be aware of and follow the conditions described in this manual for operating the instrument. The protection provided by the instrument may be impaired if the instrument is used in a manner not specified by Logos Biosystems. 7.4.2 Korean Standards...
-
Page 30: Chapter 8 - Ordering Information
Chapter 8 - Ordering Information Cat # Product Quantity ™ L40001 LUNA-II Automated Cell Counter (with printer) 1 unit ™ L40002 LUNA-II Automated Cell Counter (without printer) 1 unit ™ L12008 LUNA Reusable Slide 1 unit ™ L12010 LUNA Reusable Slide Coverslips 10 units ™... -
Page 31: Chapter 9 - Purchaser Notification
Logos Biosystems, Inc. (“Company”) will not claim any consideration against the purchaser of infringement of patents owned or controlled by the Company which cover the product based on the manufacture, use or sale of a therapeutic,... - Page 32 Logos Biosystems HEADQUARTERS FL 2 & 3 28 Simindaero 327beon-gil, Dongan-gu Anyang-si, Gyeonggi-do 14055 OUTH OREA Tel: +82 31 478 4185 Fax: +82 31 478 4184 Email: sales@logosbio.com 7700 Little River Turnpike STE 207 Annandale, VA 22003 Tel: +1 703 622 4660...
Need help?
Do you have a question about the LUNA-II and is the answer not in the manual?
Questions and answers