Table of Contents
Advertisement
Quick Links
Advertisement
Table of Contents

Related Manuals for Allegion SIMONS VOSS SmartHandle AX


Summary of Contents for Allegion SIMONS VOSS SmartHandle AX
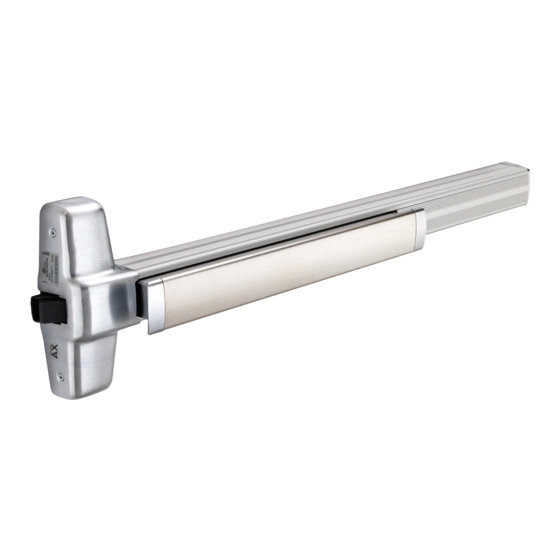
- Page 1 Manual SmartHandle AX 01.2019...
-
Page 2: Table Of Contents
Content 2 / 55 SimonsVoss Manual SmartHandle AX Content Intended use.......................... 4 General ............................ 5 Safety instructions ........................ 7 Installation........................... 9 Installation instructions....................... 9 Variant A0 .......................... 9 4.2.1 Contents of packaging .................. 9 4.2.2 Tools ....................... 10 4.2.3 Procedure ....................... 10 Variant A1 ........................ 13 4.3.1 Contents of packaging .................. - Page 3 Content 3 / 55 SimonsVoss Manual SmartHandle AX No audible programming feedback signals.............. 34 6.10 Card interface ........................ 34 6.11 Extended configuration .................... 34 6.11.1 Time-controlled changeover ................ 34 6.11.2 Turn off LED/beeper .................. 35 6.12 Deactivate freeze mode .................... 36 Operation........................... 38 Status messages ........................ 39 Battery status feedback .................... 39 Emergency release ...................... 39 Deactivated ........................ 39...
-
Page 4: Intended Use
1 | Intended use 4 / 55 SimonsVoss Manual SmartHandle AX 1 Intended use Products in the SmartHandle AX range consist of electronic door fittings. Users can engage the SmartHandle AX and open the door onto which it is fitted with an authorised ID medium, such as a transponder. The corresponding authorisations need to be issued using an electronic locking plan. -
Page 5: General
2 | General 5 / 55 SimonsVoss Manual SmartHandle AX 2 General SmartHandle AX is an electronic door handle which can be used to open and close doors. Electronic door handles in this range are available in the following models: Electronic SmartHandle AX Description –... - Page 6 2 | General 6 / 55 SimonsVoss Manual SmartHandle AX Electronic SmartHandle AX Description – Electronic door handle to mount on existing drill holes for Scandinavian Oval Variant E0 – Suitable for a lock centres distance of 105 mm – Suitable for handle locks with Scandinavian Oval –...
-
Page 7: Safety Instructions
3 | Safety instructions 7 / 55 SimonsVoss Manual SmartHandle AX 3 Safety instructions – The batteries used may pose a fire or burn hazard if handled incorrectly. Do not recharge, open, heat or burn these batteries. Do not short- circuit! –... - Page 8 3 | Safety instructions 8 / 55 SimonsVoss Manual SmartHandle AX – Modifications or further technical developments cannot be excluded and may be implemented without notice. – This documentation has been compiled based on the best knowledge available to us. Nevertheless, errors cannot be ruled out. SimonsVoss Technologies GmbH accepts no liability in such a case.
-
Page 9: Installation
4 | Installation 9 / 55 SimonsVoss Manual SmartHandle AX 4 Installation You can programme the SmartHandle AX while it is still in the packaging (except MP) and then install it. You will also find information on installing the SmartHandle AX in the accompanying quick guide. -
Page 10: Tools
4 | Installation 10 / 55 SimonsVoss Manual SmartHandle AX Quantity Object 2× Escutcheon for cylinder opening 4× Screw with predetermined breaking points 2× Adapter sleeve 6.4 mm 2× Adapter sleeve 7.4 mm 2× Adapter sleeve 8.8 mm 1× Spindle 1× Installation tool 1×... - Page 11 4 | Installation 11 / 55 SimonsVoss Manual SmartHandle AX Fig. 2: Programming passive (SmartCD.MP) ü Locking device added in LSM software. ü LSM software launched. ü Programming device connected. 1. Position the programming device. 2. Programme the SmartHandle AX (see , quick guide or LSM manual for details).
- Page 12 4 | Installation 12 / 55 SimonsVoss Manual SmartHandle AX 1. Insert the switching plate as shown. 2. Position the spring sub-assembly at an angle to the escutcheon base until it touches the switching plate. 3. Draw the spring sub-assembly back, so that the spring is compressed. 4.
-
Page 13: Variant A1
4 | Installation 13 / 55 SimonsVoss Manual SmartHandle AX 3. Fasten the escutcheon base onto the sub-assembly with the L2 screws. If you use a 7 mm spindle, place the adapter sleeve on the free side of the IMPORTANT spindle. 4. -
Page 14: Tools
4 | Installation 14 / 55 SimonsVoss Manual SmartHandle AX Quantity Object Outside handle, including: 1× 1× Grub screw Inner handle, including: 1× 1× Grub screw 1× Pre-installed escutcheon base 1× Switching plate 1× Spring element 1× Escutcheon base for cylinder opening 1×... - Page 15 4 | Installation 15 / 55 SimonsVoss Manual SmartHandle AX Fig. 3: Programming active (SmartCD.G2) Fig. 4: Programming passive (SmartCD.MP) ü Locking device added in LSM software. ü LSM software launched. ü Programming device connected. 1. Position the programming device. 2. Programme the SmartHandle AX (see , quick guide or LSM manual for details).
- Page 16 4 | Installation 16 / 55 SimonsVoss Manual SmartHandle AX X variant IMPORTANT If you have ordered the X version for very thick doors, your supply package will include an extra-long spindle bar and threaded rods in addition to ex- tension sleeves.
-
Page 17: Glass Door Fitting
4 | Installation 17 / 55 SimonsVoss Manual SmartHandle AX – Insert the spindle into the outer sub-assembly until the pin locks into the spindle. ð Spindle is inserted. Fit sub-assembly 1. Push the sub-assembly with the spindle into the door from the outer side. -
Page 18: Variant A2
4 | Installation 18 / 55 SimonsVoss Manual SmartHandle AX The glass door must feature the following holes for SimonsVoss glass door fittings (dimensions in mm): 4.4 Variant A2 4.4.1 Contents of packaging Quantity Object Outer fitting assembly, including: 1× 4×... -
Page 19: Tools
4 | Installation 19 / 55 SimonsVoss Manual SmartHandle AX Quantity Object 1× Spring element 1× Escutcheon base for cylinder opening 1× Escutcheon for inner handle 1× Escutcheon for cylinder opening 4× Screw with predetermined breaking points 1× Spindle 1× Installation tool 1×... - Page 20 4 | Installation 20 / 55 SimonsVoss Manual SmartHandle AX Fig. 6: Programming passive (SmartCD.MP) ü Locking device added in LSM software. ü LSM software launched. ü Programming device connected. 1. Position the programming device. 2. Programme the SmartHandle AX (see , quick guide or LSM manual for details).
- Page 21 4 | Installation 21 / 55 SimonsVoss Manual SmartHandle AX 1. Insert the switching plate as shown. 2. Position the spring sub-assembly at an angle to the escutcheon base until it touches the switching plate. 3. Draw the spring sub-assembly back, so that the spring is compressed. 4.
- Page 22 4 | Installation 22 / 55 SimonsVoss Manual SmartHandle AX 3. Fasten the escutcheon base onto the sub-assembly with the L2 screws. If you use a 7 mm spindle, place the adapter sleeve on the free side of the IMPORTANT spindle. 4.
-
Page 23: Variants E0 And E1
4 | Installation 23 / 55 SimonsVoss Manual SmartHandle AX 4.5 Variants E0 AND E1 4.5.1 Contents of packaging Quantity Object Outer fitting assembly, including: 4× Battery (CR2450) 1× Inlay 1× Bearing plate 1× 2× PH2 screws MO conceal assembly (not for 1×... -
Page 24: Procedure
4 | Installation 24 / 55 SimonsVoss Manual SmartHandle AX 4.5.3 Procedure Execute program- ming A large volume of data is transmitted during initial programming. You can IMPORTANT transfer data significantly faster and reduce the programming time if you use a Smart CD.MP. Fig. 7: Programming active (SmartCD.G2) Fig. 8: Programming passive (SmartCD.MP) ü... - Page 25 4 | Installation 25 / 55 SimonsVoss Manual SmartHandle AX 2. Calculate the screw lengths. 3. Select suitable predetermined breaking points which are no more than 3 mm longer than the calculated length. 4. Separate the predetermined breaking points with the pliers. ð...
- Page 26 4 | Installation 26 / 55 SimonsVoss Manual SmartHandle AX 5. Press the rear clip into the designated pawl. ð Spring contact is inserted. Reposition bolts 1. Undo the indicated screws. (for DIN R only) 2. Remove the cover plate. 3.
- Page 27 4 | Installation 27 / 55 SimonsVoss Manual SmartHandle AX ð The sub-assembly is mounted. Position outer 1. Push the outer handle into the sub-assembly until the pin locks into the handle spindle. 2. Fasten the grub screw into the handle to affix it. ð...
-
Page 28: Programming
5 | Programming 28 / 55 SimonsVoss Manual SmartHandle AX 5 Programming ü LSM software version 3.4 SP1 or higher installed. ü LSM open. ü SmartCD.MP or SmartCD.G2 connected (recommended: SmartCD.MP). 1. Select the locking system that you require. Use the ... button to open the locking system properties and use the buttons to select the required lock system. - Page 29 5 | Programming 29 / 55 SimonsVoss Manual SmartHandle AX 17. Wait for programming to complete. ð SmartHandle AX is programmed.
-
Page 30: Configuration
6 | Configuration 30 / 55 SimonsVoss Manual SmartHandle AX 6 Configuration 6.1 Pulse length SmartHandle is pre-set to engage for about 5 seconds. The time that it engages can be freely configured between 1 and 25 seconds for each lock in the software. -
Page 31: Logging Unauthorised Attempted Access Events
6 | Configuration 31 / 55 SimonsVoss Manual SmartHandle AX You can also implement automatic time-controlled changeover using a time zone plan (see Time switch-over function [} 32]). These settings are only available in the .ZK version. IMPORTANT ü LSM open. ü... -
Page 32: Flip Flop
6 | Configuration 32 / 55 SimonsVoss Manual SmartHandle AX 6.5 Flip flop Pulse mode (default setting) is switched off and the pulse duration is no longer in effect. When flip flop mode is activated, the SmartHandle changes its status from engaged to disengaged or vice versa each time it is activated using a transponder/SmartCard. - Page 33 6 | Configuration 33 / 55 SimonsVoss Manual SmartHandle AX 6. Click on the Exit button. ð Time zone is selected. Activating time Whereas time zone control itself can only influence identification media zone control and authorisations, the time change-over also activates time-dependent time change-over switching of the relay in the controller.
-
Page 34: Ignore Activation Or Expiry Date
6 | Configuration 34 / 55 SimonsVoss Manual SmartHandle AX 2 Time zone control [} 30] 6.8 Ignore activation or expiry date Identification media can be given a validity date. This validity date can be ignored if identification media need to be used regardless. ü... -
Page 35: Turn Off Led/Beeper
6 | Configuration 35 / 55 SimonsVoss Manual SmartHandle AX Unlock in the authorised time period only when disen- only when disen- always always gaged gaged SmartHandle AX: SmartHandle AX: SmartHandle AX: SmartHandle AX: engages to open engages to open engages to open engages to open as soon as identi-... -
Page 36: Deactivate Freeze Mode
6 | Configuration 36 / 55 SimonsVoss Manual SmartHandle AX 2. Change to the [Configuration/Data] tab. 3. Click on the Extended configuration button. ð The "Extended configuration" window will open. Turn off LED/ ü LSM open. beeper ü "Extended configuration" window open. 1. - Page 37 6 | Configuration 37 / 55 SimonsVoss Manual SmartHandle AX 2. Actuate any authorised identification medium. ð Locking device opens. 3. Change all batteries. 4. Activate the battery replacement identification medium on the locking device. ð Freeze mode is deactivated for about thirty seconds. 5.
-
Page 38: Operation
7 | Operation 38 / 55 SimonsVoss Manual SmartHandle AX 7 Operation The SmartHandle AX can be operated in different ways, depending on the programming. IMPORTANT The size of the gap affects the wireless connection. 1. If you use a transponder, you must position it between five and thirty centimetres away. -
Page 39: Status Messages
8 | Status messages 39 / 55 SimonsVoss Manual SmartHandle AX 8 Status messages 8.1 Battery status feedback Batteries OK. You do not need to do anything. Batteries low. Change the batteries. Batteries very low. Replace the bat- Very low teries immediately. -
Page 40: Signal
9 | Signal 40 / 55 SimonsVoss Manual SmartHandle AX 9 Signal Signal Meaning 2x short before engaging to open Identification medium accepted – (green) normal activation 1x after disengaging (green) 1 x short (red) Identification medium not authorised Flip-flop mode: Locking device is 1×... -
Page 41: Battery Warning
10 | Battery warning 41 / 55 SimonsVoss Manual SmartHandle AX 10 Battery warning You or users are warned that the SmartHandle AX is about to fail due to empty batteries. Replace the batteries in good time (see Battery replacement [} 42]). 10.1 Warning level warning level Signal... -
Page 42: Battery Replacement
11 | Battery replacement 42 / 55 SimonsVoss Manual SmartHandle AX 11 Battery replacement 11.1 Instructions on battery replacement – Only specialists may replace the batteries. – Do not touch electronics/components; do not allow them to come into contact with oil, paint, moisture, alkali or acids. –... - Page 43 11 | Battery replacement 43 / 55 SimonsVoss Manual SmartHandle AX 2. Push the SimonsVoss installation tool into the slots until the inlay pops out. 3. Pull the inlay downwards until it snaps out. 4. Remove the inlay. 5. Press the end of the battery clip inwards until it pops out.
- Page 44 11 | Battery replacement 44 / 55 SimonsVoss Manual SmartHandle AX Lost battery clip ATTENTION The battery clip is inserted. If both ends of the clip are pushed inwards at the same time and are released from the bracket, the clip may fall out. 1.
-
Page 45: Maintenance, Cleaning And Disinfection
12 | Maintenance, cleaning and disinfection 45 / 55 SimonsVoss Manual SmartHandle AX 12 Maintenance, cleaning and disinfection Digital SmartHandles MUST not come into contact with oil, grease, paint or IMPORTANT acids. SmartHandles can be damaged if you use unsuitable or aggressive clean- IMPORTANT ing agents or disinfectants. -
Page 46: Disassembly
13 | Disassembly 46 / 55 SimonsVoss Manual SmartHandle AX 13 Disassembly You will also find information on disassembly in the supplied quick guides. 13.1 Variant A0 You require the following tools for disassembly: – TX-15 screwdriver – Slotted-head screwdriver –... -
Page 47: Variant A2
13 | Disassembly 47 / 55 SimonsVoss Manual SmartHandle AX 3. Use a slotted-head screwdriver to lever off the escutcheon covers. 4. Remove the escutcheon covers. 5. Pull off the handle from the opposite side to the sub-assembly. 6. Unfasten the sub-assembly attachment screws. 7. -
Page 48: Variants E0 And E1
13 | Disassembly 48 / 55 SimonsVoss Manual SmartHandle AX 11. Remove the second handle from the sub-assembly. ð SmartHandle AX is dismounted. 13.4 Variants E0 and E1 You require the following tools for disassembly: – TX-15 screwdriver – Slotted-head screwdriver –... -
Page 49: Technical Specifications
14 | Technical specifications 49 / 55 SimonsVoss Manual SmartHandle AX 14 Technical specifications – Euro Profile cylinder Types – Scandinavian Oval – Active Read systems – Passive Active 5 cm to 30 cm Read ranges Passive Near field Dimensions 120 mm Height 140 mm... - Page 50 14 | Technical specifications 50 / 55 SimonsVoss Manual SmartHandle AX Operational: -25 °C to +50 °C Temperature range In storage (temporary): -40 °C to +50 °C In storage (long-term): 0 °C to +30 °C Protection rating IP40 Feedback – Audible (beeper) Signal – Visual (two-colour LED) Administration and settings Loggable access events Max.
- Page 51 14 | Technical specifications 51 / 55 SimonsVoss Manual SmartHandle AX Fig. 9: Size of suspended SmartHandle.AX (A1, A2) Height depends on the variant (see table). IMPORTANT...
- Page 52 14 | Technical specifications 52 / 55 SimonsVoss Manual SmartHandle AX Fig. 10: Size of stationary SmartHandle.AX (A0)
- Page 53 14 | Technical specifications 53 / 55 SimonsVoss Manual SmartHandle AX Fig. 11: Size of Scandinavian Oval SmartHandle (E0, E1)
-
Page 54: Help And Other Information
15 | Help and other information 54 / 55 SimonsVoss Manual SmartHandle AX 15 Help and other information Information ma- You will find detailed information on operation and configuration and other terial/documents documents under Informative material/Documents in the Download section on the SimonsVoss website (https://www.simons-voss.com/en/downloads/ documents.html). - Page 55 15 | Help and other information 55 / 55 SimonsVoss Manual SmartHandle AX SimonsVoss Technologies GmbH Feringastrasse 4 85774 Unterföhring Germany...
Need help?
Do you have a question about the SIMONS VOSS SmartHandle AX and is the answer not in the manual?
Questions and answers