Advertisement
Table of Contents
VCO-1, VCO-5UHD, VCO-8, VCO-16 Quick Start
Guide
This guide helps you install and use your VCO device for the first time.
Scan for full manual
Go to
upgrades are available.
Step 1: Check what's in the box
VCO-1, VCO-5UHD, VCO-8, VCO-16
1 Power adapter and cord (VCO-1, VCO-5UHD)
1 Power cord (VCO-8, VCO-16)
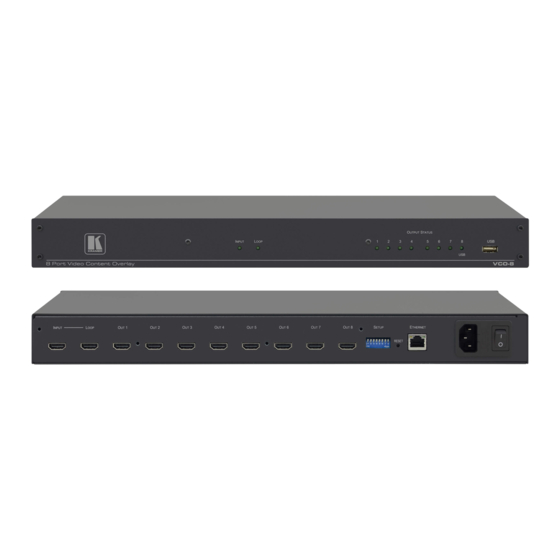
Step 2: Get to know your VCO-1, VCO-5UHD, VCO-8, VCO-16
Note that VCO-8 and VCO-16 are identical, except for the number of outputs: 8 for VCO-8 and 16 for VCO-16.
VCO-1, VCO-5UHD, VCO-8, VCO-16 Quick Start
(P/N: 2900-300848QS REV 1)
www.kramerav.com/downloads/VCO
to download the latest user manual and check if firmware
4 Rubber feet
1 Quick start guide
P/N:
2 9 0 0 - 3 0 0 8 4 8 QS
1 Bracket set (VCO-1)
1 Set of rack ears (VCO-8, VCO-16)
Rev: 1
Advertisement
Table of Contents

Subscribe to Our Youtube Channel
Related Manuals for Kramer VCO-1


Summary of Contents for Kramer VCO-1
- Page 1 1 Set of rack ears (VCO-8, VCO-16) 1 Power cord (VCO-8, VCO-16) Step 2: Get to know your VCO-1, VCO-5UHD, VCO-8, VCO-16 Note that VCO-8 and VCO-16 are identical, except for the number of outputs: 8 for VCO-8 and 16 for VCO-16.
- Page 2 VCO-8, VCO-16: Remove the three screws from each side of the unit, reinsert those screws through the rack ears and mount on a 19" rack. VCO-1: Fasten a bracket (included) on each side of the unit and attach it to a flat surface. For more information go to www.kramerav.com/downloads/VCO-1. ...
- Page 3 Note that VCO-8 and VCO-16 are identical, except for the number of outputs: 8 for VCO-8 and 16 for VCO-16. Step 5: Connect the power Connect the 5V DC power adapter (to VCO-1, VCO-5UHD) or connect the power cord (to VCO-8, VCO-16), and plug it into the mains electricity.
- Page 4 Step 6: Operate the VCO-1, VCO-5UHD, VCO-8, VCO-16 Use the Kramer VCO Setup application to manage VCO-1 / VCO-5UHD / VCO-8 / VCO-16. Download the KramerVCO-Setup.exe file from our Web site at: www.kramerav.com/downloads/VCOs. The VCO Setup App allows you to take a template which can include one or more graphic files and a playback program, modify the program and settings if needed, and load the resulting overlay onto specific device outputs (via LAN) according to a predefined schedule.
Need help?
Do you have a question about the VCO-1 and is the answer not in the manual?
Questions and answers