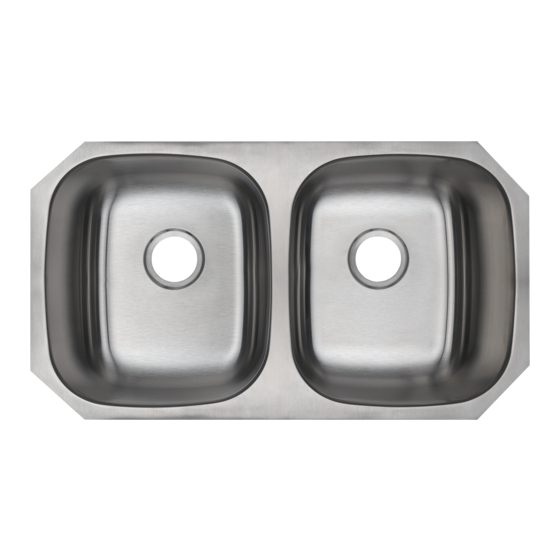
Summary of Contents for Glacier bay VR415A1
- Page 1 Model #: VR415A1 VLU3218B0 VU1512A1 VU1618A18 VU2317A1 VU2321A1 VU3018A1 VU3120A19 VU3120A2 VU3120A2R VU3120B2 VU3120B2R VU3218A0 VUR2318B1 VUR3118A0 VUR3118B1 VUR3120A2 , Monday - Friday...
- Page 2 Topmount Undermount Installation...
- Page 3 1-855-HD-GLACIER or visit www.HomeDepot.com/GLACIERBAY. undermount Hardware not shown to actual size. These screws can be installed with power tools. Undermount CIips Undermount Clip...
- Page 4 Part Description Quantity Undermount template...
- Page 5 Undermount Installation WARNING When you choose undermount style installation, please do not pull out the installation rail shown in this illustration. This will cause the sink to be damaged beyond repair.It is strongly recommended that you use a professional installer is you choose the undermount installation.
- Page 6 Undermount Installation (continued) Place the mounting clips (not included) as shown in the attched template and mark the centers of the clip on the countertop. Attaching the mounting clips step 3. HOMEDEPOT.COM/GLACIERBAY...
- Page 7 Undermount Installation (continued) HOMEDEPOT.COM/GLACIERBAY...
- Page 9 , Monday-Friday...
-
Page 10: Guía De Uso Y Cuidado
Lunes a viernes de 8:00 a.m. – 7:00 p.m., EST y los sábados de 9:00 a.m. – 6:00 p.m., EST. 1-855-HDGLACIER HOMEDEPOT.COM/GLACIERBAY GRACIAS continuamente para crear productos de calidad diseñados para mejorar su hogar. Visítenos en línea para ver nuestra línea completa de productos disponibles para sus necesidades de mejoramiento del hogar. ¡Gracias por elegir Glacier Bay! -
Page 11: Información De Seguridad
Los productos de Glacier Bay se fabrican con estándares y mano de obra de calidad superior y están respaldados por nuestra garantía limitada de por vida. Los productos de Glacier Bay están garantizados al comprador original de estar libre de defectos en materiales o mano de obra. -
Page 12: Planificación De La Instalación
Preinstalación PLANIFICACIÓN DE LA INSTALACIÓN Antes de la instalación, compruebe el espacio libre del armario: 1-855-HD-GLACIER or visit www.HomeDepot.com/GLACIERBAY. /under presenta cualquier defecto o daño, incluyendo abolladuras, combaduras, irregularidades o marcas de rozaduras. Si nota algún daño o piezas 1-855-HD-GLACIER or visit www.HomeDepot.com/GLACIERBAY. faltantes, no proceda con la instalación. -
Page 13: Contenido Del Paquete
Preinstalación (continuación) CONTENIDO DEL PAQUETE Pieza Descripción Cantidad Part Description Quantity Fregadero Plantilla para la instalación por arriba/por abajo Topmount/Undermount template Faucet assembly FastMount™ Quick connector Weight Weight clip Soap pump Soap assembly Mounting nut HOMEDEPOT.COM/GLACIERBAY Póngase en contacto con 1-855-HDGLACIER para obtener más asistencia. - Page 14 Undermount Installation Instalación por abajo Undermount Installation Undermount Installation WARNING When you choose undermount style installation, please do not pull out the installation rail shown in this illustration. This will cause the sink to be damaged beyond repair.It is strongly recommended that you use a professional installer is you choose ADVERTENCIA: Cuando escoja la instalación por abajo, no desprenda los rieles de instalación que se the undermount installation.
- Page 15 Undermount Installation (continued) Undermount Installation (continued) Instalación por abajo (continuación) Place the mounting clips (not included) as shown in the attched template and mark the centers of the clip on the countertop. Preparación del fregadero Colocar el fregadero debajo del hueco cortado de la encimera; y comprobar que el hueco es apropiado para el fregadero; ajustar el corte si es necesario. ...
- Page 16 Undermount Installation (continued) Undermount Installation (continued) Instalación por abajo (continuación) Diagrama de montaje: Encimera Silicona para Inserto sellar Presilla Fregadero Tornillo Checking for leaks and removing the quick connector Checking for leaks and removing the quick connector Please refer to steps 10 and 11 on page 8. Please refer to steps 10 and 11 on page 8.
-
Page 17: Cuidado Y Limpieza
Cuidado y limpieza Se recomienda una limpieza diaria y regular para eliminar la suciedad y evitar manchas. Utilice detergente líquido para vajilla, agua y una esponja suave de uso doméstico. de acero inoxidable del fregadero, enjuague con agua y limpie el fregadero con un paño suave y seco. Secar el fregadero evitará las manchas de agua causadas por el contacto con el agua. - Page 18 ¿Tiene preguntas o problemas, o le faltan piezas? Antes de devolver a la tienda, llame al servicio de atención al cliente de Glacier Bay Lunes a viernes de 8:00 a.m. – 7:00 p.m., EST y los sábados de 9:00 a.m. – 6:00 p.m., EST.


Need help?
Do you have a question about the VR415A1 and is the answer not in the manual?
Questions and answers
where do purchase the clips and screws to hold the sink under counter in granite countertop