Table of Contents
Advertisement
Available languages
Available languages
Item #QL033Y
Model #1001362761
USE AND CARE GUIDE
MANUAL DEL USARIO
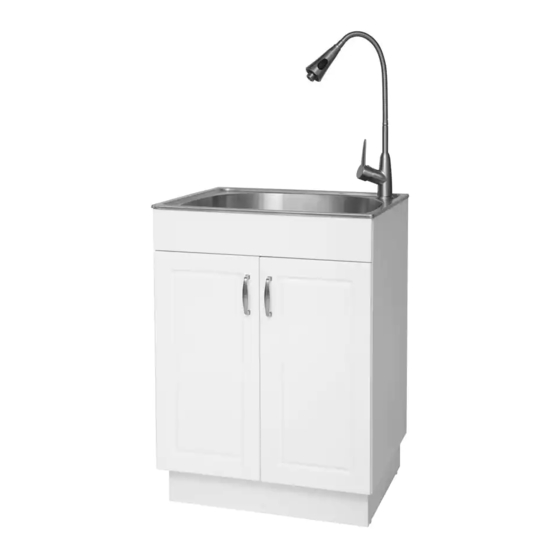
ALL-IN-ONE LAUNDRY CABINET WITH SINK AND FAUCET
GABINETE CON FREGADERO Y GRIFO TODO EN UNO
Questions, problems, missing parts?
Preguntas, problemas, piezas faltantes?
Before returning to the store, call Glacier Bay Customer Service
Antes de devolver el producto a la tienda, llame al Servicio al cliente de Glacier Bay
8:00 am - 7:00 pm, EST, Monday - Friday, 9:00 am - 6:00 pm, EST, Saturday
8 a 19 horas, hora del este, lunes a viernes, 9:00 a.m. - 6:00 p.m., hora del este, sábado
1-855-HD-GLACIER
HOMEDEPOT.COM
THANK YOU
We appreciate the trust and confidence you have placed in Glacier Bay through the purchase of this laundry cabinet. We strive to continually
create quality products designed to enhance your home. Visit us online to see our full line of products available for your home improvement
needs. Thank you for choosing Glacier Bay!
Advertisement
Chapters
Table of Contents

Related Manuals for Glacier bay QL033Y


Summary of Contents for Glacier bay QL033Y
- Page 1 THANK YOU We appreciate the trust and confidence you have placed in Glacier Bay through the purchase of this laundry cabinet. We strive to continually create quality products designed to enhance your home. Visit us online to see our full line of products available for your home improvement...
-
Page 2: Table Of Contents
Table of Contents Table of Contents ........2 Installing the Door Handles . -
Page 3: Warranty
Warranty LIFETIME LIMITED WARRANTY A thorough inspection must be made before installation and any damage must be promptly reported. We will not be liable for failures or damage that could have been discovered or avoided by proper inspection and testing prior to installation. We warrant this product to be free from defects in materials or workmanship for as long as the original consumer purchaser owns this product. -
Page 4: Pre-Installation
Pre-Installation TOOLS/MATERIALS REQUIRED (NOT SUPPLIED) Adjustable Needle nose wrench pliers Phillips Utility knife screwdriver Pipe wrench Sealant Carpenter’s level Hacksaw Safety gloves Safety goggles PARTS REQUIRED (NOT SUPPLIED) Tail Pipe P-Trap Supply lines... -
Page 5: Package Contents
Pre-Installation (continued) PACKAGE CONTENTS Part Description Quantity Cabinet Sink Faucet Strainer Basket Strainer Assembly Door Handles Cabinet Base Door Handle Screws Cabinet Base Screws Cabinet Feet Hex Wrench HOMEDEPOT.COM/GLACIERBAY Please contact 1-855-HD-GLACIER for further assistance. -
Page 6: Installation
Installation Installing the Faucet Assembly Installing the Strainer □ Carefully take out all the parts of the faucet assembly (C). □ Apply a ring of sealant to the underside of the strainer The faucet is pre-assembled, except for the sprayer head. flange. -
Page 7: Installing The Base
Installation (continued) Installing the Base Installing the Door Handles □ Insert the door handle screws (H) into the pre-drilled holes CAUTION: Do not place side load onto feet when righting on each door. the cabinet. □ Attach the door handles (F) and hand tighten the door handle screws (H). -
Page 8: Adjusting The Door Position
Installation (continued) Adjusting the Door Position Mounting the Sink □ Carefully place a bead of sealant all around the top of the If the doors need to be repositioned, the hinges can be adjusted to cabinet (A). ensure a precise fit with the cabinet. □... -
Page 9: Placing The Cabinet
Installation (continued) Placing the Cabinet Move the assembled unit to its final location. Final hook up of the supply lines and drain system can now be completed. NOTE: Supply lines are not included. The supply lines that attach the faucet to the household water system, are not supplied with this unit. -
Page 10: Care And Cleaning
Care and Cleaning SINK CABINET □ After use, always rinse your sink with tap water to dilute and □ Remove dust and dry dirt with a soft, damp cloth. remove deposits. □ Clean grease, oil, paint and ink stains with isopropyl □... -
Page 11: Service Parts
Service Parts If you are missing parts or if you require replacement parts, please contact our customer service team at 1-855-HD-GLACIER, 8:00 am - 7:00 pm, EST, Monday – Friday, 9:00 am - 6:00 pm, EST, Saturday. Identify the required part(s) and have the part number(s) ready. Part Description Code... -
Page 12: Manual Del Usario
Tabla de materias OWNER’S MANUAL ........2 Cómo instalar la base del armario . -
Page 13: Garantía
Garantía GARANTÍA LIMITADA DE POR VIDA Debe hacerse una inspección a conciencia antes de la instalación y cualquier daño debe ser reportado inmediatamente. No seremos responsables de los fallos o daños que pudieran haberse descubierto o evitado con una inspección y pruebas adecuadas antes de la instalación. Garantizamos este producto contra todo defecto en los materiales o en la fabricación, durante el tiempo que el comprador/consumidor original sea el propietario de este producto. -
Page 14: Preinstalación
Preinstalación HERRAMIENTAS/MATERIALES REQUERIDOS (NO SUMINISTRADOS) Llaves Alicates Desarmador en Cuchillo de cruz uso general Sellador de Llave de tubos silicona Nivel de Sierra de carpintero mano Guantes de Gafas de seguridad seguridad PIEZAS REQUERIDAS (NO SUMINISTRADAS) Líneas de P Trampa Tubo final alimentación... -
Page 15: Contenido Del Paquete
Preinstalación (continuación) CONTENIDO DEL PAQUETE Pieza Descripción Cantidad Armario Fregadero Grifo Colador Conjunto de colador Manijas de las puertas Base del armario Tornillos de las manijas Tornillos de la base del armario Patas del armario Llave hexagonal HOMEDEPOT.COM/GLACIERBAY Por favor, llamé al 1-855-HD-GLACIER para obtener más ayuda. -
Page 16: Instalación
Instalación Cómo instalar el grifo Cómo instalar el colador □ Retire todas las piezas del ensamblaje del grifo (C) con □ Aplique un anillo de pasta o sellador de plomería (no cuidado. El grifo está previamente ensamblado, excepto por el difusor. -
Page 17: Cómo Instalar La Base Del Armario
Instalación (continuación) Cómo instalar la base del armario Cómo instalar las manijas de las puertas PRECAUCIÓN: No ponga todo el peso sobre las patas laterales cuando lo coloque su lugar. □ Inserte los tornillos de las manijas (H) en los orificiosde cada puerta. -
Page 18: Ajuste De La Posición De Las Puertas
Instalación (continuación) Ajuste de la posición de las puertas Cómo instalar el fregadero □ Agregue un poco de sellador en la parte superior del Si necesita reubicar las puertas, ajuste las bisagras para garantizar armario (A) con cuidado. que embonen con el armario. □... -
Page 19: Colocación
Instalación (continuación) Colocación Mueva la unidad ya armada a su ubicación final. La conexión de los tubos de abastecimiento y el sistema de drenaje pueden ahora ser completados. Las líneas de abastecimiento no vienen NOTA: incluidos con en esta unidad Las líneas de abastecimiento, que conectan el grifo al suministro de agua de la casa, no vienen incluidos con en esta unidad. -
Page 20: Cuidado Y Limpieza
Cuidado y limpieza FREGADERO ARMARIO Hacer Hacer □ Después de cada uso lave el fregadero con el agua del grifo para □ Elimine el plvo y la suciedad con un paño suave y húmedo. diluir y quitar cualquier depósito. □ Limpie la grasa, aceite, pintura y manchas de tinta con □... -
Page 21: Piezas De Repuesto
Piezas de repuesto Si requiere de una pieza faltante o de repuesto, por favor llamé al 1-855-HD-GLACIER, de 8 a 19 horas, hora del este, lunes a viernes, 9:00 a.m. - 6:00 p.m., hora del este, sábado. Identifique la(s) parte(s) requerida(s) y tenga el número(s) de pieza a la mano. Pieza Descripción Código Cantidad... - Page 22 Questions, problems, missing parts? Before returning to the store, call Glacier Bay Customer Service 8:00 am - 7:00 pm, EST, Monday – Friday, 9:00 am - 6:00 pm, EST, Saturday 1-855-HD-GLACIER HOMEDEPOT.COM/GLACIERBAY Retain this manual for future use.
Need help?
Do you have a question about the QL033Y and is the answer not in the manual?
Questions and answers