
Related Manuals for Glacier bay VUR2318A1


Summary of Contents for Glacier bay VUR2318A1
- Page 1 SKU# 1005403623 / 1005403616 / 1005403614 Model# VUR2318A1 / VUR3118A1 / VUR3118A0 / FSUR2718B1 / FSUR3619A1 / FSUR3619A0 , Monday - Friday V1-TU-6...
- Page 2 Hardware Included Package Contents Undermount Installation Care and Cleaning Service Parts...
- Page 3 1-855-HD-GLACIER or visit www.HomeDepot.com/GLACIERBAY. /under Hardware not shown to actual size. These screws can be installed with power tools. Under mount clip...
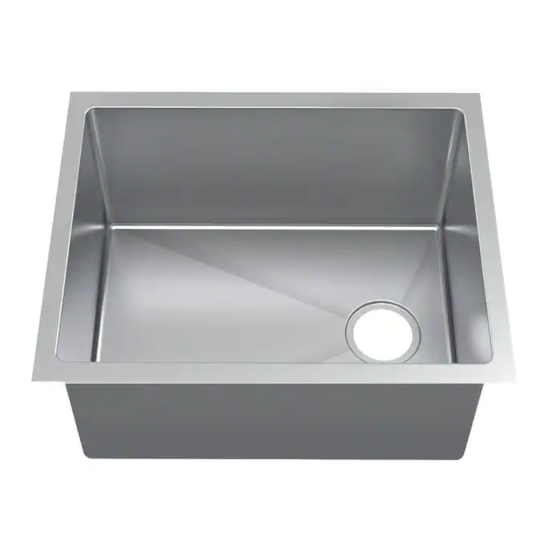
- Page 4 NOTE: The manual only displays the assembly for double bowl sink, but the assembly instruction is including but not limited to below SKU & configuration. SKU# Model# Bowls Picture 1005403623 VUR2318A1 Single 1005403616 VUR3118A1 Single 1005403614 VUR3118A0 Double Single FSUR2718B1...
- Page 5 Part Description Quantity Topmount/Undermount template Faucet...
- Page 6 Part Description Quantity Topmount/Undermount template Faucet...
- Page 7 Part Description Quantity Topmount/Undermount template Faucet...
- Page 8 Part Description Quantity Topmount/Undermount template Faucet...
- Page 9 Part Description Quantity Topmount/Undermount template Faucet...
- Page 10 Part Description Quantity Topmount/Undermount template Faucet...
- Page 11 Undermount Installation WARNING When you choose undermount style installation, please do not pull out the installation rail shown in this illustration. This will cause the sink to be damaged beyond repair.It is strongly recommended that you use a professional installer is you choose the undermount installation.
- Page 12 Undermount Installation (continued) Place the mounting clips as shown in the attched template and mark the centers of the clip on the countertop. Installing the strainer assembly Attaching the mounting clips step 3. HOMEDEPOT.COM/GLACIERBAY...
- Page 13 Undermount Installation (continued) Installing the faucet assembly Securing the faucet assembly From underneath the sink, secure the faucet assembly CAUTION: Always shut off the water supply before removing an existing faucet or replacing any part of a to the sink with the FastmountTM system (21). Push faucet.
- Page 14 Undermount Installation (continued) Attaching the quick connector Installing the weight to the receiving block Install the weight clip (20) at the point of the hose marking Push the quick connector (18) firmly upward and attach it "weight here”. Insert the weight (19) onto the clip (20) by sliding it down to the receiving block (9).
- Page 15 Undermount Installation (continued) Removing the quick connector If it is necessary to remove the quick connector (1), squeeze the tabs (2) on the quick connector and then pull down to disconnect. Squeeze Pull down Topmount Installation (continued) Installing the soap dispenser Making the wa Making the wa Making the wa...
- Page 16 y connections y connections y connections y connections supply connections supply connections supply connections supply connections cated by a label. Avoid cated by a label. Avoid tube is indicated by a label. Avoid tube is indicated by a label. Avoid cated by a label.
-
Page 17: Service Parts
Service Parts Faucet ID tags can be found on the hot water inlet Part Description Part Number Screener ST-001 Part Description Part Number Part Description Part Number bowls ST-002 Spray head and Hose RP38451* O-ring RP60002 Strainer Ring ST-003 Inverter RP70715 Quick connect Rubber washer... - Page 18 , Monday-Friday...
-
Page 19: Guía De Uso Y Cuidado
Lunes a viernes de 8:00 a.m. – 7:00 p.m., EST y los sábados de 9:00 a.m. – 6:00 p.m., EST. 1-855-HDGLACIER HOMEDEPOT.COM/GLACIERBAY GRACIAS continuamente para crear productos de calidad diseñados para mejorar su hogar. Visítenos en línea para ver nuestra línea completa de productos disponibles para sus necesidades de mejoramiento del hogar. ¡Gracias por elegir Glacier Bay! V1-TU-6... -
Page 20: Información De Seguridad
Los productos de Glacier Bay se fabrican con estándares y mano de obra de calidad superior y están respaldados por nuestra garantía limitada de por vida. Los productos de Glacier Bay están garantizados al comprador original de estar libre de defectos en materiales o mano de obra. - Page 21 Preinstalación PLANIFICACIÓN DE LA INSTALACIÓN Antes de la instalación, compruebe el espacio libre del armario: presenta cualquier defecto o daño, incluyendo abolladuras, combaduras, irregularidades o marcas de rozaduras. Si nota algún daño o piezas 1-855-HD-GLACIER or visit www.HomeDepot.com/GLACIERBAY. faltantes, no proceda con la instalación. 1-855-HD-GLACIER or visit www.HomeDepot.com/GLACIERBAY.
-
Page 22: Contenido Del Paquete
Preinstalación (continuación) CONTENIDO DEL PAQUETE NOTA: entre otras, las siguientes SKU y configuración. SKU# Modelo# Bochas Imagen 1005403623 VUR2318A1 Soltero 1005403616 VUR3118A1 Soltero 1005403614 VUR3118A0 Doble Soltero FSUR2718B1 Soltero FSUR3619A1 Doble FSUR3619A0 NOTA: haga coincidir su producto comprado para las páginas siguientes. - Page 23 Preinstalación (continuación) CONTENIDO DEL PAQUETE Pieza Descripción Cantidad Fregadero Plantilla para la instalación por arriba/por abajo Rejilla Cuba Anillo de drenaje Arandela de goma Arandela de papel Contratuerca Junta plástica Tuerca de conexión Rejilla del fregadero Conjunto del grifo HOMEDEPOT.COM/GLACIERBAY Póngase en contacto con 1-855-HDGLACIER para obtener más asistencia.
- Page 24 Preinstalación (continuación) CONTENIDO DEL PAQUETE Pieza Descripción Cantidad Fregadero Plantilla para la instalación por arriba/por abajo Rejilla Cuba Anillo de drenaje Arandela de goma Arandela de papel Contratuerca Junta plástica Tuerca de conexión Rejilla del fregadero Conjunto del grifo HOMEDEPOT.COM/GLACIERBAY Póngase en contacto con 1-855-HDGLACIER para obtener más asistencia.
- Page 25 Preinstalación (continuación) CONTENIDO DEL PAQUETE Pieza Descripción Cantidad Fregadero Plantilla para la instalación por arriba/por abajo Rejilla Cuba Anillo de drenaje Arandela de goma Arandela de papel Contratuerca Junta plástica Tuerca de conexión Rejilla del fregadero Conjunto del grifo HOMEDEPOT.COM/GLACIERBAY Póngase en contacto con 1-855-HDGLACIER para obtener más asistencia.
- Page 26 Preinstalación (continuación) CONTENIDO DEL PAQUETE Pieza Descripción Cantidad Fregadero Plantilla para la instalación por arriba/por abajo Rejilla Cuba Anillo de drenaje Arandela de goma Arandela de papel Contratuerca Junta plástica Tuerca de conexión Rejilla del fregadero Conjunto del grifo HOMEDEPOT.COM/GLACIERBAY Póngase en contacto con 1-855-HDGLACIER para obtener más asistencia.
- Page 27 Preinstalación (continuación) CONTENIDO DEL PAQUETE Pieza Descripción Cantidad Fregadero Plantilla para la instalación por arriba/por abajo Rejilla Cuba Anillo de drenaje Arandela de goma Arandela de papel Contratuerca Junta plástica Tuerca de conexión Rejilla del fregadero Conjunto del grifo HOMEDEPOT.COM/GLACIERBAY Póngase en contacto con 1-855-HDGLACIER para obtener más asistencia.
- Page 28 Preinstalación (continuación) CONTENIDO DEL PAQUETE Pieza Descripción Cantidad Fregadero Plantilla para la instalación por arriba/por abajo Rejilla Cuba Anillo de drenaje Arandela de goma Arandela de papel Contratuerca Junta plástica Tuerca de conexión Rejilla del fregadero Conjunto del grifo HOMEDEPOT.COM/GLACIERBAY Póngase en contacto con 1-855-HDGLACIER para obtener más asistencia.
- Page 29 Undermount Installation Instalación por abajo Undermount Installation WARNING When you choose undermount style installation, please do not pull out the installation rail shown in this illustration. This will cause the sink to be damaged beyond repair.It is strongly recommended that you use a professional installer is you choose ADVERTENCIA: Cuando escoja la instalación por abajo, no desprenda los rieles de instalación que se the undermount installation.
- Page 30 Undermount Installation (continued) Instalación por abajo (continuación) Preparación del fregadero Colocar el fregadero debajo del hueco cortado de la encimera; y comprobar que el hueco es apropiado para el fregadero; ajustar el corte si es necesario. Coloque un soporte debajo del fregadero para facilitar la instalación y evitar que se caiga. Place the mounting clips (not included) as shown in the attched template and mark the centers of the clip on the countertop.
- Page 31 Instalación por abajo (continuación) Instalación del fregadero Aplicar un cordón de silicona alrededor del perímetro de la parte superior del fregadero. Situar y alinear el hueco debajo de la encimera del fregadero. Una vez que el fregadero esté en la posición correcta, instalar las presillas de montaje (no incluidas). Apretar las presillas de montaje hasta que el borde del fregadero esté...
- Page 32 Instalación por abajo (continuación) Installation (continued) Installation (continued) Installation (continued) Installation (continued) Colocación del conector rápido Flushing and checking for leaks Instalación del peso Attaching the quick connector Attaching the quick connector Attaching the quick connector Attaching the quick connector to Installing the weight Instalar la presilla del peso (20) en el punto de la manguera IMPORTANT: After installation is completed, turn on the...
-
Page 33: Instalación De La Rejilla
Instalación por abajo (continuación) Removing the quick connector Instalación de la rejilla Extracción del conector rápido If it is necessary to remove the quick connector (1), Si es necesario extraer el conector rápido (1), apriete las Cuando termine, coloque las rejillas del fregadero (K) en el fregadero. squeeze the tabs (2) on the quick connector and then pestañas (2) del conector rápido y luego jale hacia abajo pull down to disconnect. -
Page 34: Cuidado Y Limpieza
Cuidado y limpieza Se recomienda una limpieza diaria y regular para eliminar la suciedad y evitar manchas. Utilice detergente líquido para vajilla, agua y una esponja suave de uso doméstico. de acero inoxidable del fregadero, enjuague con agua y limpie el fregadero con un paño suave y seco. Secar el fregadero evitará las manchas de agua causadas por el contacto con el agua. - Page 35 Service Parts Service Parts Service Parts Repuestos Service Parts Service Parts Service Parts Las etiquetas de Faucet ID tags can Faucet ID tags can Faucet ID tags can identificación del be found on the hot be found on the be found on the grifo se encuentran water inlet hot water inlet...
- Page 36 ¿Tiene preguntas o problemas, o le faltan piezas? Antes de devolver a la tienda, llame al servicio de atención al cliente de Glacier Bay Lunes a viernes de 8:00 a.m. – 7:00 p.m., EST y los sábados de 9:00 a.m. – 6:00 p.m., EST.
Need help?
Do you have a question about the VUR2318A1 and is the answer not in the manual?
Questions and answers