
Related Manuals for Glacier bay QL050


Summary of Contents for Glacier bay QL050
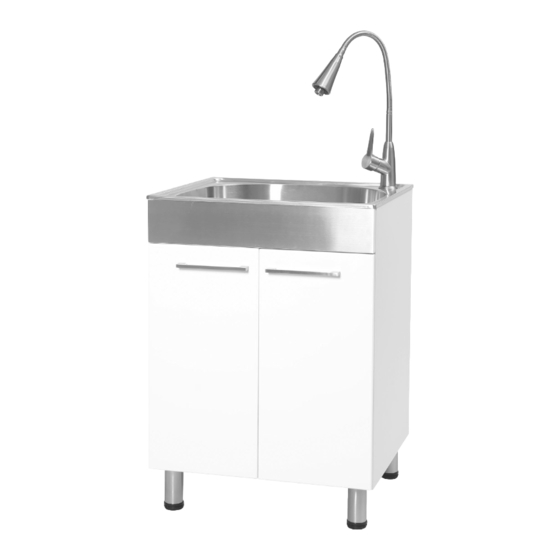
- Page 1 All-in-one apron style laundry sink and cabinet Évier et armoire de buanderie tout-en-un de style tablier # QL050 Owner’s Manual Manuel de l’utilisateur...
-
Page 2: Table Of Contents
. 4 . Protect the entire surface during installation . 5 . All holes drilled into the unit must be done from the finished surface side with extreme care and caulked very carefully to form a watertight barrier . QL050... -
Page 3: Warranty
Warranty LIFETIME LIMITED WARRANTY A thorough inspection must be made before installation and any damage must be promptly reported . We will not be liable for failures or damage that could have been discovered or avoided by proper inspection and testing prior to installation . We warrant this product to be free from defects in materials or workmanship for as long as the original consumer purchaser owns this product . -
Page 4: Pre-Installation
Pre-Installation TOOLS/MATERIALS REQUIRED (NOT SUPPLIED) Adjustable Needle nose Phillips wrench pliers screwdriver Utility knife Pipe wrench Sealant Carpenter’s level Hacksaw Safety gloves Safety goggles Masking Tape PARTS REQUIRED (NOT SUPPLIED) P-Trap Tail Pipe Supply Line QL050... -
Page 5: Package Contents
Pre-Installation (continued) PACKAGE CONTENTS Part Description Quantity Cabinet Faucet Door Handles Leveling Legs Utility Sink Strainer Assembly Strainer Basket Handle Screws Leveling Leg Screws HOMEDEPOT .COM/GLACIERBAY Please contact 1-855-HD-GLACIER for further assistance . -
Page 6: Installation
4 . Connect the plastic flange and tail pipe (not supplied), then thread the connecting nut through the tail pipe and plastic flange up to the lower threaded part of the strainer body . Tighten the connecting Rubber nut by hand . gasket Friction washer Locknut QL050... -
Page 7: Door Handle Installation
Installation (continued) INSTALLING THE LEVELING LEGS CAUTION: Do not place side load on the leveling legs when righting the cabinet as they may break . Carefully check the utility sink for damage and/or missing parts prior to installation . If there is any damage or if you are missing parts, do not proceed with the installation . -
Page 8: Door Position Adjustment
2 . Ease the utility sink (E) into the cabinet (A) . Ensure that it is placed evenly and is centered on the cabinet . Wipe off any excess sealant . Use masking tape to hold the basin in place until the sealant dries . QL050... -
Page 9: Placement
Installation (continued) PLACEMENT Move the assembled unit to its final location. Final hook up of the supply lines and drain system can now be completed. SUPPLY LINES (NOT INCLUDED) The supply lines that attach the faucet to the household water system, are not supplied with this unit . They need to be purchased separately . -
Page 10: Care And Cleaning
) . Always rub the surfaces in the direction of the grain of the steel . When finished, rinse the sink with water and dry it with a towel to allow the sink to form a protective outer layer. This procedure can also be used to renew all of the surfaces of the sink . QL050... -
Page 11: Service Parts
Service Parts If you are missing parts or if you require replacement parts, please contact our customer service team at 1-855-HD-GLACIER, 8:00 am - 6 pm, EST, Monday–Friday . Identify the required part(s) and have the part number(s) ready . Part Description Code Quantity... - Page 12 4 . Protèger la surface lors de l’installation . 5 . Tous les trous forés dans l’unité doivent être effectuées à partir du côté de la surface finie avec un soin extrême et très soigneusement calfeutrés pour former une barrière étanche à l’eau . QL050...
-
Page 13: Garantie
Garantie GARANTIE À VIE LIMITÉE Inspecter minutieusement le produit avant l’installation et signaler tout dommage sans délai . Nous ne serons pas responsables des défaillances ou des dommages qui auraient dû être découverts ou évités par une inspection adéquate et des essais avant l’installation . Nous garantissons ce produit contre tout défaut dans les matériaux ou la fabrication, aussi longtemps que le consommateur/acheteur original sera propriétaire de ce produit . -
Page 14: Préinstallation
OUTILS/MATÉRIAUX REQUIS (NON INCLUS) Tournevis Clé Pinces Phillips Couteau à lame Clé à molette Mastic retractable Gants de Niveau à bulle Scie à métaux sécurité Lunettes de Ruban sécurité Cache PIÈCES REQUISES (NON INCLUS) Tuyau de Tuyaux Siphon-P vidange d’alimentation QL050... -
Page 15: Contenu De L'emballage
Préinstallation (suite) CONTENU DE L’EMBALLAGE Pièce Description Quantité Armoire Robinet Poignées de porte Pattes de nivellement Évier utilitaire Assemblage de la crépine Panier de crépine Vis des poignées de porte Vis des pattes de nivellement HOMEDEPOT .COM/GLACIERBAY Veuillez appeler au 1-855-HD-GLACIER pour toute assistance supplémentaire. -
Page 16: Installation
à travers le tuyau de vidange et la bride en plastique jusque la partie inférieure Joint en filetée du corps de la crépine. Serrer l’écrou de raccordement caoutchouc à la main . Rondelle de friction Contre-écrou QL050... - Page 17 Installation (suite) INSTALLATION DES PATTES DE NIVELLEMENT ATTENTION : Ne pas placer de charge latérale sur les pattes lorsque vous redressez l’armoire. Vérifiez soigneusement que l’unité ne comporte aucun dommage ou pièces manquantes. Si vous constatez des dommages ou des pièces manquantes, veuillez communiquer avec le service à...
-
Page 18: Ajustement De La Position Des Portes
2 . Introduire l’évier (E) sur l’armoire (A) en vous assurant que celui-ci soit de niveau et centré sur le meuble . Essuyer l’excès de mastic . Utiliser du ruban-cache pour maintenir la cuve en place jusqu’à ce que le mastic soit solidifié. QL050... -
Page 19: Mise En Place
Installation (suite) MISE EN PLACE Déplacer l’unité assemblée à l’emplacement final. Si nécessaire niveler l’unité en ajustant les pieds de nivèlement. ASSEMBLAGE DES TUYAUX D’ALIMENTATION Les tuyaux d’alimentation qui raccordent le robinet au système d’eau résidentiel ne sont pas fournis avec cette unité . Ils doivent être achetés séparément . -
Page 20: Soin Et Nettoyage
Lorsque vous avez terminé, rincez l’évier avec de l’eau et essuyez-le à l’aide d’une serviette pour permettre qu’une couche externe protectrice se forme. Vous pouvez également utiliser cette procédure pour redonner à toutes les surfaces de l’évier leur éclat. QL050... -
Page 21: Pièces De Rechange
Pièces de rechange Si des pièces sont manquantes ou si vous avez besoin de pièces de rechange, veuillez nous contacter au 1-855-HD-GLACIER, lundi au vendredi, 8h à 18h, HNE. Veuillez identifier les pièces nécessaires et ayez les codes à portée de la main. Pièce Description Code... - Page 22 Questions, problems, missing parts? Before returning to the store, call Customer Service 8:00 am - 6:00 pm, EST, Monday - Friday Questions, problèmes, pièces manquantes? Avant de retourner au magasin, contactez le service à la clientèle Lundi au vendredi, 8h00 à 18h, H.N.E. 1-855-HD-GLACIER HOMEDEPOT.COM/GLACIERBAY Retain this manual for future use.
Need help?
Do you have a question about the QL050 and is the answer not in the manual?
Questions and answers