
Related Manuals for Glacier bay QK011


Summary of Contents for Glacier bay QK011
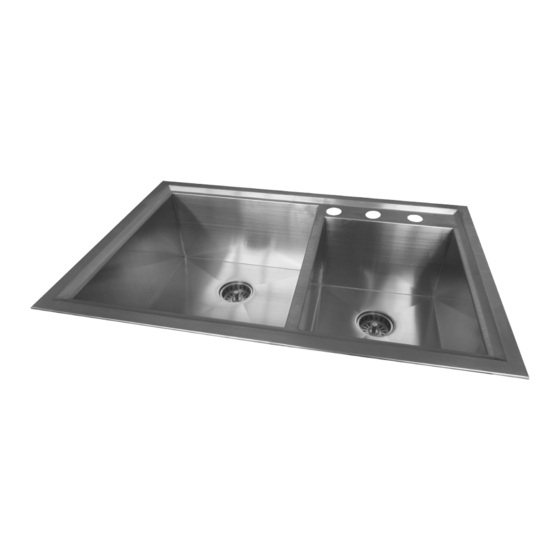
- Page 1 Stainless Steel Offset Dual-Bowl Sink Fregadero con dos cubetas de diferente tamaño de acero inoxidable #1000839188 #QK011 Owner’s Manual | Guía de uso...
-
Page 2: Table Of Contents
If you have any questions, contact the manufacturer . 3 . Installation work and plumbing must be done by qualified person(s) in accordance with all applicable codes and standards . 4 . Protect the entire surface during installation . QK011... -
Page 3: Warranty
Warranty ONE YEAR LIMITED WARRANTY A thorough inspection must be made before installation and any damage must be promptly reported . We will not be liable for failures or damage that could have been discovered or avoided by proper inspection and testing prior to installation . We warrant this product to be free from defects in materials or workmanship for one (1) year from the date of purchase . -
Page 4: Pre-Installation
1 in . (25 .4 mm) hole saw Flathead Silicone Sealant Pencil screwdriver Hacksaw Thread Seal Safety gloves Safety goggles PARTS REQUIRED (NOT SUPPLIED) NOTE: Plastic Connecting Tail pipe (2) Supply lines flange (2) nut (2) Parts not shown to actual size. QK011... -
Page 5: Package Contents
Pre-Installation (continued) PACKAGE CONTENTS Part Description Quantity Sink Mounting Template Stainless Steel Sink Vanishing Edge™ Strainer Strainer Assembly Topmount Clips Undermount Clips Garbage Disposer Adaptor Rubber Ring HOMEDEPOT .COM/GLACIERBAY Please contact 1-855-HD-GLACIER for further assistance . -
Page 6: Installation
- Make sure the template (1A) is parallel to the front of the counter . Setback Tape 3 1/2 - 4 in. (89 mm - 102 mm) Undermount installation QK011... - Page 7 Installation (continued) TESTING THE FIT OF THE SINK DRILLING THE HOLES FOR THE UNDERMOUNT CLIPS - Place the sink (A) underneath the cut-out in the counter to test its fit. Ensure that the reveal is equal on all four sides CAUTION: Always wear safety goggles and gloves when when viewed from above .
-
Page 8: Tm Strainer
SUPPLY LINES (NOT INCLUDED) The supply lines, which connect the faucet to the household water system, are not supplied with this unit . They need to be purchased separately . Follow the supply line manufacturer’s instructions for proper installation . QK011... -
Page 9: Topmount
Installation (continued) TOPMOUNT INSTALLATION PREPARING THE AREA CUTTING THE COUNTER NOTE: CAUTION: Always wear safety goggles and gloves when Topmount sinks are dropped into the counter from above. If you are using power tools to prevent personal injury . installing an undermount sink, please see “undermount installation”. Sink template (1A) shows cut-lines for both undermount and topmount installations. - Page 10 SUPPLY LINES (NOT INCLUDED) The supply lines, which connect the faucet to the household water system, are not supplied with this unit . They need to be purchased separately . Follow the supply line manufacturer’s instructions for proper installation . QK011...
-
Page 11: Installing The Garbage Disposer (Optional)
Installation (continued) INSTALLING THE VANISHING EDGE™ STRAINERS NOTE: If you are installing a garbage disposer (not supplied), do not install the strainer. Included with this item is a garbage disposer adaptor. This will replace the flange from your garbage disposer. Install the garbage disposer according to the manufacturer’s installation instructions replacing the flange for the adaptor. -
Page 12: Care And Cleaning
) . Always rub the surfaces in the direction of the grain of the steel . When finished, rinse the sink with water and dry it with a towel to allow the sink to form a protective outer layer. This procedure can also be used to renew all of the surfaces of the sink . QK011... -
Page 13: Service Parts
Service Parts If you are missing parts or if you require replacement parts, please call our customer service team at 1-855-HD-GLACIER, 8:00 am - 7:00 pm, EST, Monday - Friday, 9:00 am - 6:00 pm, EST, Saturday . Identify the required part(s) and have the part number(s) ready . Part Description Code Quantity... -
Page 14: Guía De Uso
3 . La instalación debe cumplir con todos los códigos locales de fontanería. Solicite los servicios de un instalador calificado para realizar o aprobar la instalación. 4 . Proteja la superficie total del producto durante la instalación para evitar daños . QK011... -
Page 15: Garantía
Garantía GARANTÍA LIMITADA DE UN AÑO Debe hacerse una inspección a conciencia antes de la instalación y cualquier daño debe ser reportado inmediatamente . No seremos responsables de las fallas o daños que pudieran haberse descubierto o evitado con una inspección y pruebas adecuadas antes de la instalación . Garantizamos este producto contra todo defecto en los materiales o en la fabricación, durante un (1) año. -
Page 16: Preinstalación
Desarmador plano silicona Guantes de Sierra de mano Cinta adhesiva seguridad Gafas de seguridad PIEZAS REQUERIDAS (NO SUMINSTRADAS) NOTA: Líneas de Tuerca de Tubo final (2) Brida plástica (2) Las piezas no se muestran al conexión (2) alimentación tamaño real. QK011... -
Page 17: Contenido Del Paquete
Preinstalación (continuación) CONTENIDO DEL PAQUETE Pieza Descripción Cantidad Plantilla para montaje Fregadero de acero inoxidable Colador sin bridas Conjunto de colador Presillas de montaje superficial Presillas de montaje inferior Adaptador del triturador de basura Empaquetadura de goma HOMEDEPOT .COM/GLACIERBAY Por favor, llamé al 1-855-HD-GLACIER para obtener más ayuda . -
Page 18: Instalación
. - Procure que la plantilla (1A) quede paralela a la parte delantera de la encimera . Cinta Distancia lateral: adhesiva 3 1/2 - 4 pulgadas (89 mm - 102 mm) Montaje inferior QK011... - Page 19 Instalación (continuación) CÓMO PROBAR EL ENCAJE DEL FREGADERO CÓMO PERFORAR LOS ORIFICIOS PARA LOS GANCHOS DE MONTAJE INFERIOR - Coloque el fregadero (A) debajo del corte de la encimera para probar su encaje . Procure que el mochete sea igual en los PRECAUCIÓN: Use guantes y gafas de seguridad en cuatro lados, cuando se lo ve desde arriba .
- Page 20 Las líneas de abastecimiento, que conectan el grifo al suministro de agua de la casa, no vienen incluidos con en esta unidad . Se compran por separado . Siga las instrucciones del fabricante para instalar las líneas de abastecimiento de manera adecuada . QK011...
-
Page 21: Montaje Superficial
Instalación (continuación) MONTAJE SUPERFICIAL NOTA : PRECAUCIÓN: Use guantes y gafas de seguridad en Los fregaderos superficiales se colocan en la encimera desde arriba. todo momento para evitar lesiones personales . Si está instalando un fregadero bajo encimera, consulte la sección correspondiente a “montaje inferior”. - Page 22 Las líneas de abastecimiento, que conectan el grifo al suministro de agua de la casa, no vienen incluidos con en esta unidad . Se compran por separado . Siga las instrucciones del fabricante para instalar las líneas de abastecimiento de manera adecuada . QK011...
-
Page 23: Cómo Instalar El Colador Sin Bridas
Instalación (continuación) CÓMO INSTALAR EL COLADOR NOTA: Si va a instalar un triturador de basura (no suministrado), no instale el colador. Pase a la sección siguiente, incluido con este artículo está el adaptador de Conglom Kitchen & Bath. Éste reemplazará el borde de el triturador de basura. -
Page 24: Cuidado Y Limpieza
(p . ej ., Barkeeper’s Friend terminar, enjuague el lavabo con agua y séquelo con una toalla, para permitir que se forme en él una capa protectora exterior . El mismo procedimiento puede usarse para renovar todas las superficies del lavabo. QK011... -
Page 25: Piezas De Repuesto
Piezas de repuesto Si requiere de una pieza faltante o de repuesto, por favor contacte: 1-855-HD-GLACIER, 8 a 19 horas, hora del este, lunes a viernes, 9:00 a .m . - 6:00 p .m ., hora del este, sábado. Identifique la(s) parte(s) requerida(s) y tenga el número(s) de pieza a la mano. Pieza Descripción Código... - Page 26 Questions, problems, missing parts? ¿Preguntas, problemas, piezas faltantes? Before returning to the store, call Customer Service, 8:00 am - 7:00 pm, EST, Monday - Friday, 9:00 am - 6:00 pm, EST, Saturday Antes de devolver el producto a la tienda, llame al Servicio al cliente 8 a 19 horas, hora del este, lunes a viernes, 9:00 a.m.
Need help?
Do you have a question about the QK011 and is the answer not in the manual?
Questions and answers