
Related Manuals for Thermo Scientific Dionex

Summary of Contents for Thermo Scientific Dionex
- Page 1 Dionex Integral Process Analytical Systems Operator’s Manual Document No. 065250 Revision 06 March 2020...
- Page 2 Revision 03 released January 2012; Thermo Fisher Scientific transition Revision 04 released October 2012; new part numbers assigned Revision 05 released May 2018; references to Velcro and Dionex Reference Library removed; manufacturing location and Dionex Technical Support phone number updated Revision 06 released March 2020;...
-
Page 3: Table Of Contents
1.1.3 Dionex Integral System Control ......4 Dionex Integral System Operator’s Manual ..... . 6 Related Documentation . - Page 4 Dionex Integral Systems Operator’s Manual 3 • SP Sample Preparer Description ....19 SP Overview ..........19 SP Enclosures .
- Page 5 Contents 3.12 DC Voltage Control (Option) ....... . 56 3.13 PWM Power Output (Option) ....... . 57 4 •...
- Page 6 7.2.6 Set Up the Dionex Integral Analyzers in Chromeleon 7 PA . . .91 Routine Startup and Operation ....... .92 7.3.1...
- Page 7 Contents Shutdown ..........93 7.4.1 Short-Term Shutdown .
- Page 8 Dionex Integral Systems Operator’s Manual 10.6 Replacing the Waste Valve Seal ......132 10.7 Accessing the Main SP Electronics Board .
- Page 9 Contents C • TTL and Relay Installation Instructions ..151 Installing the SP TTL and Relay Kit ......152 C.1.1 Overview .
- Page 10 Dionex Integral Systems Operator’s Manual E • Peristaltic Pump Kit Installation Instructions ..........183 Overview .
- Page 11 Contents G.2.2 Vial Cooler Installation Procedure ..... 198 Installing the Heated Dilution Vessel ......199 G.3.1 Overview .
- Page 12 Dionex Integral Systems Operator’s Manual Doc. 065250-06 03/2020...
-
Page 13: Introduction
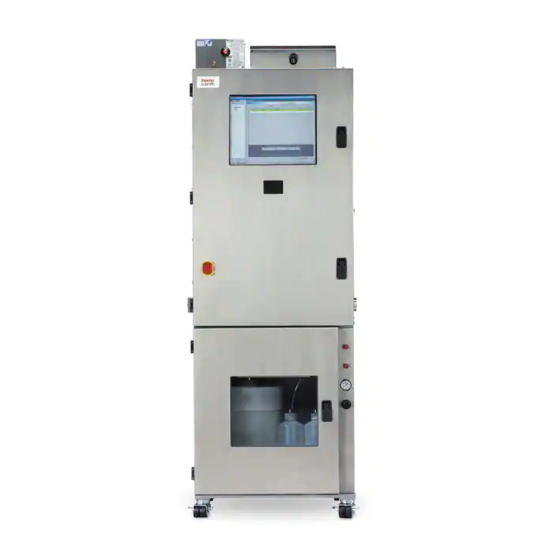
A system typically contains an analytical pump, a detector, and an SP Sample Preparer. A Dionex Integral analyzer consists of from one to four systems combined to operate in parallel. The analyzer is configured to sequentially monitor up to 21 samples. - Page 14 Dionex Integral Systems Operator’s Manual AE Analyzer Enclosure Chromeleon 7 Process Analyzer Computer Dionex ICS-6000 Dual Pump Dionex ICS-6000 Eluent Generator Dionex ICS-6000 Detector/ Chromatography Module SP Sample Preparer LE Liquids Enclosure Figure 1-1. Example Dionex Integral System Doc. 065250-06 03/2020...
-
Page 15: Dionex Integral System Components
1 • Introduction 1.1.1 Dionex Integral System Components The Dionex Integral Process Analytical Systems product line includes the following components: • AE Analyzer Enclosure • LE Liquids Enclosure • SP Sample Preparer • SS Stream Selector AE Analyzer Enclosure The AE provides the liquid and gas connections, electrical connections, electrical emissions shielding, and environmental protection often needed in a process environment. -
Page 16: Chromatography Systems Supported
Dionex Integral Systems Operator’s Manual 1.1.2 Chromatography Systems Supported The following systems can be configured in a Dionex Integral system: • ™ ™ Thermo Scientific Dionex ICS-6000 Ion Chromatography Systems • ™ ™ ™ Thermo Scientific Dionex UltiMate 3000 Rapid Separation (RS) HPLC Systems •... - Page 17 1 • Introduction Figure 1-2. Example Analyzer Configuration Doc. 065250-06 03/2020...
-
Page 18: Dionex Integral System Operator's Manual
Dionex Integral Systems Operator’s Manual Dionex Integral System Operator’s Manual The electronic version of the Dionex Integral system operator’s manual is an ® Adobe PDF (Portable Document Format) file. The file contains numerous links that you can click to go to other locations within the manual. These links include: •... - Page 19 Appendix A Lists specifications and installation site Specifications requirements for the Dionex Integral system. Appendix B Lists spare parts for the Dionex Integral system. Reordering Information Appendix C Provides instructions for installing TTL and TTL and Relay relay control functions in the SP and AE.
-
Page 20: Related Documentation
™ Dionex UltiMate 3000 RS and SD series module manuals Consumable Product Documentation For information about Dionex columns, suppressors, EluGen cartridges, and other consumable products, refer to the appropriate product manual. Software Documentation Additional software documentation includes the following: •... -
Page 21: Safety Information
Dionex Integral systems are designed for IC (ion chromatography) and HPLC (high-performance liquid chromatography) applications and should not be used for any other purpose. Operation of a Dionex Integral system in a manner not specified by Thermo Fisher Scientific may result in personal injury. - Page 22 Dionex Integral Systems Operator’s Manual Indicates that the function or process of the instrument may be impaired. Operation does not constitute a hazard. Messages d'avertissement en français Signale une situation de danger immédiat qui, si elle n'est pas évitée, entraînera des blessures graves à mortelles.
-
Page 23: Safety Symbols
1 • Introduction 1.4.2 Safety Symbols These symbols appear on Dionex Integral modules or on labels affixed to Dionex Integral modules. Symbol Meaning Alternating current Primary protective conductor terminal Secondary protective conductor terminal Power supply is on Power supply is off Indicates a potential hazard. -
Page 24: Notice On Lifting And Handling Of Thermo Scientific
Instruments For your safety, and in compliance with international regulations, the physical handling of this Thermo Scientific instrument requires a team effort to lift and/or move the instrument. This instrument is too heavy and/or bulky for one person alone to handle safely. -
Page 25: Weee Compliance
1 • Introduction 1.5.4 WEEE Compliance This product is required to comply with the European Union’s Waste Electrical & Electronic Equipment (WEEE) Directive 2012/19/EU. It is marked with the following symbol: This symbol indicates that the equipment must not be thrown into general waste and should be collected separately and processed in accordance with local and state requirements. -
Page 26: Safety Practices
Dionex Integral Systems Operator’s Manual Instrumente mit diesem Zeichen sind nicht für den normallen Abfall bestimmt; Entsorgung soll den lokalen Vorschriften entsprechend ausgeführt werden. 1.5.5 Safety Practices General Precautions • Periodically check all liquid lines for leaks. Clean up spills appropriately and use DI (deionized) water to rinse dried reagents off system components. - Page 27 Use only approved regulators and tubing connections of the appropriate material and purity. • The Dionex Integral system does not use any potentially poisonous or injurious gases. If such gases are used by other devices in the system, be sure to follow all necessary safety practices.
- Page 28 Dionex Integral Systems Operator’s Manual Doc. 065250-06 03/2020...
-
Page 29: Dionex Integral System Configurations
2 • Dionex Integral System Configurations The modular design of Dionex Integral Process Analytical Systems allows you to configure a Dionex Integral system that meets your sampling, analytical, and environmental requirements. This chapter describes two of the most common configurations of analytical system modules, sampling modules, and enclosures that make up a Dionex Integral system. - Page 30 Dionex Integral Systems Operator’s Manual Figure 2-2. Example Dionex Integral System Configuration: UltiMate 3000 System, AE, and Internal SP Doc. 065250-06 03/2020...
-
Page 31: Sp Sample Preparer Description
The internal enclosure is installed inside an AE. Any SP version (SP1, SP2, or generic) can be housed in any enclosure type. The type of enclosure required depends on the other modules configured in the Dionex Integral system. Figure 3-1 is an example of an installation with an external enclosure. - Page 32 Dionex Integral Systems Operator’s Manual External SP External SP mounted on AE Figure 3-1. SP Sample Preparer: External Enclosure Installations The SP enclosures are designed for use in nonhazardous locations. The external SP enclosure is designed to meet either NEMA 12 or NEMA 4X requirements, depending on the installation: •...
-
Page 33: Sp Power And Computer Connections
3 • SP Sample Preparer Description NEMA 4X/IP65 Intended for use primarily to provide a Mounted on equivalent degree of protection against corrosion, windblown dust and rain, splashing water, and hose-directed water. Table 3-1. NEMA Enclosure Types (Continued) NOTE The information in this table is not intended to be a complete representation National... - Page 34 Dionex Integral Systems Operator’s Manual inside the AE (see Section 5.3.2). The AE power outlet strip is a grounded receptacle. When the SP is mounted on the side of the AE or installed inside the AE, the AE power cord is the main disconnect device. In addition, the AE main power switch...
-
Page 35: Sp Liquid Leak Sensor And Drain
3 • SP Sample Preparer Description SP Power Switch Figure 3-3. SP Power Switch Software Communication The USB (Universal Serial Bus) receptacle (“B” type connector) (see Figure 3-2) allows connection to the computer on which Chromeleon 7 PA is installed. A USB cable (P/N 960779) is provided in the SP Ship Kit (SP1, P/N 069085;... -
Page 36: Sp Component Descriptions
Dionex Integral Systems Operator’s Manual SP Component Descriptions This section describes the components (valves, dilution vessels, pumps, and so on) that can be installed on an SP panel. To control an installed component, enter commands in a Chromeleon 7 instrument method or use the controls on the SP ePanel in Chromeleon 7. -
Page 37: Dilution Vessels
3 • SP Sample Preparer Description POSITION 1–2 SELECTED Standard in (SP1) From dilution pump Standard or sample in (SP2) Plug (SP1) To waste Waste (SP2) Plug Plug To waste To dilution vessel Loop (1 and 6) Valve Functions for Position 1–2 SP1: Load the standard onto the loop SP2: Load the standard or sample onto the loop... -
Page 38: Dilution Pump
Dionex Integral Systems Operator’s Manual The Mixer Stir Bar Auto-Recovery option on the Pumps/Motors page uses Analog Input 4 to monitor the mixer stir bar. If the stir bar is in an out-of-control state, the mixer motor is stopped briefly and then restarted at a speed 5% slower than before the auto-recovery occurred. -
Page 39: Loading Pumps
3 • SP Sample Preparer Description 3.5.4 Loading Pumps The following types of pumps are available for loading sample to the injection valve: • A stepper motor loading pump (P/N 068561) is standard for an SP1. (This type of pump is used as a dilution pump, also.) •... -
Page 40: Solenoid Valves
Dionex Integral Systems Operator’s Manual • To turn the pump on and off, set the position of the solenoid valve on and off in the Chromeleon 7 instrument method or on the SP ePanel in Chromeleon 7. • To adjust the pump speed, use the potentiometer on the main SP... -
Page 41: Vial Cooler (Option)
3 • SP Sample Preparer Description 3.5.6 Vial Cooler (Option) A vial cooler (P/N 068566) (see Figure 3-10) can be installed on the SP panel (see Section G.2). The cooler temperature can be set to between 4 °C and 15 °C (the default is 4 °C). You can change the temperature of the vial cooler in the Chromeleon Instrument Configuration Manager or... - Page 42 Dionex Integral Systems Operator’s Manual SP1 Component Flow Path Check Valve DI water in Plug Plug Dilution Pump Plug To waste To waste Plug Plug Standard Metering Valve Gauge Regulator To waste Gas in Dilution Pressure Vessel Relief Valve Sample in from...
- Page 43 3 • SP Sample Preparer Description SP1 Component Functions Component Description Function Standard Valve 3-way solenoid valve On: Directs stock standard to metering valve (ST/SV1) (for calibration standard preparation) Off: Stops flow of stock standard Diluent Valve 3-way solenoid valve On: Directs diluent to dilution pump (DI/SV2) Off: Stops flow of diluent...
- Page 44 Dionex Integral Systems Operator’s Manual SP1 Component Layouts Figure 3-13 shows the layout of the SP1 components when they are installed in the vertical orientation. Figure 3-12 shows the layout of the SP1 components when they are installed in the horizontal orientation.
-
Page 45: Sp2 For Dilution Or Direct Injection
3 • SP Sample Preparer Description Check Valve Gas Pressure Regulator Knob Dilution (plug) (plug) Pump Metering Valve plug plug Check Dilution Valve Vessel Loading Pump Figure 3-13. SP1 Component Layout: Horizontal Orientation 3.6.2 SP2 for Dilution or Direct Injection The SP2 configuration is intended for: •... - Page 46 Dionex Integral Systems Operator’s Manual SP2 Component Flow Path Check Valve DI water in Plug Dilution Pump To waste To waste Plug Plug Standard To waste Metering Valve Gauge Regulator To waste Gas in Dilution Pressure Vessel Relief Valve Sample in from...
- Page 47 3 • SP Sample Preparer Description SP2 Component Functions Component Description Valve Position and/or Function Standard Valve 3-way solenoid valve On: Directs stock standard to metering valve (ST/SV1) (for calibration standard preparation) Off: Directs sample to metering valve (for sample dilution) Diluent Valve 3-way solenoid valve On: Directs diluent to dilution pump...
- Page 48 Dionex Integral Systems Operator’s Manual SP2 Component Layouts Figure 3-15 shows the layout of the SP2 components when they are installed in the vertical orientation. Figure 3-16 shows the layout of the SP2 components when they are installed in the horizontal orientation.
- Page 49 3 • SP Sample Preparer Description Check Valve Gas Pressure Regulator Knob Dilution (plug) Pump Metering Valve Dilution Vessel Loading Pump Figure 3-16. SP2 Component Layout: Horizontal Orientation Doc. 065250-06 03/2020...
-
Page 50: Flow Paths And Valve Positions Used During Analyses
Dionex Integral Systems Operator’s Manual 3.6.3 Flow Paths and Valve Positions Used During Analyses This section describes the flow paths and valve positions used to analyze calibration standards, check standards, and sample streams. Flow Paths and Valve Positions for Analyzing Calibration Standards Analyzing a calibration standard consists of three main steps: •... - Page 51 3 • SP Sample Preparer Description Check DI water in Valve Plug Dilution Pump To waste To waste Plug Plug Standard Metering Valve Gauge Regulator To waste Gas in Valve Positions for Standard Analyses: Dilution Pressure Filling the Dilution Vessel Vessel Relief Valve SM/SV4 = Off...
- Page 52 Dionex Integral Systems Operator’s Manual To waste From ME valve Gauge Regulator Gas in Valve Positions for Standard Analyses: Dilution Pressure Loading the Dilution Vessel Contents Vessel Relief Valve ST/SV1 = Off SM/SV4 = Off GAS/SV8 = On SS/SV5 = On ME = 1–2...
- Page 53 3 • SP Sample Preparer Description Flow Path and Valve Positions for Analyzing Check Standards Sample in from From dilution vessel SS Sample Selector wasten DV/SV6 Check Valve To concentrator column on Loading Pump injection valve Valve Positions for Check Standard Analyses To waste SM/SV4 = On ST/SV1 = Off...
- Page 54 Dionex Integral Systems Operator’s Manual Flow Path and Valve Positions for Analyzing Sample Streams From dilution vessel Sample in from SS Sample Selector wasten DV/SV6 Check Valve To concentrator column on Loading Pump injection valve Valve Positions for Sample Stream Analyses...
- Page 55 3 • SP Sample Preparer Description Analyzing a sample stream for dilution with the SP2 consists of three main steps: • Step 1: Filling the loop on the metering valve with sample (see Figure 3-24). • Step 2: Sending the loop contents and deionized water (the diluent) to the dilution vessel.
-
Page 56: Sp Gas And Liquid Input And Output Lines
Dionex Integral Systems Operator’s Manual 3.6.4 SP Gas and Liquid Input and Output Lines Gas and liquid input and output (I/O) lines from the SP components exit through ports on the side of the SP. Figure 3-25 identifies the I/O port assignments for the SP1 and SP2. -
Page 57: Analog Inputs
3 • SP Sample Preparer Description Analog Inputs The main SP electronics board includes four analog inputs. An analog input cable (P/N 070171) is provided in the SP Ship Kit (SP1, P/N 069085; SP2, P/N 069086) for connection of an analog input to an external device. If you need more than one analog input, order additional cables separately. - Page 58 Dionex Integral Systems Operator’s Manual 5. Plug the analog input cable (P/N 070171) into an analog input connector on the main SP electronics board. NOTE Although Analog Input 4 is usually reserved for monitoring of the stir bar in the dilution vessel mixer...
- Page 59 3 • SP Sample Preparer Description To change the position of the Analog Input 4 jumper: 1. Turn off the SP power. 2. Disconnect the power cord. 3. Follow the instructions in Section 10.7 to access the main SP electronics board.
-
Page 60: Sp Ttl And Relay Control (Option)
Dionex Integral Systems Operator’s Manual SP TTL and Relay Control (Option) When the optional SP TTL and Relay Kit (P/N 068573) is installed, the SP provides nine relay outputs and eight TTL inputs. • The relay outputs allow the SP to control actions in other devices (see Section 3.8.1). -
Page 61: Relay Output Control
3 • SP Sample Preparer Description 3.8.1 Relay Output Control The relay outputs are normally open (NO). This means that the relay is open when it is off (not energized) and closed when it is on (energized). The relays can be programmed to switch any low-voltage device. Switched current must be no more than 2 A at 24 Vdc. -
Page 62: Liquid Level Sensor (Option)
Dionex Integral Systems Operator’s Manual For example, you can connect a flow sensor on a sample pipe to one of the TTL inputs. If the sample stops flowing, the sensor signals the TTL and the system bypasses that sample stream. -
Page 63: Flow Sensor (Option)
3 • SP Sample Preparer Description 3.10 Flow Sensor (Option) The optional Flow Sensor Kit (P/N 068564) provides a sensor for measuring the liquid flow rate in a stream. Flow rate readings from the sensor are displayed on the SP ePanel in Chromeleon 7. The sensor can measure flow from 0.2 to 5.0 mL/min. - Page 64 Dionex Integral Systems Operator’s Manual 4. Thread the flow sensor’s cable through the slot in the mounting panel. 5. Follow the instructions in Section 10.7 to access the main SP electronics board. 6. Plug the cable into the connector labeled...
-
Page 65: Pressure Sensor (Option)
3 • SP Sample Preparer Description 12. Save the configuration. 13. Calibrate the flow sensor (see Section 10.10). 3.11 Pressure Sensor (Option) The optional Pressure Sensor Kit (P/N 068567) provides a pressure transducer that can measure pressure from 0 to 6.9 MPa (1000 psi). Pressure reading ... - Page 66 Dionex Integral Systems Operator’s Manual Mounting Panel Pressure Transducer Mounting Plate Figure 3-33. Pressure Transducer 5. Follow the instructions in Section 10.7 to access the main SP electronics board. 6. Locate the connector labeled in the lower-left corner of the main SP...
- Page 67 3 • SP Sample Preparer Description Pressure Sensor Connector Figure 3-34. Main SP Electronics Board: Pressure Transducer Connector 7. Plug the cable into the Pressure connector on the main SP electronics board. 8. Plumb the pressure transducer inlet and outlet ports as required for the application.
-
Page 68: Dc Voltage Control (Option)
Dionex Integral Systems Operator’s Manual 3.12 DC Voltage Control (Option) The DC voltage control option provides an adjustable steady voltage of 0 to 22.65 Vdc, with a DAC output resolution of 16 bits. The option can be used to control a low current (32 mA maximum) voltage-controlled device. -
Page 69: Pwm Power Output (Option)
3 • SP Sample Preparer Description 6. Attach wires to the 2-position connector plug on the other end of the cable. To attach a wire to the plug: Strip the end of the wire, insert it into the plug, and use a screwdriver to tighten the locking screw. When attaching wires to the connector plug, be careful not to allow stray strands of wire to short to an adjoining position on the connector. - Page 70 Dionex Integral Systems Operator’s Manual The current levels can be up to 0.5 A. The PWM power output averages the voltage delivered as a percentage of the controlled range. The PWM power outputs produce a rapid duty cycle of 0 to full- scale voltage for a percentage of time.
- Page 71 3 • SP Sample Preparer Description 5. Plug the PWM power output cable (P/N 070180) into the Mixer/PWM connector on the main SP electronics board. On the other end of the power output cable, attach two wires to the 3-position connector plug.
- Page 72 Dionex Integral Systems Operator’s Manual Doc. 065250-06 03/2020...
-
Page 73: Ss Stream Selector Description
4 • SS Stream Selector Description SS Overview The SS Stream Selector (see Figure 4-1) allows selection of a sample from multiple sample streams. The SS can be configured with up to three stream selection valves, with each valve connected to up to seven sample streams. This allows sampling from one of 7, 14, or 21 streams, depending on the number of valves installed in the SS. - Page 74 Dionex Integral Systems Operator’s Manual selection valves. Sample stream outlet lines connect to outlet ports on the valves and then exit the SS through the side fittings. Refer to the label inside the SS door to identify each stream inlet and outlet line.
-
Page 75: Ss Enclosures
4 • SS Stream Selector Description SS Enclosures The SS is available in two enclosure types: • The external enclosure can be placed on a lab bench or on the floor. It can also be mounted on the side of an AE or on a wall. •... -
Page 76: Ss Power And Computer Connections
Dionex Integral Systems Operator’s Manual SS Power and Computer Connections Receptacles for connecting a power cord and USB cable are on the side of the SS (see Figure 4-3). Fuse Holder Figure 4-3. SS USB and Power Receptacles Fuse Holder and Power Receptacle The fuse cartridge contains two fast-blow IEC 127 fuses rated 3.15 A... - Page 77 4 • SS Stream Selector Description DANGER D'ÉLECTROCUTION—Pour éviter toute électrocution, il faut utiliser une prise de courant avec prise de terre. Ne l'utilisez pas et ne le branchez pas au secteur C.A. sans utiliser de branchement mis à la terre.
-
Page 78: Ss Leak Sensor And Liquid Drain
Dionex Integral Systems Operator’s Manual SS Leak Sensor and Liquid Drain A leak sensor is located inside the SS enclosure in the bottom front of the enclosure (see Figure 4-4). If the sensor becomes wet, it reports a leak to Chromeleon 7 and an error message is displayed in the audit trail. -
Page 79: Ae Analyzer Enclosure Description
5 • AE Analyzer Enclosure Description AE Overview The AE Analyzer Enclosure provides housing for the modules in a Dionex Integral system, including chromatography system modules and Dionex Integral SP and SS enclosures. The AE is designed for use in... -
Page 80: Ae Exterior Features
Dionex Integral Systems Operator’s Manual AE Exterior Features Figure 5-2 shows the exterior of the AE. Computer CPU Cover Computer Monitor Window Touch Pad Emergency Off Switch Figure 5-2. AE Front Exterior Emergency Off Switch The red switch on the AE front door shuts off the power to all... - Page 81 SHOCK HAZARD—A shock hazard exists inside the AE enclosure when the door is opened. Various types of chemicals are used in the Dionex Integral system, depending on the application that is being performed. Follow all appropriate hazardous materials and safety guidelines for chemicals when operating the Dionex Integral system.
-
Page 82: Ae Interior Features
Dionex Integral Systems Operator’s Manual AE Interior Features Figure 5-3 shows the interior features of the AE. Power Outlet Strip Shelves (2) Figure 5-3. AE Interior 5.3.1 Shelves The two shelves inside the AE are on brackets that attach to a rail system. -
Page 83: Power Outlet Strip
The leak sensors in the individual modules inside the AE provide leak detection. If the Dionex Integral system is equipped with an SP, an auxiliary leak sensor (P/N 067728) can be installed in the AE drip tray and connected to the SP electronics. -
Page 84: Ae Power And Computer Connections
Dionex Integral Systems Operator’s Manual AE Power and Computer Connections Power Receptacle The power in receptacle on the top of the AE (see Figure 5-4) provides a connection to the AE main power. Connect the power cord provided in the AE Ship Kit (P/N 069066) from this connector to a grounded, single-phase power source. - Page 85 5 • AE Analyzer Enclosure Description installation. The connections must provide proper grounding of the Dionex Integral system. Power Cord Figure 5-5. AE Power Cord Connected SHOCK HAZARD—If a grounded receptacle is not used, a shock hazard may result. Do not operate or connect to AC power mains without earthed ground connections.
- Page 86 Dionex Integral Systems Operator’s Manual Das Netzkabel ist das wichtigste Mittel zur Stromunterbrechung. Stellen Sie sicher, daß sich die Steckdose nahe am Gerät befindet und leicht zugänglich ist. Main Power Switch The power switch on the power input box (see...
-
Page 87: Ae Ttl And Relay Connectors (Option)
5 • AE Analyzer Enclosure Description additional locations only when the optional Computer Control Installation Kit (P/N 069094) is installed. A USB hub inside the AE connects the chromatography modules installed in the AE to the network. TTL and Relay Connectors (Optional) LAN Receptacle (Optional) -
Page 88: Ae Ventilation Fan (Option)
Dionex Integral Systems Operator’s Manual AE Ventilation Fan (Option) The optional ventilation fan (P/N 068544) can be mounted on the side of the AE. The fan runs continuously unless the AE power is turned off. (The fan is not controlled by Chromeleon 7 PA.) When the fan is installed, the AE meets NEMA 12 requirements. -
Page 89: Ae Purge System (Option)
These temperature set points are designed for optimal performance of the air conditioner/heater. If the set points require adjustment, contact Technical Support for Dionex products for assistance. AE Purge System (Option) When the installation site is a Class 1, Division 2 location requiring intrinsically safe equipment, a purge system is installed in the AE. -
Page 90: Ae Tower Light (Option)
Dionex Integral Systems Operator’s Manual AE Tower Light (Option) When the optional Tower Light Kit (P/N 068549) is installed, a tower with four lights is mounted on the top of the enclosure, on the left-hand side (see Figure 5-9). Tower Light Figure 5-9. - Page 91 5 • AE Analyzer Enclosure Description • In Chromeleon 7 PA, specify a relay to turn on a tower light when a result- based event occurs. For example, have the yellow light turn on if the retention time of the chloride peak exceeds 3.225. •...
- Page 92 Dionex Integral Systems Operator’s Manual Doc. 065250-06 03/2020...
-
Page 93: Le Liquids Enclosure Description
6 • LE Liquids Enclosure Description LE Overview The LE Liquids Enclosure houses mobile phase, standard, and reagent containers. The LE is installed below the AE (see Figure 5-1). For increased stability when the AE includes side-mounted options (SP or air conditioner), an extension must be installed on the LE (see Figure 2-1). -
Page 94: Le Control Panel
Dionex Integral Systems Operator’s Manual LE Control Panel The LE control panel (see Figure 6-1) includes a pressure regulator, a pressure gauge, and knobs for control of the gas pressure. • The pressure gauge indicates the Pressure pressure applied to the reservoirs On/Off and NOWPak containers. -
Page 95: Le Liquid And Gas Connections
6 • LE Liquids Enclosure Description A second, identical control panel can be installed for applications, such as transition metals, that require two gas supplies (one for reagents and one for standards and mobile phases). This prevents cross-contamination between reagents such as nitric acid and ammonium acetate-buffered PAR. LE Liquid and Gas Connections •... - Page 96 Dionex Integral Systems Operator’s Manual Doc. 065250-06 03/2020...
-
Page 97: Startup, Operation, And Shutdown
7.1.1 Prepare the Site and Facilities 1. At the installation site, select the location for the Dionex Integral system components (chromatography system modules, SP, and SS). Refer to Installation Requirements and Customer Responsibilities: Process Analytical Systems (Document No. 070186) for appropriate locations and distances. -
Page 98: Connect The Communications Cables
Initial Startup 7.2.1 Turn On the Power 1. If the Dionex Integral system includes an AE, turn on the main power switch on top of the AE. 2. Turn on the power switches for the other Dionex Integral system components (chromatography system modules, SP, and SS). -
Page 99: Set Up Chromeleon 7 Pa And Configure The System
7 • Startup, Operation, and Shutdown 7.2.2 Set Up Chromeleon 7 PA and Configure the System • For installation instructions for Chromeleon 7 PA, refer to Chromeleon 7.3 Installation Guide (Document No. 7329.0003). • For instructions on how to configure the system, refer to the Chromeleon 7 PA Help. -
Page 100: Install Consumable Components
Dionex Integral Systems Operator’s Manual 7.2.4 Install Consumable Components Install the columns, suppressor (if used), and any other consumable components according to the product manuals. 7.2.5 Calibrate the System Pump Calibration Always calibrate the dilution pump and stepper motor loading pump after replacing any component in the pump flow path that changes the system backpressure, including columns, sample loops, and tubing. - Page 101 7 • Startup, Operation, and Shutdown A standard loop with a nominal volume of 100 L is included with the ME valve. If you need a loop with a different volume, follow the instructions below to make a loop. To calibrate the new loop, follow the instructions that start on page To make a standard loop:...
- Page 102 Dionex Integral Systems Operator’s Manual 6. Using a syringe (P/N 016640) and a luer adapter (P/N 24305), fill the standard loop with deionized water. Do not introduce any air into the loop. 7. Reinstall the plug on the end of the coupler from which the water exited.
-
Page 103: Set Up The Dionex Integral Analyzers In Chromeleon 7 Pa
Detector Calibration Calibrate the detector, if required. Refer to the detector manual for instructions. 7.2.6 Set Up the Dionex Integral Analyzers in Chromeleon 7 PA In Chromeleon 7: • Create instrument methods and processing methods for each Dionex Integral system. -
Page 104: Routine Startup And Operation
Dionex Integral Systems Operator’s Manual Notes • Commands for the SP and SS must be added in the Script Editor view in the Instrument Method Editor. Commands for other Dionex Integral system components can be added in the Instrument Method Wizard. •... -
Page 105: Routine Operation
Shutdown 7.4.1 Short-Term Shutdown Follow these steps to shut down the Dionex Integral analyzer for up to two weeks. 1. In Chromeleon 7 PA, select the analyzer to be shut down. 2. Place the selected analyzer in the standby state. -
Page 106: Long-Term Shutdown
8. Empty standards bottles if stability is questionable. 7.4.2 Long-Term Shutdown Follow these steps to shut down the Dionex Integral analyzer for more than two weeks. 1. In Chromeleon 7 PA, select the analyzer to be shut down. 2. Place the selected analyzer in the standby state. -
Page 107: Maintenance
8 • Maintenance This chapter describes routine maintenance procedures for the Dionex Integral system that users can perform. All other maintenance procedures must be performed by a Technical Support Representative for Dionex products. Establish a routine maintenance program based on the guidelines here, as well as information in the user manuals for other system components (analytical pump, detector, columns, and so on). - Page 108 Dionex Integral Systems Operator’s Manual Component or Feature Action Air and liquid lines Check for leaks or spills. Isolate and repair leaks; clean up spills. Rinse dried chemicals from components with deionized water. Check for crimping; replace damaged lines. All pumps Check for piston seal leaks;...
-
Page 109: Weekly Maintenance
8 • Maintenance Weekly Maintenance Completion time: 30-40 min for a dual-system analyzer Component or Feature Action Standard solutions Prepare new solutions for the check standard and calibration standard. Analytical pump Replace the piston seal wash solution, if used. Record pump pressure when the load/inject valve is in the load position. -
Page 110: Monthly Maintenance
Dionex Integral Systems Operator’s Manual Monthly Maintenance Completion time: 1-2 hrs for a dual-system analyzer Component or Feature Action In-line filters Replace all in-line filters. Guard columns If the eluent pressure increases by 1.4 MPa (200 psi), replace the bed support in the guard column inlet. If the pressure does not return to near the original for this column, replace the guard column. -
Page 111: Troubleshooting
This manual cannot address every possible symptom and failure; however, the techniques discussed here can be applied to problem solving throughout the Dionex Integral system. A solid understanding of system operation is necessary for troubleshooting. -
Page 112: Audit Trail Error Messages
Dionex Integral Systems Operator’s Manual In summary, an effective troubleshooting strategy requires that users: 1. Understand the operation of the entire system. 2. Maintain a maintenance log. 3. Isolate the problem to either the hardware or chemistry. 4. Refer to the troubleshooting and service sections of the appropriate user manual. - Page 113 9 • Troubleshooting The table below lists the most frequently observed error messages and the default severity level of each message. (For most modules, you can change the severity level assigned to a problem whenever appropriate.) For troubleshooting assistance, go to the page indicated in the table. Audit Trail Error Message Default Severity Level...
- Page 114 Dionex Integral Systems Operator’s Manual Audit Trail Error Message Default Severity Level Loading pump stopped or lost more than 20 steps Abort page 112 Mixer motor speed is higher than expected Warning page 112 Pressure offset calibration value is out of range...
- Page 115 9 • Troubleshooting BeginSamplePrep command and/or EndSamplePrep command are specified more than once This error occurs if the sample preparation command block contains more than one beginning and/or ending command. See “Notes” on page 92 more information. To troubleshoot: Remove all duplicate commands from the sample preparation command block.
- Page 116 Dionex Integral Systems Operator’s Manual BeginSPSamplePrep command must occur before any Integral SP Sample Preparation commands This error occurs if an instrument method includes an SP sample preparation command before the sample preparation command block. See “Notes” on page 92 for more information.
- Page 117 2. Turn off the SP power briefly by pressing the SP power switch. 3. Turn on the SP power again and restart the pump flow. 4. If the problem persists, contact Technical Support for Dionex products for assistance. Doc. 065250-06 03/2020...
- Page 118 3. Turn off the SP power briefly by pressing the SP power switch. 4. Turn on the SP power again and restart the pump flow. 5. If the problem persists, contact Technical Support for Dionex products for assistance. Dilution pump lost count This is a warning message only.
- Page 119 9 • Troubleshooting 5. If the problem persists, contact Technical Support for Dionex products for assistance. EndSPSamplePrep command is not specified This error occurs if an instrument method includes a BeginSPSamplePrep command but not an EndSPSamplePrep command. Both commands are required to define a sample preparation command block.
- Page 120 2. If the message reappears, the sensor may need to be replaced. Contact Technical Support for Dionex products for assistance. 3. If the problem persists, contact Technical Support for Dionex products for assistance. Flow sensor 1 offset calibration value is out of range...
- Page 121 To troubleshoot: 1. Review the calibration procedure and then rerun the calibration (see Section 10.10). 2. If the problem persists, contact Technical Support for Dionex products for assistance. Leak sensor 1 wet -or- Leak sensor 2 wet If leaking liquid creates a hazard, stop the leak immediately by turning off the flow at the source.
- Page 122 Dionex Integral Systems Operator’s Manual 2. If you find a leak, tighten fittings (or replace tubing and fittings) as required. See Section 9.3 for detailed troubleshooting of various types of leaks. 3. After fixing the leak, dry the drip tray and leak sensor thoroughly. If the leak sensor is not dry, it will remain activated and will continue to report a leak to the audit trail.
- Page 123 2. Turn off the SP power briefly by pressing the SP power switch. 3. Turn on the SP power again and restart the pump flow. 4. If the problem persists, contact Technical Support for Dionex products for assistance. Loading pump home sensor not detected This error occurs if the loading pump electronics fail to detect when the pump reaches the home position.
- Page 124 3. Turn off the SP power briefly by pressing the SP power switch. 4. Turn on the SP power again and restart the pump flow. 5. If the problem persists, contact Technical Support for Dionex products for assistance. Mixer motor speed is higher than expected...
- Page 125 1. Review the calibration procedure and then rerun the calibration (see Section 10.10). 2. If the problem persists, contact Technical Support for Dionex products for assistance. Pressure slope calibration value is out of range This error occurs if the slope value is out of the expected range when the pressure is being calibrated.
- Page 126 3. Turn on the SP power again. 4. Try to toggle the valve position by clicking the valve control on the ePanel. 5. If the problem persists, contact Technical Support for Dionex products for assistance. User analog input 1 offset calibration value is out of range...
- Page 127 9 • Troubleshooting 2. If the problem persists, contact Technical Support for Dionex products for assistance. User analog input 1 slope calibration value is out of range -or- User analog input 2 slope calibration value is out of range -or-...
- Page 128 1. Review the calibration procedure and then rerun the calibration (see Section 10.10). 2. If the problem persists, contact Technical Support for Dionex products for assistance. Vessel heater temperature calibration setting is too close This error occurs if the difference between the two calibration temperature set points is not at least 5 °C when calibrating the vessel heater.
- Page 129 1. Review the calibration procedure and then rerun the calibration (see Section 10.10). 2. If the problem persists, contact Technical Support for Dionex products for assistance. Vial cooler temperature calibration setting is too close This error occurs if the difference between the two calibration temperature set points is not at least 5 °C when calibrating the vial cooler.
-
Page 130: Liquid Leaks/Leak Alarm
Dionex Integral Systems Operator’s Manual Liquid Leaks/Leak Alarm If leaking liquid creates a hazard, stop the leak immediately by turning off the flow at the source. Si une fuite de liquide crée un danger, arrêtez immédiatement la fuite en fermant l'écoulement à la source. - Page 131 9 • Troubleshooting If it is not possible to replace the tubing, damaged SS liquid lines can be patched. To do so, cut out the bad section and insert a new piece of tubing with a coupler (P/N 040240) on each end. NOTE Routinely patching tubing increases the possibility of leaks.
-
Page 132: Air And Gas Leaks
Dionex Integral Systems Operator’s Manual • Leaking pump head 1. Tighten the pump fitting connections. Dry the components. 2. If the pump head continues to leak, the piston seal may be defective. Replace the piston seal (see Section 10.4). Air and Gas Leaks Air leaks, which can cause excessive air consumption, are usually audible. -
Page 133: System Or System Component Does Not Power Up
9 • Troubleshooting System or System Component Does Not Power Up Electrical system circuits carry dangerous voltages. Disconnect all power before working on them. Les circuits du système électriques ont des tensions dangereuses. Débranchez toute l'alimentation électrique avant de travailler sur les circuits. - Page 134 Dionex Integral Systems Operator’s Manual • AE circuit breaker tripped The circuit breaker is the main power switch for the AE. The switch is located on the top of the AE (see Figure 5-6). To reset the circuit breaker, flip the switch to the on position.
-
Page 135: Service
Substituting non-Dionex/Thermo Fisher Scientific parts may impair the performance of the Dionex Integral system, thereby voiding the product warranty. Refer to the warranty statement in the Dionex Terms and Conditions for more information. 10.1 Eliminating a Fluid System Restriction A restriction in the fluid system (for example, crimped tubing) can cause excessive system backpressure. -
Page 136: Replacing Pump Check Valve Cartridges
Dionex Integral Systems Operator’s Manual 10.2 Replacing Pump Check Valve Cartridges These instructions apply to the dilution pump and the stepper motor loading pump (P/N 068561, both pumps). A dirty check valve causes erratic flow rates and pressures. In addition, it may cause the pump to lose prime and/or be difficult to reprime. - Page 137 Overtightening may damage the pump head and check valve housing and crush the check valve seats. 11. Reconnect the liquid lines and the power cord. Turn on the Dionex Integral main power. Doc. 065250-06 03/2020...
-
Page 138: Replacing Pump Check Valves
Dionex Integral Systems Operator’s Manual 12. Open the waste valve and turn on the pump. Allow the pump to run until no more bubbles can be seen exiting the waste line. Close the waste valve. 13. With the pump still running, check for leaks from the check valves. Tighten a check valve a little more only if it leaks. -
Page 139: Replacing A Pump Piston Seal And Backup Seal
10 • Service 10.4 Replacing a Pump Piston Seal and Backup Seal These instructions apply to the dilution pump and the stepper motor loading pump (P/N 068561, both pumps). A damaged seal allows leakage past the piston. The pump may be difficult to prime and flow rates may be unstable. - Page 140 Dionex Integral Systems Operator’s Manual 5. Carefully remove the pump head from the SP by pulling the head straight off and away from the SP panel. Lateral motion while disengaging the pump head from the piston may break the piston.
- Page 141 10 • Service insert this bent end between the washer and the orange backup seal. Lift off the washer. Be careful not to scratch the washer. Backup Washer Backup Seal Paper Clip Tool 3. To remove the old backup seal from the spacer, insert the shaft of the piston through the center hole in the spacer and then pull out the piston.
- Page 142 Dionex Integral Systems Operator’s Manual To remove the old main seal from the pump head: 1. Plug the outlet check valve with your finger and then inject deionized water through the piston opening to fill the head cavity with liquid.
- Page 143 10 • Service 5. Orient the spacer so that the small indentation on the spacer aligns with the inlet check valve. Then, insert the piston and seal into the pump head. 6. To seat the seal, push down on the spacer until it is flush with the head. Listen for the clicking sound that indicates that the seal is correctly seated.
-
Page 144: Replacing A Pump Piston
Dionex Integral Systems Operator’s Manual 10.5 Replacing a Pump Piston Continued leaking of the piston seal after installation of a new seal (assuming that the pump head is tight) indicates a dirty, scratched, or broken piston. Follow the instructions in Section 10.4... - Page 145 10 • Service 4. If the seal is removed with the valve knob Valve Knob Step 3, pull the seal off the end of the knob (see Figure 10-6). If the seal is not removed with the valve knob, insert a thin object (for example, the straightened end of a paper clip) into the cavity in the Seal...
-
Page 146: Accessing The Main Sp Electronics Board
Dionex Integral Systems Operator’s Manual 10.7 Accessing the Main SP Electronics Board Refer to the appropriate instructions below when performing a service procedure that requires access to the main SP electronics board. The instructions vary slightly, depending on the type of SP enclosure. - Page 147 10 • Service If the SP is mounted inside the AE (on the rear panel): 1. Turn off the SP power. 2. Disconnect the power cord. 3. Open the AE front door. 4. Remove the modules (chromatography modules and/or SS) from the shelf on the bottom of the AE enclosure and set them next to the AE on a workbench.
-
Page 148: Replacing An Sp Solenoid Valve
Dionex Integral Systems Operator’s Manual Figure 10-9. SP Horizontal Enclosure: Service Door Open 10.8 Replacing an SP Solenoid Valve These instructions apply to solenoid valves installed on the SP panel. 1. Turn off the SP power. 2. Disconnect the power cord. - Page 149 10 • Service SV01 SV02 Solenoid Valve Cables (8) SV03 SV04 SV05 SV06 SV07 SV08 Cable Organizer Figure 10-11. Main SP Electronics Board: Solenoid Valve Cable Connections 6. A label on the valve mounting plate identifies the number of the valve. Disconnect the valve cable from its corresponding connector on the main SP electronics board (see Figure...
-
Page 150: Changing The Peristaltic Loading Pump Speed
Dionex Integral Systems Operator’s Manual 14. Close and secure the SP service door. 15. If you removed the SP from the AE rear panel: a. Lift up the SP, align the four hooks on the rear of the SP with the mounting rails on the AE rear panel, and hang the SP onto the rails. - Page 151 10 • Service Cable from the SP2 peristaltic loading pump (plugged into Plug in a second connector SV09) peristaltic pump here (connector Use this SV10) potentiometer to control the SP2 peristaltic loading pump speed Use this potentiometer to control the speed of a second peristaltic pump Figure 10-12.
-
Page 152: Calibrating Components
Dionex Integral Systems Operator’s Manual 10.10 Calibrating Components Chromeleon provides commands for calibrating the components in a Dionex Integral system. 1. Open the ePanel in Chromeleon 7. 2. Click the button for the calibration to be performed (for example, click Dilution Pump Calibration to calibrate the dilution pump). - Page 153 10 • Service 4. The fuse drawer is located above the power receptacle (see Figure 10-13). A small tab Fuse locks the fuse drawer in place. Using a small Drawer screwdriver, press the tab in and then up to release the fuse drawer. 5.
- Page 154 Dionex Integral Systems Operator’s Manual Doc. 065250-06 03/2020...
-
Page 155: A • Specifications
A • Specifications A.1 Environmental (All Analyzer Components) Operating 10 to 40 °C (50 to 104 °F) Temperature Humidity 5% to 95% relative humidity, noncondensing A.2 AE Analyzer Enclosure and LE Liquids Enclosure A.2.1 Electrical AE Main Power 100 to 240 Vac, 50/60 Hz (Auto-sensing power supply; no manual voltage or frequency adjustment required) Typical input power: 10 W (AE only, without other devices connected) -
Page 156: Physical
Dionex Integral Systems Operator’s Manual A.2.2 Physical Dimensions AE only Height: 102 cm (40 in) Width: 64 cm (25 in) Depth: 66 cm (26 in) AE and LE Height: 188 cm (74 in) Width: 64 cm (25 in); 97 cm (38 in) with the LE extension... -
Page 157: Pumps
A • Specifications A.3.3 Pumps Dilution Pump Type Stepper motor Operating Pressure 0.28 to 5.5 kPa (40 to 800 psi) Flow Rate 15.0 mL/min, maximum Loading Pumps Type Stepper motor Operating Pressure 0.28 to 17 MPa (40 to 2500 psi) Flow Rate 3.0 mL/min, maximum Type... -
Page 158: Dilution Vessels
Dionex Integral Systems Operator’s Manual Stream Selection Valves Type 17-port, 8-position, electrically-actuated valve Operating Pressure 5.5 MPa (800 psi), maximum A.3.5 Dilution Vessels Unheated Dilution Vessel Capacity 250 mL Operating Pressure 170 to 240 kPa (25 to 35 psi) Pressure Relief... -
Page 159: Physical
A • Specifications A.4.2 Physical Dimensions Height: 53 cm (21 in) Width: 30.5 cm (12 in) Depth: 32 cm (12.5 in) Weight 34 kg (76 lbs) Doc. 065250-06 03/2020... - Page 160 Dionex Integral Systems Operator’s Manual Doc. 065250-06 03/2020...
-
Page 161: B • Reordering Information
B • Reordering Information Part Number Item AE/LE 068545 Air conditioner/heater, 115 Vac 069093 Air conditioner/heater, 230 Vac 044128 Bottle, 1 liter 044129 Bottle, 2 liters 052882 NOWPak II container 052885 NOWPak II container, PTFE liner AAA-068551 NOWPak Bag-in-a-Bottle container 069094 Computer Control Installation Kit 068546... - Page 162 Dionex Integral Systems Operator’s Manual Part Number Item 068561 Pump, stepper motor 066163 Pump backup seal, stepper motor 047747 Pump check valve cartridge, stepper motor 047660 Pump inlet check valve assembly, stepper motor 047661 Pump outlet check valve assembly, stepper motor...
-
Page 163: C • Ttl And Relay Installation Instructions
C • TTL and Relay Installation Instructions This appendix contains installation instructions for the following optional kits and components: Part Number Option Description 068573 SP TTL and Relay Kit Provides a controller board, connectors, and cables for adding TTL and relay control to the SP. -
Page 164: Installing The Sp Ttl And Relay Kit
Dionex Integral Systems Operator’s Manual C.1 Installing the SP TTL and Relay Kit C.1.1 Overview The SP TTL and Relay Kit (P/N 068573) provides the parts necessary for adding TTL and relay control functions to the SP. The kit includes the... - Page 165 C • TTL and Relay Installation Instructions 3. Follow the instructions in Section 10.7 to access the main SP electronics board. 4. Disconnect the cable in the upper-right corner of the main SP electronics board (see Figure C-1). 5. Screw the three standoffs into the main SP electronics board at the locations indicated in Figure C-1.
- Page 166 Dionex Integral Systems Operator’s Manual Figure C-2 shows the TTL/Relay controller board (outlined in white) attached to the main SP electronics board. TTL/Relay Controller Board Figure C-2. Main SP Electronics Board: TTL/Relay Controller Board Installed (Vertical SP Enclosure Shown) If you are installing a stand-alone SP, go on to the next section.
- Page 167 C • TTL and Relay Installation Instructions Install the SP TTL/Relay Panel and Connect the Cables Complete this section only if you are installing a stand-alone SP. 1. Remove the cover plate from the side of the SP (see Figure C-3).
- Page 168 Dionex Integral Systems Operator’s Manual 3. Plug one end of the male-to-male relay cable into the male connector on the rear of the TTL/Relay panel (inside the SP enclosure) (see Figure C-5). 4. Plug the other end of the relay cable into the male connector on the TTL/Relay controller board.
-
Page 169: Installing The Ae Ttl And Relay Kit
C • TTL and Relay Installation Instructions C.2 Installing the AE TTL and Relay Kit NOTE Before starting this procedure, install the SP TTL and Relay Kit (see Section C.1). C.2.1 Overview The AE TTL and Relay Kit (P/N AAA-068548) provides the parts necessary for installing TTL and relay connectors onto the top of the AE and connecting them to the TTL/Relay controller board in the SP. - Page 170 Dionex Integral Systems Operator’s Manual Install the 25-Pin D-Sub Connector Inserts 1. Lift the lid on the cap that covers one of the two TTL and relay openings on the top of the AE (see Figure C-6). 2. Remove the screws that attach the cap to the AE and remove the cap.
- Page 171 C • TTL and Relay Installation Instructions Connect the Cables 1. Plug one end of the male-to-male relay cable into the male connector on the TTL/Relay controller board on the SP door (see Figure C-8). Male (TTL) Female (Relay) Connector Connector Figure C-8.
-
Page 172: Installing The Ttl And Relay Breakout Boards
Dionex Integral Systems Operator’s Manual C.3 Installing the TTL and Relay Breakout Boards NOTE Before starting this procedure, install the SP TTL and Relay Kit (see Section C.1). If the SP is installed inside an AE—or is mounted on the side of an AE—also install the AE TTL and Relay Kit... -
Page 173: Ttl And Relay Breakout Board Installation Procedure
C • TTL and Relay Installation Instructions C.3.2 TTL and Relay Breakout Board Installation Procedure Connect Wires to the TTL and Relay Breakout Boards 1. Check the following tables to determine which pins on the TTL and relay connectors are required for your installation. For example: •... - Page 174 Dionex Integral Systems Operator’s Manual Function Function Relay 1 NO Relay 1 COM Relay 2 NO Relay 2 COM Relay 3 NO Relay 3 COM Ground Relay 4 NO Relay 4 COM Relay 5 NO Relay 5 COM Relay 6 NO...
- Page 175 C • TTL and Relay Installation Instructions Figure C-9. TTL Breakout Board Figure C-10. Relay Breakout Board Doc. 065250-06 03/2020...
- Page 176 Dionex Integral Systems Operator’s Manual Figure C-11 shows an example of a relay breakout board with two pairs of wires connected. Figure C-11. Example Relay Breakout Board with Wires Connected Plug In the Breakout Boards • To connect to an external SP: a.
- Page 177 C • TTL and Relay Installation Instructions • To connect directly to the SP TTL/Relay Controller Board: a. Plug the breakout boards into their corresponding connectors on the board (see Figure C-8). b. Connect the free ends of the wires to the appropriate connector pins on other devices.
- Page 178 Dionex Integral Systems Operator’s Manual Secure the breakout board connector with two screws (see Figure C-14). Breakout Board Connector Connector Hood Figure C-14. Breakout Board Installed in the AE Connector Hood g. Finger-tighten the nut on the hood cap to ensure a watertight seal around the cable.
- Page 179 , is compatible with the output signals provided by Normal Edge Dionex modules. If the device connected to the SP does not send a normal edge signal, follow the steps below to select the appropriate control type. To determine...
- Page 180 Dionex Integral Systems Operator’s Manual alarm turns off. For the Shutdown and Standby actions, returning the TTL to high has no effect. • Inverted Edge: The inverted edge mode works identically to the normal edge mode except that the positive and negative edges are reversed in function.
-
Page 181: Installing The Ae Tower Light Kit
C • TTL and Relay Installation Instructions C.4 Installing the AE Tower Light Kit NOTE Before starting this procedure, install the SP TTL and Relay Kit (see Section C.1). C.4.1 Overview The AE Tower Light Kit (P/N 068549) provides parts for mounting a tower with four LED lights onto the top of the AE enclosure. - Page 182 Dionex Integral Systems Operator’s Manual 2. From the top of the AE, thread the tower light cable through the round opening in the front left corner of the AE (see Figure C-16). Thread tower light cable through this opening Figure C-16. Opening for Tower Light on Top of AE 3.
- Page 183 C • TTL and Relay Installation Instructions Connect the Cable 1. Connect the extension cable to the tower light cable. 2. Route the extension cable to the inside of the SP enclosure. 3. If you have not done so already, access the main SP electronics board (for instructions, see Section 10.7).
- Page 184 Dionex Integral Systems Operator’s Manual b. Replace any modules that were removed from the lower shelf of the AE. c. Replace the two access panels on the exterior of the AE. 7. Plug in the power cord and turn on the power.
-
Page 185: D • Ae Purge Kit Installation Instructions
D • AE Purge Kit Installation Instructions For detailed installation requirements and operating instructions for the purge system, please refer to the manual provided with the system. The instructions here are intended to supplement the information in the purge system manual. D.1 Overview The AE Purge Kit (P/N 068546) provides the parts necessary for installing a purge system in the AE Analyzer Enclosure. -
Page 186: Ae Purge Kit Installation Procedure
Dionex Integral Systems Operator’s Manual D.2 AE Purge Kit Installation Procedure These are the main steps in the installation procedure: • Installing the purge control unit • Installing the purge orifice/spark arrestor and the pressure relief valve • Sealing all openings in the enclosures D.2.1... - Page 187 D • AE Purge Kit Installation Instructions 7. On the inside of the AE, tighten the nut onto the fitting (see Figure D-2). Gray Fitting Nut Figure D-2. AE Interior: Gray Fitting Nut Installed 8. On the inside of the AE, thread the red and black wires of the purge control cable through the gray fitting nut (see Figure D-3) and out to...
- Page 188 Dionex Integral Systems Operator’s Manual 9. On the top of the AE, remove the cover on the purge control unit’s black box by removing two Phillips screws (see Figure D-4). Remove two Phillips screws Figure D-4. Remove Cover on Purge Control Unit’s Black Box 10.
- Page 189 D • AE Purge Kit Installation Instructions 11. On the purge control unit, plug the red and black wires on the purge control cable into the connectors on the black box: Plug the black wire into the middle connector and the red wire into the outside connector (see Figure D-6).
- Page 190 Dionex Integral Systems Operator’s Manual 13. Tighten the gray fitting. 14. Inside the AE, locate the connectors on the top left side. Remove the jumper from the Remove this jumper second connector from the left (see Figure D-8). (To do...
-
Page 191: Installing The Purge Orifice/Spark Arrestor And The Pressure Relief Valve
D • AE Purge Kit Installation Instructions D.2.2 Installing the Purge Orifice/Spark Arrestor and the Pressure Relief Valve 1. Follow the instructions in the manual provided with the purge control system to install the purge orifice in the spark arrestor. Use the smallest orifice provided with the purge control system. - Page 192 Dionex Integral Systems Operator’s Manual Figure D-11, the purge orifice/spark arrestor and relief valve are installed on the right side of an LE. Front of AE Relief Valve Front of LE Purge Orifice Figure D-11. Purge Orifice/Spark Arrestor and Relief Valve Installed on Right Side of LE (Example Configuration) Doc.
-
Page 193: Sealing All Openings In The Enclosures
D.2.3 Sealing All Openings in the Enclosures To prevent air leaks when the purge system is in operation, seal all openings in the Dionex Integral system enclosures, including the following: • Replace any vented panels on the enclosures. Cover larger openings with the solid panels included in the AE Purge Kit. - Page 194 Dionex Integral Systems Operator’s Manual • If an SP is installed, insert a plug in the drain inside the SP (see Figure D-13). Plug Figure D-13. Plug in SP Drain • If the AE is mounted on the wall, install a plug in the drain under the...
-
Page 195: Instructions
E • Peristaltic Pump Kit Installation Instructions Overview The Peristaltic Pump Kit (P/N 068558) provides the parts necessary for installing a peristaltic pump on the SP Sample Preparer panel. The kit includes the following parts: Part Number Item Quantity 045689 Washer 045938 Screw, Phillips... -
Page 196: Installing The Peristaltic Pump On The Sp Panel
Dionex Integral Systems Operator’s Manual • Configuring the pump in the Chromeleon 7 Instrument Configuration Manager E.2.1 Installing the Peristaltic Pump on the SP Panel 1. Turn off the SP power. 2. Disconnect the power cord. 3. Orient the peristaltic pump on the mounting panel as shown in Figure E-1. - Page 197 E • Peristaltic Pump Kit Installation Instructions • When installing the second peristaltic pump, plug in the cable at position SV10 Figure E-2 Figure E-3 for the locations of SV10 SV09 Position SV10 (Use for second peristaltic pump cable) Position SV09 (Use for first peristaltic pump cable)
-
Page 198: Assembling The Peristaltic Tubing And Fittings
Dionex Integral Systems Operator’s Manual 4. Close and secure the SP service door. E.2.3 Assembling the Peristaltic Tubing and Fittings 1. Install the peristaltic tubing adapter parts on the PharMed tubing in the order and orientation shown in Figure E-4. Use the retainer sleeve with an inside diameter that is closest in size to the outside diameter of the tubing. - Page 199 E • Peristaltic Pump Kit Installation Instructions 6. To open the tubing clamp, squeeze the two tabs on the top and bottom of the clamp and slide the clamp to the right (see Figure E-5). Tubing Clamp (Open) Figure E-5. Peristaltic Tubing Installation 7.
- Page 200 Dionex Integral Systems Operator’s Manual 9. Wrap the tubing snugly around the pump head rollers. Lift up the bottom tubing clip to open it, insert the tubing into the clip opening, and then release the clip (see Figure E-7). 10. Close the tubing clamp by pushing it to the left until the tabs lock into...
-
Page 201: Configuring The Pump In Chromeleon 7
E • Peristaltic Pump Kit Installation Instructions the peristaltic tubing adapter set. Install the nut and ferrule on the tubing as shown in Figure E-9. Figure E-9. Fitting Nut and Ferrule for Peristaltic Tubing Connections 13. If you removed the SP from the AE rear panel during this installation procedure: a. - Page 202 Dionex Integral Systems Operator’s Manual Doc. 065250-06 03/2020...
-
Page 203: F • Liquid Level Sensor Installation Instructions
F • Liquid Level Sensor Installation Instructions Overview The Liquid Level Sensor Kit (P/N 068563) provides the parts necessary for installing a liquid level sensor on either a reservoir or a NOWPak Bag-in-a-Bottle container (P/N AAA-068551). The kit includes the following parts: Part Number Item Quantity... -
Page 204: Installing The Liquid Level Sensor On The Reservoir Or
Dionex Integral Systems Operator’s Manual F.2.1 Installing the Liquid Level Sensor on the Reservoir or Container 1. Remove the label from the back of the liquid level sensor (see Figure F-1). Remove this label from the sensor Figure F-1. Sensor with Label 2. -
Page 205: Plugging The Liquid Level Sensor Cable Into The Main
F • Liquid Level Sensor Installation Instructions 5. Slide the cinch strap back onto the reservoir or NOWPak Bag-in-a- Bottle container. Position the strap at the location where you plan to install the sensor. 6. Insert the liquid sensor between the reservoir or NOWPak Bag- in-a-Bottle container and the cinch strap (see... - Page 206 Dionex Integral Systems Operator’s Manual Connectors for four liquid level sensors Cable from liquid level sensor 1 Figure F-5. Main SP Electronics Board (Vertical Enclosure Shown): Liquid Level Sensor Connectors 7. Close and secure the SP service door. 8. If you removed the SP from the AE rear panel: a.
-
Page 207: G • Thermal Options Installation Instructions
G • Thermal Options Installation Instructions This appendix provides instructions for installing the following components in an SP Sample Preparer: Part Number Option Description 068572 Thermal Control Board Provides a thermal control board and cables. 068524 Heated Dilution Vessel, Provides a dilution vessel with heater and 50 mL stir bar. -
Page 208: Thermal Control Board Installation Procedure
Dionex Integral Systems Operator’s Manual G.1.2 Thermal Control Board Installation Procedure 1. Turn off the SP power. 2. Disconnect the power cord. 3. Follow the instructions in Section 10.7 to access the main SP electronics board. 4. Screw the two standoffs into the main SP electronics board at the... - Page 209 G • Thermal Options Installation Instructions Figure G-2. Main SP Electronics Board: Thermal Control Board Installed (Vertical SP Enclosure Shown) 8. Locate the connector labeled on the thermal control POWER SUPPLY board (see Figure G-3). COOLER Connector HEATER Connector Thermal Control Power Supply Cable (Connected to...
-
Page 210: Installing The Vial Cooler
Dionex Integral Systems Operator’s Manual 9. Plug the cable from the SP power supply into the POWER SUPPLY connector on the thermal control board. Installing the Vial Cooler NOTE Before starting this procedure, install the Thermal Control Board Kit (see Section G.1). -
Page 211: Installing The Heated Dilution Vessel
G • Thermal Options Installation Instructions 2. Thread the vial cooler cable through the opening in the SP panel. 3. Attach the vial cooler mounting panel to the SP panel. 4. Locate the connector labeled on the thermal control board COOLER (see Figure... -
Page 212: Heated Dilution Vessel Installation Procedure
Dionex Integral Systems Operator’s Manual G.3.2 Heated Dilution Vessel Installation Procedure 1. Plug the heated dilution vessel extension cable into the connector labeled on the thermal control board (see Figure G-3). HEATER 2. Align the notch on the rear of the... - Page 213 G • Thermal Options Installation Instructions 6. Connect the liquid line from the DV valve to the bottom of the heated dilution vessel. Doc. 065250-06 03/2020...
- Page 214 Dionex Integral Systems Operator’s Manual Doc. 065250-06 03/2020...
-
Page 215: H • Lockout Instructions For The Ae, Sp, Or Ss
H • Lockout Instructions for the AE, SP, or SS This appendix contains instructions for installation of a lockout device on the AE, SP, or SS. A lockout device protects the module from being powered up. For standard power plugs, Thermo Fisher Scientific recommends the Hubbell HLDMP lockout device shown in Figure H-1. - Page 216 Dionex Integral Systems Operator’s Manual Power Switch Figure H-2. SP/SS Power Switch Power Switch Figure H-3. AE Power Switch Doc. 065250-06 03/2020...
-
Page 217: Installing A Lockout Device
H • Lockout Instructions for the AE, SP, or SS H.1.2 Installing a Lockout Device 1. Open the lockout device and insert the power connector into the device (see Figure H-4). Figure H-4. Insert Power Connector into Lockout Device 2. Close the lockout device and slide the cover so that the padlock holes are lined up between the cover and the base (see Figure H-5, View A). -
Page 218: Re-Energizing A Module
Dionex Integral Systems Operator’s Manual 4. Secure the padlock as shown in Figure H-6. Lock the padlock and remove the keys. Figure H-6. Lock Padlock and Remove Keys H.1.3 Re-energizing a Module 1. Unlock the padlock on the lockout device and remove the padlock. - Page 219 Index Numerics Air conditioner (AE), 76 Specifications, 146 10-port high-pressure valve, 24 Air consumption, excessive, 120 Connections, 25 Analog inputs, 45 Flow schematic, 24 Analog Input 4 jumper position, 47 Functions, 25 Connections, 45 17-port stream selection valve, 61 Monitoring the stir bar, 26, 46, 112 Specifications, 45 Analytical pump, 1 Analyzer...
- Page 220 Dionex Integral Systems Operator’s Manual Heated dilution vessel, 195 Controlling relays, 79 Leak sensor, 110 Initial setup, 91 Liquid level sensor, 191 Instrument methods, 26 Multiconductor, 160 Pump calibration, 88 Peristaltic pump, 139, 183 Sequences, 92 Power cord, 21, 64, 72 – 73...
- Page 221 Error messages, 100 – 109, 111, 113 – 117 AE, 144 Default severity levels, 101 Air conditioner, 147 Icons, 100 SP/SS, 144 External SP Dionex product support, 99 Mounted on AE, 19 Direct injection, 29 Stand-alone, 19 Drain port External SS, 63 AE, 71...
- Page 222 Dionex Integral Systems Operator’s Manual Control, 4 Electrical connections, 85 Gas connection Maintenance procedures, 95 Damaged, 120 Operation, routine, 93 LE Liquids Enclosure, 83 Regulatory compliance, 11 Gas consumption, excessive, 120 Safety information, 9 Gas I/O lines, 44 Shutdown procedures, 93 – 94...
- Page 223 Weekly, 97 Maintenance log, 99 – 100 Manuals, user, 8 Mechanical precautions, 15 PAR, 83 Metering valve, 24 Parts, non-Dionex, 123 Calibrating the loop, 88 Peristaltic pump, 27 Flow schematic, 24 See also Loading pump (peristaltic type) Functions, 25, 31, 35...
- Page 224 Dionex Integral Systems Operator’s Manual Physical specifications (SP/SS) procedure, 124 – 126 Dimensions, 144 Check valve replacement procedure, 124 Weight, 144 Dilution pump, 26 Piston Leaking, 120 Replacing, 132 Loading pumps, 27 Piston seal Piston replacement procedure, 132 Replacing, 127...
- Page 225 Index Solenoid valves, 28 Flow schematic, 28 Safety information, 9 Functions performed, 31, 35 Safety messages, 9 Replacement procedure, 136 – 137 Safety practices, 14 Solvent containers Sample loop, 24 See Mobile phase containers Calibration, 88 SP Relay and TTL Kit, 48, 78 – 79 Sample outlet line, 62 SP Sample Preparer, 3, 19 Connection, 62...
- Page 226 Dionex Integral Systems Operator’s Manual Specifications (AE) Stream selection valve, 61 Electrical, 143 PEEK valve, 61, 150 Physical, 144 Port connections, 61 – 62 Specifications (air conditioner) Stainless steel valve, 61, 150 Electrical, 146 Suppressor Physical, 147 Operating precautions, 93...
- Page 227 Index Responses (actions) controlled with, 49 Waste valve Tubing connections Opening, 127 Isolating a restriction, 123 Seal replacement procedure, 132 Replacing a broken line, 118 Water sources Types of, 81 Connecting to systems, 85 Weekly maintenance, 97 Weight AE, 144 Air conditioner, 147 UltiMate 3000 HPLC Systems, 4 SP/SS, 144...
- Page 228 Dionex Integral Systems Operator’s Manual Index-10 Doc. 065250-06 03/2020...
Need help?
Do you have a question about the Dionex and is the answer not in the manual?
Questions and answers